Honey Sesame Roasted Carrots Simple Flavorful Dish

Looking to brighten up your dinner table? Honey Sesame Roasted Carrots offer a simple yet flavorful twist that everyone will enjoy. This dish combines sweet, sticky honey and rich sesame oil for a mouthwatering treat. In just a few easy steps, you’ll have roasted carrots that wow your taste buds. Let’s dive into how to make this delicious side dish that’s perfect for any meal!
Why I Love This Recipe
- Delicious Balance: The sweet honey combined with the nutty sesame oil creates a perfect harmony of flavors that enhances the natural sweetness of the carrots.
- Quick and Easy: This recipe requires minimal prep time and can be prepared in just 40 minutes, making it a fantastic option for busy weeknights.
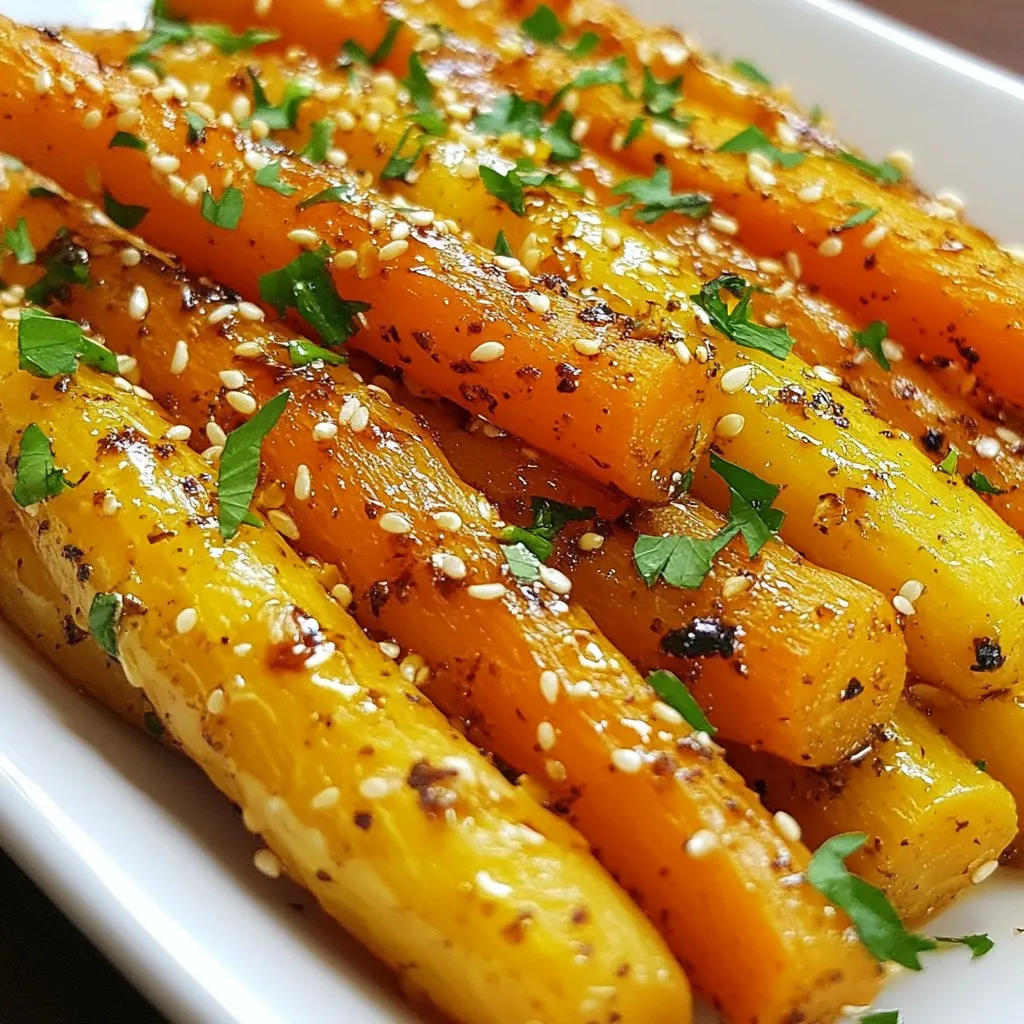
- Colorful Presentation: The vibrant orange of the roasted carrots paired with fresh green parsley makes for a visually stunning dish that will impress your guests.
- Health Benefits: Carrots are packed with vitamins and antioxidants, making this dish not only tasty but also a nutritious addition to any meal.
Ingredients
– 1 lb baby carrots, peeled and trimmed
– 3 tablespoons honey
– 2 tablespoons sesame oil
– 1 tablespoon soy sauce
– 1 tablespoon toasted sesame seeds
– 1 teaspoon ground ginger
– Salt and freshly ground black pepper to taste
– Fresh parsley, finely chopped (for garnish)
When I prepare Honey Sesame Roasted Carrots, I love using baby carrots. They are sweet and tender. The honey adds a lovely glaze that makes the dish shine. Sesame oil brings a nutty flavor that pairs perfectly with carrots. Soy sauce adds depth to the dish, making it savory.
Don’t forget the toasted sesame seeds. They give a nice crunch and enhance the flavor. Ground ginger adds warmth and a hint of spice. Salt and pepper round out the taste, enhancing all the flavors.
Finally, fresh parsley makes the dish pop with color. It adds freshness and a lovely aroma. Gathering these ingredients will set you up for a delightful cooking experience. Each one plays a role in making this dish simple yet flavorful.

Step-by-Step Instructions
Preheating the Oven
Start by preheating your oven to 425°F (220°C). This step is key for crispy carrots. Line a baking sheet with parchment paper. This helps with cleanup and keeps the carrots from sticking.
Preparing the Honey-Sesame Mixture
In a big bowl, mix together the honey, sesame oil, soy sauce, and ground ginger. Add a pinch of salt and pepper for taste. Whisk it all together until it’s smooth. This mixture gives the carrots a sweet and savory flavor.
Tossing the Carrots
Now, add the baby carrots to your bowl. Toss them gently in the honey-sesame mix. Make sure each carrot is well-coated. This step is important for even flavor.
Arranging on the Baking Sheet
Next, place the coated carrots on the prepared baking sheet. Make sure they are in a single layer. Give them enough space so they roast evenly. This will help them caramelize nicely.
Roasting the Carrots
Put the baking sheet in the oven and roast the carrots for 25-30 minutes. Halfway through, take them out and give them a gentle toss. This helps them cook evenly. They are done when they are soft and caramelized.
Garnishing Before Serving
Once roasted, take the baking sheet out of the oven. Sprinkle the warm carrots with toasted sesame seeds. This adds a nice crunch. Then, transfer them to a serving dish. Finish by garnishing with finely chopped parsley. This makes your dish look bright and fresh.
Tips & Tricks
Choosing the Right Carrots
To make the best honey sesame roasted carrots, pick fresh baby carrots. Look for bright orange color and firm texture. Avoid carrots that feel soft or have dark spots. If you can’t find baby carrots, use regular carrots. Just cut them into equal sizes for even cooking.
Achieving the Perfect Roast
Roasting carrots brings out their natural sweetness. Preheat your oven to 425°F (220°C). This high heat helps caramelize the sugars in the carrots. Spread them in a single layer on your baking sheet. If they are too crowded, they will steam instead of roast. Toss them halfway through cooking for even browning.
Enhancing Flavor with Variations
Want to add a twist? You can mix in garlic for a savory kick. Just mince 2-3 cloves and add them to the honey-sesame mixture. If you like heat, sprinkle in some chili flakes. This adds a nice spice that complements the sweet and nutty flavors. Experiment with these flavors to find your favorite version!
Pro Tips
- Cut Evenly: Ensure that all carrots are cut to a similar size for uniform roasting, which promotes even cooking and caramelization.
- Honey Substitute: If you prefer a vegan option, maple syrup can be used instead of honey for a similarly sweet and delicious glaze.
- Spice It Up: For an extra kick, consider adding a pinch of red pepper flakes to the honey mixture for a subtle heat that complements the sweetness.
- Storage Tip: Leftover roasted carrots can be stored in an airtight container in the fridge for up to 3 days, making them a great option for meal prep!

Variations
Alternative Sweeteners
You can swap honey for maple syrup. This gives a different taste. Agave nectar works too. Each sweetener adds its own flavor twist. Experiment to find your favorite!
Different Vegetable Additions
Try adding bell peppers or zucchini. These veggies roast well and add color. Sweet potatoes also pair nicely with the honey glaze. Mixing different veggies gives you fun new flavors!
Serving Suggestions
Serve these carrots with grilled chicken or fish. They also go well with leafy salads. The sweetness of the carrots balances savory proteins. Try them with a light vinaigrette salad for a perfect meal!
Storage Info
Storing Leftovers
Store any leftover honey sesame roasted carrots in an airtight container. Place them in the fridge. They will stay fresh for up to four days. Make sure to let them cool completely before storing. This helps keep their texture.
Reheating Guidelines
To reheat the carrots, you can use the oven or microwave. For the oven, preheat it to 350°F (175°C). Spread the carrots on a baking sheet. Heat for about 10-15 minutes, or until warm. If using the microwave, place the carrots in a bowl. Heat for one to two minutes, stirring halfway.
Meal Prep Tips
Meal prepping with these carrots is easy and fun. You can wash and cut the baby carrots ahead of time. Store them in the fridge in water to keep them crisp. Prepare the honey-sesame mixture and keep it in a jar. This way, when you’re ready to cook, it’s all set to go!
FAQs
Can I use regular carrots instead of baby carrots?
Yes, you can use regular carrots. Just peel and cut them into similar sizes. This helps them cook evenly. Baby carrots are sweet and tender, but regular ones work well too.
How do I adjust the recipe for a larger crowd?
To feed more people, simply double the ingredients. Use 2 pounds of carrots and adjust the honey, sesame oil, and soy sauce accordingly. You may need a larger baking sheet or two sheets for even roasting.
What’s the best way to reheat roasted carrots?
Reheat roasted carrots in the oven at 350°F (175°C) for about 10-15 minutes. This keeps them crisp and warm. You can also use a microwave, but they may lose some texture.
Can I make this dish ahead of time?
Yes, you can prepare the carrots ahead. Roast them, then let them cool. Store them in the fridge for up to three days. When ready to serve, just reheat them in the oven.
This recipe shows you how to make tasty roasted baby carrots. We walked through the main steps, from mixing honey and sesame oil to roasting them perfectly. Remember, you can tweak the flavors with garlic or chili flakes and store leftovers for later. Roasted carrots pair well with many dishes, making them a great choice for any meal. Try it out for a quick and healthy side! You’ll impress your family and friends with this simple yet delightful dish. Enjoy the rich flavors and the ease of preparatio

Honey Sesame Roasted Carrots
Ingredients
- 1 lb baby carrots, peeled and trimmed
- 3 tablespoons honey
- 2 tablespoons sesame oil
- 1 tablespoon soy sauce
- 1 tablespoon toasted sesame seeds
- 1 teaspoon ground ginger
- to taste salt and freshly ground black pepper
- for garnish fresh parsley, finely chopped
Instructions
- Preheat your oven to 425°F (220°C). Line a baking sheet with parchment paper to prevent sticking and make cleanup easier.
- In a spacious mixing bowl, combine the honey, sesame oil, soy sauce, ground ginger, and a sprinkle of salt and pepper. Whisk these ingredients together thoroughly until the mixture is smooth and emulsified.
- Carefully add the peeled and trimmed baby carrots to the bowl. Toss them gently, ensuring that every carrot is well-coated in the honey-sesame mixture.
- Arrange the carrots in a single layer on the prepared baking sheet, making sure they have enough space between them for even roasting.
- Place the baking sheet in the preheated oven and roast the carrots for 25-30 minutes. Halfway through, give them a gentle toss to promote even caramelization and tenderness. You’ll know they’re done when they are fork-tender and beautifully caramelized.
- Once roasted, take the baking sheet out of the oven and promptly sprinkle the warm carrots with toasted sesame seeds, allowing them to stick to the honey glaze.
- Carefully transfer the roasted carrots to a vibrant serving dish, and finish by garnishing with a generous sprinkle of finely chopped fresh parsley.


![- 1 can (15 oz) chickpeas, drained and rinsed - 1 can (5 oz) tuna in water, drained - 1/4 cup Greek yogurt or vegan mayonnaise (optional) - 1 tablespoon Dijon mustard - 1/2 red bell pepper, finely chopped - 1/4 red onion, finely chopped - 1/4 cup fresh parsley, chopped - 1 tablespoon fresh lemon juice - Seasoning: Salt and pepper to taste - Optional: 1 ripe avocado, diced To make this salad, gather all the ingredients listed above. The chickpeas and tuna serve as the base. Chickpeas give a nice texture, while tuna adds protein. The Greek yogurt or vegan mayo brings creaminess. Dijon mustard gives it a tangy kick. Chop the red bell pepper and red onion finely for a nice crunch. Fresh parsley adds color and flavor. A squeeze of lemon juice brightens up the dish. You can also add diced avocado for extra creaminess. This Easy Chickpea Tuna Salad is perfect for lunch or a light dinner. You can follow the [Full Recipe] for step-by-step guidance. - Lightly mash the chickpeas in a large mixing bowl. - Combine the drained tuna with the chickpeas. - Whisk together Greek yogurt, Dijon mustard, and lemon juice in a small bowl. - Pour the yogurt mixture over the chickpeas and tuna. - Fold in the chopped red bell pepper, red onion, parsley, and optional avocado. - Season with salt and pepper to taste. - Serve immediately or chill before serving. This Easy Chickpea Tuna Salad is simple and quick. You can find the Full Recipe for more details. Enjoy it as a meal or snack! - Use freshly squeezed lemon juice for a brighter flavor. This adds freshness. - Adjust seasoning to taste. Start with a little and add more if needed. - Pair the salad with whole grain crackers. This adds crunch and fullness. - Serve as a filling for lettuce wraps. It makes a great low-carb meal. - Garnish with extra parsley and lemon wedges. This makes your dish look bright and inviting. - Use a colorful bowl to showcase the vibrant ingredients. This enhances the overall experience. For the full recipe, check the detailed steps to create this delicious dish! {{image_4}} You can easily change up the recipe to suit your taste. If you want a plant-based option, swap Greek yogurt for vegan mayonnaise. This keeps the salad creamy and tasty. You can also switch the chickpeas for different beans. Black beans or white beans both work well. These swaps give you a fun twist on the classic recipe. Want to add some crunch? Diced celery is a great choice. It brings a nice texture to the salad. If you like salty flavors, try adding olives. They give a briny kick that pairs well with the other ingredients. Feel free to get creative with your flavor choices! If you need to make it gluten-free, check the ingredients you use. Most of the items in the salad should be gluten-free. Just make sure that any sauces or extras are also gluten-free. This way, you can enjoy the salad without worry. For the Full Recipe, check out the complete guide for making this delicious dish! Store your chickpea tuna salad in an airtight container. This keeps it fresh. Make sure the lid is on tight. For the best taste, eat it within 3-4 days. After this time, it may lose flavor. This salad is best served cold or at room temperature. Avoid reheating to keep the texture and taste just right. Enjoy it straight from the fridge for a quick meal! Yes, you can make it a few hours in advance. This gives the flavors time to meld together. I often make this salad in the morning for lunch later. It’s easy and saves time! Absolutely! This salad holds up well for meal prep. You can store it in the fridge for a few days. It remains tasty and fresh, making it a great option for busy weeks. This salad is high in protein, fiber, and healthy fats. Chickpeas provide protein and fiber, while tuna adds more protein. Greek yogurt gives creaminess and healthy fats. Overall, it's a nutritious choice for any meal. In this article, we explored how to make a tasty and simple Chickpea Tuna Salad. You learned the key ingredients and followed easy steps to prepare it. We discussed tips for adding flavor and how to store any leftovers. Finally, the salad’s health benefits make it a smart choice for meals. This salad is quick, nutritious, and great for any occasion. Enjoy making it in your own kitchen!](https://goldendishy.com/wp-content/uploads/2025/07/30687038-eca4-4cc3-b428-c7157439eb59-768x768.webp)
![To make Cheesy Ranch Potatoes, you will need a few simple items. Gather these ingredients before you start cooking: - 2 pounds baby potatoes, halved - 1 cup shredded sharp cheddar cheese - ½ cup creamy sour cream - 1 packet ranch dressing mix (about 1 ounce) - 3 tablespoons extra virgin olive oil - 1 teaspoon garlic powder - 1 teaspoon onion powder - Salt and freshly ground black pepper to taste - 2 green onions, finely sliced (for garnish) Each ingredient plays a key role in creating that cheesy, ranch-flavored goodness. The baby potatoes serve as the base, providing a tender texture. Sharp cheddar cheese adds a rich, creamy taste. Sour cream brings a tangy flavor, while the ranch dressing mix ties everything together with its herby notes. The garlic and onion powders enhance the overall taste, making every bite delicious. Don't forget the green onions; they add a fresh crunch on top! For the complete recipe, check out the [Full Recipe]. - Preheat the oven to 400°F (200°C). This makes sure your potatoes cook evenly. - In a large bowl, mix the olive oil, ranch dressing mix, garlic powder, onion powder, salt, and pepper. Stir until well combined. - Add the halved baby potatoes to the bowl. Toss them until every piece is coated in the ranch mixture. This step adds great flavor. - Line a baking sheet with parchment paper. This helps with easy cleanup. - Spread the coated potatoes on the lined baking sheet in a single layer. This helps them roast evenly. - Roast the potatoes for 25-30 minutes. They should turn golden brown and be tender when pierced. - Take the baking sheet out of the oven and sprinkle cheddar cheese over the hot potatoes. - Return the baking sheet to the oven for 5-7 minutes. Wait until the cheese melts and bubbles. - Drizzle sour cream over the cheesy potatoes and top with sliced green onions. This adds a fresh touch. Check out the Full Recipe for more details! To make Cheesy Ranch Potatoes, start by preheating your oven to 400°F (200°C). This helps the potatoes roast evenly. Spread the potatoes out on a lined baking sheet. This ensures they cook well and get crispy. Check for doneness by piercing them with a fork. They should be tender and golden brown. To boost flavor, try adding herbs like parsley or dill. You can also mix in spices like paprika or cayenne for a kick. If you want a different cheese, use mozzarella or pepper jack. Each type brings a unique taste and texture to the dish. For serving, use a colorful bowl to show off the cheesy ranch potatoes. Add a sprinkle of extra cheddar on top for flair. You can also place whole green onion tops around the edge for a fresh look. These simple steps make your dish appealing and ready for guests. For the full recipe, follow the steps provided in the earlier sections. Enjoy your cooking! {{image_4}} You can make Cheesy Ranch Potatoes even more fun with simple swaps. - Using different types of cheese: Try mozzarella for a milder taste or pepper jack for a kick. You can even mix cheeses for a rich flavor. - Substituting Greek yogurt for sour cream: Greek yogurt gives you a nice tang and adds protein. It’s a healthier option that keeps your potatoes creamy. Change the flavor to keep things exciting. - Spicy ranch version: Add a teaspoon of cayenne pepper to the ranch mix. This will give your potatoes a nice heat. - Herb-infused options: Mix in dried herbs like thyme or rosemary. This adds a fresh taste that pairs well with the cheese. Making Cheesy Ranch Potatoes work for everyone is easy! - Vegan adaptations: Swap the cheese for a vegan cheese and use coconut yogurt. This keeps all the creamy goodness without dairy. - Gluten-free adjustments: Use a gluten-free ranch mix. Most ranch mixes are gluten-free, but always check the labels. Feel free to explore these variations to make this dish your own! For the full recipe, check out Cheesy Ranch Potatoes Delight. To keep your cheesy ranch potatoes fresh, store them in the fridge. Place them in an airtight container. They will last about 3 to 5 days. Make sure they cool completely before sealing. For longer storage, you can freeze them. Put the cooled potatoes in a freezer-safe bag. They can last up to 2 months in the freezer. To reheat your potatoes, the best method is using an oven. Preheat the oven to 350°F (175°C). Spread the potatoes on a baking sheet. Heat them for about 15 to 20 minutes. This will help keep the texture crispy. You can also use a microwave. Place the potatoes in a microwave-safe dish. Heat them in short bursts of 1 minute. Stir in between to ensure even heating. To keep flavor and texture, avoid reheating them too long. If they dry out, add a little bit of sour cream or cheese on top. These tips will help you enjoy the cheesy ranch potatoes just as much as the first time. You can tell the potatoes are done by checking a few signs. First, they should be golden brown and crispy on the outside. Second, when you poke them with a fork, they should feel soft inside. If the fork slides in easily, your potatoes are ready to enjoy! Yes, you can prepare Cheesy Ranch Potatoes ahead of time! Start by following the recipe steps, but stop before roasting. Cover the potatoes and store them in the fridge for up to 24 hours. When you’re ready to bake, simply add extra time in the oven if they are cold. This way, you can enjoy them fresh without much fuss. These cheesy potatoes pair well with many dishes. Serve them alongside grilled chicken or steak for a filling meal. They also go great with a fresh salad or steamed veggies. For a fun twist, try them with barbecue or as a side for tacos. The options are endless, making it easy to create a delicious meal. For the complete cooking steps, check out the Cheesy Ranch Potatoes Delight 🥔. In this blog post, we covered how to make Cheesy Ranch Potatoes. We started with the ingredients, then walked through easy steps to prepare and roast them. I shared helpful tips, variations, and storage info to keep your dish fresh. These potatoes are a tasty side for any meal. You can customize them to fit your taste. Enjoy making this dish, and let it add flavor to your table!](https://goldendishy.com/wp-content/uploads/2025/06/4f138a04-3393-4361-b7e8-8b602e29b2ef-768x768.webp)

![- 4 medium-sized beets - 4 cups mixed greens - 1/2 cup goat cheese - 1/4 cup walnuts - 1/4 cup dried cranberries or pomegranate seeds - 1/4 cup extra virgin olive oil - 2 tablespoons balsamic vinegar - 1 teaspoon honey - Salt and pepper - Fresh parsley for garnish The ingredients in this salad make it a real treat. The beets bring a sweet earthiness. They roast beautifully, turning soft and tender. Mixed greens add a fresh crunch. Goat cheese offers creamy tanginess. Walnuts give a nice crunch and healthy fats. Dried cranberries or pomegranate seeds add a pop of sweetness. This salad is not just tasty; it is also healthy. Each serving has about: - Calories: 350 - Fats: 25g - Proteins: 8g - Carbohydrates: 30g By using wholesome ingredients, you create a dish that nourishes as well as delights. This salad contains common allergens: - Dairy (goat cheese) - Nuts (walnuts) Always check for allergies before serving. You can easily swap goat cheese and walnuts for alternatives if needed. To start, heat your oven to 400°F (200°C). Wrap each beet in aluminum foil. Make sure they are sealed tight so they steam well. Place the wrapped beets on a baking sheet. This will catch any drips. Roast the beets for about 45 minutes to 1 hour. They should be tender when pierced with a fork. Once done, take them out and let them cool. When they are cool enough, peel off the skins. You might want to wear gloves to keep your hands clean. For the dressing, gather these ingredients: - 1/4 cup extra virgin olive oil - 2 tablespoons balsamic vinegar - 1 teaspoon honey - Salt and pepper to taste In a small bowl, whisk the olive oil, balsamic vinegar, honey, and a pinch of salt and pepper. Taste it to see if you like the balance of flavors. Adjust the seasoning if needed. This dressing will add a nice tangy kick to your salad. Now it's time to put everything together. Slice the cooled beets into wedges or rounds. In a large bowl, combine the mixed greens, sliced beets, toasted walnuts, and dried cranberries or pomegranate seeds. Toss them gently to mix evenly. Drizzle some of the dressing over the salad and toss again, so all ingredients are coated. For presentation, transfer the salad to a nice serving platter or divide it into individual plates. Crumble the goat cheese over the top for a creamy texture. Drizzle a bit more dressing over the cheese. If you like, add fresh parsley for color and flavor. Follow the [Full Recipe] for detailed steps and measurements. Remember, a beautiful salad is always a joy to eat! Choosing the right beets Select firm, smooth beets. Look for small to medium sizes, as they roast better. Avoid any that feel soft or have spots. How to tell when beets are done Beets are ready when a fork easily pierces them. Depending on size, this takes 45 minutes to 1 hour at 400°F. Let them cool before peeling. Substitutions for balsamic vinegar If you want a twist, use red wine vinegar or apple cider vinegar. Both add a tasty zing without losing the salad's charm. Adding herbs to the dressing Fresh herbs like thyme or basil brighten the dressing. Chop them finely and mix in for added flavor. A little goes a long way. Ideal accompaniments This salad pairs well with crusty bread or a light soup. These sides enhance the meal without overpowering the main dish. Pairing with proteins for a meal Add grilled chicken or shrimp for a hearty option. If you're vegetarian, consider roasted chickpeas or tofu. Both options make it filling and delicious. For the full recipe, check out the [Full Recipe]. {{image_4}} You can make your salad heartier by adding proteins. Grilled chicken or shrimp works well. Simply cook the protein and slice it. Top your salad with it for extra flavor. If you want a vegetarian option, use tofu. Cube the tofu and sauté it until golden. This adds protein and a nice texture. Incorporating seasonal fruits or veggies can elevate your salad. In spring, try fresh strawberries or asparagus. In the fall, add diced apples or roasted squash. These ingredients not only taste great but also add color. Consider swapping nuts for crunch. Almonds, pecans, or sunflower seeds are all tasty options. For a vegan version, simply replace goat cheese. Use cashew cream or a vegan cheese. These alternatives still give you that creamy texture. You can also experiment with dressings. A lemon vinaigrette or tahini dressing adds a new twist. Both options keep the salad fresh while staying plant-based. For the full recipe, check out the complete guide above! To store leftovers, place the salad in an airtight container. This keeps it fresh and prevents the greens from wilting. You can add a paper towel to absorb excess moisture. Store it in the fridge for up to three days. Keep the dressing separate until serving. This helps maintain the salad's crunch. You cannot freeze the whole salad. Freezing changes the texture of the greens, making them mushy. However, you can freeze roasted beets. Place them in a freezer-safe bag and squeeze out the air. They will stay fresh for about three months. Thaw them in the fridge before using. Beets last about one to two weeks in the fridge. Keep them unpeeled in a cool, dark place. Mixed greens should be used within five days for best taste. Goat cheese stays fresh for about one week once opened. Keep it tightly wrapped to avoid drying out. Roasting beets is simple and rewarding. Here’s how: 1. Preheat your oven to 400°F (200°C). 2. Scrub each beet clean and trim off the tops and bottoms. 3. Wrap each beet in aluminum foil. This keeps them moist. 4. Place the wrapped beets on a baking sheet. 5. Roast for 45 minutes to 1 hour. They are done when a fork easily pierces them. 6. Let them cool, then peel off the skins. Wear gloves to avoid staining your hands. Roasting beets brings out their natural sweetness. It makes them tender and full of flavor. You can use them in salads, sandwiches, or as a side dish. You can get a head start on this salad! Here are some tips: - Roast the beets a day early. Store them in the fridge. They will stay fresh. - Prepare the dressing ahead of time. Keep it in a jar. Shake before use. - Wash and dry the mixed greens. Store them in a container with a paper towel to absorb moisture. Assemble the salad just before serving. This keeps it crisp and fresh. If you need an alternative to goat cheese, here are some creamy options: - Feta cheese adds a salty flavor and crumbly texture. - Cream cheese is soft and rich, perfect for spreading. - Ricotta cheese is light and fluffy, giving a mild taste. These substitutes work well in the salad. Choose one that you like best! For the full recipe, check out the Roasted Beet and Goat Cheese Salad. This blog shared a tasty beet salad recipe, from ingredients to storage tips. You learned how to roast beets and mix a great dressing. I also provided variations to suit different diets, plus storage advice. Keep experimenting with ingredients and enjoy the colorful flavors. Simple changes can make each meal unique. This salad is not just healthy; it's fun and versatile. Enjoy your cooking journey and impress your family and friends with this easy dish!](https://goldendishy.com/wp-content/uploads/2025/06/47a93f65-23b8-4270-bc0e-899490eb93a9-768x768.webp)