Honey Mustard Chicken Tenders Crispy and Flavorful Meal

Looking for a quick and delicious meal? These honey mustard chicken tenders deliver crispy goodness in every bite. With just a few simple ingredients and easy steps, you can whip up this flavorful dish in no time. Whether you need a weeknight dinner or a tasty appetizer, these tenders fit the bill. Let’s dive into the ingredients and steps you’ll need to create this mouthwatering meal!
Ingredients
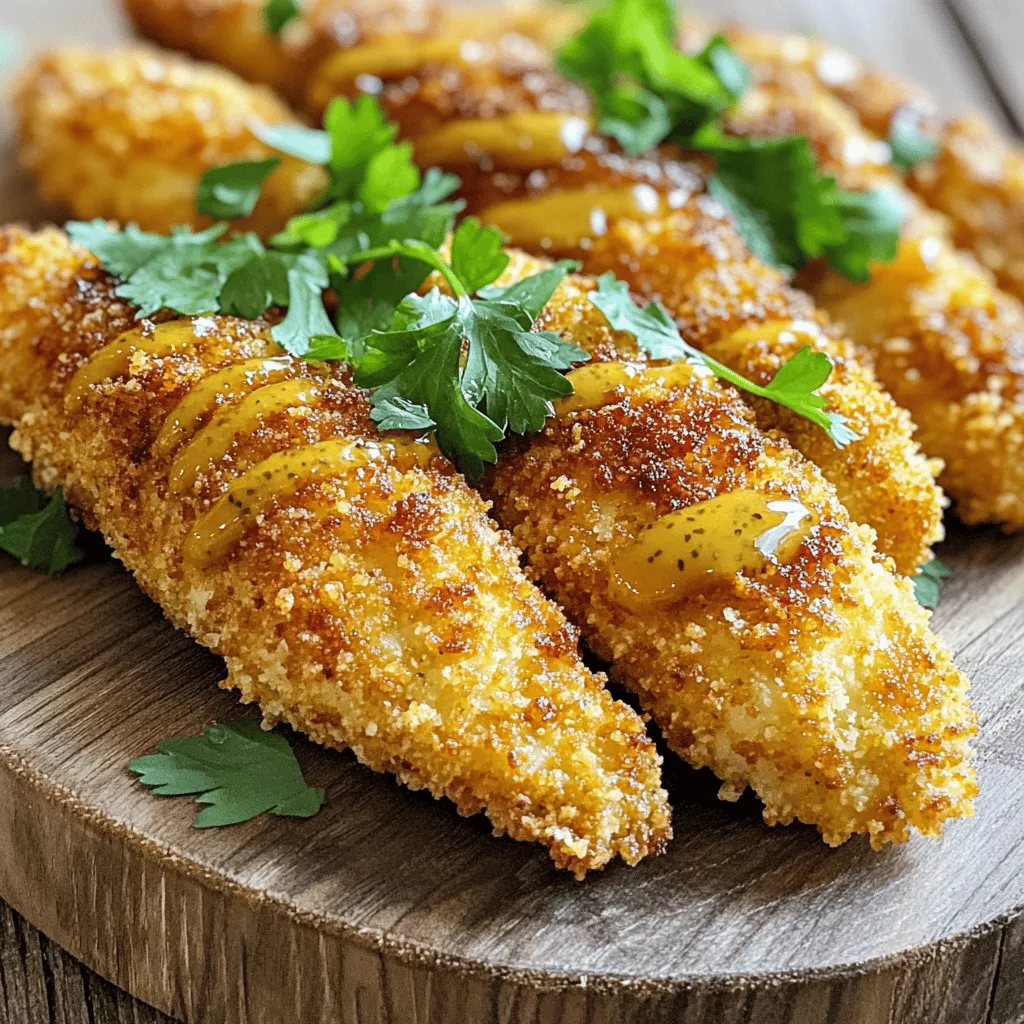
Main Ingredients for Honey Mustard Chicken Tenders
To make tasty honey mustard chicken tenders, gather these key ingredients:
– 1 pound chicken tenders
– 1/4 cup honey
– 1/4 cup Dijon mustard
– 1 tablespoon olive oil
– 1 teaspoon garlic powder
– 1 teaspoon paprika
– Salt and pepper to taste
– 1 cup breadcrumbs (preferably panko for extra crunch)
– Fresh parsley, chopped (for garnishing)
These ingredients come together to create a sweet and tangy flavor that kids and adults love.
Optional Ingredients for Extra Flavor
You can add some optional ingredients to enhance the taste. Consider these:
– 1 teaspoon onion powder
– 1/2 teaspoon cayenne pepper (for a spicy kick)
– 1 tablespoon lemon juice (for brightness)
Adding these can give your chicken an extra burst of flavor. Feel free to experiment with your favorite spices.
Equipment Needed
You will need a few simple tools to prepare this dish:
– A baking sheet
– Parchment paper
– Two mixing bowls
– A whisk
– A meat thermometer
Having the right equipment will make the cooking process smooth and enjoyable.
Step-by-Step Instructions
Prepping the Oven and Baking Sheet
First, I preheat my oven to 400°F (200°C). This step is key for crispiness. I line a baking sheet with parchment paper. This helps keep the chicken from sticking. A clean baking sheet makes cleanup easy too.
Making the Honey Mustard Marinade
In a medium bowl, I mix the following:
– 1/4 cup honey
– 1/4 cup Dijon mustard
– 1 tablespoon olive oil
– 1 teaspoon garlic powder
– 1 teaspoon paprika
– Salt and pepper to taste
I whisk these ingredients until they blend well. This marinade gives the chicken a sweet and tangy flavor. It adds moisture and helps the breading stick.
Coating the Chicken Tenders
Next, I take my chicken tenders (1 pound) and dip each one in the honey mustard mix. I make sure each piece is well-coated. I let any extra marinade drip off. Then, I move to a bowl with 1 cup of breadcrumbs. Panko works best for great crunch!
I roll each tender in the breadcrumbs. I press gently to ensure they get a good coating. After that, I arrange them on the baking sheet. I space them out to let hot air circulate around them.
Baking and Broiling for Perfect Crispiness
I place the baking sheet in the oven and bake for 20-25 minutes. The chicken should turn golden brown and reach 165°F (74°C) inside. I often use a meat thermometer to check.
For extra crunch, I broil the chicken for 2-3 minutes. I watch closely to prevent burning. After baking, I let the tenders rest for a few minutes. This keeps them juicy. Finally, I garnish with fresh parsley for color.
Tips & Tricks
How to Choose the Best Chicken Tenders
When picking chicken tenders, look for fresh ones. They should be pink and plump. Avoid any with brown spots or a strange smell. If you can, buy organic. Organic chicken often has better flavor and texture. You can also ask your butcher for help. They can guide you to the freshest options.
Ensuring the Perfect Crunch with Breadcrumbs
Using the right breadcrumbs is key for a crispy result. I recommend panko breadcrumbs. They are lighter and create a bigger crunch. When coating your chicken, press the breadcrumbs firmly onto each piece. This helps them stick better. For extra flavor, mix in some grated Parmesan cheese or spices into the breadcrumbs.
Storing Leftovers and Reheating Instructions
If you have leftovers, store them in an airtight container in the fridge. They will stay fresh for up to three days. To reheat, place the tenders on a baking sheet in a preheated oven at 375°F (190°C). Bake for about 10 minutes until they’re heated through. This method keeps them crispy. You can also use an air fryer for a quick reheat. Just set it to 350°F (175°C) for about 5 minutes. Enjoy your tasty Honey Mustard Chicken Tenders again!

Variations
Adding Spices for a Unique Flavor
You can spice up your honey mustard chicken tenders easily. Add a pinch of cayenne for heat. If you like warmth, try smoked paprika instead of regular. You can also mix in some Italian herbs, like basil or oregano, for a fresh taste. These spices give your dish a new twist and keep it exciting.
Alternative Coating Options
If you want a different crunch, switch up your coating. Try crushed cornflakes for a sweet and crispy layer. You can use crushed nuts, like almonds or pecans, for a richer flavor. For a gluten-free option, almond flour works well too. Each alternative adds a unique taste and texture to your chicken tenders.
Pairing Suggestions for Meals
Honey mustard chicken tenders pair well with many sides. Serve them with a fresh salad for a light meal. You can also enjoy them with sweet potato fries for a fun twist. Add some steamed veggies for a colorful plate. Don’t forget about dipping sauces! Try ranch or barbecue for extra flavor. Use these ideas to create a complete meal that your family will love.
Nutrition Information
Calories and Macronutrients Breakdown
Each serving of honey mustard chicken tenders has around 350 calories. This dish is rich in protein, with about 25 grams per serving. You also get healthy fats from olive oil and carbs from breadcrumbs. The dish provides a balanced meal, making it great for any time of day.
Health Benefits of Ingredients
The main ingredients offer several health benefits. Chicken is a great source of lean protein, which helps build muscle. Honey adds natural sweetness and has antioxidants. Dijon mustard can aid digestion and is low in calories. Garlic powder may boost your immune system. Olive oil contains healthy fats that are good for your heart.
Adjusting the Recipe for Dietary Needs
You can easily adjust this recipe for different diets. For gluten-free needs, use gluten-free breadcrumbs. If you want to lower sugar, use less honey or a sugar substitute. For a dairy-free version, ensure all ingredients are free from dairy. You can also make it low-carb by skipping the breadcrumbs and using crushed nuts instead.
FAQs
Can I use chicken breasts instead of tenders?
Yes, you can use chicken breasts. Just cut them into strips. This will help them cook evenly. Adjust the cooking time to about 25-30 minutes. Check for a golden color and an internal temperature of 165°F.
How long to cook frozen chicken tenders?
If you start with frozen chicken tenders, cook them for about 25-30 minutes. Make sure to spread them out on the baking sheet. This helps them cook nicely and get crispy. Always check the package for specific times, as they can vary.
What dipping sauces go well with honey mustard chicken tenders?
Honey mustard chicken tenders pair well with a few tasty dips:
– Barbecue sauce
– Ranch dressing
– Buffalo sauce
– Sweet and sour sauce
These sauces add extra flavor and fun to your meal.
How to make honey mustard sauce from scratch?
Making honey mustard sauce is easy. Here’s a simple recipe:
– Mix 1/4 cup honey with 1/4 cup Dijon mustard.
– Stir until smooth.
– Adjust sweetness to taste by adding more honey if needed.
This sauce is perfect for dipping or drizzling over your chicken tenders.
This post covered how to make honey mustard chicken tenders. You learned about needed ingredients, from basic to optional ones. The step-by-step guide detailed how to cook these tenders perfectly. Helpful tips for crunch and storage were also shared. Lastly, variations and nutrition facts cater to different tastes and diets.
In conclusion, with these steps, you can enjoy tasty chicken tenders at home. Happy cooking!


![To make crispy air fryer chicken wings, you need the right ingredients. Here’s what you’ll need: - 2 pounds of chicken wings - 1 tablespoon baking powder - 1 teaspoon garlic powder - 1 teaspoon onion powder - 1 teaspoon smoked paprika - 1 teaspoon salt - ½ teaspoon black pepper - ½ teaspoon cayenne pepper (optional, for heat) - 2 tablespoons olive oil These ingredients help create a crunchy skin and juicy meat. The spice mix is key to adding flavor. The baking powder helps crisp the skin. Garlic and onion powders give a savory kick. Smoked paprika adds a touch of smokiness. The salt enhances all the flavors. Black pepper brings a mild heat, while cayenne adds more spice if you like it hot. You can add a few optional touches to enhance your dish. Fresh parsley, finely chopped, looks great as a garnish. It adds color and freshness to the wings. As for dipping sauces, ranch or blue cheese dressing pairs perfectly with these wings. You can also try hot sauce for an extra kick! For the full recipe, check out the main article. Start by preheating your air fryer to 400°F (200°C). This step is key for crispy wings. Make sure the fryer is empty and clean. Let it heat up while you prepare the chicken. Rinse 2 pounds of chicken wings under cold water. Pat them dry with paper towels. Dry wings help get that nice crunch. In a bowl, mix these spices: - 1 tablespoon baking powder - 1 teaspoon garlic powder - 1 teaspoon onion powder - 1 teaspoon smoked paprika - 1 teaspoon salt - ½ teaspoon black pepper - ½ teaspoon cayenne pepper (optional for heat) After mixing, add the wings to the bowl. Drizzle with 2 tablespoons of olive oil. Toss well so every wing gets coated. You want flavor in every bite! Carefully place the wings in the air fryer basket in a single layer. Avoid crowding them. This allows air to circulate and crisp them up. Cook for 25-30 minutes. Flip the wings halfway through for even cooking. Look for a golden-brown color and crispy texture. After cooking, let the wings rest for a few minutes. This keeps them juicy. Finally, garnish with fresh parsley and serve with ranch or blue cheese dressing. Enjoy your crispy air fryer chicken wings! You can find the full recipe above. To make your wings extra crispy, start with dry wings. Pat them well with paper towels. The baking powder helps create crunch. It pulls moisture away and makes the skin crisp. Air fry at 400°F (200°C) for the best results. Flip them halfway through to ensure even cooking. If you want more crunch, give them a quick broil after cooking. One mistake is overcrowding the air fryer basket. This stops air from flowing around the wings. Cook in batches if needed. Another error is not drying the wings enough. Wet wings lead to soggy skin. Lastly, avoid using too much oil. A little goes a long way. The oil helps the spices stick and adds flavor without making them greasy. Use a good air fryer that heats evenly. A basket-style air fryer works well. You’ll need mixing bowls for seasoning the wings. A set of measuring spoons is also handy for accuracy. Finally, have a good pair of tongs for flipping the wings safely. A meat thermometer can help check if they are cooked through. For the full recipe, be sure to check the linked instructions. {{image_4}} You can easily change the flavor of your wings. To make Buffalo wings, toss them in hot sauce before serving. For BBQ wings, add your favorite BBQ sauce after cooking. You can even mix flavors! Try garlic parmesan by adding garlic powder and parmesan cheese. Each variation brings a new taste to your plate. Wing sizes can change the cooking time. For small wings, cook for 20-25 minutes. Medium wings need about 25-30 minutes. Large wings may take 30-35 minutes. Always check for doneness. The internal temperature should reach 165°F (74°C). This ensures safe and tasty wings. If you don't have an air fryer, you can bake or fry wings. To bake, set your oven to 425°F (220°C) and cook wings for 40-45 minutes. Flip them halfway. For frying, heat oil to 350°F (175°C) and fry wings for 8-10 minutes. Each method offers its own delicious crunch. For the complete recipe, check out the [Full Recipe]. After enjoying your crispy air fryer chicken wings, you may have some left. To keep them fresh, place the wings in an airtight container. This helps keep moisture out. Store them in the fridge for up to three days. If you want to keep them longer, consider freezing them. To reheat your wings, the air fryer is best. Preheat it to 375°F (190°C). Place the wings in the basket in a single layer. Heat them for 5 to 10 minutes. This method helps keep the wings crispy. You can also use an oven, but the air fryer works wonders for crispiness. If you freeze your wings, they can last for up to three months. Place the cooled wings in a freezer-safe bag. Remove as much air as possible before sealing. When you want to eat them, thaw the wings overnight in the fridge. Then, reheat them in the air fryer for a crispy finish. This is a great way to enjoy your crispy air fryer chicken wings later. For the full recipe, check out the complete guide! To get crispy wings, start with dry wings. Use paper towels to remove excess moisture. Baking powder is your secret weapon! It helps make the skin crisp. Coat the wings evenly with the spice mix. Arrange them in a single layer in the air fryer. Don’t overcrowd them; air needs to flow. Flip the wings halfway through cooking for even crispiness. Keep an eye on them for a nice golden color. Yes, you can use frozen chicken wings! Just remember to thaw them first. You can leave them in the fridge overnight or run them under cold water. After thawing, pat them dry. Then, follow the same steps in the Full Recipe. Cooking time may be a bit longer, so check for doneness. When serving crispy wings, ranch and blue cheese dressings are classic choices. They add creaminess and balance the spice. You can also try honey mustard for sweetness or hot sauce for extra heat. Experiment with different sauces to find your favorite match! In this post, we explored how to make crispy air fryer chicken wings. We covered essential ingredients, step-by-step instructions, and helpful tips. You can experiment with flavors like buffalo and BBQ, too. Remember to store leftovers properly and reheat safely for the best taste. Enjoy your tasty wings and share them with friends or family. Now, you have all the tools to make crispy wings at home whenever you want. Happy cooking!](https://goldendishy.com/wp-content/uploads/2025/06/40ff0ca3-8982-419f-b213-91fbe0dabedd-768x768.webp)
![- 8 oz (about 225g) rotini or penne pasta - 1 cup cherry tomatoes, halved - 1 cucumber, finely diced - 1/2 red onion, finely chopped - 1 bell pepper (any color), diced into small pieces - 1 cup Kalamata olives, pitted and sliced in half - 1 cup feta cheese, crumbled into bite-sized pieces - 1/4 cup fresh parsley, roughly chopped - 1/4 cup high-quality olive oil - 2 tablespoons red wine vinegar (optional for flavor) - 1 tablespoon freshly squeezed lemon juice - 1 teaspoon dried oregano - Sea salt and freshly cracked black pepper to taste You can make this salad your own. Try adding: - Grilled chicken or shrimp for protein - Artichoke hearts for extra flavor - Sun-dried tomatoes for a sweeter touch - Avocado for creaminess - Different herbs like mint or dill for freshness Fresh ingredients shine in this salad. Here’s how to pick the best: - Choose firm, bright cherry tomatoes. They should smell sweet. - Look for a cucumber with smooth skin. It should feel heavy for its size. - Pick bell peppers that are shiny and firm. Avoid any with soft spots. - For olives, select Kalamata that are dark and plump. - Get feta cheese that is crumbly and moist, not dry. Using fresh ingredients elevates the flavor and makes your Easy Greek Pasta Salad a true delight. For the full recipe, check out the Mediterranean Delight Pasta Salad 🥗! Start by boiling a large pot of salted water. This step is key to flavor. Add 8 oz of rotini or penne pasta. Cook it according to the package directions until it is al dente. This should take about 8-10 minutes. Once the pasta is cooked, drain it well. Rinse the pasta under cold water to stop the cooking and cool it down. This keeps the texture just right. In a large mixing bowl, add the cooled pasta. Next, toss in 1 cup of halved cherry tomatoes, 1 diced cucumber, and 1/2 finely chopped red onion. Don’t forget 1 diced bell pepper, which adds color and crunch. Add 1 cup of Kalamata olives that you’ve pitted and sliced. Finally, sprinkle in 1/4 cup of roughly chopped fresh parsley. Mix everything well to combine the flavors. In a small bowl, whisk together the dressing. Use 1/4 cup of high-quality olive oil. Add 2 tablespoons of red wine vinegar or fresh lemon juice if you prefer a brighter taste. Squeeze in 1 tablespoon of lemon juice for extra zest. Mix in 1 teaspoon of dried oregano. Season with sea salt and freshly cracked black pepper to taste. Whisk until the ingredients blend into a smooth dressing. Drizzle the dressing over the pasta and vegetable mix. Toss gently to coat all the ingredients well with the dressing. This step is crucial for flavor. Now, softly fold in the crumbled feta cheese. Be careful not to break the cheese too much; you want those nice chunks. For the best flavor, cover the salad with plastic wrap. Place it in the refrigerator for at least 20 minutes. This waiting period allows the flavors to blend beautifully. After chilling, taste the salad. Adjust the seasoning with more salt, pepper, or lemon juice if needed. Enjoy making this Easy Greek Pasta Salad! For the Full Recipe, check the link. To make the best Greek pasta salad, start with the right pasta. Use rotini or penne, as they hold the dressing well. Cook the pasta just right. It should be al dente, so it stays firm. Rinse it under cold water after cooking. This step cools the pasta and stops it from cooking more. Next, chop your veggies evenly. This way, each bite has a bit of everything. Fresh ingredients bring the best flavor. Use ripe cherry tomatoes and a crisp cucumber. Kalamata olives add a nice briny touch. Don’t forget the feta cheese! It should be crumbly but not too small. Many people overcook the pasta. This makes it mushy and not enjoyable. Also, don’t skip the rinsing step. It keeps the pasta from sticking together. Another mistake is not seasoning enough. Taste your salad after mixing. You might need more salt, pepper, or lemon juice. Always adjust to make it perfect for your palate. Lastly, let your salad chill before serving. This step allows the flavors to blend and deepen. A quick chill of at least 20 minutes works wonders. For more flavor, try adding fresh herbs. Basil or dill can brighten the dish. If you like heat, add a pinch of red pepper flakes. This gives your salad a nice kick. Experiment with your dressing too! Swap red wine vinegar for lemon juice for a brighter taste. A splash of balsamic vinegar can also add depth. Lastly, if you want a creamier salad, mix in some Greek yogurt. It adds richness without overpowering other flavors. For the full recipe, check out the Mediterranean Delight Pasta Salad. Enjoy making this simple and colorful dish! {{image_4}} You can easily add proteins to your Easy Greek Pasta Salad. Grilled chicken or canned tuna are great choices. They boost the dish's nutrition and make it more filling. For chicken, use cooked, diced pieces. For tuna, just drain and flake it. Mix your chosen protein right into the salad for a complete meal. Feel free to switch up the veggies in your pasta salad. Different colors and flavors keep it exciting. Try adding artichoke hearts, sun-dried tomatoes, or roasted red peppers. You can also use zucchini or spinach for a fresh twist. Just chop them into small pieces and mix them in. If you want a vegan version, swap feta cheese for a plant-based alternative. Nutritional yeast can also add a cheesy flavor without dairy. For gluten-free options, use gluten-free pasta. There are many types available now. This way, you can enjoy the salad without worry. Check labels to ensure all ingredients meet your dietary needs. Find the full recipe at [Full Recipe]. To keep your Easy Greek Pasta Salad fresh, store it in an airtight container. This helps prevent air and moisture from spoiling your salad. If you have leftovers, make sure to cool the salad before sealing it. This keeps the flavors intact and avoids sogginess. You can also separate the dressing if you want to keep the salad crisp for longer. This salad tastes best cold, so there’s no need to reheat it. If you find the pasta has absorbed the dressing, add a splash of olive oil or lemon juice. Toss it gently to revive the flavors. If you stored the salad in the fridge, let it sit at room temperature for about 10 minutes before serving. This will enhance the taste and texture. Your Easy Greek Pasta Salad can last about 3 to 5 days in the fridge. Always check for any signs of spoilage. Look for changes in color or texture. If you notice any off smells, discard it. Trust your senses; if something seems off, it’s better to be safe. Enjoy your salad while it's fresh for the best taste! You can store Easy Greek Pasta Salad in the fridge for about 3 to 5 days. Keep it in a sealed container to keep it fresh. If you see any signs of spoilage, like an off smell or discoloration, it's best to toss it out. Yes, you can make this salad ahead of time! In fact, it tastes better after sitting for a while. The flavors meld together nicely. I recommend making it a few hours in advance or even the night before. Just remember to add the feta cheese right before serving to keep it fresh. Greek Pasta Salad pairs well with various dishes. You can serve it alongside grilled chicken, lamb, or fish. It also works great as a side for burgers or sandwiches. If you're having a picnic, it's perfect with some crusty bread and hummus. Yes, you can substitute feta cheese if you prefer. Try using goat cheese or ricotta for a different flavor. For a dairy-free option, you can use a plant-based cheese. Just keep in mind that the taste will change slightly, but the salad will still be delicious! This blog post covers how to make Easy Greek Pasta Salad. We discussed essential ingredients and tips for freshness. You learned steps to prepare the salad, mix the ingredients, and make the dressing. We highlighted ways to enhance flavors and avoid common mistakes. Plus, you can try various protein and veggie options. Finally, you got storage tips to keep the salad fresh. Enjoy making this salad for your next meal or gathering! It’s simple, tasty, and fun to customize.](https://goldendishy.com/wp-content/uploads/2025/06/0fc22d26-3c6f-4a8e-aae2-92058968a948-768x768.webp)
![To create this vibrant salad, gather these fresh ingredients: - 1 medium zucchini, sliced into half-moons - 1 bell pepper (red or yellow for sweetness), chopped into bite-sized pieces - 1 small eggplant, diced into uniform cubes - 1 cup cherry tomatoes, halved for a burst of sweetness - 1 red onion, cut into wedges for flavor - 3 tablespoons balsamic vinegar for a tangy kick - 2 tablespoons extra-virgin olive oil for richness - 1 tablespoon honey to balance the acidity - Sea salt and freshly cracked pepper to taste - 1 teaspoon dried oregano for an aromatic touch - 1 cup mixed greens (arugula, spinach, or your favorites) - ¼ cup feta cheese, crumbled (optional, for creaminess) - Fresh basil leaves for a fragrant garnish Not all ingredients need to be set in stone. Here are some smart swaps: - Use yellow squash instead of zucchini. The texture remains similar. - Any color bell pepper works well; green adds a more bitter taste. - Swap eggplant for mushrooms for a different texture and flavor. - Try different vinegars, like red wine vinegar, if balsamic is not available. - Maple syrup can replace honey for a vegan option. - For a dairy-free choice, omit feta cheese or use a vegan alternative. Choosing the right veggies makes a big difference. Here’s how to select the best: - Look for firm zucchini with shiny, smooth skin. Avoid soft spots. - Choose bell peppers that feel heavy and have smooth skin. - For eggplant, pick ones that are shiny and feel heavy for their size. - Cherry tomatoes should be plump and free from blemishes. - Pick red onions that are firm and have a vibrant color. - Visit local farmers' markets for the freshest produce whenever possible. These small choices can bring your Balsamic Roasted Vegetable Salad to life. For the complete recipe, check the [Full Recipe]. First, set your oven to 425°F (220°C). This high heat helps the veggies roast nicely. While the oven heats, grab a large mixing bowl. Add your sliced zucchini, chopped bell pepper, diced eggplant, halved cherry tomatoes, and red onion wedges. Mix them well. This step ensures every bite is packed with flavor. Next, take a small bowl. In it, combine 3 tablespoons of balsamic vinegar, 2 tablespoons of extra-virgin olive oil, and 1 tablespoon of honey. Add a pinch of sea salt and freshly cracked pepper. Finally, mix in 1 teaspoon of dried oregano. Whisk these ingredients together until smooth. This vinaigrette will bring a tangy and sweet kick to your salad. Now, line a baking sheet with parchment paper. Spread your mixed vegetables in a single layer. Make sure they are not crowded, as this helps them roast evenly. Place the baking sheet in the oven and roast for 20-25 minutes. Stir the vegetables halfway through. This mix ensures they cook evenly and get that lovely caramelization. Once the veggies are tender and golden, take them out and let them cool for a few minutes. In a large serving bowl, add your fresh mixed greens. Then, toss in the roasted vegetables. Gently mix until the greens and vegetables blend well. If you like, sprinkle ¼ cup of crumbled feta on top. Finally, add fresh basil leaves for a fragrant touch. Enjoy your colorful and tasty salad! For the full recipe, check out the details provided above. To get the best flavor, cut your vegetables into similar sizes. This step helps them roast evenly. Place them in a single layer on the baking sheet. Crowding the pan can cause steaming instead of roasting. Stir the vegetables halfway through cooking. This simple action helps them brown nicely on all sides. Always dress your salad right before serving. This keeps the greens fresh and crunchy. Use just enough dressing to coat the veggies. A light touch prevents sogginess. When mixing, toss gently to avoid bruising the greens. If you prefer more flavor, add more balsamic vinegar or a splash of lemon juice. Fresh herbs can elevate your salad. Try adding chopped parsley or cilantro for a fresh twist. You can also add a pinch of red pepper flakes for a kick. Experiment with spices like cumin or paprika for unique flavors. These additions can make your salad truly special and memorable. {{image_4}} You can mix and match veggies to suit your taste. Try adding carrots for sweetness or broccoli for crunch. Swap in asparagus for a fresh twist. You can even use sweet potatoes for a hearty base. The options are endless! Each veggie brings its own flavor and texture. You can create a new salad every time. Want to make this salad filling? Add proteins like grilled chicken or shrimp. Chickpeas or black beans also work well for plant-based options. They boost the protein without altering the salad's great taste. If you want a creamy touch, add avocado slices. These options turn your salad into a complete meal. This salad is easy to make vegan and gluten-free. Just skip the feta cheese or use a plant-based alternative. Use gluten-free grains like quinoa for added texture. You can also mix in nuts or seeds for crunch. These simple swaps keep your salad tasty while meeting dietary needs. Enjoy the fresh flavors without worry! For the full recipe, check out the Balsamic Roasted Vegetable Salad. Store leftover Balsamic Roasted Vegetable Salad in an airtight container. Make sure the salad is cool before sealing it. This keeps the flavors fresh and prevents sogginess. Try to eat the leftovers within three days for the best taste. I recommend using glass containers for storing your salad. Glass is non-reactive and helps keep the food fresh longer. If you prefer plastic, choose BPA-free containers. Make sure they fit your salad snugly to limit air exposure. To reheat roasted vegetables, place them on a baking sheet. Heat your oven to 350°F (175°C) and roast for about 10-15 minutes. This keeps the veggies crispy and warm. You can also reheat them in a skillet over medium heat for a few minutes. Just stir often to avoid burning. If you want to add a little moisture, a splash of balsamic vinegar can help revive the flavors. Enjoy your meal! Yes, you can make this salad ahead. Roast the veggies and prepare the salad. Keep the roasted veggies and greens separate. Store them in the fridge. Mix them just before serving for the best taste and texture. Mixed greens work great with roasted veggies. I love using arugula, spinach, or kale. They add crunch and a fresh taste. You can choose any greens you enjoy. Just pick ones that won’t wilt fast. Balsamic roasted vegetables last about 3 to 5 days in the fridge. Store them in an airtight container. The flavors will deepen over time, making them even tastier. Just reheat them before serving for a warm dish. You can use frozen vegetables, but fresh is best. Frozen veggies may release more water while cooking. If using frozen, roast them a bit longer. This helps them get nice and crispy. Balsamic roasted vegetable salad is easy and fun to make. We covered the ingredients, step-by-step instructions, and tips for the best results. You can customize this salad with different veggies or proteins. Proper storage keeps leftovers fresh, and I shared FAQs to answer common questions. Try this salad for a tasty and healthy meal. Enjoy making it your own!](https://goldendishy.com/wp-content/uploads/2025/06/26f5156f-9b75-49f6-aa69-260bfc3a782d-768x768.webp)


. You should refrigerate any leftover avocado egg salad in an airtight container. This way, it stays fresh for up to one hour before serving. However, I recommend eating it right away for the best taste. The flavors blend nicely when it’s fresh, and the texture remains creamy. Freezing avocado egg salad is not a good idea. The avocado will change texture and become mushy when thawed. To enjoy the best taste and texture, consume this dish fresh. You can prep the egg salad a day ahead of time. Store it in an airtight container in the fridge. Keep the salad separate from the lettuce leaves. This way, the lettuce stays crisp when you serve the wraps. For the full recipe, check the earlier section. No, fresh hard-boiled eggs provide better texture and flavor. Canned eggs lack the richness and depth that fresh eggs bring. When you boil eggs, the yolk stays creamy, while the whites turn firm. This contrast makes each bite delightful and satisfying. Consume within 1-2 days for best quality. As time passes, the avocado can brown, and the salad loses its fresh taste. Store it in an airtight container to keep it as fresh as possible. If you see browning, you can mix in a little lemon juice to help revive the color. Pair with fresh fruit, vegetable sticks, or a light soup. Fresh fruit adds sweetness, while crunchy vegetable sticks give texture. A light soup can balance the meal and add warmth. These sides complement the wraps and make for a well-rounded meal. In this post, we explored a simple, healthy recipe for avocado egg salad lettuce wraps. We covered the essential ingredients, step-by-step preparation, and tips for the best flavor and texture. These wraps are a great way to enjoy nutritious foods without heavy carbs. As you try this recipe, feel free to make it your own. Enjoy experimenting with different ingredients and variations. Eating healthy can be fun and tasty!](https://goldendishy.com/wp-content/uploads/2025/07/cd9e1d49-3f1d-44c5-8cf3-19f4c22fda08-768x768.webp)