Honey Garlic Sheet Pan Chicken Flavorful Family Meal

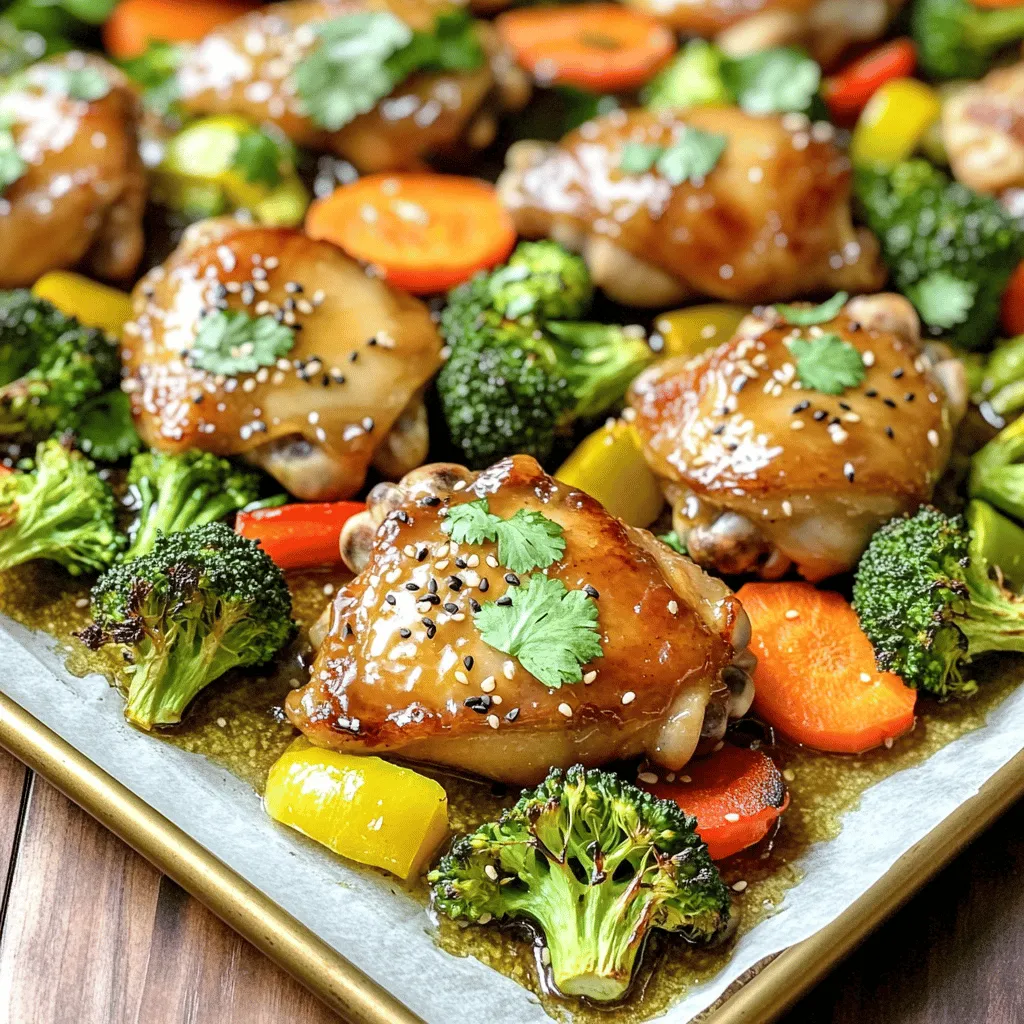
Get ready for a delicious dinner with my Honey Garlic Sheet Pan Chicken! This easy recipe combines tender chicken thighs, fresh veggies, and a sweet garlic glaze all on one pan. Perfect for busy nights, this meal is packed with flavor and will have your family asking for seconds. Let’s dive into the ingredients and I’ll show you how to create this tasty family favorite!
Ingredients
Main Ingredients
– 4 boneless, skinless chicken thighs
– 1/4 cup honey
– 1/4 cup soy sauce or tamari
– 4 cloves garlic, minced
Additional Ingredients
– 1 tablespoon freshly grated ginger
– 2 tablespoons olive oil
– 1 teaspoon sesame oil
– 1 teaspoon black sesame seeds (optional)
– 2 cups broccoli florets
– 1 bell pepper, thinly sliced
– 1 cup carrots, thinly sliced
– Salt and pepper, to taste
– Fresh cilantro, chopped, for garnish
Gathering fresh ingredients is key for this honey garlic sheet pan chicken. Use high-quality honey for a rich flavor. You can choose soy sauce or tamari based on your dietary needs. I love using fresh garlic and ginger for the best taste.
For the veggies, I always pick vibrant colors like red or yellow bell peppers. They add sweetness and crunch. Broccoli and carrots not only bring color but also nutrients.
Be sure to have salt and pepper on hand. They help bring out all the flavors in this dish. Fresh cilantro adds a nice touch at the end. It brightens up the meal and makes it look pretty.Enjoy making this dish!
Step-by-Step Instructions
Preparation Steps
– Preheat the oven to 400°F (200°C).
– Line a large baking sheet with parchment paper.
Sauce Preparation
– Whisk together honey, soy sauce, garlic, ginger, olive oil, and sesame oil.
Assembling the Dish
– Lay chicken on the baking sheet and coat with sauce.
– Add vegetables and season with olive oil, salt, and pepper.
Cooking Process
– Bake for 25-30 minutes and brush with remaining sauce for a glossy finish.
The steps are simple and fun. You start by preheating your oven to 400°F. This heat gives the chicken a nice, crispy finish. While the oven warms, line a large baking sheet with parchment paper. This makes cleanup easy later.
Next, let’s make the sauce. In a bowl, whisk together honey, soy sauce, minced garlic, ginger, olive oil, and sesame oil. The mix should be smooth. This sauce is what makes the chicken and veggies shine.
Now, place the chicken thighs on the baking sheet. Pour half of the sauce over the chicken. Make sure it’s well coated. Set the rest aside for later.
Add your chopped veggies around the chicken. Toss them in olive oil, salt, and pepper. This step adds flavor and helps them roast nicely.
Time to bake! Put the sheet pan in the oven and bake for 25-30 minutes. The chicken should reach 165°F inside. In the last five minutes, brush the chicken with the reserved sauce. This gives it a shiny, inviting look.
Once you take it out, let it rest for a few minutes. This allows the flavors to come together. Now you are ready to enjoy a delicious meal!
Tips & Tricks
Cooking Tips
– Ensure chicken reaches an internal temperature of 165°F (75°C).
– Use parchment paper for easier cleanup and helps with even cooking.
Getting the chicken cooked just right is key. I always use a meat thermometer. This tool gives me peace of mind that my chicken is safe to eat. Parchment paper is my best friend in the kitchen. It makes cleaning up a breeze and helps the food cook evenly. No sticking means no mess!
Flavor Enhancements
– Experiment with additional spices such as chili flakes for heat.
– Marinate chicken for an hour for enhanced flavor absorption.
Want a kick? Try adding chili flakes. Just a pinch can make a big difference. Marinating the chicken in the sauce for an hour helps the flavors soak in. It makes the dish taste richer and more delicious.
Presentation Tips
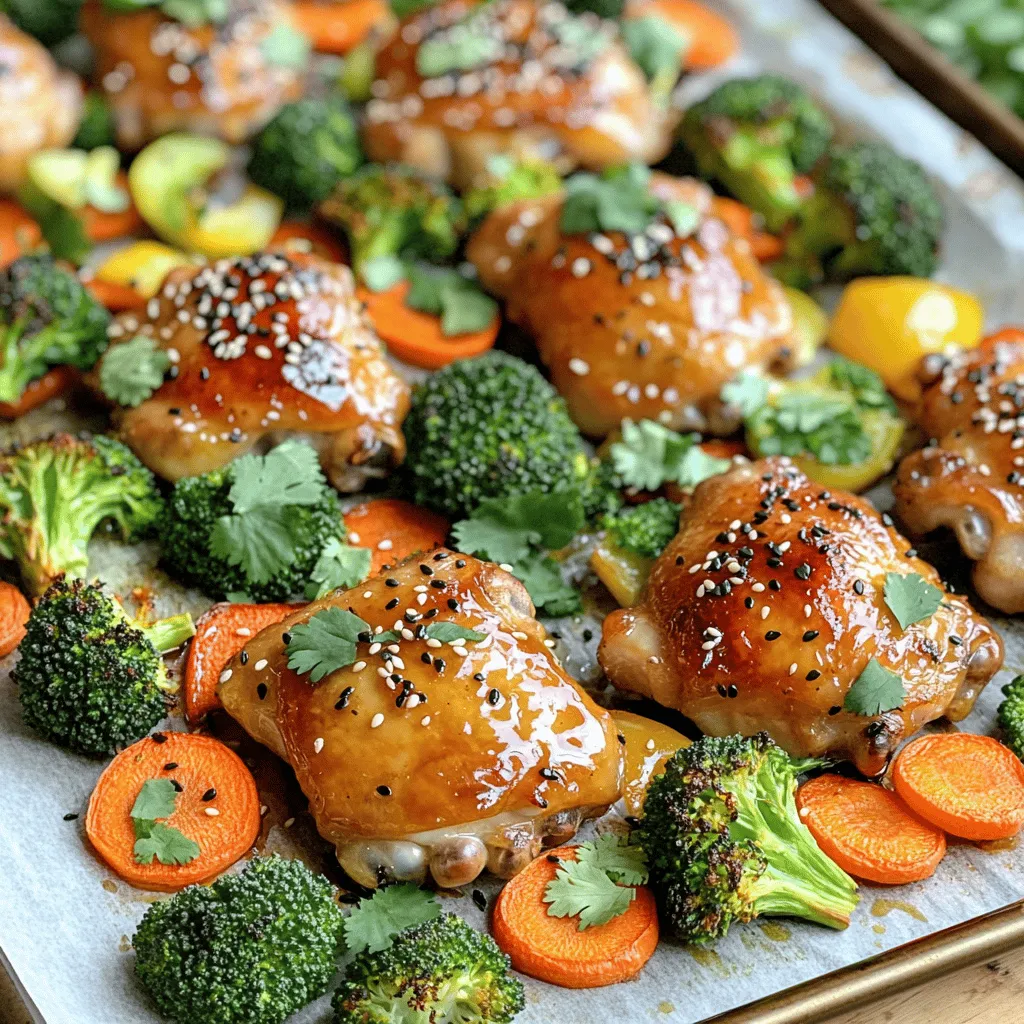
– Arrange chicken and vegetables beautifully on a platter.
– Drizzle leftover glaze for visual appeal and enhanced flavor.
When serving, I like to present my dish nicely. Place the chicken in the center of a big platter and surround it with the colorful veggies. Drizzling the leftover glaze on top not only looks nice but also adds more flavor. Your family will love the taste and the look of this meal!

Variations
Vegetable Alternatives
You can easily change the veggies in this dish. Substitute broccoli with green beans or asparagus. Both add a fresh taste. You can also add sliced onions or zucchini. These choices bring extra flavor and texture to your meal.
Protein Substitutes
If you want to change the protein, use chicken breasts instead of thighs. Chicken breasts cook quickly and remain juicy. For a plant-based option, try tofu. It absorbs the honey garlic sauce well and adds a nice texture.
Gluten-Free Options
If you need a gluten-free option, use tamari. It works just like soy sauce. Tamari has a rich flavor and keeps your dish safe for gluten-free diets. Always check the label to be sure.
Storage Info
Refrigeration Tips
Store leftovers in an airtight container in the refrigerator for up to 4 days. This helps keep the chicken and veggies fresh. When you need a quick meal, just pull it out and enjoy.
Freezing Instructions
You can freeze cooked chicken and vegetables for up to 3 months. Make sure they cool first. Place them in freezer bags or containers. Label them with the date for easy tracking.
Reheating Recommendations
Reheat in the oven or microwave until heated through. If using the oven, set it to 350°F (175°C). This helps keep the chicken juicy. For the microwave, use a microwave-safe dish and cover it. Heat in short bursts to avoid drying it out.
FAQs
How do I know when the chicken is fully cooked?
To check if the chicken is fully cooked, use a meat thermometer. You want the internal temperature to reach 165°F (75°C). This ensures the chicken is safe to eat. If you don’t have a thermometer, cut into the thickest part of the chicken. The meat should be white and the juices should run clear.
Can I make this recipe ahead of time?
Yes, you can make this dish ahead of time. Prepare the honey garlic sauce and marinate the chicken in it for a few hours or overnight. This helps the flavors seep in. You can also chop the vegetables early and store them in the fridge. When you are ready, just bake everything together.
What can I serve with Honey Garlic Sheet Pan Chicken?
You can serve this chicken with rice, quinoa, or a fresh green salad. These sides balance the flavors and add texture to your meal. Rice absorbs the sauce well, while quinoa adds a nutty taste. A salad adds freshness and crunch, making your meal more complete.
This blog post covered a simple and tasty recipe for Honey Garlic Sheet Pan Chicken. You learned about the main ingredients, preparation steps, cooking tips, and ways to customize the dish.
Remember, cooking is fun. Use fresh veggies and your favorite spices to make it yours. Enjoy your meal with friends or family, and share your creations. Happy cooking!


![To make these crispy fish tacos, gather these key items: - 1 lb white fish fillets (cod or tilapia work great) - 1 cup all-purpose flour - 1 cup cornmeal - 1 teaspoon paprika - 1/2 teaspoon cayenne pepper - 1/2 teaspoon garlic powder - 1/2 teaspoon salt - 1/4 teaspoon black pepper - 2 large eggs, beaten - Vegetable oil, for frying - 8 small corn tortillas The toppings add flavor and texture to your tacos. Here are my favorites: - 1/2 cup red cabbage, thinly sliced - 1 avocado, sliced - Fresh cilantro leaves, for garnish - Lime wedges, for serving To round out your meal, consider these sides: - Fresh salsa for a zesty kick - A drizzle of spicy crema for creaminess - Mexican rice for a hearty addition These ingredients make crispy fish tacos a fun and tasty weeknight meal. For the full recipe, be sure to check out the details above! Start by drying the fish fillets with paper towels. This step helps the coating stick better. Cut the fish into strips that are about 1 inch wide. This size cooks evenly and fits nicely in the tacos. In a medium bowl, mix the flour, cornmeal, paprika, cayenne pepper, garlic powder, salt, and black pepper. Stir until well combined. In another bowl, beat the eggs until smooth. This egg wash will help the coating stick. Heat about 1 inch of vegetable oil in a large skillet over medium-high heat. Check if the oil is hot by dropping in a pinch of the flour mix; if it sizzles, it's ready. Dip each fish strip into the egg wash, letting excess drip off. Then coat it in the flour mixture, pressing lightly to ensure it sticks. Place the coated fish in the hot oil, frying in batches to prevent overcrowding. Cook for 3-4 minutes on each side until golden brown. Transfer the fried fish to a plate lined with paper towels to absorb extra oil. Warm each corn tortilla in a dry skillet for about 30 seconds on each side. This makes them soft and easy to fold. For each tortilla, place 2-3 pieces of crispy fish. Top with sliced red cabbage, avocado, and fresh cilantro. Don’t forget to serve the tacos with lime wedges. A squeeze of lime adds a bright, fresh flavor. For the full recipe, you can check the complete details above. To get that perfect crunch, follow these steps: - Dry the Fish: Start by patting the fish fillets with paper towels. This removes moisture and helps them get crispy. - Use Cornmeal: Mixing cornmeal with flour gives extra texture and crunch. It makes the coating thicker and crispier. - Hot Oil: Make sure the oil is hot enough before frying. If it’s too cool, the fish will absorb oil and turn soggy. - Don’t Overcrowd: Fry the fish in batches. Too many pieces at once cools the oil and affects crispiness. Here are some common mistakes you should steer clear of: - Skipping the Egg Wash: The egg wash helps the coating stick. Don’t skip this step! - Not Heating the Oil Properly: Always test the oil. If it’s not hot, you’ll end up with greasy fish. - Using Wet Fish: Wet fish won’t fry well. Always dry them before coating. - Flipping Too Soon: Let the fish cook fully on one side before flipping. This helps it stay intact and crispy. Enhance your tacos with these tasty garnishes: - Fresh Cilantro: Adds a burst of freshness and color. - Avocado: Creamy avocado pairs well with crispy fish. - Lime Wedges: A squeeze of lime brightens up the flavors. - Salsa or Crema: A drizzle of spicy crema or your favorite salsa adds flavor and moisture. For the full recipe, check out [Full Recipe]. {{image_4}} If you want to try a different protein, shrimp works great. Just peel and devein before cooking. You can also use chicken strips. They need a bit more time to cook, so adjust frying time. Another option is tofu for a different texture. Press it to remove water and cut into strips. For a vegetarian twist, use cauliflower. Cut it into small florets, coat, and fry. It gets nice and crispy. If you want a vegan option, tempeh is fantastic. Slice it thin and marinate for flavor before frying. Just make sure to use a plant-based egg wash or a mixture of flour and water. To boost flavor, add lime zest to the coating mix. It brightens each bite. For spice, increase the cayenne pepper in the coating. You can also create a spicy sauce for drizzling on top. Mix yogurt or mayo with hot sauce for a creamy kick. Fresh herbs like cilantro or parsley can add freshness too. These variations keep the dish exciting, ensuring you can enjoy crispy fish tacos in many ways! Try out the full recipe to explore these options. To keep your crispy fish tacos fresh, store leftovers in an airtight container. Place the fish in one container and the toppings in another. This keeps the fish crispy and the toppings fresh. You can also wrap the tortillas in foil for better storage. To reheat, use the oven or an air fryer for best results. Preheat your oven to 350°F (175°C). Place the fish on a baking sheet and bake for about 10 minutes. If using an air fryer, heat it to 350°F (175°C) and fry for 5 minutes. This way, the fish stays crispy. Cooked fish lasts about 2-3 days in the fridge. Fresh toppings, like cabbage and avocado, can last 1-2 days. Store each item separately. If you have leftover tortillas, they can stay fresh in a sealed bag for up to a week. Always check for signs of spoilage before using any of the ingredients. For the full recipe, check the complete list of ingredients. I recommend using white fish like cod or tilapia. These fish have a mild flavor and cook well. They stay tender inside while getting crispy on the outside. Other good options include haddock or snapper. Yes, you can prepare the fish ahead of time. Cut the fish into strips and coat them. Keep the coated fish in the fridge for up to an hour. This helps the coating stick better when you fry them. If you can't find corn tortillas, flour tortillas are a good choice. You can also use lettuce leaves for a low-carb option. They add a nice crunch and freshness to your tacos. Crispy fish tacos can be gluten-free if you use gluten-free flour. Make sure to check the labels on your ingredients. Corn tortillas are naturally gluten-free, so they work well for this dish. For the best results, use gluten-free breadcrumbs or a gluten-free flour blend for coating the fish. Crispy fish tacos are a fun dish to make at home. We discussed key ingredients, topped it with tasty options, and paired it with sides. The steps from preparing the fish to frying it were simple and clear. Use my tips for crispy results and avoid common mistakes. You can also explore variations for flavors and dietary choices. Proper storage will keep your tacos fresh. Now, enjoy making and sharing your crispy fish tacos! They’re sure to impress.](https://goldendishy.com/wp-content/uploads/2025/06/e15c4a6f-d152-43b4-ae39-d2f9004115b6-768x768.webp)


![Zesty Spaghetti Aglio e Olio Ingredients: - 400g spaghetti - 6 cloves garlic, thinly sliced - ½ cup extra virgin olive oil - 1 teaspoon red pepper flakes (or to taste) - Zest of 1 lemon - Juice of 1 lemon - ¼ cup fresh parsley, finely chopped - Salt, to taste - Freshly grated Parmesan cheese (optional, for garnish) Spaghetti Aglio e Olio shines with simple, fresh ingredients. Each plays a vital role. - Spaghetti: This serves as the base of the dish. Choose high-quality pasta for the best texture. - Garlic: Fresh garlic gives a rich flavor. Use thin slices for even cooking. - Olive Oil: Extra virgin olive oil adds depth. It also helps infuse the garlic flavor. - Red Pepper Flakes: These provide heat. Adjust the amount to match your spice level. - Lemon: Zest and juice add brightness. They balance the richness of the oil. - Parsley: Fresh parsley adds color and freshness. It complements the garlic. Sometimes, you may need to swap ingredients. Here are some great options: - Pasta: Use any long pasta, like linguine or fettuccine. - Garlic: Garlic powder can work in a pinch, but fresh is best. - Olive Oil: Avocado oil is a good alternative. It has a similar flavor. - Red Pepper Flakes: Fresh chili or hot sauce can replace flakes for heat. - Lemon: Lime juice can work if you’re out of lemons. - Parsley: Basil or chives can add a different yet tasty note. This dish is all about the balance of flavors. Each ingredient enhances the others. Enjoy your cooking journey with Spaghetti Aglio e Olio! Start by filling a large pot with water. Add a lot of salt to the water. This step helps to flavor the spaghetti. Bring the water to a rolling boil. Add the spaghetti and cook it according to the package instructions. Usually, this takes about 8-10 minutes for 'al dente' pasta. Once it is cooked, save 1 cup of the pasta water. Drain the spaghetti in a colander. In a large skillet, heat the extra virgin olive oil over medium heat. When the oil is warm, add the thinly sliced garlic and red pepper flakes. Sauté the garlic gently, stirring often for about 2-3 minutes. Watch the garlic closely; you want it golden brown and fragrant, not burnt. Burnt garlic can turn the dish bitter, which is not what we want! Once the garlic is ready, carefully add the drained spaghetti to the skillet. Use tongs or a pasta fork to toss the spaghetti. Make sure each strand is coated in the garlic oil. If the pasta looks dry, add some reserved pasta water, one tablespoon at a time. Keep tossing until you reach the sauciness you like. Now, remove the skillet from the heat. Add the lemon zest and juice to the pasta. Toss everything well to mix. Season with salt according to your taste. Then, gently fold in the finely chopped parsley. This adds color and flavor to your dish. To get the best spaghetti, cook it until it is 'al dente.' This means it should still have a little bite. Fill a large pot with water and add a good amount of salt. Bring the water to a boil. Add the spaghetti and follow the package instructions. Usually, this takes about 8 to 10 minutes. Before draining, save a cup of the cooking water. This water helps to moisten the pasta later. Garlic is key in Spaghetti Aglio e Olio. Use fresh cloves and slice them thinly. Heat the olive oil in a skillet on medium heat. Add the sliced garlic and red pepper flakes. Stir gently for 2 to 3 minutes until the garlic turns golden. Be careful not to burn it! After mixing in lemon zest and juice, you add a bright taste. The lemon cuts through the richness and lifts the dish. Serving matters! Use warm bowls to keep your pasta hot. After plating, drizzle some of the leftover garlic oil over the spaghetti. This adds flavor and shine. Garnish with fresh parsley for color. A lemon wedge on the side adds a fun touch. When your guests squeeze it over their pasta, the dish becomes even more zesty. For a special finish, you can sprinkle on some grated Parmesan cheese. This makes the dish look gourmet, even though it’s simple to make. Enjoy your flavorful garlic pasta dish! For the complete recipe, check out the full recipe. {{image_4}} You can easily make Spaghetti Aglio e Olio heartier by adding proteins like shrimp or chicken. For shrimp, use raw, peeled shrimp. Sauté them in the garlic oil for about 3-4 minutes until they are pink and cooked through. If you prefer chicken, use diced chicken breast. Cook it in the oil until it's no longer pink. This adds great flavor and makes the dish more filling. If you want a vegetarian twist, consider adding greens. Spinach or kale works great. Add them to the skillet after the garlic has cooked. Stir until the greens wilt and mix well with the garlic oil. This not only adds color but also boosts the nutrition of your meal. You can also use peas for a pop of sweetness. For those who love heat, you can adjust the red pepper flakes to your taste. Start with the recommended amount, then add more if you want it spicier. If you want a unique twist, try adding sliced fresh chili peppers or a dash of hot sauce. This will give your dish a vibrant kick and enhance the overall flavor profile. Experimenting with these variations makes Spaghetti Aglio e Olio fun and exciting. You can enjoy it just the way you like! For the full recipe, check out the details above. To keep your leftover spaghetti aglio e olio fresh, follow these steps: - Let the pasta cool down to room temperature. - Place it in an airtight container. - Store it in the fridge for up to three days. This method helps maintain the flavors and texture of your dish. When reheating spaghetti aglio e olio, I recommend these tips: - Use a skillet over medium heat. - Add a splash of olive oil for moisture. - Stir frequently to prevent sticking. You can also microwave it. Just cover it and add a little water. Heat in short bursts, stirring in between. If you want to freeze spaghetti aglio e olio, do this: - Place cooled pasta in a freezer-safe bag. - Remove excess air and seal tightly. - Store in the freezer for up to two months. When ready to eat, thaw in the fridge overnight. Reheat on the stove for the best taste. Enjoy your flavorful garlic pasta dish again! For the full recipe, check out the [Full Recipe]. Spaghetti Aglio e Olio is a simple pasta dish from Italy. It features spaghetti tossed with garlic and olive oil. The dish gets a kick from red pepper flakes. It’s quick to make and uses few ingredients. This makes it perfect for a weeknight meal. You can find the full recipe [here](#). Yes, you can easily make this dish vegan. Just skip the Parmesan cheese that some people use. The rest of the recipe is naturally vegan. The garlic oil and pasta create a rich flavor on their own. You won’t miss the cheese at all! To make Spaghetti Aglio e Olio less spicy, reduce the red pepper flakes. Start with half a teaspoon instead of a full teaspoon. You can also omit them if you prefer no heat. The garlic and olive oil will still give great flavor. Adjusting the spice level allows everyone to enjoy this dish. You’ve learned how to make Spaghetti Aglio e Olio. We covered essential ingredients and tasty substitutes. The step-by-step guide helped simplify cooking and mixing. Tips showed how to perfect texture and flavor. The variations let you customize your dish, making it unique. Lastly, we talked about storing and reheating leftovers. Now, you can enjoy this dish any time. With simple steps, you’ll impress family and friends. Dive into your kitchen and try it out today!](https://goldendishy.com/wp-content/uploads/2025/06/d19134da-6fc7-4b27-a706-dd24852a29ee-768x768.webp)
