Looking for a side dish that’s easy, tasty, and full of flavor? Honey garlic roasted carrots are just what you need! With a sweet and savory glaze, these carrots steal the show at any meal. In this post, I’ll guide you step-by-step to make this delightful dish. Plus, I’ll share tips for perfect roasting and fun variations. Let’s dive in and transform your carrots into something special!
Ingredients
List of Ingredients
To make honey garlic roasted carrots, gather these simple ingredients:
– 1 lb baby carrots (or regular carrots, peeled and sliced into sticks)
– 3 tablespoons honey
– 2 tablespoons extra virgin olive oil
– 3 cloves garlic, finely minced
– 1 teaspoon fresh thyme leaves (or ½ teaspoon dried thyme)
– Freshly ground salt and pepper, to taste
– 1 tablespoon freshly squeezed lemon juice
– Fresh parsley leaves for garnishing (optional)
Optional Ingredients for Personalization
You can easily make this dish your own by adding:
– Other herbs like rosemary or dill for a different flavor
– A sprinkle of red pepper flakes for heat
– Carrots mixed with other roasted veggies like potatoes or beets
Nutritional Information
This dish is not just tasty; it’s also good for you. Here’s a quick look at the nutrition per serving:
– Calories: About 130
– Protein: 1g
– Carbohydrates: 27g
– Fiber: 4g
– Sugars: 10g
– Fats: 4g
These numbers can change based on your personal choices, especially if you add extra ingredients. Enjoy this healthy side dish that’s full of flavor!
Step-by-Step Instructions
Preheat and Prepare
First, preheat your oven to 400°F (200°C). This step is key for even roasting. Gather your ingredients. You should have baby carrots, honey, olive oil, garlic, thyme, and lemon juice ready.
Mixing the Honey Garlic Glaze
In a large bowl, combine the honey, olive oil, minced garlic, and thyme. Add a good pinch of salt and pepper. Next, squeeze in the lemon juice. Whisk the mixture well until it is smooth. This glaze will give your carrots a sweet and savory flavor.
Roasting the Carrots
Now, it’s time to coat the carrots. Add them to your bowl with the glaze. Toss them gently until they are well coated. Line a baking sheet with parchment paper for easy cleanup. Spread the carrots out in a single layer, avoiding crowding.
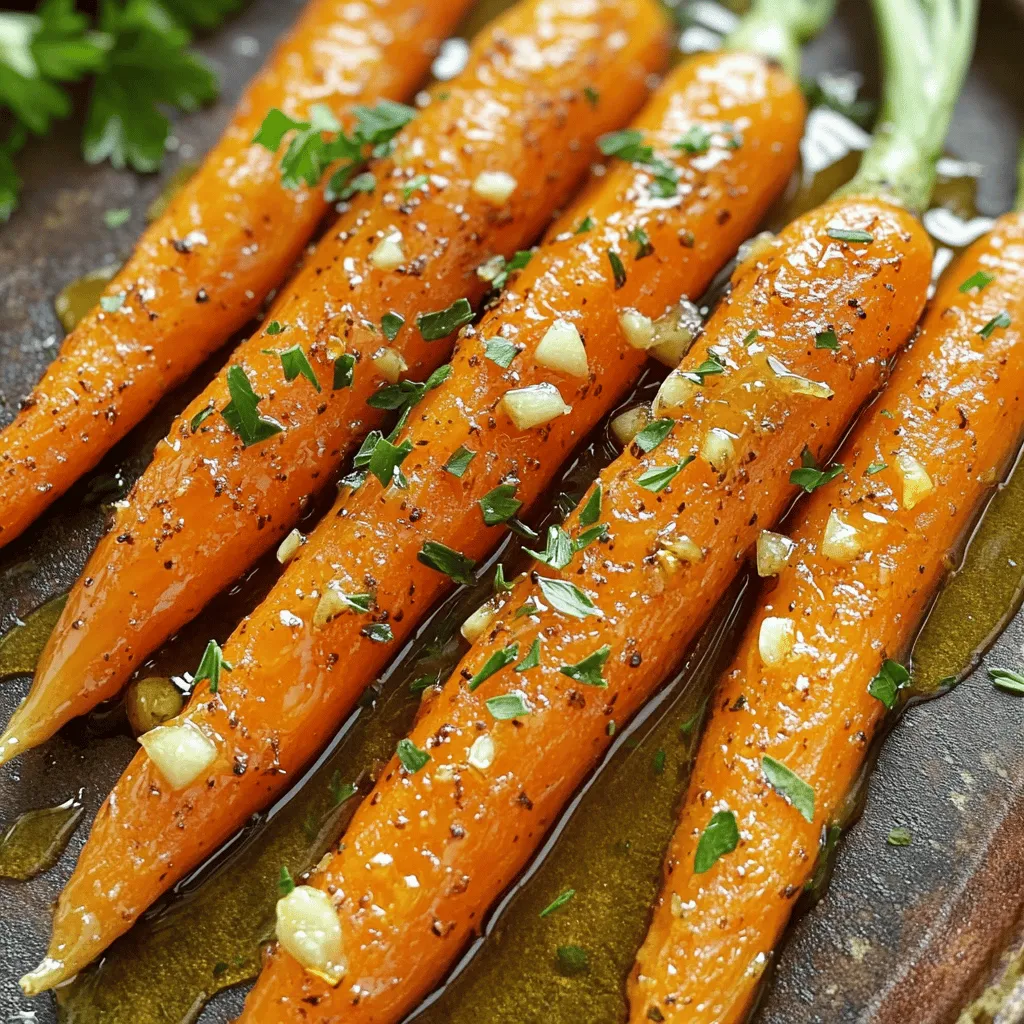
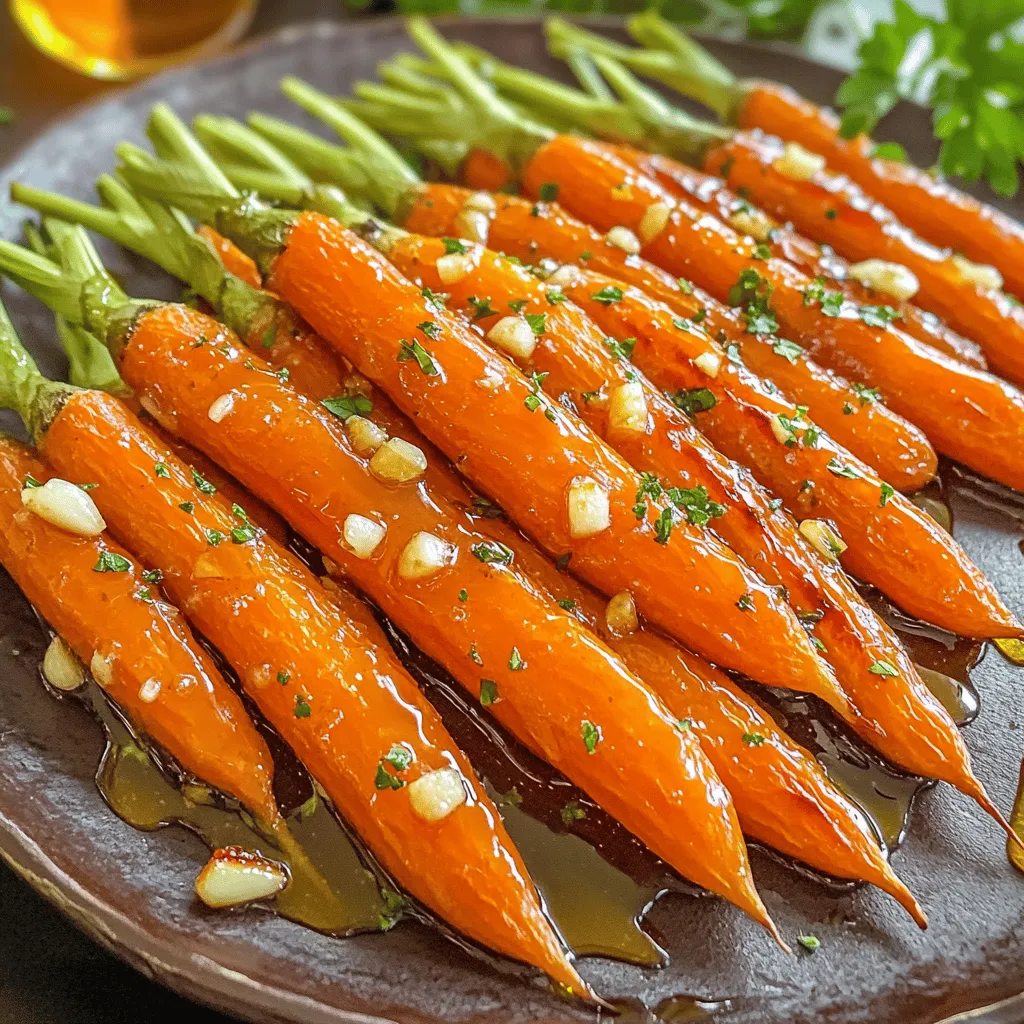
Place the baking sheet in the preheated oven. Roast the carrots for 25-30 minutes. Halfway through, toss the carrots again for even cooking. They should become tender and caramelized. Once done, let them cool for a few minutes. If you like, drizzle some extra glaze over the top for added flavor.
Finally, garnish with fresh parsley before serving. This adds a pop of color and freshness.
Tips & Tricks
Ensuring Perfect Roasting
To ensure your carrots roast perfectly, choose fresh carrots. Baby carrots work well, but regular ones are great too. If using regular carrots, slice them into sticks for even cooking. Spread the carrots out in a single layer on the baking sheet. This step keeps them from steaming and helps them caramelize nicely. Toss them halfway through cooking for even browning.
Achieving the Ideal Glaze Consistency
For a great glaze, mix the honey, olive oil, garlic, and thyme well. The oil helps the honey coat the carrots. If your glaze feels too thick, add a splash of water or lemon juice. This can help thin it out and ensure it coats the carrots evenly. Remember, a smooth glaze means more flavor in every bite!
Presentation Tips for Serving
To make your dish pop, use a nice platter. Once the carrots are roasted, transfer them carefully. Drizzle with extra honey for shine. Sprinkle fresh parsley or thyme over the top for color. This simple touch makes your dish look gourmet. Enjoy serving them at your next meal!
Variations
Adding Other Vegetables
You can easily change this dish by adding other vegetables. Try sweet potatoes or parsnips. They roast well and add new flavors. Just cut them to a similar size as the carrots. This helps them cook evenly.
Alternative Sweeteners
If you want to switch up the sweet taste, use maple syrup or agave. Both give a nice flavor and work well with the garlic. You can use the same amount as honey. Just mix it well with the other ingredients.
Flavor Enhancements (like spices or herbs)
Adding spices can boost the taste of your honey garlic roasted carrots. You might try a pinch of cumin or chili powder for warmth. Fresh herbs like rosemary or dill can also add a bright note. Experiment with what you love! Each change can make this dish new and exciting.
Storage Info
How to Store Leftover Carrots
To store leftover honey garlic roasted carrots, first let them cool down. Use an airtight container to keep them fresh. If you have a lot, divide them into smaller portions. Place the container in the fridge. They will stay good for about 3 to 5 days. Keeping them sealed helps avoid drying out.
Reheating Instructions
When you’re ready to enjoy the leftovers, preheat your oven to 350°F (175°C). Spread the carrots on a baking sheet. You can drizzle a little olive oil for extra moisture. Heat them for about 10 to 15 minutes, or until they feel warm. You can also use a microwave if you’re in a hurry. Just cover them with a damp paper towel and heat in 30-second bursts.
Freezing Tips
If you want to keep the carrots longer, freezing is a great option. First, let the carrots cool completely. Spread them in a single layer on a baking sheet. Freeze them for about 1 hour. This step prevents them from sticking together. After that, transfer the carrots to freezer bags. Remove as much air as possible before sealing. They can last for up to 3 months in the freezer. To eat, thaw them in the fridge overnight before reheating.
FAQs
Can I use frozen carrots?
Yes, you can use frozen carrots. However, fresh carrots will taste better. Frozen carrots may lose some crunch. If you use them, roast them longer to ensure they cook fully. Just remember to thaw them before roasting for the best results.
What can I serve with honey garlic roasted carrots?
Honey garlic roasted carrots pair well with many dishes. You can serve them with grilled chicken, beef, or fish. They also taste great with rice or quinoa. Try them with a fresh salad for a balanced meal. Their sweet and savory flavor adds depth to any plate.
How do I make this dish ahead of time?
You can make this dish ahead of time. Prepare the honey garlic glaze and coat the carrots. Store them in the fridge for up to 24 hours. When ready to serve, just roast them in the oven. This saves time and still gives you that amazing flavor.
We explored the key ingredients and steps to make honey garlic roasted carrots. You learned how to mix the glaze, roast the carrots, and personalize the dish. We also discussed useful tips for perfect roasting and presentation. Lastly, we covered variations and storage tips to keep your dish fresh. Use this guide to make a tasty meal. Enjoy these carrots with your loved ones for a delightful experience.


