If you’re looking for a quick and tasty dish, honey garlic chicken bites are perfect. They combine sweet honey with savory garlic for rich flavors. With just a few simple ingredients, you can whip them up in no time. This guide will walk you through every step, from marinating to cooking. Get ready to impress your family or guests with this easy treat!
Why I Love This Recipe
- Quick and Easy: This recipe is perfect for busy weeknights, taking just 50 minutes from start to finish!
- Flavor Explosion: The combination of honey, garlic, and ginger creates a deliciously sweet and savory sauce that’s hard to resist.
- Healthy Ingredients: Using chicken breast and low-sodium soy sauce makes this dish a healthier option without sacrificing flavor.
- Customizable: Feel free to add your favorite veggies or adjust the sauce ingredients to suit your taste!
Ingredients
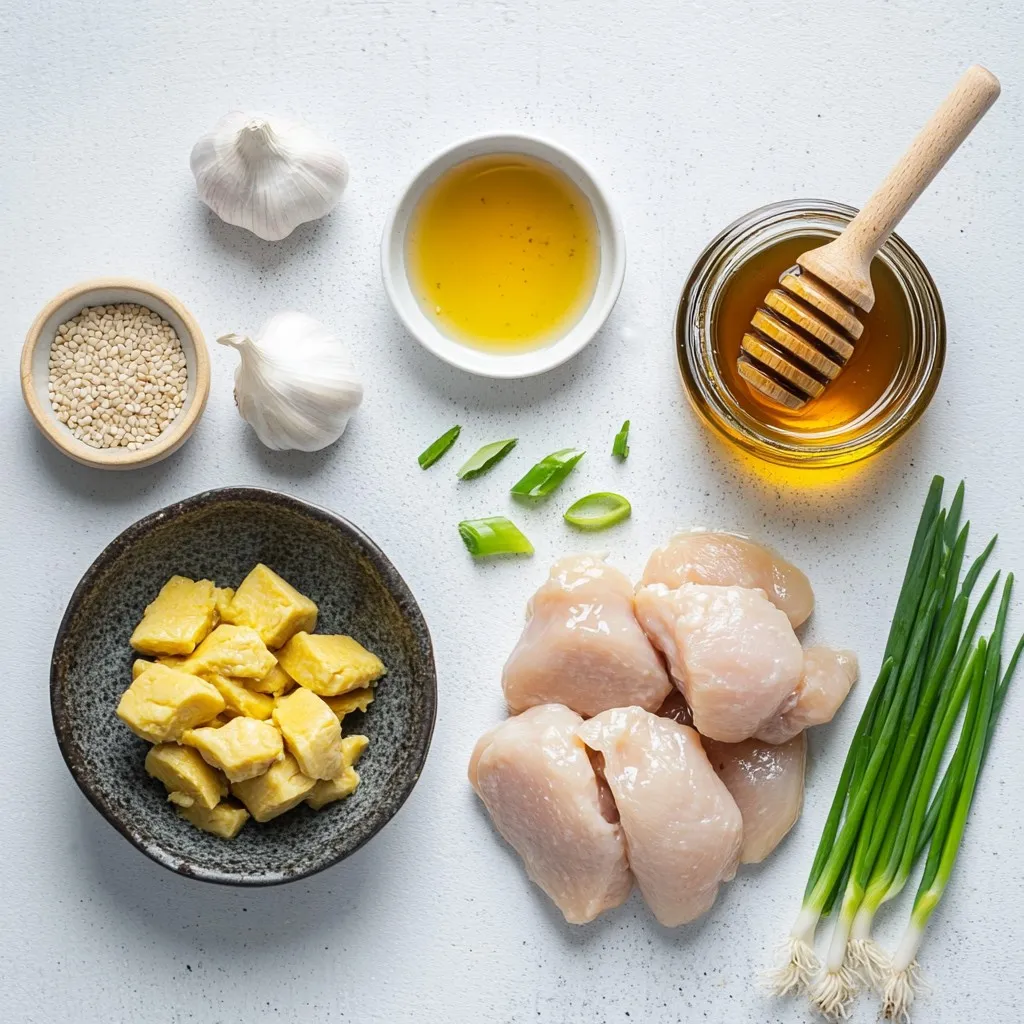
Main Ingredients
– 1 lb chicken breast
– 1/4 cup honey
– 3 tablespoons low-sodium soy sauce
Additional Ingredients
– 3 cloves garlic
– 1 tablespoon fresh ginger
– 1 tablespoon cornstarch
Seasoning and Garnishing
– Vegetable oil
– Salt and pepper
– Sesame seeds and chopped green onions
Gather all the ingredients before you start. This makes cooking easier and more fun. You can use fresh chicken breast, which gives the best taste. Honey adds sweetness, while soy sauce gives a nice saltiness. Garlic and ginger bring warmth and flavor. Cornstarch helps thicken the sauce later.
Make sure to have vegetable oil for frying. A pinch of salt and pepper brings out all the flavors. For the final touch, sesame seeds and chopped green onions make the dish look pretty. Keep these tips in mind when you gather your ingredients, and you will be on your way to making a tasty treat!
Step-by-Step Instructions
Marination Process
To start, you need to make a great marinade. In a large bowl, whisk together the honey, soy sauce, minced garlic, and grated ginger. This mixture adds amazing flavor to the chicken.
Next, take your bite-sized chicken pieces and add them to the marinade. Make sure each piece is fully coated. This step is key for great taste. Cover the bowl with plastic wrap or a lid. Place it in the fridge for at least 30 minutes. This allows the flavors to blend nicely.
Cooking the Chicken
Once the chicken has marinated, take it out of the fridge. Put the chicken in a separate bowl and set the marinade aside for later.
Now, mix cornstarch with one tablespoon of water in a small bowl. Stir until smooth. This will help thicken the sauce later.
Heat up vegetable oil in a large skillet over medium-high heat. When the oil is hot, add the marinated chicken in a single layer. Lightly season with salt and pepper. Sear the chicken for about 4 to 5 minutes. Turn the chicken occasionally until it turns a lovely golden brown. Once cooked, remove it from the skillet and keep it on a plate.
Making the Sauce
Now it’s time to make the sauce. In the same skillet, pour in the reserved marinade. Bring it to a gentle simmer over medium heat. Stir in the cornstarch slurry you made earlier. Continue cooking for about 1 to 2 minutes until the sauce thickens up.
Finally, return the cooked chicken to the skillet. Toss it in the thickened sauce to coat it well. Let it cook for another minute to ensure the chicken is hot. This step makes all the flavors come together beautifully.
Tips & Tricks
Cooking Tips
– Best practices for marination: Always use a glass or plastic bowl for marinating. This keeps the flavors strong. Coat the chicken well in the marinade. Cover it and chill for at least 30 minutes. This time lets the flavors mix and seep into the chicken.
– Achieving the perfect sear: Heat your skillet well before adding the chicken. The oil should shimmer but not smoke. Lay the chicken in a single layer. This helps it brown evenly. Turn it carefully to avoid tearing the pieces.
Presentation Tips
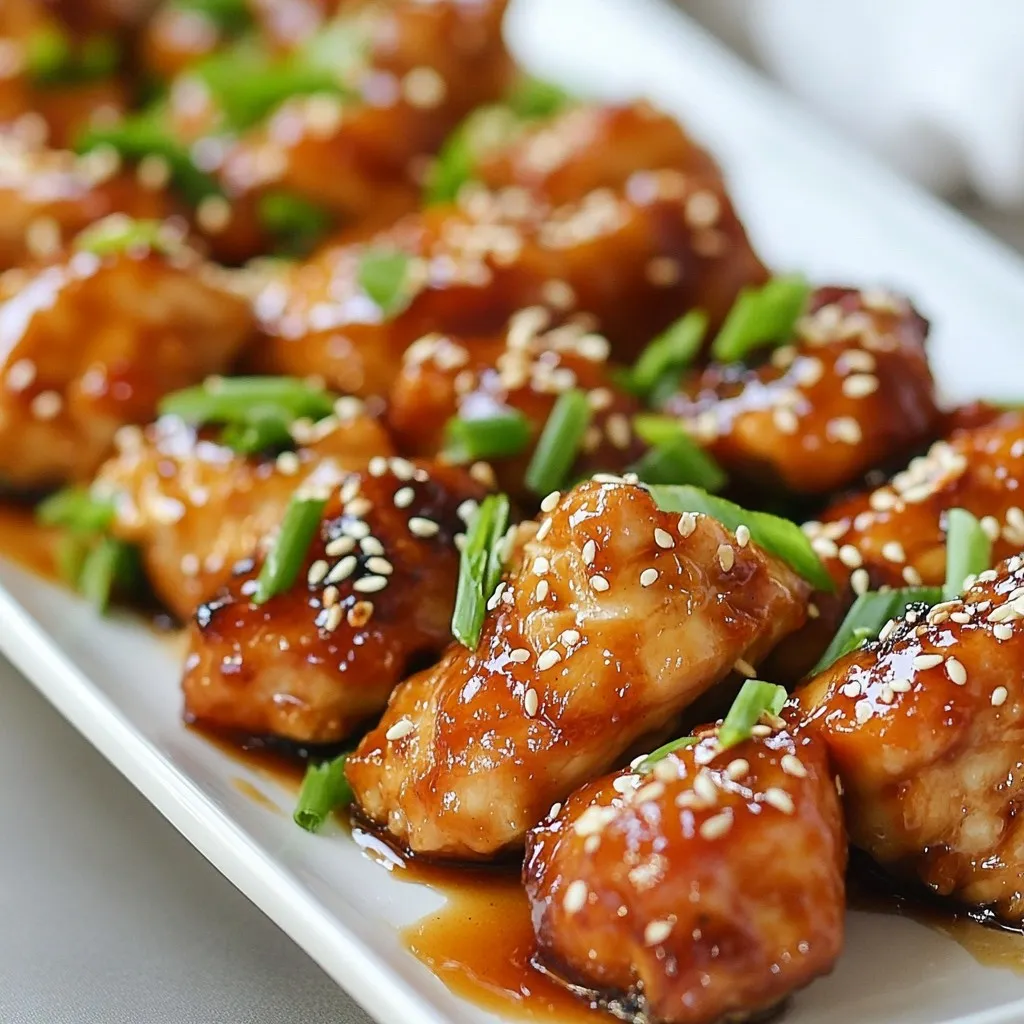
– Plating suggestions for visuals: Use a large, clean platter for a nice look. Arrange the chicken bites in a circle or a cluster. Drizzle any extra sauce on top for shine. This makes the dish look more appealing.
– Garnishing with sesame seeds and green onions: Sprinkle sesame seeds over the chicken for crunch. Add chopped green onions for color and a fresh taste. These small touches can make your dish pop.
Common Mistakes to Avoid
– Overcooking chicken: Keep an eye on the chicken while it cooks. Overcooked chicken can be dry and tough. Cook it just until it turns golden brown and reaches 165°F.
– Not letting flavors meld during marination: Don’t rush the marination. If you don’t let the chicken sit, it won’t soak up the flavors. Always allow enough time for marinating to get the best taste.
Pro Tips
- Marination Time: Allow the chicken to marinate longer than 30 minutes if possible; this will enhance the flavor even more.
- Cooking Temperature: Ensure the skillet is hot enough before adding the chicken to achieve a nice sear and prevent sticking.
- Thickening the Sauce: If you want a thicker sauce, add more cornstarch slurry gradually until you reach your desired consistency.
- Garnishing: For an extra flavor boost, consider adding a sprinkle of crushed red pepper flakes along with sesame seeds and green onions.
Variations
Ingredient Swaps
You can swap honey with maple syrup or agave nectar. This change adds a different taste. If you want to try other proteins, use shrimp or tofu instead of chicken. You can also add vegetables like bell peppers or broccoli for color and crunch.
Flavor Additions
To spice things up, add chili flakes to the marinade. This will give your chicken a nice kick. You can also use fresh herbs like basil or cilantro. These herbs can bring fresh flavors to your dish.
Cooking Methods
If you want a healthier option, bake the chicken bites in the oven. Preheat your oven to 400°F (200°C) and spread the chicken on a baking sheet. Bake for about 20 minutes or until fully cooked. Another fun method is grilling the chicken. This adds a smoky flavor that pairs well with the honey garlic sauce. Just make sure to keep an eye on it, so it doesn’t burn.
Storage Info
Leftover Storage
To store leftover honey garlic chicken bites, place them in an airtight container. Make sure they cool down first. Store them in the fridge for up to four days. If you want to keep them longer, freezing is a great option. Use a freezer-safe bag or container, and they can last for up to three months. Be sure to label the bag with the date.
Reheating Instructions
To reheat your chicken bites, the best method is to use the oven. Preheat the oven to 350°F (175°C). Spread the chicken on a baking sheet and heat for about 10-15 minutes. This keeps them crispy. You can also use a microwave, but be careful. Microwaving can make the chicken a bit soggy. To avoid that, cover them with a damp paper towel.
Shelf Life
Honey garlic chicken bites last about four days in the fridge. If frozen, they can stay good for three months. Look out for signs of spoilage. If you see any odd smells or changes in color, it’s best to toss them. Enjoy these tasty bites while they’re fresh for the best flavor!
FAQs
What can I serve with Honey Garlic Chicken Bites?
You can serve these bites with many side dishes. Here are some ideas:
– Steamed rice
– Fried rice
– Vegetable stir-fry
– Crispy salad
– Sweet potato fries
These sides add texture and flavor. They balance the sweetness of the chicken bites. You can also pair them with:
– Fresh cucumber slices
– Dipping sauces like sweet chili sauce
– A light soy sauce mix
These options enhance the meal. They keep your plate colorful and fun!
Can I make this recipe gluten-free?
Yes, you can make this recipe gluten-free. Use gluten-free soy sauce. Look for tamari or coconut aminos as good options.
You can also use:
– Gluten-free cornstarch for thickening.
– Honey is naturally gluten-free, so it’s safe.
Be sure to check all labels when buying. This way, you make a safe meal for everyone.
How spicy is this dish?
This dish is not spicy. It has a sweet and savory flavor profile. If you want a kick, you can add red pepper flakes.
Start with a small amount. You can always add more if you want it hotter. For heat-sensitive diners, serve the sauce on the side. This way, they can choose how much to use.
In this post, you learned how to make delicious honey garlic chicken bites. We covered the main and additional ingredients you need, along with tips for cooking and presentation. I shared ways to vary the dish and how to store leftovers. This recipe is simple and fun to try. Don’t be afraid to add your own twist. You can make it your own! Enjoy this dish with friends and family for great flavors and good times. Keep sharing and exploring new recipe


