Healthy Peanut Butter Oat Bars Easy and Nutritious Treat
![To make healthy peanut butter oat bars, you need a few key items: - 2 cups rolled oats - 1/2 cup natural peanut butter - 1/4 cup honey or maple syrup - 1/4 cup unsweetened applesauce - 1/2 cup mixed nuts (almonds, walnuts, cashews), roughly chopped - 1/4 cup dark chocolate chips (optional) - 1/2 teaspoon ground cinnamon - 1/4 teaspoon sea salt These ingredients work together to create a tasty and nutritious snack. The oats provide fiber, while the peanut butter adds protein and healthy fats. Honey or maple syrup gives sweetness, and applesauce keeps the bars moist. You can easily change your bars by adding extra flavors or textures. Here are some fun options: - Dried fruits (like cranberries or raisins) - Seeds (like chia or flaxseed) - Protein powder for an extra boost - Coconut flakes for added flavor Feel free to mix and match these add-ins to suit your taste. These oat bars pack a nutritious punch. Here’s a quick look at what you’ll get: - Calories: About 150 per bar - Protein: Around 5g, thanks to the peanut butter and nuts - Fiber: Approximately 3g from the oats and nuts - Healthy Fats: Includes unsaturated fats from the peanut butter and nuts These bars not only taste great but also fuel your body. With their balanced nutrition, they make a perfect snack or breakfast option. For the complete recipe, check the Full Recipe link. Start by preheating your oven to 350°F (175°C). This step ensures even baking. Next, grab an 8x8-inch baking pan. Line it with parchment paper, letting some paper hang over the edges. This makes it easy to lift the bars out later. In a large mixing bowl, combine 2 cups of rolled oats, 1/2 teaspoon of ground cinnamon, and 1/4 teaspoon of sea salt. Stir well until the dry ingredients are mixed evenly. This mix creates a solid base for your bars. In a separate bowl, blend together 1/2 cup of natural peanut butter, 1/4 cup of honey or maple syrup, and 1/4 cup of unsweetened applesauce. Mix vigorously until the mixture is smooth. Pour this wet mixture into the bowl with the dry ingredients. Stir thoroughly, ensuring all the oats are coated. Now, it’s time for the fun part! Fold in 1/2 cup of roughly chopped mixed nuts and 1/4 cup of dark chocolate chips, if you want a sweet touch. Make sure to distribute these extras evenly throughout the batter. Spoon the mixture into your prepared baking pan. Use a spatula or your hands to press the mixture down firmly. This ensures the bars hold their shape while baking. Bake in the preheated oven for 20-25 minutes. Look for a lovely golden brown color on the edges. Once done, remove the pan from the oven. Let it cool for about 10 minutes. Use the parchment paper to lift the bars from the pan and place them on a wire rack. Allow them to cool completely before cutting into your desired size. You can store any leftovers in an airtight container to keep them fresh. Enjoy these tasty treats as a snack or a quick breakfast! For the complete recipe, see the Full Recipe section. To get the best texture for your peanut butter oat bars, use rolled oats. They stay chewy and hold together well. If you want a softer bar, add a bit more applesauce. For crunch, add more nuts. Press the mixture firmly into the pan. This helps the bars hold their shape when baked. Store your bars in an airtight container. This keeps them fresh and moist. You can also layer parchment paper between bars to prevent sticking. If you want to keep them longer, freeze them. They freeze well for up to three months. Just wrap them tightly in plastic wrap before placing them in a freezer bag. These bars make a great snack or breakfast. Cut them into small squares for easy grabbing. Pair them with yogurt or fruit for a balanced meal. You can also drizzle some honey on top for added sweetness. Feel free to explore the [Full Recipe] for more ideas on how to enjoy these delicious treats! {{image_4}} You can change up the nuts in your oat bars. Use almonds, walnuts, or cashews. If you like seeds, try adding pumpkin seeds or sunflower seeds. These options add crunch and healthy fats. Mix and match to find your favorite combination. If you want a different sweet taste, try maple syrup instead of honey. You can also use agave nectar for a milder flavor. For a low-calorie option, consider stevia or monk fruit sweetener. Each sweetener changes the taste just a little. Adding fruits and spices can make your bars pop with flavor. Try mashed bananas or dried fruits like cranberries or apricots. For spices, add a pinch of nutmeg or ginger for warmth. You can even fold in some cocoa powder for a chocolatey twist. These small changes can make your bars exciting and unique. To keep your healthy peanut butter oat bars fresh, store them in an airtight container. This helps to lock in moisture and flavor. You can keep them at room temperature for up to a week. If you want them to last longer, consider refrigerating them. The cool air helps maintain their taste and texture. Freezing is a great way to extend the life of your oat bars. Wrap each bar tightly in plastic wrap. Then place them in a freezer-safe bag or container. You can freeze the bars for up to three months. When you're ready to enjoy them, just take out a bar and let it thaw on the counter. If you prefer warm bars, you can reheat them. Simply place a bar in the microwave for about 15-20 seconds. This warms them up nicely and brings back their fresh-baked taste. If you stored them in the fridge, let them sit at room temperature for a few minutes before warming to avoid cold centers. For more details, check out the Full Recipe. Yes, you can swap peanut butter for almond, cashew, or sunbutter. Each nut butter brings its own flavor. Almond butter gives a creamy texture, while cashew butter is milder. Sunbutter is a great option for nut allergies. Just make sure to choose a natural nut butter without added sugars or oils. These oat bars last about one week at room temperature. Keep them in an airtight container. For longer storage, they can stay fresh in the fridge for about two weeks. If you want to enjoy them later, freeze the bars. They can last up to three months in the freezer. Just thaw them when you are ready to eat. Yes, this recipe is gluten-free if you use certified gluten-free oats. Most rolled oats are naturally gluten-free. However, some brands may process oats with gluten-containing grains. Always check the label before buying. This way, you can enjoy your oat bars without worry. Yes, you can skip added sugars. Use ripe bananas instead of honey or maple syrup. Applesauce also adds natural sweetness. You can add a bit more applesauce if you want a sweeter taste. This keeps the oat bars healthy and tasty without extra sugar. You now have a complete guide to making healthy peanut butter oat bars. We covered essential ingredients and fun add-ins to suit your taste. Step-by-step instructions ensure your bars come out perfectly every time. I shared tips for the best texture and storage methods to keep them fresh. You can also explore different variations for added flavor. These oat bars are easy to make, fun to customize, and nutritious. Enjoy your delicious, homemade snacks!](https://goldendishy.com/wp-content/uploads/2025/07/83a658d4-f414-4ba0-9f79-92aafa211a05.webp)
Are you looking for a tasty treat that’s healthy and easy to make? You’ve found it! These Healthy Peanut Butter Oat Bars pack a punch of flavor and nutrition. In this post, I’ll guide you through simple steps to whip up these delicious bars, plus tips on customizing them to your taste. Say goodbye to store-bought snacks and enjoy a wholesome, homemade delight that the whole family will love! Let’s dive in!
Ingredients
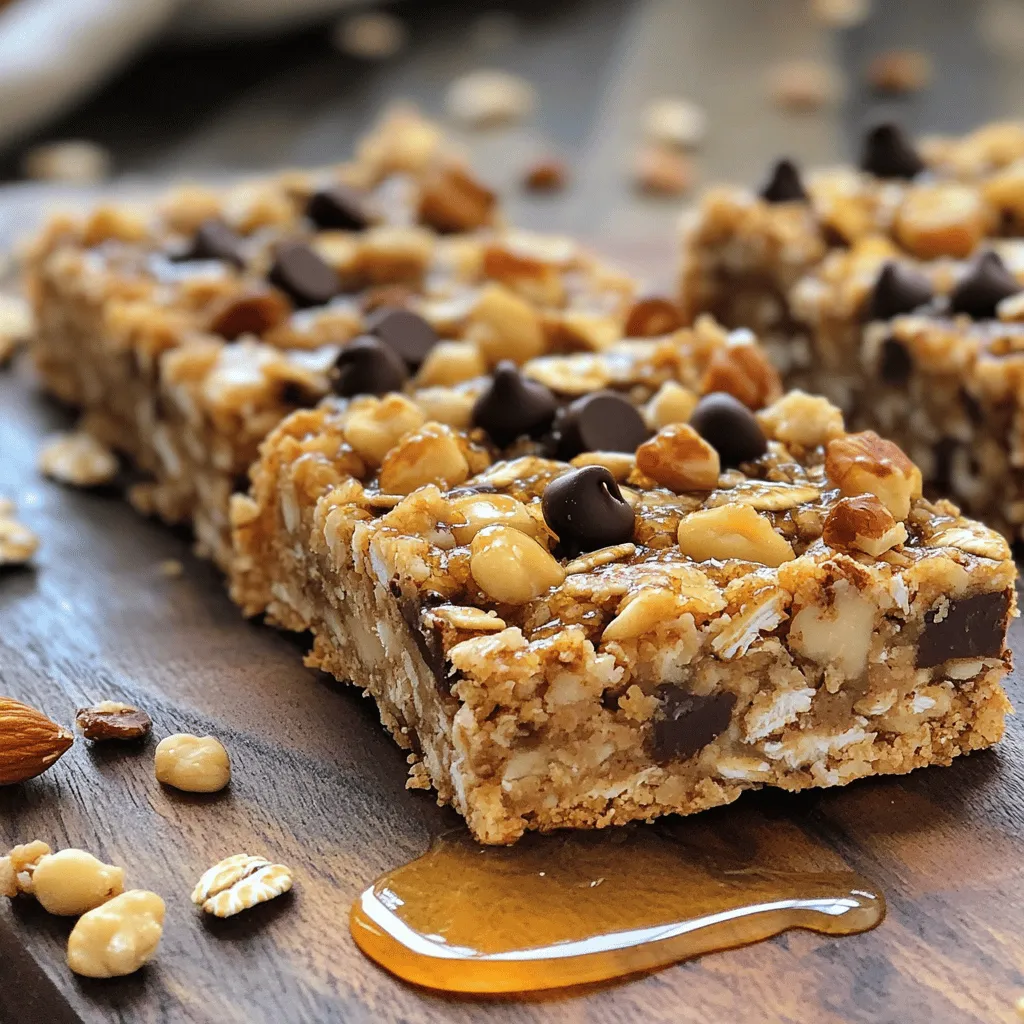
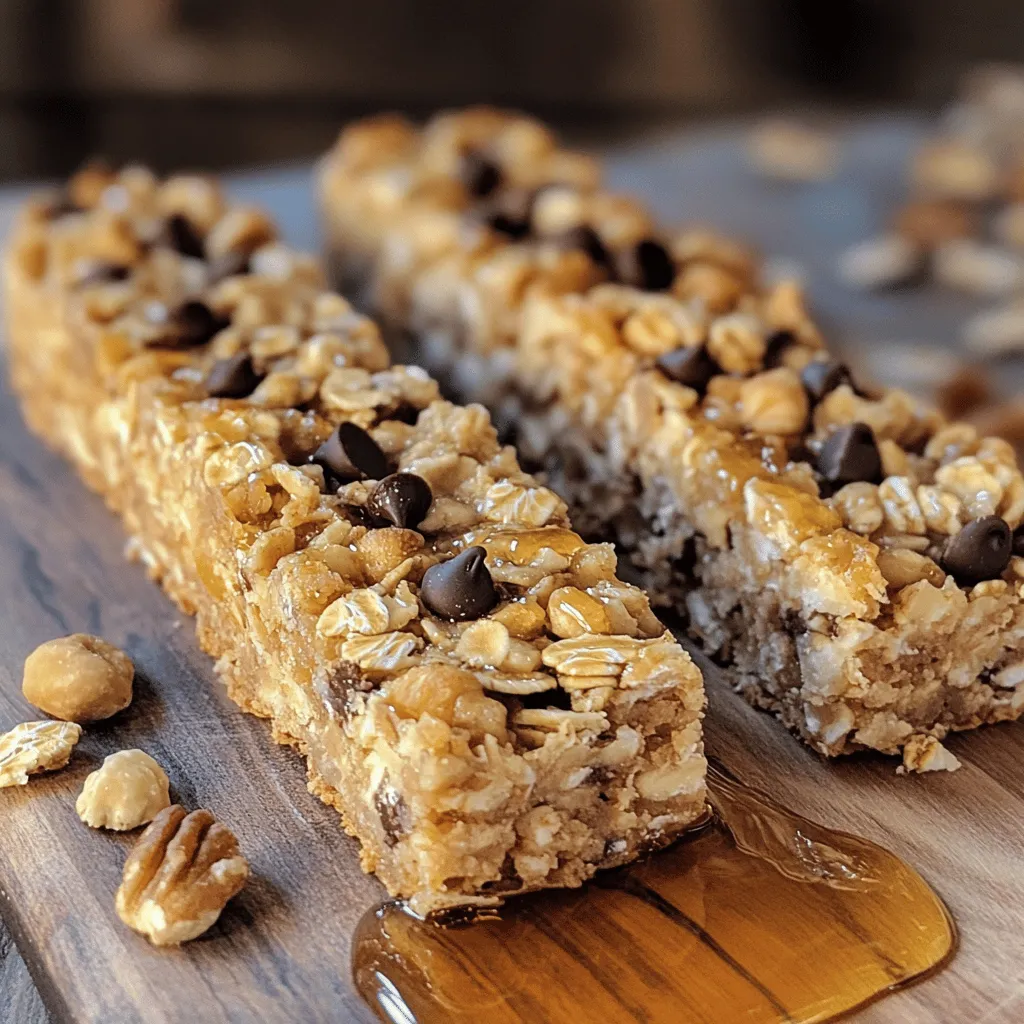
Essential Ingredients for Healthy Peanut Butter Oat Bars
To make healthy peanut butter oat bars, you need a few key items:
– 2 cups rolled oats
– 1/2 cup natural peanut butter
– 1/4 cup honey or maple syrup
– 1/4 cup unsweetened applesauce
– 1/2 cup mixed nuts (almonds, walnuts, cashews), roughly chopped
– 1/4 cup dark chocolate chips (optional)
– 1/2 teaspoon ground cinnamon
– 1/4 teaspoon sea salt
These ingredients work together to create a tasty and nutritious snack. The oats provide fiber, while the peanut butter adds protein and healthy fats. Honey or maple syrup gives sweetness, and applesauce keeps the bars moist.
Optional Add-ins to Customize Your Bars
You can easily change your bars by adding extra flavors or textures. Here are some fun options:
– Dried fruits (like cranberries or raisins)
– Seeds (like chia or flaxseed)
– Protein powder for an extra boost
– Coconut flakes for added flavor
Feel free to mix and match these add-ins to suit your taste.
Nutritional Value Breakdown
These oat bars pack a nutritious punch. Here’s a quick look at what you’ll get:
– Calories: About 150 per bar
– Protein: Around 5g, thanks to the peanut butter and nuts
– Fiber: Approximately 3g from the oats and nuts
– Healthy Fats: Includes unsaturated fats from the peanut butter and nuts
These bars not only taste great but also fuel your body. With their balanced nutrition, they make a perfect snack or breakfast option.
Step-by-Step Instructions
Preparation Before Baking
Start by preheating your oven to 350°F (175°C). This step ensures even baking. Next, grab an 8×8-inch baking pan. Line it with parchment paper, letting some paper hang over the edges. This makes it easy to lift the bars out later.
Mixing Dry Ingredients
In a large mixing bowl, combine 2 cups of rolled oats, 1/2 teaspoon of ground cinnamon, and 1/4 teaspoon of sea salt. Stir well until the dry ingredients are mixed evenly. This mix creates a solid base for your bars.
Combining Wet and Dry Mixtures
In a separate bowl, blend together 1/2 cup of natural peanut butter, 1/4 cup of honey or maple syrup, and 1/4 cup of unsweetened applesauce. Mix vigorously until the mixture is smooth. Pour this wet mixture into the bowl with the dry ingredients. Stir thoroughly, ensuring all the oats are coated.
Gently folding in extras
Now, it’s time for the fun part! Fold in 1/2 cup of roughly chopped mixed nuts and 1/4 cup of dark chocolate chips, if you want a sweet touch. Make sure to distribute these extras evenly throughout the batter.
Baking and Cooling Process
Spoon the mixture into your prepared baking pan. Use a spatula or your hands to press the mixture down firmly. This ensures the bars hold their shape while baking. Bake in the preheated oven for 20-25 minutes. Look for a lovely golden brown color on the edges.
Once done, remove the pan from the oven. Let it cool for about 10 minutes. Use the parchment paper to lift the bars from the pan and place them on a wire rack. Allow them to cool completely before cutting into your desired size. You can store any leftovers in an airtight container to keep them fresh. Enjoy these tasty treats as a snack or a quick breakfast!
Tips & Tricks
How to Achieve Perfect Texture
To get the best texture for your peanut butter oat bars, use rolled oats. They stay chewy and hold together well. If you want a softer bar, add a bit more applesauce. For crunch, add more nuts. Press the mixture firmly into the pan. This helps the bars hold their shape when baked.
Storage Tips for Freshness
Store your bars in an airtight container. This keeps them fresh and moist. You can also layer parchment paper between bars to prevent sticking. If you want to keep them longer, freeze them. They freeze well for up to three months. Just wrap them tightly in plastic wrap before placing them in a freezer bag.
Serving Suggestions
These bars make a great snack or breakfast. Cut them into small squares for easy grabbing. Pair them with yogurt or fruit for a balanced meal. You can also drizzle some honey on top for added sweetness.

Variations
Different Nut and Seed Options
You can change up the nuts in your oat bars. Use almonds, walnuts, or cashews. If you like seeds, try adding pumpkin seeds or sunflower seeds. These options add crunch and healthy fats. Mix and match to find your favorite combination.
Sweetener Alternatives
If you want a different sweet taste, try maple syrup instead of honey. You can also use agave nectar for a milder flavor. For a low-calorie option, consider stevia or monk fruit sweetener. Each sweetener changes the taste just a little.
Add-ins for Flavor Boosts (like fruits or spices)
Adding fruits and spices can make your bars pop with flavor. Try mashed bananas or dried fruits like cranberries or apricots. For spices, add a pinch of nutmeg or ginger for warmth. You can even fold in some cocoa powder for a chocolatey twist. These small changes can make your bars exciting and unique.
Storage Info
Best Practices for Storing Oat Bars
To keep your healthy peanut butter oat bars fresh, store them in an airtight container. This helps to lock in moisture and flavor. You can keep them at room temperature for up to a week. If you want them to last longer, consider refrigerating them. The cool air helps maintain their taste and texture.
Freezing Instructions for Longevity
Freezing is a great way to extend the life of your oat bars. Wrap each bar tightly in plastic wrap. Then place them in a freezer-safe bag or container. You can freeze the bars for up to three months. When you’re ready to enjoy them, just take out a bar and let it thaw on the counter.
How to Reheat or Refresh Bars
If you prefer warm bars, you can reheat them. Simply place a bar in the microwave for about 15-20 seconds. This warms them up nicely and brings back their fresh-baked taste. If you stored them in the fridge, let them sit at room temperature for a few minutes before warming to avoid cold centers.
FAQs
Can I substitute peanut butter with another nut butter?
Yes, you can swap peanut butter for almond, cashew, or sunbutter. Each nut butter brings its own flavor. Almond butter gives a creamy texture, while cashew butter is milder. Sunbutter is a great option for nut allergies. Just make sure to choose a natural nut butter without added sugars or oils.
How long do these oat bars last?
These oat bars last about one week at room temperature. Keep them in an airtight container. For longer storage, they can stay fresh in the fridge for about two weeks. If you want to enjoy them later, freeze the bars. They can last up to three months in the freezer. Just thaw them when you are ready to eat.
Is this recipe gluten-free?
Yes, this recipe is gluten-free if you use certified gluten-free oats. Most rolled oats are naturally gluten-free. However, some brands may process oats with gluten-containing grains. Always check the label before buying. This way, you can enjoy your oat bars without worry.
Can I make these bars without added sugar?
Yes, you can skip added sugars. Use ripe bananas instead of honey or maple syrup. Applesauce also adds natural sweetness. You can add a bit more applesauce if you want a sweeter taste. This keeps the oat bars healthy and tasty without extra sugar.
You now have a complete guide to making healthy peanut butter oat bars. We covered essential ingredients and fun add-ins to suit your taste. Step-by-step instructions ensure your bars come out perfectly every time. I shared tips for the best texture and storage methods to keep them fresh. You can also explore different variations for added flavor.
These oat bars are easy to make, fun to customize, and nutritious. Enjoy your delicious, homemade snacks!
![To make healthy peanut butter oat bars, you need a few key items: - 2 cups rolled oats - 1/2 cup natural peanut butter - 1/4 cup honey or maple syrup - 1/4 cup unsweetened applesauce - 1/2 cup mixed nuts (almonds, walnuts, cashews), roughly chopped - 1/4 cup dark chocolate chips (optional) - 1/2 teaspoon ground cinnamon - 1/4 teaspoon sea salt These ingredients work together to create a tasty and nutritious snack. The oats provide fiber, while the peanut butter adds protein and healthy fats. Honey or maple syrup gives sweetness, and applesauce keeps the bars moist. You can easily change your bars by adding extra flavors or textures. Here are some fun options: - Dried fruits (like cranberries or raisins) - Seeds (like chia or flaxseed) - Protein powder for an extra boost - Coconut flakes for added flavor Feel free to mix and match these add-ins to suit your taste. These oat bars pack a nutritious punch. Here’s a quick look at what you’ll get: - Calories: About 150 per bar - Protein: Around 5g, thanks to the peanut butter and nuts - Fiber: Approximately 3g from the oats and nuts - Healthy Fats: Includes unsaturated fats from the peanut butter and nuts These bars not only taste great but also fuel your body. With their balanced nutrition, they make a perfect snack or breakfast option. For the complete recipe, check the Full Recipe link. Start by preheating your oven to 350°F (175°C). This step ensures even baking. Next, grab an 8x8-inch baking pan. Line it with parchment paper, letting some paper hang over the edges. This makes it easy to lift the bars out later. In a large mixing bowl, combine 2 cups of rolled oats, 1/2 teaspoon of ground cinnamon, and 1/4 teaspoon of sea salt. Stir well until the dry ingredients are mixed evenly. This mix creates a solid base for your bars. In a separate bowl, blend together 1/2 cup of natural peanut butter, 1/4 cup of honey or maple syrup, and 1/4 cup of unsweetened applesauce. Mix vigorously until the mixture is smooth. Pour this wet mixture into the bowl with the dry ingredients. Stir thoroughly, ensuring all the oats are coated. Now, it’s time for the fun part! Fold in 1/2 cup of roughly chopped mixed nuts and 1/4 cup of dark chocolate chips, if you want a sweet touch. Make sure to distribute these extras evenly throughout the batter. Spoon the mixture into your prepared baking pan. Use a spatula or your hands to press the mixture down firmly. This ensures the bars hold their shape while baking. Bake in the preheated oven for 20-25 minutes. Look for a lovely golden brown color on the edges. Once done, remove the pan from the oven. Let it cool for about 10 minutes. Use the parchment paper to lift the bars from the pan and place them on a wire rack. Allow them to cool completely before cutting into your desired size. You can store any leftovers in an airtight container to keep them fresh. Enjoy these tasty treats as a snack or a quick breakfast! For the complete recipe, see the Full Recipe section. To get the best texture for your peanut butter oat bars, use rolled oats. They stay chewy and hold together well. If you want a softer bar, add a bit more applesauce. For crunch, add more nuts. Press the mixture firmly into the pan. This helps the bars hold their shape when baked. Store your bars in an airtight container. This keeps them fresh and moist. You can also layer parchment paper between bars to prevent sticking. If you want to keep them longer, freeze them. They freeze well for up to three months. Just wrap them tightly in plastic wrap before placing them in a freezer bag. These bars make a great snack or breakfast. Cut them into small squares for easy grabbing. Pair them with yogurt or fruit for a balanced meal. You can also drizzle some honey on top for added sweetness. Feel free to explore the [Full Recipe] for more ideas on how to enjoy these delicious treats! {{image_4}} You can change up the nuts in your oat bars. Use almonds, walnuts, or cashews. If you like seeds, try adding pumpkin seeds or sunflower seeds. These options add crunch and healthy fats. Mix and match to find your favorite combination. If you want a different sweet taste, try maple syrup instead of honey. You can also use agave nectar for a milder flavor. For a low-calorie option, consider stevia or monk fruit sweetener. Each sweetener changes the taste just a little. Adding fruits and spices can make your bars pop with flavor. Try mashed bananas or dried fruits like cranberries or apricots. For spices, add a pinch of nutmeg or ginger for warmth. You can even fold in some cocoa powder for a chocolatey twist. These small changes can make your bars exciting and unique. To keep your healthy peanut butter oat bars fresh, store them in an airtight container. This helps to lock in moisture and flavor. You can keep them at room temperature for up to a week. If you want them to last longer, consider refrigerating them. The cool air helps maintain their taste and texture. Freezing is a great way to extend the life of your oat bars. Wrap each bar tightly in plastic wrap. Then place them in a freezer-safe bag or container. You can freeze the bars for up to three months. When you're ready to enjoy them, just take out a bar and let it thaw on the counter. If you prefer warm bars, you can reheat them. Simply place a bar in the microwave for about 15-20 seconds. This warms them up nicely and brings back their fresh-baked taste. If you stored them in the fridge, let them sit at room temperature for a few minutes before warming to avoid cold centers. For more details, check out the Full Recipe. Yes, you can swap peanut butter for almond, cashew, or sunbutter. Each nut butter brings its own flavor. Almond butter gives a creamy texture, while cashew butter is milder. Sunbutter is a great option for nut allergies. Just make sure to choose a natural nut butter without added sugars or oils. These oat bars last about one week at room temperature. Keep them in an airtight container. For longer storage, they can stay fresh in the fridge for about two weeks. If you want to enjoy them later, freeze the bars. They can last up to three months in the freezer. Just thaw them when you are ready to eat. Yes, this recipe is gluten-free if you use certified gluten-free oats. Most rolled oats are naturally gluten-free. However, some brands may process oats with gluten-containing grains. Always check the label before buying. This way, you can enjoy your oat bars without worry. Yes, you can skip added sugars. Use ripe bananas instead of honey or maple syrup. Applesauce also adds natural sweetness. You can add a bit more applesauce if you want a sweeter taste. This keeps the oat bars healthy and tasty without extra sugar. You now have a complete guide to making healthy peanut butter oat bars. We covered essential ingredients and fun add-ins to suit your taste. Step-by-step instructions ensure your bars come out perfectly every time. I shared tips for the best texture and storage methods to keep them fresh. You can also explore different variations for added flavor. These oat bars are easy to make, fun to customize, and nutritious. Enjoy your delicious, homemade snacks!](https://goldendishy.com/wp-content/uploads/2025/07/83a658d4-f414-4ba0-9f79-92aafa211a05-300x300.webp)


![To make tasty Maple Pecan Scones, you need some key ingredients. Here they are: - 2 cups all-purpose flour - 1/2 cup chopped pecans, plus extra for garnish - 1/3 cup packed brown sugar - 1 tablespoon baking powder - 1/2 teaspoon fine salt - 1/2 teaspoon ground cinnamon - 1/4 cup cold unsalted butter, cut into small cubes - 1/2 cup heavy cream, chilled - 1/4 cup pure maple syrup - 1 large egg, at room temperature - 1 teaspoon pure vanilla extract - Additional maple syrup for drizzling (optional) These ingredients work together to create a rich, flavorful scone. The maple syrup and pecans bring a sweet and nutty taste. You can add a few optional ingredients to enhance your scones even more. Consider these: - Dried cranberries or cherries for a tart kick - Chocolate chips for a sweet treat - Fresh herbs like rosemary for a savory twist These extras can make your scones unique. Mix and match to find your favorite flavor. If you need to swap out some items, here are some good substitutions: - Use whole wheat flour instead of all-purpose flour for more fiber. - Swap brown sugar with coconut sugar for a different taste. - Replace heavy cream with coconut cream for a dairy-free option. - Use maple extract if you run out of pure maple syrup. These swaps still keep the scones delicious. Feel free to get creative with what you have on hand. For the full recipe, check out the earlier sections. First, you need to preheat your oven. Set it to 400°F (200°C). While that heats up, grab a baking sheet. Line it with parchment paper. This step helps the scones not stick. It makes clean-up easy too. Now, let’s get to the mixing! In a large bowl, whisk these dry ingredients together: - 2 cups all-purpose flour - 1/2 cup chopped pecans - 1/3 cup packed brown sugar - 1 tablespoon baking powder - 1/2 teaspoon fine salt - 1/2 teaspoon ground cinnamon Whisk until everything is mixed well. In another bowl, combine the wet ingredients. Take: - 1/2 cup heavy cream - 1/4 cup pure maple syrup - 1 large egg - 1 teaspoon pure vanilla extract Whisk them together until smooth. Next, add the wet mix to the dry mix. Stir gently with a spatula. The dough should be sticky and chunky. Don’t overmix! Now, turn the dough onto a floured surface. Knead it gently a few times. Shape it into a circle, about 1-inch thick. Cut it into 8 wedges. Place the wedges on the baking sheet, giving them some room to grow. Bake your scones for 15-20 minutes. They should turn a light golden color and feel firm. Once done, let them cool on a wire rack. For extra flavor, drizzle with more maple syrup and sprinkle some chopped pecans on top. Enjoy your delicious maple pecan scones! For a detailed list of steps, check the Full Recipe. To get the best texture in your Maple Pecan Scones, focus on the butter. Use cold, unsalted butter. Cut it into small cubes and mix it with the flour until you see coarse crumbs. Some pieces should be the size of peas. This step keeps the scones flaky and tender. Baking time is key. Preheat your oven to 400°F (200°C). Bake the scones for 15 to 20 minutes. Watch them closely during the last few minutes. You want them lightly golden and firm to the touch. If you bake them too long, they will become dry. Serving is just as important as baking. Place warm scones on a rustic wooden board or a nice platter. Drizzle with extra maple syrup for sweetness. Add chopped pecans on top for crunch. A sprig of mint or edible flowers can add color and make the dish more inviting. For more details, check the Full Recipe. {{image_4}} You can make gluten-free maple pecan scones easily. Replace all-purpose flour with a gluten-free blend. Look for a mix that has xanthan gum, as it helps bind the ingredients. Keep the other ingredients the same. The texture may change a bit, but they will still taste great! To make vegan maple pecan scones, swap the heavy cream with almond milk or coconut milk. Use coconut oil instead of butter. You can also replace the egg with a flax egg. To make a flax egg, mix one tablespoon of ground flaxseed with three tablespoons of water. Let it sit for five minutes to thicken. These changes keep the scones tasty and fluffy! You can add fun flavors to your scones. Try mixing in chocolate chips or dried fruit. For a sweet touch, add 1/2 cup of chocolate chips or chopped dried apricots. You can also use cranberries or raisins for a chewy texture. Mix these in when you fold in the pecans. This adds extra flavor and makes each bite exciting! For the full recipe, check out the recipe section above. To keep your maple pecan scones fresh, store them in an airtight container. Place a piece of parchment paper between layers to prevent sticking. They will stay good for about three days at room temperature. If you want to keep them longer, consider freezing them. To reheat your scones, preheat your oven to 350°F (175°C). Place the scones on a baking sheet and warm them for about 5-10 minutes. This helps restore their fresh-baked taste and texture. You can also microwave them for about 15-20 seconds, but the oven gives better results. If you want to freeze your scones, do it before baking. After shaping the dough into wedges, place them on a baking sheet. Freeze them for about an hour until firm, then transfer them to a freezer bag. They can stay frozen for up to three months. When ready to bake, just add a few extra minutes to the baking time. For the full recipe, refer back to the details above. Yes, you can make Maple Pecan Scones ahead of time. Prepare the dough and shape it into wedges. Then, wrap the dough in plastic wrap and store it in the fridge for up to two days. When you're ready to bake, just slice and bake as usual. This method keeps them fresh and tasty. You can tell when the scones are done by looking for a golden color on top. They should feel firm to the touch. You can also insert a toothpick into the center. If it comes out clean, the scones are ready. Maple Pecan Scones pair well with many things. You can serve them with a drizzle of maple syrup for added sweetness. A dollop of clotted cream or butter also works great. Pair them with coffee or tea for a lovely breakfast or snack. For a fun twist, add fresh fruit or yogurt on the side. For the full recipe, check out the [Full Recipe]. Maple pecan scones bring warmth and flavor to your kitchen. We explored key ingredients and smart substitutions for a perfect batch. Step-by-step instructions ensured clear baking methods. Tips helped with texture and bake time, making your scones shine. We also discussed tasty variations to brighten your meals. Finally, proper storage methods keep leftovers fresh. Enjoy these scones with friends or alone—they're a delight for all.](https://goldendishy.com/wp-content/uploads/2025/07/b23162c1-955c-4f99-8dc2-297b57ec6074-768x768.webp)

