Grilled Vegetable Skewers Tasty and Simple Recipe
. Enjoy mixing and matching these ideas! To store leftover grilled vegetable skewers, let them cool first. Place them in an airtight container. You can keep them in the fridge for up to three days. If you want to keep them longer, freezing is a better choice. When you're ready to eat leftovers, you have a few options for reheating. You can use the microwave for quick heat. Place the skewers on a plate and cover them with a damp paper towel. Heat for 30 seconds to 1 minute. You can also reheat them on the grill. This method helps keep the smoky flavor. Just grill them for about 5 minutes over low heat, turning occasionally. If you want to freeze grilled vegetable skewers, first remove the veggies from the skewers. Place the veggies in a single layer on a baking sheet. Freeze them for an hour, then transfer them to a freezer-safe bag. This way, they won't stick together. You can store them in the freezer for up to three months. When you're ready to use them, just thaw them overnight in the fridge. You can then reheat as mentioned above. Enjoy your flavorful grilled veggies anytime! For a full recipe, check out the vibrant grilled vegetable skewers. Yes, you can use frozen vegetables for skewers. However, fresh vegetables are better. Frozen veggies have more water. This can make them mushy when grilled. If you use frozen, thaw them first. Pat them dry to remove excess moisture. This helps keep them firm and tasty. You can tell the vegetables are done by looking at them. They should be tender and have nice grill marks. When a fork goes in easily, they are ready. Each vegetable cooks a bit differently. Zucchini and bell peppers may take less time than mushrooms. Keep an eye on them while grilling. Many dips go well with grilled vegetable skewers. Here are a few great options: - Hummus - Tzatziki - Garlic aioli - Ranch dip - Pesto Each dip adds a new flavor. You can mix and match to find what you love best. Enjoy exploring these tasty options! Grilling vegetable skewers is fun and easy. We covered tasty ingredients, from fresh veggies to zesty marinades. You learned step-by-step methods for marinating and grilling. I shared tips for the best grilling and how to achieve those perfect marks. Explore variations to suit your taste and consider storage tips for leftovers. Remember, this dish is adaptable. You can create a healthy meal that fits your style. Now, it’s your turn to fire up the grill and enjoy delicious skewers!](https://goldendishy.com/wp-content/uploads/2025/06/ba27ef34-bcc3-4460-8414-05014c8a22e5.webp)
Grilled vegetable skewers are a simple and tasty dish perfect for any meal. You can turn fresh veggies into a colorful, flavorful treat. In this recipe, I’ll show you how to make these skewers from scratch, step by step. You’ll learn about the best vegetables to use, how to marinate them, and tips for grilling. Let’s get started on making your new favorite summer dish!
Ingredients
List of Vegetables
– 1 medium zucchini, sliced into thick rounds
– 1 bell pepper (choose your favorite color), cut into 1-inch chunks
– 1 medium red onion, cut into wedges
– 1 cup cherry tomatoes (preferably mixed colors for visual appeal)
– 1 medium yellow squash, sliced into thick rounds
– 8 oz cremini mushrooms, halved
Marinade Ingredients
– 4 tablespoons extra virgin olive oil
– 2 tablespoons balsamic vinegar
– 2 cloves garlic, finely minced
Seasonings and Oils
– 1 teaspoon dried oregano
– 1 teaspoon smoked paprika
– Salt and freshly cracked pepper to taste
– Fresh basil leaves for garnish
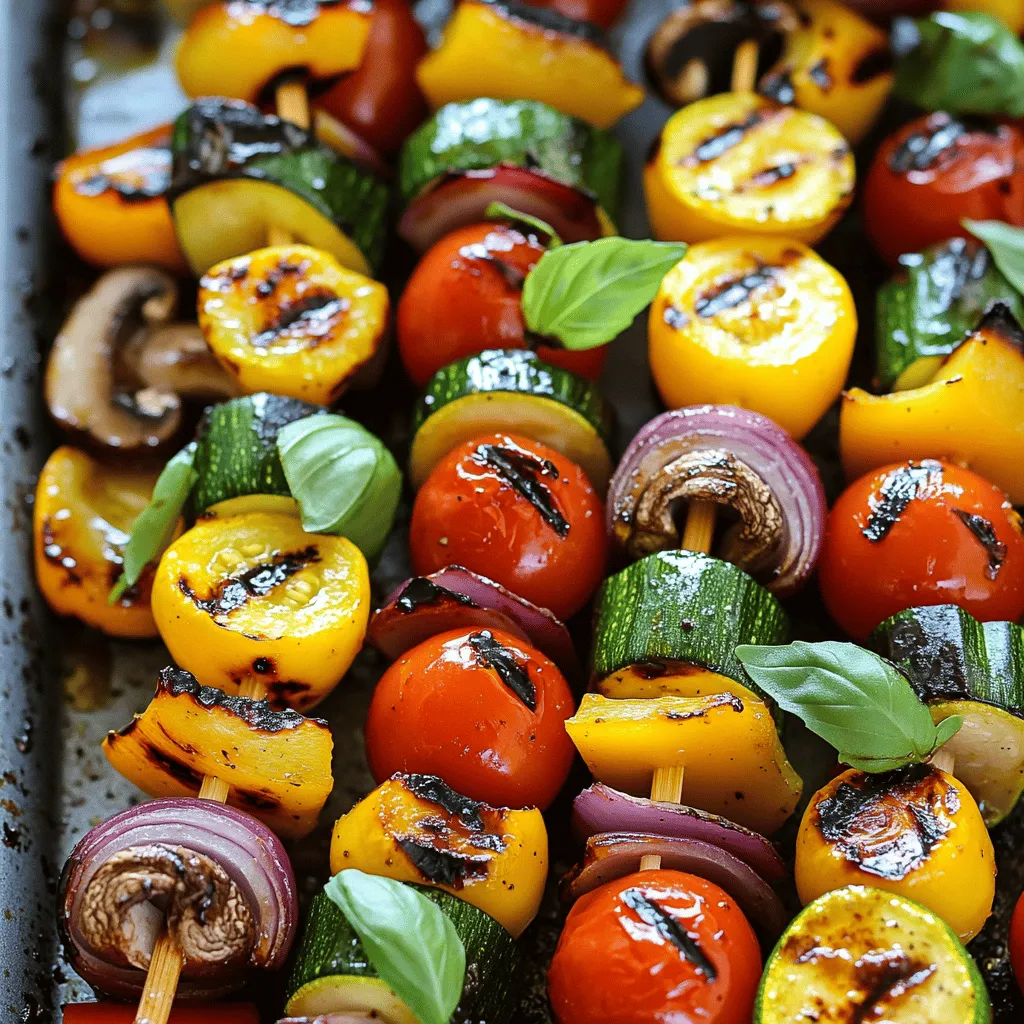
When you gather these ingredients, think about how each one adds flavor. The zucchini and squash give a nice crunch. Colorful bell peppers and sweet cherry tomatoes make it bright. The red onion adds a mild sweetness, while the mushrooms bring an earthy taste.
The marinade is key. Olive oil keeps the veggies juicy. Balsamic vinegar adds a tangy sweetness. Garlic gives a punch of flavor. Dried oregano and smoked paprika bring depth. Don’t forget salt and pepper to make everything pop!
Once you have all these ingredients, you are ready to start making your tasty grilled vegetable skewers.
Step-by-Step Instructions
Preparing the Marinade
Start with a big mixing bowl. Add four tablespoons of extra virgin olive oil. Then, pour in two tablespoons of balsamic vinegar. Next, add two cloves of finely minced garlic. Toss in one teaspoon of dried oregano and one teaspoon of smoked paprika. Finish with salt and freshly cracked pepper. Whisk until it smells amazing.
Marinating the Vegetables
Now, it’s time to add the vegetables. Place the zucchini rounds, bell pepper chunks, onion wedges, cherry tomatoes, yellow squash rounds, and halved mushrooms into the bowl. Gently mix everything. Make sure each piece is coated in that tasty marinade. Let the veggies sit for about 10 minutes. This helps the flavors soak in.
Grilling the Skewers
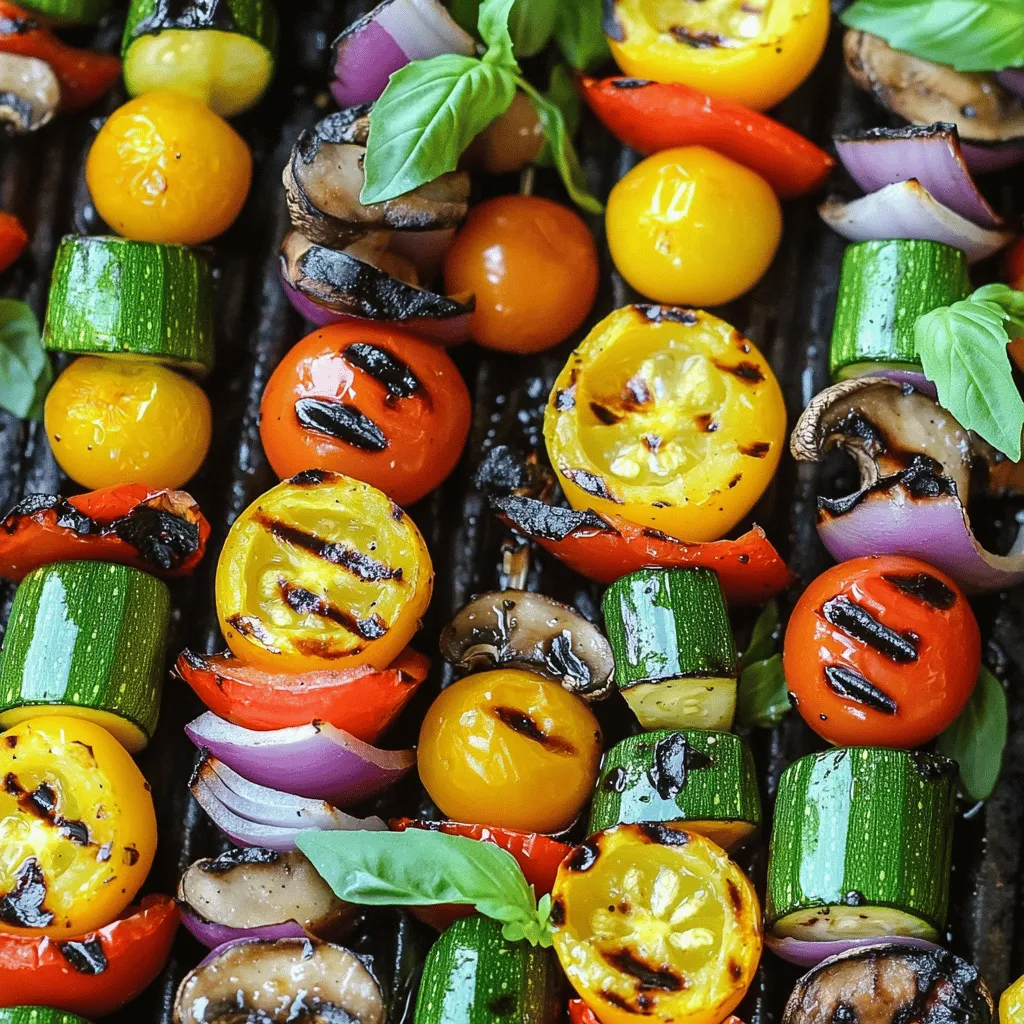
Preheat your grill to medium-high heat. If you use wooden skewers, soak them in water for at least 30 minutes. This stops them from burning. Carefully thread the marinated veggies onto the skewers. Mix up the colors for a fun look. Aim for 4-5 pieces of veggies per skewer.
When the grill is hot, place the skewers on it. Cook for 10-15 minutes. Turn them often to cook evenly. You want them to be tender with nice grill marks. Once done, take them off the grill and let them rest for 2-3 minutes. Sprinkle torn basil leaves on top before serving.Enjoy your grilled vegetable skewers!
Tips & Tricks
Best Grilling Techniques
To grill your skewers well, start with a clean grill. Heat it to medium-high. This helps the veggies cook evenly. Place the skewers at an angle to the grill grates. This method helps cook the vegetables without sticking.
How to Achieve Perfect Grill Marks
To get those pretty grill marks, don’t flip the skewers too soon. Let them sit for about three to four minutes. Check for good sear marks before turning. If you want more marks, rotate them 90 degrees halfway through cooking.
Soaking Wooden Skewers
Soak wooden skewers for at least 30 minutes before using them. This step is key to preventing burning. Use a bowl of water, and add some weight to keep them submerged. You can also add flavor by soaking them in broth or wine. This little trick makes your skewers taste better while grilling.

Variations
Different Vegetable Combinations
You can use many kinds of vegetables for your skewers. Try mixing and matching based on what you like. Here are some great ideas:
– Eggplant
– Asparagus
– Cauliflower florets
– Sweet corn
– Pineapple chunks
Each of these adds a unique taste. For example, eggplant gives a rich flavor, while corn adds sweetness. Just cut them into pieces that will fit on your skewers easily.
Suggested Marinades and Sauces
Marinades can change the whole taste of your grilled veggies. Here are some tasty options:
– Lemon juice and thyme
– Soy sauce and ginger
– Yogurt and mint
These marinades not only add flavor but also tenderize the vegetables. Let them soak for about 15 minutes. This will help the veggies absorb the flavors well.
Serving Suggestions: Sides and Dips
You can serve grilled vegetable skewers with many sides and dips. Here are some favorites:
– Hummus
– Tzatziki sauce
– Quinoa salad
These pair well with the skewers. Hummus adds creaminess, while tzatziki gives a refreshing taste. Quinoa salad can be a hearty side.Enjoy mixing and matching these ideas!
Storage Info
How to Store Leftovers
To store leftover grilled vegetable skewers, let them cool first. Place them in an airtight container. You can keep them in the fridge for up to three days. If you want to keep them longer, freezing is a better choice.
Reheating Grilled Vegetable Skewers
When you’re ready to eat leftovers, you have a few options for reheating. You can use the microwave for quick heat. Place the skewers on a plate and cover them with a damp paper towel. Heat for 30 seconds to 1 minute. You can also reheat them on the grill. This method helps keep the smoky flavor. Just grill them for about 5 minutes over low heat, turning occasionally.
Freezing Tips for Grilled Veggies
If you want to freeze grilled vegetable skewers, first remove the veggies from the skewers. Place the veggies in a single layer on a baking sheet. Freeze them for an hour, then transfer them to a freezer-safe bag. This way, they won’t stick together. You can store them in the freezer for up to three months. When you’re ready to use them, just thaw them overnight in the fridge. You can then reheat as mentioned above. Enjoy your flavorful grilled veggies anytime!
FAQs
Can I use frozen vegetables for skewers?
Yes, you can use frozen vegetables for skewers. However, fresh vegetables are better. Frozen veggies have more water. This can make them mushy when grilled. If you use frozen, thaw them first. Pat them dry to remove excess moisture. This helps keep them firm and tasty.
How do I know when the vegetables are done grilling?
You can tell the vegetables are done by looking at them. They should be tender and have nice grill marks. When a fork goes in easily, they are ready. Each vegetable cooks a bit differently. Zucchini and bell peppers may take less time than mushrooms. Keep an eye on them while grilling.
What are some good dips to serve with grilled vegetable skewers?
Many dips go well with grilled vegetable skewers. Here are a few great options:
– Hummus
– Tzatziki
– Garlic aioli
– Ranch dip
– Pesto
Each dip adds a new flavor. You can mix and match to find what you love best. Enjoy exploring these tasty options!
Grilling vegetable skewers is fun and easy. We covered tasty ingredients, from fresh veggies to zesty marinades. You learned step-by-step methods for marinating and grilling. I shared tips for the best grilling and how to achieve those perfect marks. Explore variations to suit your taste and consider storage tips for leftovers. Remember, this dish is adaptable. You can create a healthy meal that fits your style. Now, it’s your turn to fire up the grill and enjoy delicious skewers!
. Enjoy mixing and matching these ideas! To store leftover grilled vegetable skewers, let them cool first. Place them in an airtight container. You can keep them in the fridge for up to three days. If you want to keep them longer, freezing is a better choice. When you're ready to eat leftovers, you have a few options for reheating. You can use the microwave for quick heat. Place the skewers on a plate and cover them with a damp paper towel. Heat for 30 seconds to 1 minute. You can also reheat them on the grill. This method helps keep the smoky flavor. Just grill them for about 5 minutes over low heat, turning occasionally. If you want to freeze grilled vegetable skewers, first remove the veggies from the skewers. Place the veggies in a single layer on a baking sheet. Freeze them for an hour, then transfer them to a freezer-safe bag. This way, they won't stick together. You can store them in the freezer for up to three months. When you're ready to use them, just thaw them overnight in the fridge. You can then reheat as mentioned above. Enjoy your flavorful grilled veggies anytime! For a full recipe, check out the vibrant grilled vegetable skewers. Yes, you can use frozen vegetables for skewers. However, fresh vegetables are better. Frozen veggies have more water. This can make them mushy when grilled. If you use frozen, thaw them first. Pat them dry to remove excess moisture. This helps keep them firm and tasty. You can tell the vegetables are done by looking at them. They should be tender and have nice grill marks. When a fork goes in easily, they are ready. Each vegetable cooks a bit differently. Zucchini and bell peppers may take less time than mushrooms. Keep an eye on them while grilling. Many dips go well with grilled vegetable skewers. Here are a few great options: - Hummus - Tzatziki - Garlic aioli - Ranch dip - Pesto Each dip adds a new flavor. You can mix and match to find what you love best. Enjoy exploring these tasty options! Grilling vegetable skewers is fun and easy. We covered tasty ingredients, from fresh veggies to zesty marinades. You learned step-by-step methods for marinating and grilling. I shared tips for the best grilling and how to achieve those perfect marks. Explore variations to suit your taste and consider storage tips for leftovers. Remember, this dish is adaptable. You can create a healthy meal that fits your style. Now, it’s your turn to fire up the grill and enjoy delicious skewers!](https://goldendishy.com/wp-content/uploads/2025/06/ba27ef34-bcc3-4460-8414-05014c8a22e5-300x300.webp)

. To start, you need to preheat your grill or oven. If you choose to grill, set it to medium-high heat. This will help create a nice char on the corn. If baking sounds better, preheat your oven to 400°F (200°C). Both methods work well, giving you tasty corn. Next, prepare the garlic butter mixture. In a mixing bowl, combine melted unsalted butter, minced garlic, smoked paprika, sea salt, and black pepper. Whisk this mix together until all the ingredients blend well. The aroma will fill your kitchen, making it hard to wait for the corn! Now, it’s time to coat the corn. Take each ear of corn and brush it with your garlic butter mix. Make sure to cover every kernel. This ensures each bite bursts with flavor. For grilling, place the corn on the grill grates. Rotate it every 2-3 minutes until charred and tender, about 10-12 minutes total. If baking, wrap the corn in aluminum foil and bake for 20-25 minutes, turning halfway. After cooking, sprinkle grated Parmesan cheese on top while it’s still hot. Optionally, drizzle with fresh lemon juice for added flavor. Finally, garnish your corn with chopped parsley for a bright finish. Enjoy your Garlic Parmesan Corn on the Cob! For a complete guide, check out the Full Recipe. Grilling corn on the cob can be fun and easy. First, soak the husked corn in water for 15 minutes before grilling. This helps keep the corn moist. When you're ready, heat your grill to medium-high. Place the corn directly on the grates. Rotate the corn every 2-3 minutes. This gives it even cooking and a nice char. In about 10-12 minutes, the corn will be bright and tender. For the best garlic flavor, use fresh garlic. Mince the cloves finely to release the oils. Mix it well with the melted butter before brushing it on the corn. If you want a stronger taste, let the garlic sit in the butter for a bit. This helps the flavors blend. You can also add a touch of garlic powder if you like more depth. If you prefer a bit of heat, add a pinch of cayenne pepper to your garlic butter. For those who enjoy a milder taste, skip the pepper entirely. You can also adjust the smoked paprika amount. Start with less, then taste as you go. Everyone has different spice levels, so make it your own. Remember, you can always add more spice, but you can’t take it out! For the full recipe, check out the Garlic Parmesan Corn on the Cob section. {{image_4}} To change up the flavor, you can add more spices. Try adding chili powder for heat. You can also mix in some Italian herbs, like oregano or basil. They give a fresh lift. If you love herbs, fresh cilantro is a great choice. Just chop it fine and add it to your garlic butter mix. This will make your corn taste even better! Parmesan is great, but other cheeses can work too. For a creamier taste, use feta cheese. It adds a nice tang. If you want something sharper, try aged cheddar. It gives a bold kick. You can even use vegan cheese if you prefer. Just make sure it melts well. Each cheese choice will give your corn a unique twist. Serving corn on the cob can be fun and playful. Try cutting the corn into smaller pieces for easy sharing. You can also serve it on skewers for a fun touch. Drizzle it with a spicy sauce for extra flavor. If you want a fancy look, sprinkle some microgreens on top. They add color and freshness. For the full recipe, check out the detailed steps to make this dish shine! After enjoying your Garlic Parmesan Corn on the Cob, you may have some left. It’s best to store it in an airtight container. Let the corn cool to room temperature first. Wrap each ear in plastic wrap or foil for extra protection. This keeps it fresh and tasty for later. Store the container in the fridge. It can last about 3 to 4 days. When you’re ready to enjoy the leftover corn, reheating it is simple. You can use the microwave, grill, or oven. For the microwave, place the corn on a plate and cover it with a damp paper towel. Heat in short bursts of 30 seconds. Check to see if it’s warm. If using the grill, wrap the corn in foil to avoid drying out. Heat for about 5 to 7 minutes. For the oven, preheat to 350°F (175°C) and bake wrapped corn for 10 to 15 minutes. Freezing is a great option if you want to save the corn for a long time. Husk the corn and cut the kernels off the cob if you prefer. Place the kernels in a freezer bag, removing as much air as possible. Label the bag with the date. You can also freeze whole cobs. Wrap each cob in plastic wrap and place it in a freezer bag. The corn can last up to 6 months in the freezer. When you’re ready to use it, thaw in the fridge overnight before reheating. You can pair Garlic Parmesan Corn on the Cob with many easy side dishes. Some great options include: - Grilled chicken or fish - Fresh salad with vinaigrette - Coleslaw for crunch - Roasted potatoes for heartiness - Tomato and mozzarella salad for freshness These sides complement the sweet, buttery flavor of the corn. They also create a colorful plate. Yes, you can make Garlic Parmesan Corn on the Cob in the oven. Preheat your oven to 400°F (200°C). Wrap the corn tightly in aluminum foil to keep it moist. Bake for 20-25 minutes. Turn the foil halfway through cooking. This method gives you tender corn, full of flavor. To prevent the corn from sticking to the grill, follow these tips: - Preheat the grill to medium-high heat. - Brush the grill grates with oil before placing the corn. - Make sure to coat the corn with the garlic butter mixture. This keeps it moist and adds flavor. - Rotate the corn every few minutes to avoid sticking. These steps help you achieve perfectly grilled corn every time. Enjoy your cooking! Making Garlic Parmesan Corn on the Cob is simple and fun. We covered the best ingredients, tools, and methods. Preheating is key, and the garlic butter really adds flavor. You learned grilling tips and how to customize with herbs or spices. Don't forget about storage and reheating for later. Enjoy your delicious corn, and share it with friends. Each bite can bring smiles, making it worth the effort. Now, get cooking!](https://goldendishy.com/wp-content/uploads/2025/07/bd43f489-c25e-441e-8123-0082a4d55c21-768x768.webp)


![- 2 cups Granny Smith apples, diced into bite-sized pieces - 1 cup celery, finely sliced - 1 cup red grapes, halved - 1 cup walnuts, coarsely chopped for texture - 1/2 cup plain Greek yogurt, for creaminess - 1/4 cup mayonnaise, to enhance richness - 1 tablespoon fresh lemon juice, to brighten flavors - 1 teaspoon honey, to balance tartness - Salt and freshly ground black pepper, to taste This classic Waldorf salad features fresh produce that bursts with flavor. I love using Granny Smith apples because they add a nice crunch and tartness. They pair perfectly with the sweet red grapes. Celery provides a refreshing crunch, making every bite enjoyable. You also need walnuts for a rich nutty flavor and a great texture. I like to coarsely chop them to keep some larger pieces for crunch. The creamy dressing comes from a mix of plain Greek yogurt and mayonnaise. This blend adds richness and keeps the salad light. Add fresh lemon juice to keep the apples bright and tasty. A touch of honey balances the tartness of the apples and grapes. Seasoning with salt and black pepper enhances the overall taste. This mix of ingredients creates a delightful and colorful salad that is perfect for any meal. For the full recipe, check out the detailed instructions to create this refreshing Waldorf salad. Start by dicing the Granny Smith apples into bite-sized pieces. This makes them easy to eat. To keep the apples fresh and bright, toss them in lemon juice right away. The juice helps stop browning. Next, slice the celery into thin pieces. You want them crunchy and fresh. Then, halve the red grapes. This adds a sweet and juicy burst to the salad. For the dressing, take a bowl and combine plain Greek yogurt and mayonnaise. This mix brings creaminess and smoothness to your salad. Add honey, salt, and black pepper. Whisk these together until you have a smooth, even texture. This dressing is key to making your salad flavorful. In a large bowl, fold the diced apples, sliced celery, halved grapes, and chopped walnuts together. Be gentle to keep all the pieces intact. Then, pour the creamy dressing over the salad. Carefully mix everything to coat the ingredients evenly. Taste the salad and adjust flavors if needed. Add more salt, pepper, or honey for balance. Let it chill for at least 30 minutes so the flavors blend well. Serve it on crisp lettuce leaves for a bright and tasty dish. For the full recipe, check the earlier sections. To keep your apples fresh, start by using lemon juice. After dicing Granny Smith apples, toss them in lemon juice right away. This helps prevent browning. You can also use a mix of water and lemon juice. Soak the diced apples for a few minutes. Drain and dry them before adding to your salad. This step keeps your salad looking vibrant. You can adjust the sweetness and tanginess of your Waldorf salad. If you want more sweetness, add extra honey. For a tangier taste, increase the lemon juice. You can also try different dressings. A bit of apple cider vinegar can give a nice twist. Experiment with your flavors until you find what you love. For a beautiful presentation, serve your salad on crisp lettuce leaves. Use romaine or butter lettuce for a nice touch. You can also add fresh herbs as a garnish. Chopped mint or parsley can add color. Serve the salad in a clear bowl to show off the bright colors. This makes your dish not only tasty but also eye-catching. For more details, refer to the Full Recipe. {{image_4}} You can switch up the fruits in Waldorf salad. Try using ripe pears or sweet strawberries. Each fruit gives a new flavor twist. You can also use different nuts. Pecans or almonds add a nice crunch. Each change can make the salad feel fresh and new. If you want a vegan version, swap Greek yogurt with plant-based yogurt. Use a vegan mayo for creaminess. For gluten-free diets, ensure your mayonnaise is gluten-free. You can also make a low-fat dressing. Use low-fat yogurt and reduce the mayo. These options keep the salad tasty while meeting dietary needs. Waldorf salad shines as both a side dish and a main course. Serve it alongside grilled chicken for a hearty meal. You can also pair it with other salads for a light lunch. Mixing flavors and textures makes it exciting. For a fun twist, serve it in endive leaves or on a bed of spinach. This adds a lovely presentation and taste. For the full recipe, check out the [Full Recipe]. To store leftover Waldorf salad, place it in an airtight container. Make sure to seal it tightly. This keeps the salad fresh and prevents any unwanted smells. Keep it in the fridge right after serving. If you have any extra lettuce, store it separately to keep it crisp. Waldorf salad tastes best when eaten within three days. After that, the apples may start to brown and lose their crunch. The salad will still be safe to eat for up to five days, but the texture might change. Waldorf salad is best served cold. If you need to serve it after refrigeration, just give it a gentle stir. If the salad seems a bit too thick, add a splash of lemon juice or a bit of yogurt to loosen it up. Avoid reheating, as it can change the texture and taste. Enjoy it fresh for the best flavor! Waldorf Salad dates back to the late 1800s. It first appeared at the Waldorf Astoria Hotel in New York City. Chef Oscar Tschirky created this dish for a charity ball. The original recipe included only apples, celery, and mayonnaise. Over time, people added nuts, grapes, and yogurt for extra flavor. Today, we enjoy many versions of this classic salad. Yes, you can prepare Waldorf Salad ahead of time. Make the salad and store it in the fridge. Keep it covered to keep it fresh. I recommend waiting to add nuts until serving. This keeps them crunchy. If you want to serve it later, mix all the ingredients except the dressing. Add the dressing just before serving for the best taste. You can easily swap out some ingredients in Waldorf Salad. Use different fruits like pears or strawberries if you like. If you prefer a vegan option, replace yogurt and mayo with avocado or a plant-based yogurt. For nuts, use almonds or pecans instead of walnuts. These options let you customize the salad to your taste. This blog post covered the making of a Waldorf Salad. You learned about fresh ingredients like apples, celery, and grapes. We discussed how to prepare them, make a tasty dressing, and mix everything together. I shared tips for keeping your apples crisp and customizing flavor. You can also try different fruits and nuts or adapt the recipe for dietary needs. Enjoy your Waldorf Salad, and remember to store it correctly for the best taste. Happy eating!](https://goldendishy.com/wp-content/uploads/2025/06/f7b618e5-0e03-408a-a1e5-f7591c04b926-768x768.webp)
![- 2 ripe peaches, halved and pitted - 1 tablespoon extra virgin olive oil - Kosher salt and freshly cracked black pepper, to taste - 4 cups fresh arugula or a mix of leafy greens - 8 oz creamy burrata cheese - ¼ cup toasted almonds, roughly chopped - ¼ cup balsamic glaze - Fresh basil leaves, for garnish When you make this Grilled Peach Burrata Salad, you need just a few key ingredients. Each one plays a big role in the flavor and texture. The peaches bring sweetness, while the burrata adds creaminess. The arugula gives a nice peppery bite. The toasted almonds add crunch, and the balsamic glaze ties everything together with a sweet tang. You can even add fresh basil leaves for a pop of color and taste. I love how simple ingredients can create such a beautiful dish. - Calories: Approximately 300 per serving - Fats: 22g - Protein: 8g - Carbohydrates: 20g This salad is not just tasty; it also offers health benefits. Peaches are low in calories and high in vitamins A and C. They support eye health and boost your immune system. Arugula is rich in vitamins and minerals. It helps with digestion and adds fiber. Burrata is creamy and delicious, providing protein and healthy fats. Almonds are good for your heart and give you energy. Overall, this dish is a great choice for a healthy meal or snack. You can enjoy this salad while knowing it’s good for you! For the complete recipe, check out the [Full Recipe]. - Preheat grill or grill pan to medium-high heat. - Brush peach halves with olive oil, salt, and pepper. To start, I heat my grill or grill pan to medium-high heat. This helps the peaches caramelize nicely. While my grill heats up, I prepare the peaches. I cut them in half and remove the pit. Then, I brush the cut sides with olive oil. A sprinkle of salt and pepper adds a touch of flavor and enhances the natural sweetness of the peaches. - Grill peaches cut side down for 4-5 minutes. - Remove and set aside to cool. Next, I place the peaches cut side down on the grill. I let them cook for 4 to 5 minutes. I look for those beautiful grill marks, which mean they are ready. Once grilled, I carefully remove them and set them aside to cool. The grilling process brings out the peaches' natural sugars, making them even sweeter. - Create a base of arugula in the serving bowl. - Tear and place burrata on greens. - Slice and arrange peaches around burrata. - Add almonds and drizzle with balsamic glaze. - Garnish with basil leaves. Now for the fun part—assembly! I take a large serving bowl and create a bright base of arugula. The fresh greens add a peppery bite. I then gently tear the burrata cheese into pieces, placing them on top of the greens. The creamy texture of burrata pairs perfectly with the grilled peaches. Next, I slice the peaches into wedges and artfully arrange them around the burrata. I love the contrast of the warm peaches and the cool cheese. I then scatter toasted almonds over the salad. They add a nice crunch to each bite. Finally, I drizzle balsamic glaze all over the salad. This adds a sweet and tangy touch that ties all the flavors together. I finish with fresh basil leaves for color and aroma. This salad is a true delight, and you can find the Full Recipe for all the details above! To achieve perfect grill marks on your peaches, start with a clean grill. Preheat it to medium-high heat. Brush your peach halves with olive oil. This helps them avoid sticking and gives them a nice sear. Place the peaches cut side down. Let them cook for about 4-5 minutes without moving them. This ensures nice grill lines and caramelization. If you don’t have a grill, you can use a griddle or stovetop pan. Heat it well and follow the same oiling and cooking steps. You can still get great flavor without a grill! To boost the flavor of your grilled peaches, try adding some spices. A pinch of cinnamon can add warmth. Fresh thyme or rosemary adds a nice herbal touch. You can sprinkle these on before grilling. If you need an alternative to balsamic glaze, try honey or maple syrup. Drizzle these over the salad for a sweet touch. A splash of lemon juice can also add brightness to the dish. For a beautiful display, serve the salad on a large, shallow platter. This lets the colors pop. You can also use individual bowls for a personal touch. Drizzle extra balsamic glaze on the plate for added flair. Garnishing is key! Use fresh basil leaves to add color and aroma. Consider adding edible flowers for an extra visual boost. These small touches make your salad stand out and look professional. {{image_4}} You can change the salad by adding protein. Grilled chicken adds a nice, savory touch. Shrimp also works well, bringing a sweet flavor. If you want a plant-based option, try tofu. For cheese, you can swap burrata for feta. Feta gives a nice salty kick. Goat cheese is another great choice. It brings creaminess and a tangy flavor. You can also switch up the dressing. A honey vinaigrette adds sweetness and pairs well with peaches. A citrus dressing, made with lemon or lime, brightens the dish and adds zest. If you want to make this salad vegan, skip the cheese. You can use a vegan cheese option or leave it out. A simple olive oil and vinegar mix works well too. In the summer, use fresh peaches. But when peaches are out of season, try nectarines. They have a similar taste and texture. Plums are another great choice, adding a sweet and juicy bite. As the seasons change, adapt your salad to use what’s fresh. In fall, add roasted squash for warmth. In winter, try pomegranate seeds for a burst of color and flavor. Each season offers new ways to enjoy this salad. To keep your grilled peach burrata salad fresh, store leftovers in a sealed container. This helps prevent drying and keeps flavors strong. You can store it in the fridge for up to three days. The peaches will soften, but they still taste great. The burrata may lose some creaminess but remains delicious. I do not recommend freezing the salad. The texture of peaches and burrata changes when frozen. If you must freeze, store only the grilled peaches. Wrap them in plastic and place in an airtight bag. When ready to use, thaw them in the fridge overnight. To refresh your salad, take it out of the fridge and let it sit for a few minutes. This helps bring back the flavors. If the greens look wilted, consider adding fresh arugula. You can also drizzle a bit more balsamic glaze for added flavor. Gently mix the salad to combine the ingredients, then serve. This will make it look and taste great again. You can prep the salad in parts. Grill the peaches and store them in the fridge. You can also wash and dry the greens. Keep the burrata cheese wrapped until you're ready to serve. Assemble everything just before you eat. This keeps the salad fresh and tasty. If you do not have burrata, try using fresh mozzarella. It has a similar creamy texture. Goat cheese is another good choice. It adds a tangy flavor that pairs well with peaches. Yes, this salad is naturally gluten-free. All the ingredients listed are free from gluten. Just make sure any balsamic glaze you use is gluten-free. Some brands may add gluten, so check the label. Fresh basil is a great choice for this salad. It adds a sweet and aromatic touch. Mint is another option that gives a refreshing flavor. You can also try arugula for a spicy kick. Use these herbs to boost the taste of your dish. This blog post detailed a delicious grilled peach and burrata salad. We covered the ingredients, from juicy peaches to creamy burrata and flavorful arugula. You learned how to prepare, grill, and assemble this fresh dish easily. We also shared tips for grilling and creative variations. Remember, you can adapt this salad for every season, and it stores well for later use. Enjoy experimenting with flavors and presentations to make it your own. This salad is sure to impress at any meal!](https://goldendishy.com/wp-content/uploads/2025/06/bc92e29d-8312-48fc-8428-fe4367025cca-768x768.webp)
