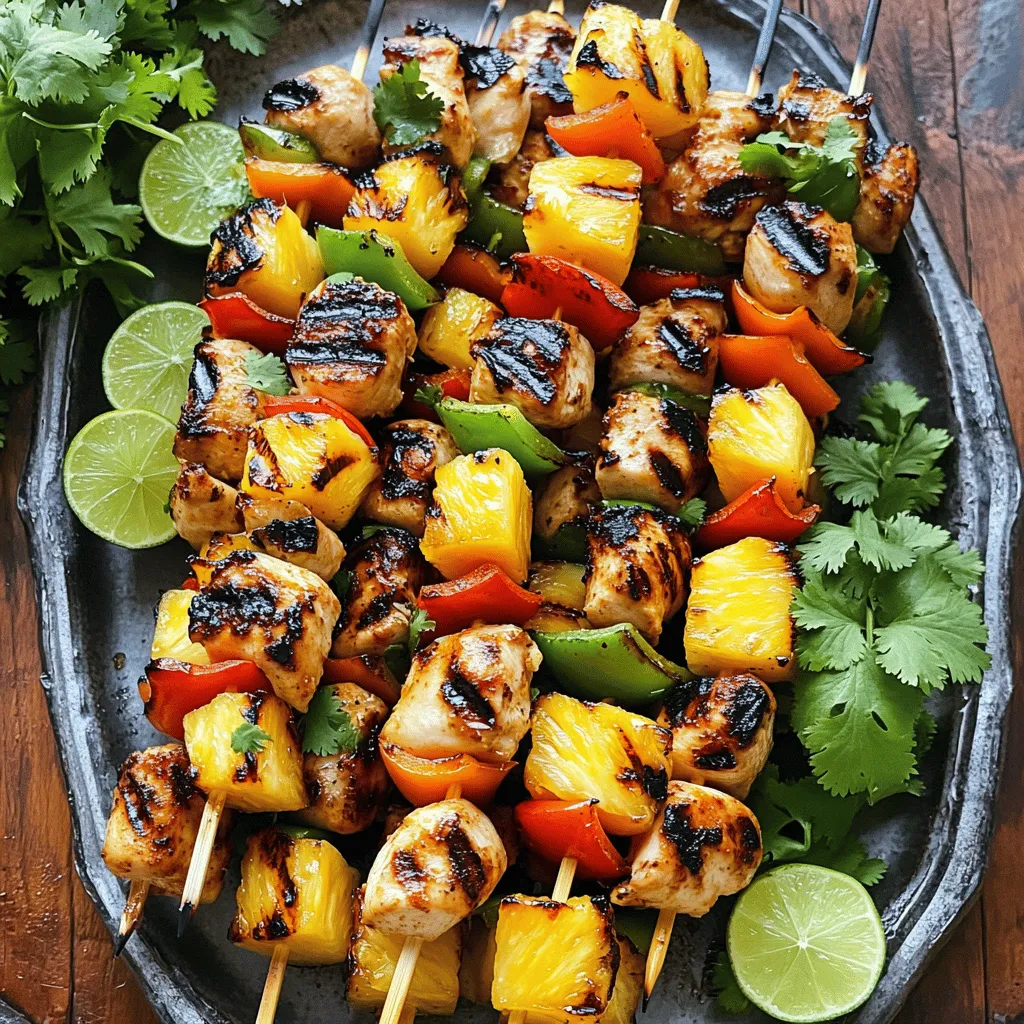
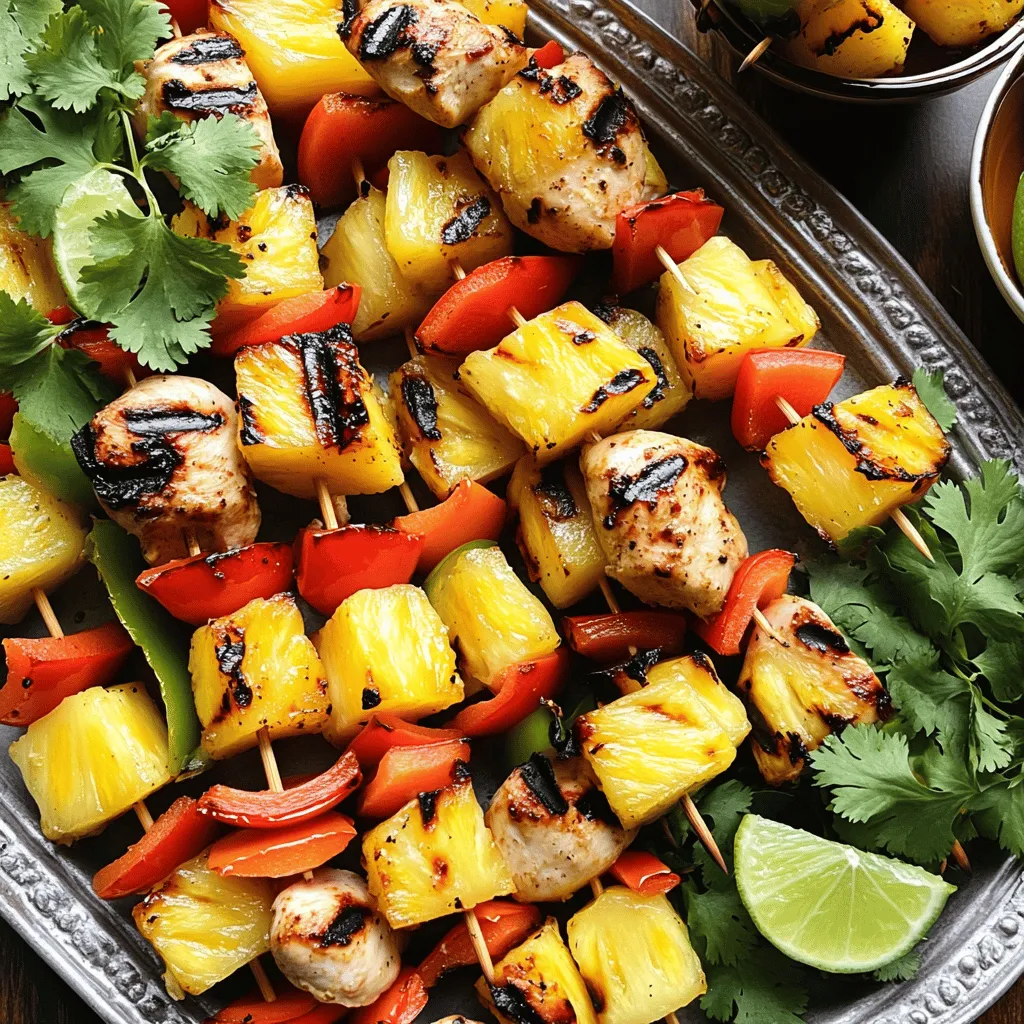
Get ready to fire up your grill! Grilled Pineapple Chicken Skewers are a fun and tasty meal for any outdoor gathering. With juicy chicken and sweet pineapple, this dish is sure to impress your friends and family. In this post, I’ll guide you through each simple step, share tips for perfecting your grill game, and explore tasty variations. Let’s make your next barbecue a hit!
Ingredients
Chicken and Marinade Components
For the best grilled pineapple chicken skewers, you need some key ingredients. Here’s what you will need:
– 1 pound boneless, skinless chicken breast, cut into 1-inch cubes
– 2 tablespoons soy sauce
– 2 tablespoons honey
– 1 tablespoon extra virgin olive oil
– 1 tablespoon fresh ginger, finely minced
– 2 cloves garlic, finely minced
– 1 teaspoon black pepper
The chicken serves as the main star of the dish. The marinade adds juicy sweetness and rich flavor. Honey balances the salty soy sauce, while ginger and garlic give it a nice kick.
Fresh Produce
Next, let’s talk about fresh produce. Good choices can really enhance the dish. You will need:
– 1 cup fresh pineapple, peeled and cut into 1-inch cubes
– 1 bell pepper (your choice of color), cut into 1-inch pieces
– 1/2 red onion, cut into wedges
The sweetness of the pineapple works well with the savory chicken. Bell peppers add crunch and color, while red onion gives a nice bite.
Skewers and Additional Items
Finally, you will need skewers and some extras. Make sure to have:
– Skewers (wooden skewers should be soaked in water for 30 minutes to prevent burning)
Soaking wooden skewers helps them not catch fire on the grill. This ensures the chicken and veggies cook evenly and stay juicy. Now you’re ready to create a tasty outdoor meal!
Step-by-Step Instructions
Preparing the Marinade
Start by gathering your ingredients. You will need soy sauce, honey, olive oil, minced ginger, minced garlic, and black pepper. In a large bowl, mix these items well. This creates a tasty marinade that will flavor your chicken.
Marinating the Chicken
Cut your chicken into 1-inch cubes. Add the chicken to the marinade. Make sure each piece is well-coated. Cover the bowl with plastic wrap or a lid. Place it in the fridge for at least 30 minutes. This helps the chicken soak up all the flavors.
Assembling the Skewers
While the chicken marinates, cut your bell pepper, red onion, and fresh pineapple into 1-inch pieces. Once the chicken is ready, take it out of the fridge. Grab your soaked skewers and start threading them. Alternate the chicken, pineapple, bell pepper, and onion. Pack them tightly for stability.
Grilling Process
Preheat your grill to medium-high heat. When your grill is hot, place the skewers on the grate. Grill the skewers for about 10 to 12 minutes. Turn them occasionally. Aim for nice grill marks. Ensure the chicken reaches an internal temperature of 165°F. Once done, let the skewers rest for a few minutes. This keeps the juices inside. Serve warm for a tasty outdoor meal.
Tips & Tricks
Achieving Perfect Grill Marks
To get those beautiful grill marks, preheat your grill well. Aim for medium-high heat. When you place the skewers on the grill, don’t move them right away. Let them cook for about 3 to 4 minutes on one side. Then, turn them a quarter turn to create those lovely diamond patterns. This technique helps lock in flavor and moisture.
Marinating Duration Recommendations
For best flavor, marinate your chicken for at least 30 minutes. If you have more time, let it sit for up to 2 hours. This longer marinating time allows the chicken to soak up all the tasty marinade. Just remember, don’t marinate for more than 4 hours. The acid in the marinade can change the chicken’s texture.
Best Practices for Skewering
When skewering the chicken and veggies, make sure to cut everything into similar sizes. This helps them cook evenly. Alternate the chicken, pineapple, and vegetables on the skewer for a nice mix of flavors. Pack them closely, but not too tight. This way, heat can circulate around each piece. Soak wooden skewers in water for at least 30 minutes before using to avoid burning. You want the focus on the food, not the skewers!
Variations
Alternative Vegetables to Use
You can switch up the veggies in your skewers. Try using zucchini, mushrooms, or cherry tomatoes. These add nice color and flavor. Each vegetable cooks differently, so cut them into similar sizes. This way, they all finish cooking at the same time. Bell peppers add sweetness, while red onions give a sharp taste. Mixing these options keeps the meal exciting.
Different Marinade Ideas
The marinade is key to great flavor. You can change the soy sauce for teriyaki or barbecue sauce. For a spicy kick, add some chili sauce or fresh jalapeños. You can also try citrus zest or juice for a zesty twist. A honey mustard mix can make your skewers sweet and tangy. Experimenting with marinades allows you to create your perfect flavor.
Vegetarian or Vegan Options
You can easily make this dish vegetarian or vegan. Replace chicken with firm tofu or tempeh. These options will soak up the marinade well. Use the same ingredients for your marinade, and you’re set. Adding more veggies like eggplant or portobello mushrooms gives a hearty feel. You can also include fruits like peaches or mango for a sweet touch. This makes the dish fun and fresh!
Storage Info
Storing Leftovers
After making grilled pineapple chicken skewers, you might have some left. To store these, let them cool to room temperature first. Place the skewers in an airtight container. They stay fresh in the fridge for up to three days. If you want to keep them longer, freezing is a great option.
Reheating Instructions
When you’re ready to eat leftovers, reheat them safely. You can use a microwave or an oven. For the microwave, place the skewers on a plate. Heat them for about 2-3 minutes or until warm. If using the oven, preheat it to 350°F. Place the skewers on a baking sheet and heat for 10-15 minutes. Avoid drying them out by covering them with foil.
Freezing Tips
If you want to freeze your skewers, do this right after they cool. Wrap each skewer tightly in plastic wrap. Then, place them in a freezer-safe bag or container. Label it with the date. They can stay in the freezer for up to three months. When you’re ready to enjoy them, thaw overnight in the fridge before reheating. This keeps the flavors fresh and tasty.
FAQs
How long do you grill chicken skewers?
You grill chicken skewers for 10 to 12 minutes. This time helps cook the chicken fully. Make sure to turn them often. This gives you nice grill marks and even cooking. You want the chicken to reach 165°F inside. Always use a meat thermometer to check.
Can I use frozen chicken for this recipe?
Using frozen chicken is not the best choice. Frozen chicken may not marinate well. It can also cook unevenly. If you must use frozen chicken, thaw it first. Always marinate fresh or fully thawed chicken for the best flavor.
What sides pair well with grilled pineapple chicken skewers?
Many sides work great with these skewers. Here are a few ideas:
– Rice (white or brown)
– Quinoa salad
– Grilled corn on the cob
– Mixed green salad
– Potato salad
These sides add balance to the meal and keep it light.It includes all the ingredients and steps to make this tasty dish. Enjoy the process and the delicious results!
This post walked you through making tasty grilled pineapple chicken skewers. We covered key ingredients like chicken, marinade, and fresh produce. The step-by-step guide made the process easy. Tips helped you master grilling and marinating. You also learned about variations, storage, and common questions.
Grilled skewers are simple, fun, and full of flavor. Try them for your next meal!


