Greek Lemon Chicken Soup Delightful and Easy Recipe

Are you ready to warm your soul with a bowl of Greek Lemon Chicken Soup? This delightful recipe combines tender chicken, fresh veggies, and bright lemon for a comforting dish you’ll love. Not only is it easy to make, but it also bursts with flavor and healthy goodness. Join me as we dive into the steps to create this delicious soup, perfect for any day or occasion!
Why I Love This Recipe
- Bright and Refreshing Flavor: The combination of lemon juice and zest brings a vibrant tang that lifts the whole dish, making each spoonful a delightful experience.
- Comforting and Hearty: This soup is the perfect remedy for a chilly day, providing warmth and comfort with its rich chicken broth and tender orzo pasta.
- Easy to Make: With straightforward steps and simple ingredients, this recipe allows even beginner cooks to create a delicious meal without stress.
- Nutritious and Wholesome: Packed with protein from chicken and nutrients from vegetables, this soup is a healthy option that doesn’t compromise on flavor.
Ingredients
Main Ingredients for Greek Lemon Chicken Soup
– 2 boneless, skinless chicken breasts
– 1 cup orzo pasta
– 1 medium onion, finely chopped
– 2 cloves garlic, minced
– 2 carrots, diced
– 2 celery stalks, diced
In this soup, chicken breasts are the star. They cook up juicy and tender. Orzo pasta gives the soup a nice, comforting texture. I love adding onion, garlic, and veggies like carrots and celery for flavor. They make the broth rich and satisfying.
Broth and Seasoning
– 6 cups chicken broth
– Salt and pepper
– 1/4 cup freshly squeezed lemon juice
– 1 teaspoon lemon zest
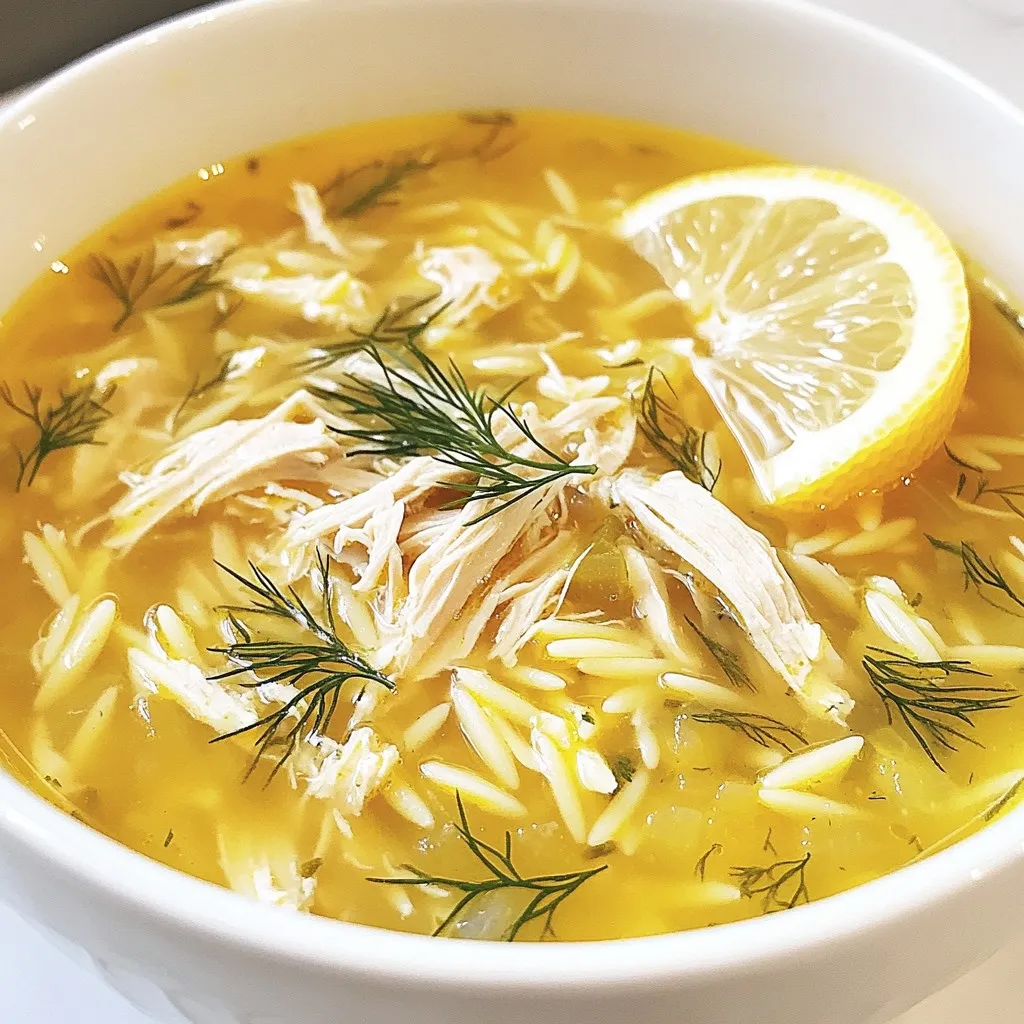
– Fresh dill, finely chopped (for garnish)
The broth is the heart of this dish. Six cups of chicken broth create a warm base. I add salt and pepper to enhance the taste. Then, I mix in fresh lemon juice and zest for that bright, zesty flavor. Finally, I sprinkle fresh dill on top for a pop of color and taste. The fresh herbs really make this soup shine!

Step-by-Step Instructions
Cooking the Chicken
First, heat 1 tablespoon of olive oil in a large pot. Once the oil shimmers, add the chicken breasts. Cook them for about 5 minutes on each side until golden brown. After cooking, remove the chicken from the pot and set it aside on a cutting board to cool.
Sautéing Vegetables
In the same pot, add the finely chopped onion, diced carrots, and diced celery. Sauté the vegetables for about 5 minutes. Stir them occasionally until they start to soften. Then, add the minced garlic and sauté for an additional minute until fragrant.
Simmering the Broth
Pour in the chicken broth and bring it to a gentle boil. Once it boils, lower the heat to medium-low. Reintroduce the cooked chicken to the pot and let it simmer for 15-20 minutes. This ensures the chicken cooks fully through.
Cooking the Orzo
Carefully remove the chicken again and place it on a cutting board. Stir the orzo pasta directly into the boiling broth. Cook the orzo according to the package instructions, which typically takes around 8-10 minutes.
Preparing the Egg-Lemon Mixture
While the orzo cooks, whisk together the eggs, freshly squeezed lemon juice, and lemon zest in a large mixing bowl. Ensure the mixture is smooth and fully combined.
Combining Ingredients
Gradually ladle about 1 cup of the hot broth from the pot into the egg mixture while whisking continuously. This step helps temper the eggs, keeping them from scrambling. Slowly pour the tempered egg mixture back into the pot while stirring gently. Shred the cooled chicken into bite-sized pieces and return it to the soup pot. Season the soup with salt and freshly cracked pepper to taste.
Tips & Tricks
Achieving the Best Flavor
To boost flavor, try adding fresh herbs. Oregano and thyme work wonders. Fresh ingredients always shine in this soup. Use good quality chicken broth and fresh lemon juice. They make a big difference in taste. When you cook, season along the way. It helps build layers of flavor.
Preventing Scrambled Eggs
To avoid scrambled eggs, use the tempering technique. This means slowly adding hot broth to the egg mixture. Whisk continuously while doing this. This step warms the eggs without cooking them. Add the egg mixture back to the pot gently. Timing matters here; do it after simmering the soup.
Presentation Tips
For serving, use warm bowls. Ladle the soup in and add fresh dill on top. A slice of lemon on the rim adds charm. You can also serve crusty bread on the side. This makes your meal feel inviting and complete.
Pro Tips
- Use Fresh Ingredients: Freshly squeezed lemon juice and homemade chicken broth significantly elevate the flavor of your soup. Whenever possible, opt for fresh rather than bottled or canned ingredients.
- Properly Temper the Eggs: When adding the egg mixture to the soup, always temper the eggs with hot broth first. This prevents them from scrambling and ensures a smooth, creamy texture in your soup.
- Control the Orzo Texture: To avoid mushy pasta, consider cooking the orzo separately and adding it to each bowl just before serving. This keeps it al dente and allows for better texture in the soup.
- Garnish Creatively: A sprinkle of fresh dill adds not only flavor but also a pop of color. Consider adding other herbs like parsley or chives for variety and visual appeal.

Variations
Substitutions for Ingredients
If you want to switch things up, you can change the protein. Shrimp works great in this soup. Just add it at the same time as the orzo. Tofu is also a good choice for a vegetarian option. It absorbs the flavors well.
For a gluten-free diet, you can skip the orzo. Instead, use rice or gluten-free pasta. Both options will still taste good in the soup.
Flavor Variations
To make the soup even better, try adding spinach or other greens. They add color and nutrients. You can stir them in just before serving. If you want a twist, use lime juice instead of lemon. It gives a fun, zesty flavor.
Serving Variations
Enhance your soup with spices or herbs. A sprinkle of paprika or a dash of cayenne can add a nice kick. Fresh herbs like parsley or mint can also brighten the dish.
For side dishes, crusty bread pairs perfectly. You can also serve a simple salad. It complements the soup’s flavors well. Enjoy your meal!
Storage Info
Storing Leftovers
To store your Greek Lemon Chicken Soup, place it in an airtight container. Make sure it cools down before sealing. Store it in the fridge for up to three days. This soup tastes great even after a few days!
Reheating Tips
When reheating, you can use a microwave or stovetop. For the microwave, heat in short bursts. Stir in between to keep the texture smooth. On the stovetop, use low heat and stir often. This helps maintain the soup’s creamy feel.
Freezing Instructions
To freeze the soup, let it cool completely. Pour the soup into freezer-safe containers. Leave space at the top because it will expand. The soup can last up to three months in the freezer.
When you’re ready to eat, move the soup to the fridge to thaw overnight. For reheating, warm it gently on the stovetop. You may need to add a splash of broth to restore its original taste.
FAQs
What can I substitute for orzo in Greek Lemon Chicken Soup?
If you need a substitute for orzo, there are great options. You can use gluten-free pasta, like brown rice pasta or quinoa pasta. Both options work well and keep the soup tasty. If you want something simpler, try using rice or quinoa. Both will soak up the soup’s flavors nicely.
Can I use rotisserie chicken for this recipe?
Absolutely! Using rotisserie chicken makes this soup even easier. Just shred the pre-cooked chicken and add it to the soup when you simmer the broth. This saves time and still gives you great flavor.
How can I make this soup creamier?
To add creaminess, you can mix in some dairy. Heavy cream or half-and-half works well. If you prefer a dairy-free option, use coconut milk or cashew cream. Both will give the soup a rich texture without losing the fresh taste.
Is Greek Lemon Chicken Soup healthy?
Yes, this soup is quite healthy! It has lean protein from the chicken and many veggies like carrots and celery. The lemon juice adds vitamin C, while the broth offers hydration. Just watch your portion size if you are mindful of your diet. Enjoy this light yet filling dish!
Greek Lemon Chicken Soup is a simple and tasty dish. We covered the main ingredients like chicken, orzo, and healthy vegetables. Next, I shared steps to make this soup, from cooking chicken to adding the egg-lemon mix. I offered tips to boost flavor and avoid common mistakes. You can also explore fun variations and learn how to store leftovers.
In the end, this soup is easy to customize and great for any meal. Enjoy making a warm bowl of comfor

Lemon-Infused Greek Chicken Soup
Ingredients
- 2 pieces boneless, skinless chicken breasts
- 6 cups chicken broth
- 1 cup orzo pasta
- 1 medium onion, finely chopped
- 2 cloves garlic, minced
- 2 pieces carrots, diced
- 2 pieces celery stalks, diced
- 3 large eggs
- 0.25 cup freshly squeezed lemon juice
- 1 teaspoon lemon zest
- to taste salt and freshly cracked pepper
- for garnish fresh dill, finely chopped
- 1 tablespoon olive oil
Instructions
- In a large pot, heat 1 tablespoon of olive oil over medium heat. Once the oil shimmers, add the chicken breasts to the pot. Cook for approximately 5 minutes on each side, or until golden brown. Once cooked, remove the chicken from the pot and set aside on a cutting board to cool slightly.
- In the same pot, add the finely chopped onion, diced carrots, and diced celery. Sauté the vegetables for about 5 minutes, stirring occasionally, until they start to soften. Add the minced garlic and continue to sauté for an additional minute, or until the garlic becomes fragrant.
- Pour the chicken broth into the pot and bring it to a gentle boil. Once boiling, lower the heat to medium low, reintroduce the cooked chicken to the pot, and allow it to simmer for 15-20 minutes, or until the chicken is fully cooked through.
- Carefully remove the chicken once more and place it on a cutting board. Stir the orzo pasta directly into the boiling broth and cook according to the package instructions, which typically takes around 8-10 minutes.
- While the orzo is cooking, in a large mixing bowl, whisk together the eggs, freshly squeezed lemon juice, and lemon zest until the mixture is smooth and fully combined.
- Gradually ladle about 1 cup of the hot broth from the pot into the egg mixture while whisking continuously. This step helps to temper the eggs, preventing them from scrambling when added to the hot soup.
- Slowly pour the tempered egg mixture back into the pot while stirring gently. Shred the cooled chicken into bite-sized pieces and return it to the soup pot. Season the soup with salt and freshly cracked pepper to taste, adjusting as necessary.
- Allow the soup to simmer for an additional 2-3 minutes, letting it warm through and slightly thicken. Remove the pot from heat.


![- 2 boneless, skinless chicken breasts - 8 oz fettuccine pasta - 2 cups fresh spinach, roughly chopped - 1 cup heavy cream - 1 cup finely grated Parmesan cheese - 2 tablespoons olive oil - 2 cloves garlic, minced - Salt and freshly ground black pepper, to taste - Fresh basil leaves, for garnish (optional) - Red pepper flakes, for a spicy kick (optional) When I cook Chicken and Spinach Alfredo, I gather these key ingredients first. The chicken breasts are a must because they add protein and flavor. I prefer fettuccine pasta for its wide shape, which holds the creamy sauce well. Fresh spinach adds a pop of green and nutrients, making the dish feel lighter. Next, I grab heavy cream. It’s the star of the sauce, bringing that rich, smooth texture. Of course, Parmesan cheese can't be skipped. It gives depth and a savory taste that blends perfectly with the cream. In the additional ingredients, olive oil is essential for cooking. It adds a nice flavor base. Minced garlic brings a wonderful aroma and a bit of zing. I always keep salt and pepper handy to season the dish just right. Lastly, I suggest garnishing with fresh basil for that extra flair. A sprinkle of red pepper flakes can bring heat if you like a spicy bite. For the full list of ingredients, check out the Full Recipe. First, I boil a large pot of salted water. Once it bubbles, I add the fettuccine. I cook it until it's al dente, which takes about 8-10 minutes. After cooking, I drain the pasta but keep a small cup of the pasta water for later. While the pasta cooks, I heat olive oil in a skillet over medium heat. I take the chicken breasts and season them with salt and pepper on both sides. I place the chicken in the hot skillet and cook for about 6-7 minutes on each side. When they turn golden brown and are fully cooked, I remove them from the skillet. I let them rest for a few minutes before slicing them into thin strips. In the same skillet, I lower the heat and add minced garlic. I sauté it for about 30 seconds until it smells amazing. Then, I slowly pour in heavy cream while stirring. I let it simmer gently, making sure it doesn’t boil. Next, I whisk in grated Parmesan cheese until the sauce is smooth and creamy. I add the chopped spinach and let it cook for 1-2 minutes until it wilts. Now, I carefully fold the cooked fettuccine into the creamy sauce. I mix it well so each strand is coated. If the sauce is too thick, I add a bit of the reserved pasta water to get the right consistency. Finally, I arrange the sliced chicken on top of the pasta. If I want a spicy touch, I sprinkle some red pepper flakes over everything. For the full recipe, check out the earlier section. - Adjusting seasoning: Start by tasting your sauce as you cook. Add more salt or pepper if needed. A pinch of nutmeg can also enhance the flavor. This small touch makes a big difference. - Whisking technique for smooth sauce: When you add the cream and cheese, whisk constantly. This helps to blend everything smoothly. It prevents lumps and ensures a creamy texture. - Presentation tips: Serve the Chicken and Spinach Alfredo in shallow bowls. Drizzle extra sauce on top for a rich look. Finish with freshly grated Parmesan and a basil sprig. This adds color and makes the dish pop. - Best accompaniments: Garlic bread or a fresh salad pairs perfectly. The crunch of the salad balances the creaminess of the dish. A glass of white wine complements the flavors well too. - Multitasking during prep: While the pasta cooks, focus on the chicken. Season it and cook it in the same skillet. This saves time and adds flavor to the sauce. Always keep an eye on the pasta so it doesn’t overcook. By using these tips, you can make your Chicken and Spinach Alfredo even better. Each step adds to the dish's overall experience, making it truly enjoyable. Enjoy the process and get creative! {{image_4}} You can switch out the chicken for other proteins. Shrimp works great in this dish. It adds a nice flavor and cooks quickly. Tofu is a good option for a vegetarian meal. Just make sure to season it well before cooking. For pasta, fettuccine is classic, but you can try penne or whole wheat. Penne holds the sauce well due to its shape. Whole wheat adds a nutty flavor and more fiber. Want to boost nutrition? Add seasonal vegetables. Broccoli brings crunch and color. You can steam it lightly before adding. Bell peppers add sweetness and vibrancy. Slice them thinly to mix in easily. Feel free to experiment! Seasonal vegetables can change the dish each time. Enhancing flavor is simple. You can add herbs like Italian seasoning for a savory kick. A sprinkle of lemon zest brightens the dish and adds freshness. For a bit of heat, red pepper flakes are great. Just a pinch goes a long way. These variations keep your Chicken and Spinach Alfredo fun and fresh. Check out the Full Recipe to get started! After you enjoy your Chicken and Spinach Alfredo, store any leftovers in the fridge. Use an airtight container to keep it fresh. You can keep it for about 3 to 4 days. To reheat, put the pasta in a pan over low heat. Add a splash of water or cream to help it warm evenly. Stir often to keep it creamy and avoid burning. If you want to keep it longer, you can freeze Chicken and Spinach Alfredo. Place it in a freezer-safe container or bag. Make sure to remove as much air as possible. It can last in the freezer for up to 2 months. When you are ready to eat it, take it out and thaw it in the fridge overnight. To reheat, warm it in a pan over low heat, adding a bit of water or cream to restore its creaminess. For the complete recipe, check the [Full Recipe]. Chicken and Spinach Alfredo lasts about 3 to 4 days in the fridge. Store it in an airtight container to keep it fresh. Make sure to cool it down before placing it in the fridge. This helps prevent condensation, which can make the dish soggy. Yes, you can make this recipe ahead of time. Cook the pasta and chicken in advance. Store them separately from the sauce. When you’re ready to eat, just heat everything together. This keeps the pasta from getting mushy. For the best taste, try to eat it within a few days. You can use half-and-half for a lighter option. If you want a dairy-free choice, try coconut cream or cashew cream. Both options give a nice creamy texture. You may need to adjust the seasonings to match your taste. Yes, you can make this dish gluten-free. Use gluten-free pasta such as rice or corn pasta. For the sauce, just check the labels on your cream and cheese. Most are gluten-free, but it’s good to be sure. This way, everyone can enjoy your Chicken and Spinach Alfredo. For the full recipe, check the details above! This blog post covered the key ingredients and steps for making Chicken and Spinach Alfredo. We discussed how to prepare the pasta, cook the chicken, and create a creamy sauce. Plus, I shared tips for enhancing flavors and serving. Remember, you can mix it up with different proteins and veggies. Also, I provided storage advice to keep your meal fresh. Embrace your creativity in the kitchen. Enjoy a tasty meal and share it with friends or family!](https://goldendishy.com/wp-content/uploads/2025/06/ee4d0533-23fd-4fc4-b715-1820a1e3e494-768x768.webp)
![- Bell peppers and their colors: You can use four large bell peppers. Choose any color you like: red, yellow, green, or orange. Each adds its own taste and look to the dish. - Protein options: For the filling, you can select either ground turkey or beef. Both options will give you a hearty and satisfying meal. - Base ingredients: You will need one cup of cooked rice. You can use either white or brown rice. Additionally, add one cup of black beans, rinsed and drained, and one cup of corn. You can choose fresh, frozen, or canned corn. - Flavor enhancers: To boost the flavor, use one cup of salsa. You can pick your favorite brand or make it homemade. Also, add one tablespoon of taco seasoning. You can use store-bought or make your own. - Toppings: For the top of the peppers, use one cup of shredded cheddar cheese. This cheese gives a nice gooey texture. You can add extra cheese for a more decadent touch. Fresh cilantro is a great garnish, adding color and a bit of fresh flavor. You can find the full recipe in the earlier sections of this article. Happy cooking! Preheat the oven to 375°F (190°C). This helps cook the peppers evenly. While it heats, grab a baking dish. Set it aside for the stuffed peppers. Prepare the bell peppers by slicing the tops off. Remove the seeds and membranes, which can taste bitter. Brush each pepper with olive oil. This adds flavor and helps them roast nicely. Place the peppers upright in the baking dish. Cook the meat in a large skillet over medium heat. Add 1 pound of ground turkey or beef. Break it apart with a spatula as it cooks. Make sure it browns well. Once cooked, drain any excess fat. This keeps the filling lean and tasty. Next, add rice, black beans, corn, salsa, and seasoning to the skillet. Use 1 cup of cooked rice, 1 cup of rinsed black beans, and 1 cup of corn. Pour in 1 cup of salsa and 1 tablespoon of taco seasoning. Sprinkle some salt and pepper too. Mix everything well. Simmer the mixture for about 5 minutes. This lets the flavors meld together, making the filling more delicious. Stir it occasionally to avoid sticking. Now, mix in half of the shredded cheddar cheese. This makes the filling creamy and rich. Remove the skillet from heat. Stuff the peppers by spooning the mixture into each one. Press down gently to pack it in well. This ensures every bite is full of flavor. Top with more cheese by sprinkling the remaining cheddar over each filled pepper. It will melt and brown nicely while baking. Bake the peppers by covering the baking dish with aluminum foil. Place it in the oven for 25-30 minutes. In the last 10 minutes, remove the foil. This helps the cheese bubble and turn golden. Once done, cool the peppers for a few minutes before serving. The filling will be very hot. If you like, garnish with fresh cilantro for extra flavor. Enjoy your taco stuffed bell peppers! Remember, you can find the full recipe above for all the details. How to choose fresh bell peppers: Pick bell peppers that are firm and shiny. Look for smooth skin with no blemishes. A good pepper feels heavy for its size. Colors like red, yellow, and orange are sweeter. Green peppers are a bit more bitter. All colors work well in this dish. Ensuring optimal cooking temperature and timing: Set your oven to 375°F (190°C) before you start cooking. This temperature helps the peppers cook evenly. Bake them for 25-30 minutes. In the last 10 minutes, uncover the dish to let the cheese brown. Suggestions for additional spices or ingredients: Add cumin or chili powder for an extra kick. You can also mix in diced tomatoes or jalapeños for more flavor. If you love heat, try adding some hot sauce to the filling. Offering a vegetarian option: For a vegetarian version, swap the meat for lentils or extra beans. You can use quinoa instead of rice for a healthy twist. This way, everyone can enjoy taco stuffed bell peppers! Plating ideas for presentation: Serve the peppers on a colorful platter. You can place them upright for a fun look. Add a dollop of sour cream on the side. Fresh cilantro on top adds a pop of green. Recommended side dishes for a complete meal: Pair your stuffed peppers with a fresh salad or tortilla chips. A side of guacamole or salsa also works great. These sides make the meal more fun and filling. For the full details, check out the Full Recipe! {{image_4}} You can mix up the protein in taco stuffed bell peppers. If you want a meatless option, try using black beans or lentils. They add great flavor and protein. For a twist, you can also use ground chicken or pork. When it comes to cheese, feel free to get creative. While cheddar is classic, you might try Monterey Jack or pepper jack for extra spice. You can also use cream cheese for a creamier filling. For salsa, any kind works! Chunky salsa adds texture, while smooth salsa blends in. You can even make your own with fresh tomatoes, onions, and peppers. Grilling adds a smoky flavor. Wrap the stuffed peppers in foil and place them on the grill. Cook for about 15 to 20 minutes until tender. You can also use a slow cooker. Place the stuffed peppers in the slow cooker with a bit of sauce. Cook on low for 4 to 6 hours for a hands-off approach. If you need a quick meal, the microwave is your friend. Just place the stuffed peppers in a microwave-safe dish. Cover with a lid or plastic wrap. Heat for about 5 to 7 minutes, checking for doneness. Using seasonal veggies makes your dish brighter. In summer, add fresh zucchini or corn. In fall, consider adding diced sweet potatoes or pumpkin. These add flavor and nutrition. For holidays, you can theme your peppers. For Halloween, use orange peppers and stuff them with spicy fillings. For Christmas, use red and green peppers and add festive spices. It’s a fun way to celebrate! For the full recipe, check out [Full Recipe]. To store leftovers, place the stuffed peppers in an airtight container. This keeps them fresh and tasty. You can keep them in the fridge for up to three days. Make sure they cool down first to avoid steam build-up. If you want to save some for later, freezing is a great option. Wrap each stuffed pepper tightly in plastic wrap. Then, place them in a freezer-safe bag. They can last for up to three months in the freezer. When you’re ready to eat, thaw them overnight in the fridge. To reheat, bake at 350°F (175°C) for about 25 minutes, or until heated through. For easy meal prep, you can cook a big batch in advance. Make the filling and stuff the peppers ahead of time. Store them in the fridge for two days before baking. This way, you can have a quick meal ready on busy nights. You can also use different colors of bell peppers for fun and variety. What can I substitute for rice in the recipe? You can use quinoa or cauliflower rice instead of regular rice. Quinoa adds protein and fiber. Cauliflower rice keeps it low-carb. Both options work well and keep the dish tasty. How do I know when the peppers are fully cooked? The peppers should be tender but not mushy. You can poke them with a fork. If they give easily but hold their shape, they are ready. The cheese should be melted and bubbly on top too! Caloric content and portion sizes Each stuffed pepper is about 300 calories. This includes the filling and toppings. If you use ground turkey, it may be lower in calories. Adjust the portion size based on your hunger. Health benefits of ingredients used Bell peppers are rich in vitamins A and C. They help boost your immune system. Black beans provide protein and fiber, promoting good digestion. Corn adds vitamins and a sweet crunch. What drinks pair well with taco stuffed bell peppers? A refreshing drink like lemonade or iced tea works great. For adults, a light beer or margarita adds fun. Choose drinks that balance the spice of the peppers. Can taco stuffed bell peppers be made in advance for gatherings? Yes! You can prepare the stuffed peppers ahead of time. Just store them in the fridge. Bake them when your guests arrive. They will taste fresh and hot from the oven! For the full recipe, check the earlier section. Taco stuffed bell peppers are fun and easy to make. We covered the key ingredients, steps, and helpful tips for a great dish. You learned how to mix flavors and pack ingredients for maximum yum. With ideas for storage and meal prep, you’re ready to enjoy these peppers anytime. Get creative with variations to keep things fresh. Whether for a family dinner or a gathering, these peppers can impress. Happy cooking!](https://goldendishy.com/wp-content/uploads/2025/06/e36cd186-0c48-4bd5-9184-2d07a9c06671-768x768.webp)
![- 1 pound (450g) potato gnocchi - 2 cups marinara sauce - 1 cup ricotta cheese - 1 cup shredded mozzarella cheese - 1/2 cup grated Parmesan cheese - 1 cup baby spinach, roughly chopped - 1/2 cup cherry tomatoes, halved - 1 tablespoon olive oil - 1 teaspoon garlic powder - Salt and pepper to taste - Fresh basil leaves for garnish Cooking gnocchi is simple. You only need a few key ingredients to make this dish shine. Start with potato gnocchi. It gives a soft, fluffy texture. Marinara sauce adds a rich flavor. Ricotta cheese adds creaminess. Mozzarella and Parmesan bring that cheesy goodness. Don’t forget the fresh spinach. It adds color and nutrition. Cherry tomatoes offer a juicy burst in each bite. Olive oil helps everything meld together. Garlic powder adds depth. Finally, you can season with salt and pepper to your liking. - Alternative cheeses for different flavors: You can swap ricotta for cottage cheese. Use provolone or gouda instead of mozzarella for a twist. - Gluten-free gnocchi options: Look for gnocchi made with rice or corn flour. They work just as well! - Seasonal vegetables to replace spinach or tomatoes: Try bell peppers or zucchini in place of spinach. Fresh asparagus or roasted squash can replace tomatoes too. These substitutions keep the dish fresh and exciting. You can adjust based on what you have or what is in season. Check out the Full Recipe for more details on how to create this loaded baked gnocchi dish! - Preheat the oven to 400°F (200°C). - In a large pot, bring salted water to a boil. - Carefully add the potato gnocchi to the boiling water. - Cook until the gnocchi float, about 2-3 minutes. - Use a slotted spoon to transfer them to a colander. - In a big mixing bowl, combine the drained gnocchi with marinara sauce. - Add ricotta cheese, chopped baby spinach, and garlic powder. - Season with a pinch of salt and pepper. - Gently fold the mixture so all gnocchi get coated. - Take a baking dish and grease it with olive oil. - Transfer the gnocchi mixture to the dish, spreading it evenly. - Top the mix with mozzarella and Parmesan cheese. - Scatter halved cherry tomatoes over the cheese layer. - Drizzle olive oil on top for a nice glaze. - Bake in the preheated oven for 20-25 minutes. - Look for bubbly and golden cheese. - Once baked, remove the dish and let it cool. - Garnish with fresh basil leaves before serving. This loaded baked gnocchi dish is a savory delight that brings comfort and joy. For the full recipe, check out the detailed instructions. Enjoy your cooking! To get that perfect gooey cheese texture, use a mix of cheeses. I like ricotta for creaminess and mozzarella for stretch. Bake the dish until the cheese bubbles and starts to brown. Keep an eye on it to avoid burning. For an even golden-brown top, spread the cheese evenly. A light drizzle of olive oil helps too. You can customize this dish for different diets. For a vegan version, swap the cheese with plant-based options. Low-carb eaters can use cauliflower gnocchi instead of potato gnocchi. Try adding different seasonings. Red pepper flakes add heat, while Italian herbs bring freshness. You can also toss in cooked meats for more flavor. Serve the loaded gnocchi in colorful bowls for a nice look. This helps show off the melted cheese and bright tomatoes. Garnish with fresh basil leaves for a pop of color. A sprinkle of cracked black pepper can add an extra touch. For an elegant finish, drizzle a bit of olive oil on top. For the full recipe, check out the [Full Recipe]. {{image_4}} You can change up the flavor by using different sauces. Pesto sauce gives a fresh taste. It pairs well with the gnocchi's soft texture. Spinach-based sauces add a nice green color and taste. They also boost the nutrition. You can also try a cream or Alfredo sauce. This makes the dish rich and creamy. Each sauce brings its own twist to the meal. Adding proteins makes your loaded baked gnocchi heartier. You can use chicken for a classic touch. Sliced sausage adds a nice zing. If you want a plant-based option, mushrooms work great. They soak up flavors and add depth. Tofu is another good choice for a vegetarian boost. These proteins will fill you up and keep the dish exciting. Want to spice things up? You can add heat with red pepper flakes or jalapeños. They give the dish a nice kick. If you prefer smoky flavors, try smoked paprika or bacon bits. These flavors create a unique twist. You might even consider adding a sweet element, like caramelized onions. This balances the savory notes and adds depth. Each of these enhancements can make your dish special. To keep your loaded baked gnocchi fresh, let it cool. Then, place it in an airtight container. This helps prevent moisture loss. You can also use a glass dish with a lid. Make sure to store it in the fridge. This way, it stays safe to eat for later. When reheating, use the oven for the best results. Preheat it to 350°F (175°C). Place the gnocchi in an oven-safe dish, cover it with foil, and heat for about 15-20 minutes. You can also use a microwave, but it may not keep the texture. If you want to freeze it, do so before baking. Wrap it tightly in plastic wrap, then in foil. It can last up to three months in the freezer. In the fridge, loaded baked gnocchi lasts about three to four days. Check for any changes in smell or color to spot spoilage. If you see mold or it smells off, it’s best to throw it away. Enjoy your delicious meal, and don’t hesitate to check out the Full Recipe for more on this tasty dish! Baked gnocchi is done when the cheese is bubbly and golden. It should smell amazing too! Check the edges for a nice brown color. The dish usually takes 20-25 minutes in the oven. Yes, you can make Loaded Baked Gnocchi ahead! Prepare it and store it in the fridge. Just cover it well. When ready to eat, bake it straight from the fridge. You may need to add a few extra minutes to the cooking time. Great side dishes include a simple green salad or garlic bread. You can also serve roasted veggies for a healthy touch. Pairing with a light soup can make it a cozy meal too. Absolutely! Frozen gnocchi works well for this recipe. Just cook it according to the package instructions. Then, follow the steps in the Full Recipe to make it tasty. Yes, Loaded Baked Gnocchi is perfect for meal prep! You can portion it out for easy lunches or dinners. Just store it in airtight containers in the fridge. Enjoy it throughout the week! Loaded Baked Gnocchi is a fun dish you can easily make. You learned about the great ingredients, simple steps to prepare, and ways to customize it. Remember to enjoy experimenting with flavors and textures. You can adapt it to fit your taste. Whether you're storing leftovers or reheating, you can keep it fresh. This dish not only warms your belly but also sparks creativity in your kitchen. Dive in and enjoy making this delicious meal!](https://goldendishy.com/wp-content/uploads/2025/06/a4704798-2aa5-49c0-949b-2886f6a00168-768x768.webp)
![- 1 large head of cauliflower, cut into bite-sized florets - 1 cup shredded sharp cheddar cheese - 1/2 cup grated Parmesan cheese, divided - 1 cup heavy cream - 2 cloves garlic, finely minced - 1/2 teaspoon smoked paprika - 1/2 teaspoon freshly ground black pepper - 1 teaspoon salt, or to taste - 1/2 teaspoon onion powder - 1/4 cup seasoned breadcrumbs (optional, for added crunch) - Fresh parsley, chopped, for garnish The key to a great cheesy cauliflower bake lies in its simple yet flavorful ingredients. First, you need a large head of cauliflower. Cut it into bite-sized florets. This helps it cook evenly. Next, gather your cheeses. I love using sharp cheddar for its strong taste and Parmesan for a hint of nutty flavor. Heavy cream is a must for that rich, creamy texture. Don't forget the garlic! Mince two cloves finely for a burst of flavor. Seasoning is important, too. Smoked paprika adds warmth, while black pepper and onion powder enhance the dish. If you want a crunchy topping, use seasoned breadcrumbs. They give the bake a nice texture. Finally, finish with fresh parsley. It brings color and freshness. These ingredients come together to create a comforting dish that everyone will enjoy. Check out the Full Recipe for more details! - Preheat the oven to 375°F (190°C). - Boil the cauliflower florets. Start by preheating your oven. This step is key to getting that nice, golden top. While the oven heats, take a pot and fill it with water. Add a pinch of salt. Bring the water to a boil. Once boiling, add the cauliflower florets. Cook them for about 5 to 7 minutes. You want them tender but still a bit firm. Drain the cauliflower and set it aside. - Combine heavy cream, garlic, and spices in a saucepan. - Stir in shredded cheddar and Parmesan cheese until smooth. Now, let’s make the cheese sauce. In a medium saucepan, pour in the heavy cream. Add the minced garlic, salt, black pepper, smoked paprika, and onion powder. Heat it on medium. Stir this mix gently, keeping it warm but don’t let it boil. Once warm, slowly add the shredded cheddar and half of the grated Parmesan cheese. Stir until the cheese melts and the sauce is smooth and creamy. - Mix the cauliflower with the cheese sauce. - Transfer to a baking dish and top with breadcrumbs. In a large bowl, mix the cooked cauliflower with your cheese sauce. Make sure every floret gets coated with that cheesy goodness. Next, take a baking dish and lightly grease it. Pour the cauliflower mixture into the dish. Spread it evenly. If you want a crunchy topping, sprinkle the remaining grated Parmesan cheese and breadcrumbs on top. - Bake until golden brown and bubbly. - Garnish and serve. Place the baking dish in the preheated oven. Bake it for about 20 to 25 minutes. You want the top to be golden brown and bubbly. When it's done, take it out and let it cool for a few minutes. For a nice touch, sprinkle some freshly chopped parsley on top before serving. Enjoy your cheesy cauliflower bake! For the full recipe, refer to the earlier sections. To make the best cheesy cauliflower bake, cook the cauliflower just right. Boil it for about 5-7 minutes. You want it tender but still slightly firm. This helps keep the florets intact when you mix them with the cheese sauce. For the cheese sauce, ensure it is smooth. Stir the heavy cream and garlic over medium heat. Add the cheese slowly while stirring. This will help you avoid lumps. A smooth sauce coats the cauliflower evenly, giving it that creamy goodness. Don't be afraid to experiment with flavors. A little smoked paprika adds a nice touch. You can also try different cheeses. A mix of cheddar and Gruyère can elevate your dish. Using fresh herbs for garnish makes a big difference. Chopped parsley adds color and freshness. You can also use chives for an onion flavor boost. These small touches can turn a great dish into a memorable one. Think about what pairs well with cheesy cauliflower bake. It goes great with roasted chicken or grilled fish. You can also serve it with a crisp salad for added crunch. This dish is perfect for gatherings. Serve it at family dinners or potlucks. It is a great side dish for holidays too. Everyone loves a warm, cheesy treat! For the full recipe, check the instructions above. {{image_4}} You can make this dish lighter with a few easy swaps. - Low-fat cheese options: Try using part-skim mozzarella or low-fat cheddar. - Alternative non-dairy cream substitutes: Use almond milk or coconut cream for a dairy-free choice. These swaps keep the taste rich while cutting calories and fat. Want to spice it up? There are plenty of ways to add flavor. - Adding cooked bacon or sausage for extra protein: Crumbled crispy bacon brings a smoky touch. - Introducing vegetables like spinach or bell peppers: These add color and nutrients to your bake. Feel free to mix and match your favorite proteins and veggies for a unique dish. How you serve this dish can change the experience. - Individual ramekins for portion control: They make for a fun and fancy presentation. - Making it a main dish with protein additions: Pair it with chicken or fish for a complete meal. These options help you customize your cheesy cauliflower bake for any occasion. After enjoying your cheesy cauliflower bake, you might have some leftovers. To keep them fresh, place them in an airtight container. This helps lock in moisture and flavor. You can store the leftovers in the fridge for up to three days. When you’re ready to eat again, just scoop out what you need. Want to save some for later? Freezing is a great option. Cool the dish completely first. Then, transfer it to a freezer-safe container. Make sure to label it with the date. You can freeze it for up to three months. When you’re ready to enjoy it again, thaw it in the fridge overnight. For reheating, you can use the oven. Preheat it to 350°F (175°C). Cover the dish with foil to keep it moist. Bake for about 25-30 minutes, or until heated through. If you want a crispy top, remove the foil for the last 10 minutes. Enjoy your cheesy goodness! For the full recipe, click here [Full Recipe]. Yes, you can prepare cheesy cauliflower bake ahead of time. Start by cooking the cauliflower and making the cheese sauce. After mixing them together, place the dish in the fridge. Cover it tightly with plastic wrap or foil to keep it fresh. When ready to bake, remove it from the fridge. Bake it straight from the cold for about 10 minutes longer than the usual time. This way, you enjoy a warm, cheesy treat without a lot of last-minute work. Cheesy cauliflower bake pairs well with many dishes. Here are some great options: - Grilled chicken: The savory chicken complements the creamy bake. - Steak: A juicy steak adds richness to the meal. - Salad: A fresh garden salad balances the heaviness of the bake. - Roasted vegetables: Crisp, roasted veggies add color and flavor. These side dishes can make your meal feel complete and delicious. Yes! Cheesy cauliflower bake is perfect for vegetarians. It uses cauliflower, cheese, and cream, all plant-based. Just ensure that the cheese options are vegetarian-friendly. Many cheeses are made without animal rennet, making them suitable for vegetarian diets. This dish is a tasty way to enjoy a healthy meal while meeting dietary needs. To sum up, this blog covered how to make a delicious cheesy cauliflower bake. We talked about required ingredients, step-by-step instructions, and tips for great results. You learned about variations, healthy swaps, and how to store leftovers. This dish is not just tasty; it is easy to make and perfect for many meals. Try it yourself for a comforting treat that everyone will enjoy. Remember, the best part is making it your own by adding what you love!](https://goldendishy.com/wp-content/uploads/2025/06/4f60bbbb-6786-4607-99e4-9a4e6c15f60e-768x768.webp)
