Greek Chicken Pasta Salad Flavorful and Fresh Meal

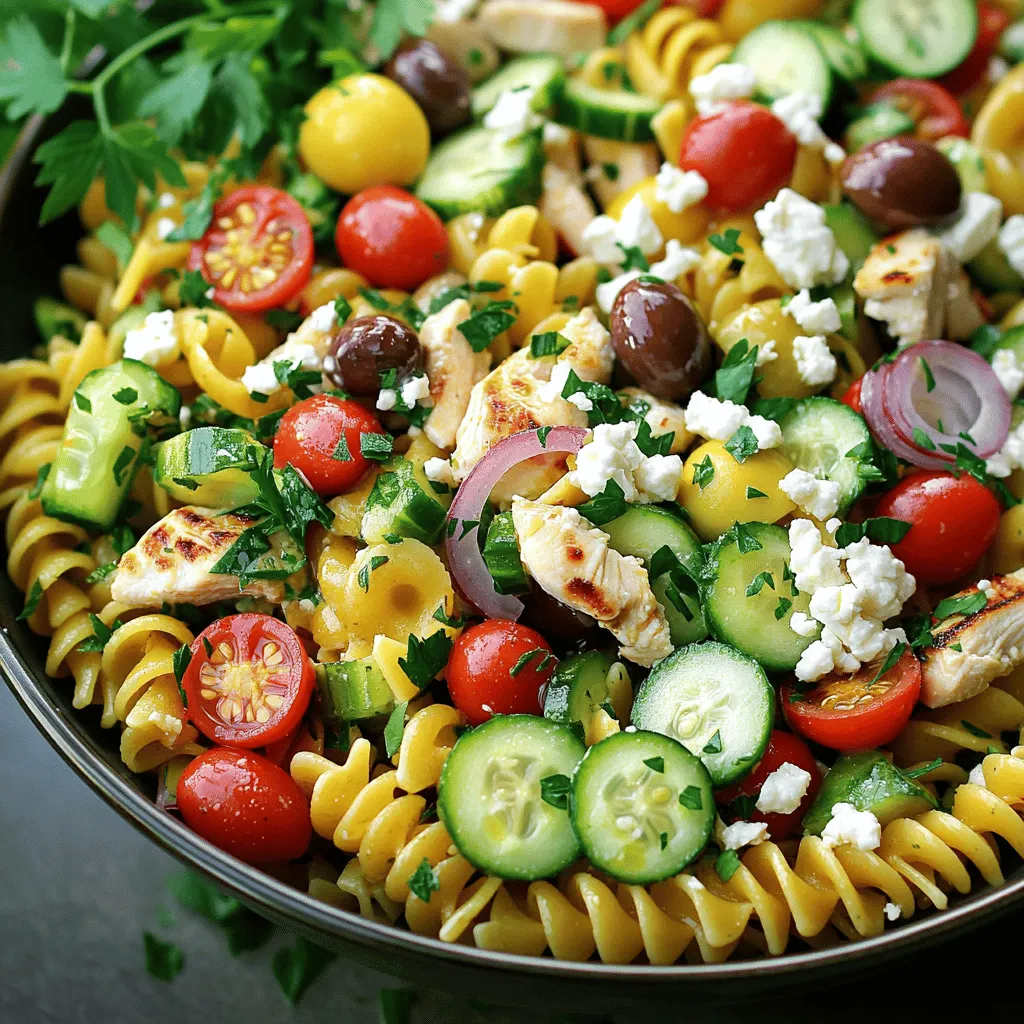
Looking for a refreshing meal that bursts with flavor? My Greek Chicken Pasta Salad is just what you need! With rotini pasta, grilled chicken, fresh veggies, and tangy feta, this dish serves up a summer vibe all year round. Plus, it’s easy to customize and makes a perfect meal prep option. Let’s dive in and make a dish that’s both tasty and satisfying!
Ingredients
Main Ingredients
– 2 cups rotini pasta
– 1 pound boneless, skinless chicken breast
– 1 cup cherry tomatoes, halved
– 1 cucumber, diced
– 1/2 red onion, finely chopped
– 1 cup kalamata olives, pitted and sliced
– 1/2 cup feta cheese, crumbled
– 2 tablespoons olive oil
– 1 teaspoon dried oregano
– 1 teaspoon garlic powder
– Salt and pepper, to taste
– 2 tablespoons lemon juice
– 1 teaspoon red wine vinegar (optional)
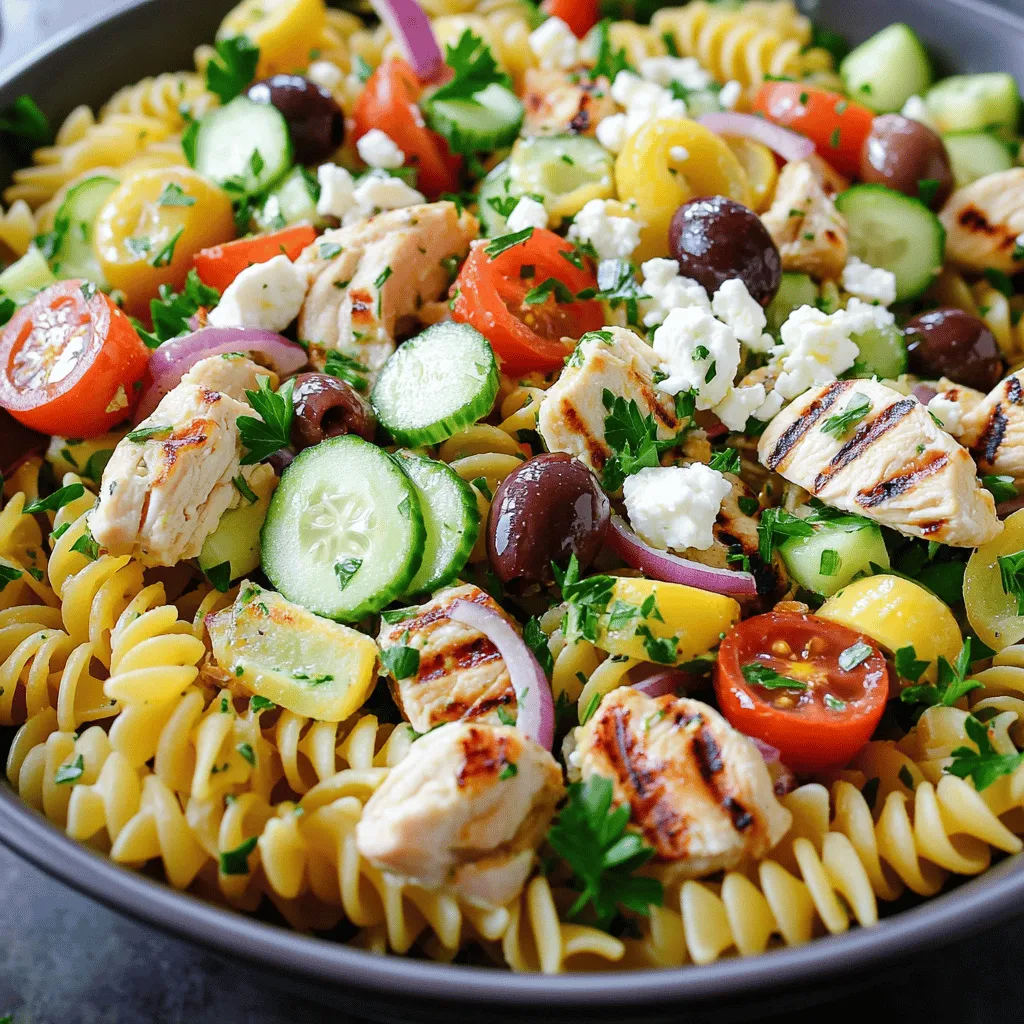
The main ingredients make this Greek chicken pasta salad fresh and tasty. First, we start with rotini pasta, which holds the dressing well. Chicken adds protein and makes the salad filling. Fresh veggies like cherry tomatoes, cucumber, and red onion bring color and crunch. Kalamata olives add a briny bite, while feta cheese provides creaminess.
Don’t forget the seasonings! Olive oil, oregano, and garlic powder enhance the flavors. Salt and pepper are a must for balance. You can add lemon juice for a zesty kick and red wine vinegar for extra tang, if you like.
This mix of ingredients creates a vibrant dish that is both healthy and satisfying. You can enjoy it as a meal or a side. Each bite bursts with flavor and freshness, making it perfect for warm days or gatherings.
Step-by-Step Instructions
Cooking the Pasta
To start, fill a large pot with salted water. Bring it to a rolling boil. Once the water boils, add 2 cups of rotini pasta. Cook the pasta according to the package instructions. You want it to be al dente. This means it should be firm but cooked through. After cooking, drain the pasta in a colander. Let it cool completely while you prepare the chicken.
Grilling the Chicken
While the pasta cooks, take 1 pound of boneless, skinless chicken breast. Drizzle it with 2 tablespoons of olive oil. Season both sides with 1 teaspoon of dried oregano and 1 teaspoon of garlic powder. Don’t forget to sprinkle some salt and pepper too. Heat a grill pan or skillet over medium heat. Cook the chicken for about 6-7 minutes on each side. Make sure it reaches an internal temperature of 165°F. When done, set the chicken aside for a few minutes to rest, then slice it into bite-sized pieces.
Assembling the Salad
In a large mixing bowl, combine the cooled rotini pasta, sliced chicken, 1 cup of halved cherry tomatoes, 1 diced cucumber, 1/2 finely chopped red onion, and 1 cup of sliced kalamata olives. Gently toss the ingredients together. It’s important to mix everything well so each bite is full of flavor.
Dressing the Salad
For the dressing, take a small bowl and whisk together 2 tablespoons of lemon juice and 1 teaspoon of red wine vinegar, if using. Add another drizzle of olive oil for a light dressing. Pour this mixture over the pasta salad. Toss everything gently to ensure the salad is evenly coated.
Adding Finishing Touches
Now, carefully fold in 1/2 cup of crumbled feta cheese and 1/4 cup of chopped fresh parsley. This adds a burst of flavor and color. Taste the salad and adjust the seasoning if needed. You can add more salt and pepper to enhance the taste.
Serving Suggestions
For the best flavor, let the salad sit at room temperature for about 15 minutes before serving. This allows all the ingredients to blend nicely. Serve the salad in a large bowl, drizzling a bit more olive oil on top. Garnish with extra parsley for a vibrant touch.
Tips & Tricks
Customization Options
You can swap chicken for other proteins. Try grilled shrimp or chickpeas for a twist. You can also change the pasta type. Whole wheat or gluten-free pasta works great too.
Flavor Enhancements
Herbs and spices can boost the salad’s taste. Fresh basil or dill adds a nice zing. You can mix in some red pepper flakes for heat. A splash of balsamic vinegar can also brighten the flavors.
Presentation Tips
Serve the salad in a large, colorful bowl. Drizzle a bit more olive oil on top for shine. Garnish with extra parsley for a fresh look. For parties, use clear glass bowls to show off the bright ingredients.

Variations
Vegetarian Option
You can easily make this salad meat-free. Instead of chicken, use grilled tofu or chickpeas. Both options add protein and flavor. Tofu absorbs the dressing well, making it tasty. Chickpeas add a nice crunch. Feel free to add extra veggies, like bell peppers or spinach, to boost nutrition.
Whole Grain or Gluten-Free Pasta
If you prefer whole grain, swap regular rotini for whole wheat rotini. It adds fiber and a nutty taste. For gluten-free options, use rice pasta or quinoa pasta. Both types hold up well and keep the salad delicious. Just cook them according to package instructions for best results.
Additional Ingredients
You can mix in other veggies or proteins for variety. Shrimp works great, adding a seafood twist. Just grill or sauté the shrimp until they turn pink. You can also add bell peppers, artichokes, or avocado. These additions keep the salad fresh and colorful. Be creative and use what you love!
Storage Info
Keeping Leftovers
To keep your Greek chicken pasta salad fresh, store it in an airtight container. This helps keep the flavors intact. If you plan to eat it later, try to separate the dressing. This keeps the pasta from getting soggy. You can mix the dressing in right before serving.
Shelf Life
Your Greek chicken pasta salad lasts about three to five days in the fridge. Make sure to check for any signs of spoilage before eating. If it smells off or looks different, it’s best to toss it. Keeping it stored properly helps maintain its taste and freshness.
Tips for Reheating
When you want to enjoy your leftovers, skip the microwave. Instead, gently heat the pasta in a pan over low heat. Add a splash of olive oil or a bit of water. This keeps the flavors bright. If you need to reheat the chicken, slice it and warm it separately. This way, you avoid losing any tasty juices.
FAQs
Can I make this salad ahead of time?
Yes, you can make this salad ahead of time. I love prepping meals to save time. Here are some tips:
– Prepare the pasta and chicken a day before.
– Store them in separate containers. This keeps the pasta from getting soggy.
– Chop the veggies and olives the night before, too.
– Mix everything together just before serving. This keeps it fresh and crunchy.
What can I substitute for feta cheese?
If you need to swap out feta cheese, there are good options. Some choices include:
– Goat cheese, which adds a tangy taste.
– Ricotta cheese for a creamy texture.
– Vegan feta, if you’re dairy-free.
These alternatives still give your salad great flavor.
Is this salad good for meal prepping?
Absolutely! This salad is perfect for meal prepping. Here are my recommendations:
– Make a large batch at once for the week.
– Store it in airtight containers to stay fresh.
– Keep the dressing separate until you’re ready to eat. This helps maintain texture.
You can enjoy it for lunch or dinner all week long!
This blog post gave a clear guide to making a Greek chicken pasta salad. We covered the key ingredients, from rotini pasta and chicken to fresh veggies and feta cheese. You learned step-by-step cooking and assembly tips. Customization options let you tailor the dish to your taste. Remember, good storage keeps leftovers fresh. Making this salad ahead can save time. Embrace variations to suit your needs. Enjoy creating a tasty meal that’s both healthy and satisfying!


![- 1 pound boneless, skinless chicken breasts, cut into 1-inch cubes - 1/4 cup fresh basil leaves, finely chopped - Zest from 2 lemons (about 2 tablespoons) - 3 tablespoons freshly squeezed lemon juice The chicken breast serves as a great base. It’s lean, tender, and perfect for grilling. Fresh basil adds a bright, herbal note. The lemon zest and juice provide a refreshing tang that makes this dish stand out. - 2 tablespoons extra virgin olive oil - 2 cloves garlic, finely minced - 1 teaspoon honey (optional, for a touch of sweetness) Olive oil keeps the chicken moist and helps the flavors blend. Garlic adds depth and aroma, while honey can balance the tart lemon if you want a hint of sweetness. - Salt and freshly ground black pepper to taste - Wooden or metal skewers Salt and pepper are essential for enhancing flavors. If you use wooden skewers, soak them in water for 30 minutes. This prevents burning during grilling. For the Full Recipe, check the detailed instructions along with cooking tips. You’ll need these ingredients to create a fantastic summer delight. To start, mix the marinade ingredients in a bowl. Combine: - 1/4 cup fresh basil leaves, finely chopped - Zest from 2 lemons (about 2 tablespoons) - 3 tablespoons freshly squeezed lemon juice - 2 tablespoons extra virgin olive oil - 2 cloves garlic, finely minced - 1 teaspoon honey (optional) - Salt and pepper to taste Whisk these together until they blend well. This step builds flavor. The lemon and basil create a bright, fresh taste that makes the chicken sing. Marination is key for juicy chicken. It helps the meat soak up the marinade's flavors. Once you prepare the marinade, add the cubed chicken to the bowl. Make sure each piece is coated. Cover the bowl tightly with plastic wrap. Let the chicken marinate in the fridge for at least 30 minutes. For best results, aim for 1-2 hours. This allows the chicken to become tender and flavorful. While the chicken marinates, preheat your grill or grill pan over medium-high heat. A hot grill helps create a nice sear on the chicken. Once the chicken is ready, thread the cubes onto skewers. Leave small gaps between pieces for even cooking. Place the skewers on the grill. Cook them for about 10-12 minutes, turning them often. To ensure the chicken is done, use a meat thermometer. The internal temperature should reach 165°F. After grilling, let the skewers rest for a few minutes. This helps keep the chicken moist. For the full recipe, check the section above. Enjoy making your lemon basil chicken skewers! To get juicy chicken, monitor the grill's temperature. Aim for medium-high heat. This helps cook the chicken quickly while keeping it tender. Use a meat thermometer to check the inside. The chicken should reach 165°F. Avoid over-charring by turning the skewers. Rotate them every few minutes for even cooking. If you see dark spots, move the skewers to a cooler part of the grill. This way, the chicken cooks well without burning. You can add more spices and herbs to the marinade. Consider using oregano or thyme for extra zest. A pinch of red pepper flakes can give it a nice kick. Just be careful not to overpower the lemon and basil. For marinating, let the chicken soak for at least 30 minutes. If you have time, marinate it for a few hours. The longer it sits, the more flavor it absorbs. This step makes a big difference in taste. For plating, arrange the skewers on a wooden board or a nice platter. Adding fresh basil leaves and lemon wedges makes it look vibrant. This adds a pop of color and gives a hint of what’s inside. Pair the skewers with side dishes like grilled vegetables or a fresh salad. You can also serve them with rice or quinoa for a filling meal. These sides enhance the overall experience of your lemon basil chicken skewers. Check the Full Recipe for more ideas! {{image_4}} You can change things up with lemon basil chicken skewers. Try adding vegetable skewers. Bell peppers, zucchini, and cherry tomatoes make great choices. They add color and crunch. If you want to swap proteins, shrimp is a tasty option. Shrimp cooks fast and absorbs flavors well. Just marinate them the same way as chicken. Dipping sauces can take your skewers to new heights. A simple garlic aioli pairs well with the fresh flavors. You can also try tzatziki for a cool and creamy contrast. For a spicy kick, sriracha or a sweet chili sauce is perfect. These sauces work with the lemon and basil, enhancing each bite. If you need gluten-free options, check your sauces and marinades. Most of the ingredients are safe, but read labels. For vegan alternatives, use tofu or tempeh instead of chicken. Marinate them just like the chicken for the best taste. You can still enjoy the bright lemon and basil flavors in a plant-based version. For the full recipe, check the [Full Recipe]. Refrigeration Guidelines After cooking, allow the chicken skewers to cool. Place them in an airtight container. Refrigerate within two hours. The chicken can stay fresh for up to four days. Always check for any signs of spoilage before eating. Freezing Tips If you want to keep them longer, freezing is a great option. Wrap the skewers tightly in plastic wrap. Then, place them in a freezer bag. They can last for up to three months in the freezer. When ready to use, thaw them in the fridge overnight before reheating. Best Methods The best way to reheat your skewers is in the oven. Preheat it to 350°F (175°C). Place the skewers on a baking tray for about 10 to 15 minutes. This method helps keep the chicken juicy. You can also reheat them on the grill for a nice char. Maintaining Flavor and Texture To maintain the flavor, add a splash of water or broth while reheating. Cover the skewers with foil to keep moisture in. This prevents the chicken from drying out and keeps it tasty. How Long Can They Last? When stored properly, cooked lemon basil chicken skewers can last for about four days in the fridge. If frozen, they can last up to three months without losing quality. Signs of Spoilage Always check for signs of spoilage. If the chicken smells off or has a slimy texture, it's best to toss it. Color change can also indicate spoilage. Trust your senses; when in doubt, throw it out. If you want to swap chicken, many tasty options exist. You can use: - Turkey breast: It has a mild flavor like chicken. - Tofu: Great for a plant-based option. - Shrimp: Cooks fast and absorbs flavors well. - Pork tenderloin: Offers a different texture and taste. Each of these options works well with the lemon and basil marinade. Adjust cooking times based on the protein you choose. Yes! Preparing the marinade ahead saves time. Here are some tips: - Mix all marinade ingredients in a bowl. - Store it in a sealed container in the fridge for up to 2 days. - When ready, add your chicken and let it soak up those flavors. Make sure to mix well before using. This keeps the flavors fresh and vibrant. To make sure your chicken is safe to eat, use a meat thermometer. Here’s how: - Insert the thermometer into the thickest part of the chicken. - Look for a temperature of 165°F. This means it’s fully cooked. - If you don't have a thermometer, cut a piece open. The meat should be white, not pink. Using a thermometer helps you avoid undercooked chicken, keeping your meal safe and tasty. You now know how to make delicious grilled chicken skewers. Start with fresh chicken, herbs, and a tasty marinade. Marinade time is key for flavor. Grilling tips help you serve juicy chicken every time. You can try different add-ins or sauces for variety. Store leftovers properly to keep them fresh. This recipe is simple yet satisfying, perfect for meals anytime. Enjoy creating your perfect skewers!](https://goldendishy.com/wp-content/uploads/2025/06/c554147d-c949-48f7-8e40-7e32e563b89e-768x768.webp)