Gingerbread Crinkle Cookies Festive and Flavorful Treat

Looking to add some festive cheer to your baking? Gingerbread Crinkle Cookies are the perfect treat! These cookies boast a soft, chewy center with a delightful crinkle and a burst of warm spices. Follow my simple recipe to whip up this flavorful holiday delight. Whether for a party or cozy nights at home, these cookies will warm your heart and impress your guests. Let’s dive into the delicious world of Gingerbread Crinkle Cookies!
Why I Love This Recipe
- Flavorful Spices: The combination of ginger, cinnamon, and cloves creates a warm, cozy flavor that is perfect for the holiday season.
- Easy to Make: With simple steps and common ingredients, these cookies are approachable for bakers of all skill levels.
- Fun Crinkle Effect: The powdered sugar coating gives these cookies their signature crinkly look, making them visually appealing and festive.
- Perfect for Sharing: These cookies are great for holiday gatherings and make a wonderful gift for friends and family.
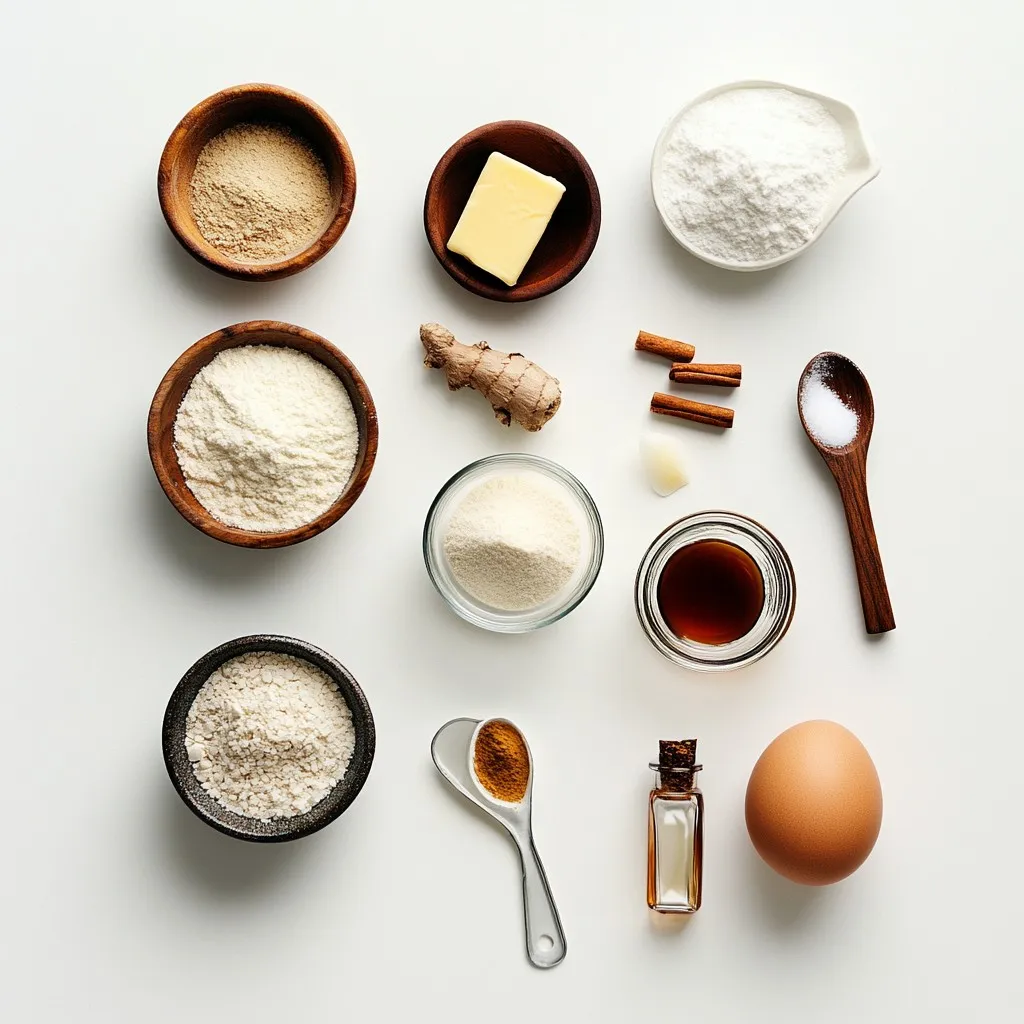
Ingredients
Dry Ingredients
– 2 ½ cups all-purpose flour
– 2 teaspoons baking soda
– 1 tablespoon ground ginger
– 1 tablespoon ground cinnamon
– ½ teaspoon ground nutmeg
– ½ teaspoon ground cloves
– ¼ teaspoon salt
Wet Ingredients
– ½ cup unsalted butter
– 1 cup brown sugar
– 1 large egg
– ¼ cup molasses
– 1 teaspoon vanilla extract
Coating
– ½ cup powdered sugar
Let’s talk about the ingredients. First, the dry ingredients create the base for our cookies. The flour gives structure. Baking soda makes them rise. The spices add warmth and comfort. You can smell the ginger and cinnamon as you mix.
Next, we have our wet ingredients. Butter makes the cookies rich. Brown sugar adds sweetness and moisture. The egg binds everything together. Molasses brings a deep flavor, while vanilla adds a lovely aroma.
Finally, we coat the cookies in powdered sugar. This step is key! It gives the cookies their signature crinkle look. The sugar also adds a sweet crunch that contrasts the soft center.
Each ingredient plays its part in creating the perfect Gingerbread Crinkle Cookie. You will taste the care in every bite!

Step-by-Step Instructions
Preparing the Oven and Baking Sheet
– Preheat the oven to 350°F (175°C).
– Line a baking sheet with parchment paper.
Mixing the Dry Ingredients
– In a bowl, combine 2 ½ cups of all-purpose flour, 2 teaspoons of baking soda, and spices:
– 1 tablespoon of ground ginger
– 1 tablespoon of ground cinnamon
– ½ teaspoon of ground nutmeg
– ½ teaspoon of ground cloves
– ¼ teaspoon of salt.
– Whisk them together until blended. Set this mixture aside.
Creaming Butter and Sugar
– In a large bowl, cream ½ cup of softened unsalted butter with 1 cup of brown sugar.
– Beat it until fluffy, about 2-3 minutes.
– Add 1 large egg, ¼ cup of molasses, and 1 teaspoon of vanilla extract.
– Mix on low speed until smooth.
Combining Wet and Dry Ingredients
– Gradually add the dry mixture to the wet mixture.
– Mix on low speed just until combined.
– It’s okay if a few flour streaks remain.
Chilling and Shaping the Dough
– Cover the dough with plastic wrap. Chill it in the fridge for 30 minutes.
– After chilling, scoop portions of the dough using a tablespoon.
– Roll each portion into a ball and coat it in ½ cup of powdered sugar.
Baking the Cookies
– Place the sugar-coated dough balls on the prepared baking sheet, spacing them 2 inches apart.
– Bake in the preheated oven for 10-12 minutes.
– The edges should look set, and the tops will have a crinkly texture.
– After baking, let the cookies cool on the baking sheet for 5 minutes.
– Gently transfer them to a wire rack to cool completely.
Tips & Tricks
Achieving the Perfect Crinkle
The key to those lovely crinkles lies in the powdered sugar. Roll each dough ball well, coating it generously. This sugar helps create that classic crinkle effect during baking. Avoid overmixing your dough. Mix just until combined. A few flour streaks are fine. Overmixing can change the cookie’s texture and ruin the crinkle.
Baking Tips
To check for doneness, look for set edges. The tops should have a crinkled look. If they look too soft, bake a minute longer. For even baking, space the dough balls about two inches apart. This helps the cookies spread without merging. Using parchment paper also aids in even browning.
Presentation Ideas
Serve your cookies on a festive platter. Dust them with extra powdered sugar for a snowy effect. This adds to their charm and makes them look special. Pair these cookies with hot cocoa or spiced tea. The warm drinks enhance the cozy feeling of the season. Enjoy these delightful treats with family and friends!
Pro Tips
- Chill the Dough: Chilling the dough for at least 30 minutes is essential for achieving the perfect texture and preventing the cookies from spreading too much while baking.
- Use Fresh Spices: For the best flavor, ensure your spices are fresh. Ground spices lose their potency over time, so consider using whole spices and grinding them yourself if possible.
- Don’t Overbake: Keep an eye on the cookies as they bake; they should be soft in the center and just set around the edges. Overbaking can result in dry cookies.
- Extra Powdered Sugar: For an extra festive touch, roll the cookies in powdered sugar again after they have cooled for a beautiful snow-like effect.

Variations
Different Spice Combinations
You can change the spice mix to make new flavors. Try using cardamom or allspice for a unique taste. Adding citrus zest, like orange or lemon, gives a fresh twist. This bright flavor contrasts well with the warm spices.
Additional Mix-ins
Want to make these cookies even more fun? Toss in chocolate chips for a sweet bite. Chopped nuts add a nice crunch, while dried fruit brings a chewy texture. Each mix-in creates a new cookie experience.
Gluten-Free Options
If you need gluten-free cookies, you can swap the flour. Use almond flour or a gluten-free flour blend. Make sure to check the blend has xantham gum for the right texture. These swaps keep the cookies tasty and enjoyable for everyone.
Storage Info
Cooling and Storing
To keep your Gingerbread Crinkle Cookies fresh, let them cool completely. Once cooled, store them in an airtight container. This keeps them soft and tasty. You can stack them in layers with parchment paper in between. This method prevents sticking. The cookies stay fresh for about a week at room temperature. For longer storage, keep them in the fridge. Just remember to seal them well.
The best containers for cookies are glass or plastic. Choose a container with a tight lid. This helps keep moisture out. If you have a cookie jar, that works too! Just make sure it seals well.
Freezing Instructions
You can freeze the cookie dough or the baked cookies. To freeze the dough, scoop it into balls. Place the balls on a baking sheet and freeze them for about two hours. After they are firm, transfer them to a freezer bag. Label the bag with the date and type of cookie. The dough lasts up to three months in the freezer.
To freeze baked cookies, let them cool completely. Then, stack them with parchment paper in between. Place them in a freezer-safe container. They can stay in the freezer for three months as well.
When you want to enjoy cookies, thaw dough or cookies in the fridge overnight. If you need them fast, let the cookies sit at room temperature for about an hour. For baked cookies, you can also reheat them. Just pop them in a 300°F (150°C) oven for a few minutes. Enjoy them warm!
FAQs
What makes Gingerbread Crinkle Cookies different from regular gingerbread cookies?
Gingerbread Crinkle Cookies stand out because of their unique texture. They have a soft, chewy center, with a crinkled surface. This crinkling happens when you roll the dough in powdered sugar. The sugar crust creates a delightful contrast to the soft cookie inside. It gives each bite a burst of sweetness that pairs perfectly with the warm spices. These cookies feel festive and fun, making them a great treat.
Can I use molasses alternatives?
Yes, you can use substitutes for molasses. Some good options include:
– Honey
– Maple syrup
– Dark corn syrup
These alternatives may change the flavor slightly. Honey adds a floral note, while maple syrup gives a touch of woodiness. Always choose a thick liquid for the best results. Use the same amount as the recipe calls for molasses.
How do I prevent the cookies from spreading too much?
To keep your cookies from spreading too much, follow these tips:
– Chill the dough for 30 minutes. This firms up the butter.
– Space the dough balls at least 2 inches apart on the baking sheet.
– Use a preheated oven set at 350°F (175°C).
These steps help the cookies hold their shape. Avoid overmixing the dough, as this can create excess warmth and lead to spreading.
We covered how to make gingerbread crinkle cookies, from ingredients to baking tips. You learned about the perfect spice blend, the right mixing method, and how to store your cookies. Don’t forget the fun variations you can try. These tips will help you enjoy baking while creating delicious treats. Follow these steps, and make your kitchen smell wonderful. Happy bakin

Gingerbread Crinkle Cookies
Ingredients
- 2.5 cups all-purpose flour
- 2 teaspoons baking soda
- 1 tablespoon ground ginger
- 1 tablespoon ground cinnamon
- 0.5 teaspoon ground nutmeg
- 0.5 teaspoon ground cloves
- 0.25 teaspoon salt
- 0.5 cup unsalted butter, softened to room temperature
- 1 cup brown sugar, tightly packed
- 1 large egg, at room temperature
- 0.25 cup molasses
- 1 teaspoon vanilla extract
- 0.5 cup powdered sugar (for rolling the cookies)
Instructions
- Begin by preheating your oven to 350°F (175°C). Prepare a baking sheet by lining it with parchment paper for easy cleanup.
- In a medium-sized bowl, combine the all-purpose flour, baking soda, ground ginger, ground cinnamon, ground nutmeg, ground cloves, and salt. Whisk them together until well blended, then set this mixture aside.
- In a large mixing bowl, using an electric mixer, cream the softened butter and brown sugar on medium speed until the mixture is light and fluffy, taking about 2-3 minutes.
- Add the large egg, molasses, and vanilla extract to the creamed mixture. Beat on low speed until all the ingredients are well incorporated and the mixture is smooth.
- Gradually add the dry ingredient mixture to the wet ingredients, mixing on low speed just until combined. Be careful not to overmix; a few flour streaks are okay.
- Cover the dough with plastic wrap and chill in the refrigerator for about 30 minutes. This step helps firm up the dough, making it easier to handle.
- Once chilled, use a tablespoon to scoop portions of the dough and roll them into balls between your palms.
- Generously roll each ball in powdered sugar until well-coated. This step is crucial for achieving the signature crinkle effect.
- Arrange the sugar-coated dough balls on your prepared baking sheet, ensuring to space them about 2 inches apart for even baking.
- Bake in the preheated oven for 10-12 minutes, or until the edges appear set and the tops have created a delightful crinkly texture.
- After baking, allow the cookies to cool on the baking sheet for 5 minutes. Then gently transfer them to a wire rack to cool completely.


![- 1 ½ cups graham cracker crumbs - ½ cup unsalted butter, melted - 2 tablespoons granulated sugar - 16 oz cream cheese, softened to room temperature - 1 cup granulated sugar - 3 large eggs, at room temperature - 1 teaspoon pure vanilla extract - 2 tablespoons fresh lemon zest - ½ cup freshly squeezed lemon juice - 1 cup fresh blueberries - Powdered sugar for dusting (optional) The key to great Lemon Blueberry Cheesecake Bars lies in using fresh, high-quality ingredients. The combination of cream cheese and lemon creates a creamy texture with a bright flavor. The blueberries add bursts of sweetness and color. - If you need a gluten-free option, try almond flour or gluten-free cookies for the crust. - For a vegan version, you can use plant-based cream cheese. Look for brands that offer a similar taste. - If you want to cut sugar, use coconut sugar or a sugar substitute like stevia. These substitutions help you customize the recipe to fit your needs while keeping it delicious. For the full recipe, check the detailed instructions above. 1. First, preheat your oven to 350°F (175°C). This step is key for even baking. 2. Next, prepare an 8x8 inch baking pan. Line it with parchment paper. Let the paper hang over the sides. This helps when lifting the bars out later. 3. In a medium mixing bowl, combine 1 ½ cups of graham cracker crumbs, ½ cup melted unsalted butter, and 2 tablespoons of granulated sugar. Mix until it looks like damp sand. 4. Press this mixture firmly into the bottom of the pan. This forms your crust. Bake it for 8-10 minutes until it turns lightly golden. Remove it from the oven and let it cool slightly. 1. In a large bowl, use an electric mixer to beat 16 oz of softened cream cheese with 1 cup of granulated sugar. Mix until it is smooth and creamy. This should take about 2-3 minutes. 2. Add 3 large eggs, one at a time. Mix on low speed after each egg. Avoid overmixing to keep air bubbles out. 3. Now, stir in 1 teaspoon of vanilla extract, 2 tablespoons of fresh lemon zest, and ½ cup of freshly squeezed lemon juice. Make sure everything blends well. 4. Gently fold in 1 cup of fresh blueberries with a spatula. Be careful not to crush them; you want them whole in the bars. 1. Pour the cheesecake mixture over the cooled crust in the pan. Spread it evenly using a spatula. 2. Bake the mixture in the preheated oven for 25-30 minutes. The center should look set but still jiggle slightly. It will firm up more as it cools. 3. Once baked, take the pan out and let it cool to room temperature. After it cools, refrigerate for at least 4 hours. For best results, leave it overnight. 4. When you’re ready to serve, lift the cheesecake out of the pan using the parchment paper. Cut into squares and enjoy! You can dust the tops with powdered sugar for a nice touch. For the full recipe and more details, check out the [Full Recipe]. Avoiding cracks in the cheesecake To prevent cracks, do not overmix the batter. Overmixing adds air, which can create bubbles. Also, use room temperature ingredients. Cold cream cheese can make lumps. Bake the bars at a lower temperature for a longer time. A water bath can help keep the heat even. Achieving the perfect texture For a creamy texture, blend the cream cheese until smooth. Mix in the eggs one at a time. This keeps the batter light and fluffy. Do not rush this step. After baking, let the bars cool slowly to room temp. Chill them in the fridge for at least four hours. Creative ways to present the bars Cut the bars into squares and place them on a nice plate. You can garnish with fresh blueberries and lemon slices for color. A drizzle of lemon glaze adds shine and flavor. Serve them with a dollop of whipped cream for extra flair. Complementary toppings and sides Top each bar with a sprinkle of powdered sugar for sweetness. A scoop of vanilla ice cream pairs well, too. You can also serve with a side of lemon curd for a zesty punch. Fresh mint leaves add a pop of color and freshness. Fixing undercooked bars If the bars are too soft, return them to the oven. Bake for an additional 5-10 minutes. The center should have a slight jiggle but not be runny. Make sure to let them cool before checking the texture. Preventing overbaking Keep an eye on your bars as they bake. If the edges start to brown too much, cover them with foil. Use a toothpick to check doneness. It should come out mostly clean but with a bit of moist filling clinging to it. {{image_4}} You can mix up the flavors in your cheesecake bars easily. Swap blueberries for other berries like raspberries or strawberries. You can even use a mix of berries for a fun twist. If you love chocolate, add some chocolate chips. This makes the bars sweeter and richer. If you need gluten-free options, use gluten-free graham crackers for the crust. They work just as well and taste great. For those on a dairy-free diet, try using vegan cream cheese. It gives you a similar creamy texture without the dairy. Change the fruits based on what’s in season. In summer, use fresh peaches or cherries for a juicy taste. In the fall, think about adding pumpkin or apple flavors. You can also dress up the bars for holidays. Try adding whipped cream or holiday-themed sprinkles for fun. These variations let you enjoy lemon blueberry cheesecake bars in new ways. Don't forget to check out the Full Recipe for more details! To store leftover Lemon Blueberry Cheesecake Bars, place them in an airtight container. This keeps them fresh and tasty. You can also cover them with plastic wrap. Store them in the fridge for up to five days. For the best flavor, eat them within the first two days. You can freeze these cheesecake bars for longer storage. First, cut them into squares. Wrap each square in plastic wrap, then place them in a freezer-safe bag. They will last about three months in the freezer. When you're ready to enjoy them, take out the bars and place them in the fridge overnight to thaw. You can also let them sit at room temperature for about 30 minutes before serving. If you plan to serve these bars at a gathering, make them a day ahead. This allows the flavors to blend nicely. To keep the bars fresh, store them in the fridge until you're ready to serve. For a beautiful touch, dust the tops with powdered sugar just before serving. This keeps the bars looking fresh and inviting even a day later. For the full recipe, check out the Lemon Blueberry Cheesecake Bars section. Lemon Blueberry Cheesecake Bars are a creamy and tangy dessert. They combine smooth cheesecake with fresh blueberries and zesty lemon. The base is a crispy graham cracker crust that adds crunch. These bars are easy to slice and serve, making them perfect for gatherings. You can enjoy them chilled, which enhances the flavors. Each bite is a delightful mix of sweet and tart. Yes, you can make these bars ahead of time. They taste even better when chilled overnight. Prepare the bars and let them cool to room temperature. Place them in the fridge for at least four hours. If you want to make them days in advance, store them in an airtight container. Just remember to cut them into squares before serving. This way, you save time on the day of your event. You can tell when cheesecake bars are done by looking for a few signs. The edges should be set, while the center may jiggle slightly. This jiggle means they will firm up as they cool. Another sign is a light golden color around the edges. If you see cracks forming, they may be overbaked. Keep an eye on them during the last few minutes of baking. Yes, there are several substitutes for eggs in this recipe. You can use unsweetened applesauce; a quarter cup replaces one egg. Another option is silken tofu, blended until smooth. Use about one quarter cup for each egg needed. You can also try using flaxseed meal mixed with water. One tablespoon of flaxseed meal mixed with three tablespoons of water equals one egg. These alternatives keep your cheesecake rich and creamy. In this blog post, we covered how to create delicious lemon blueberry cheesecake bars. We started with the ingredients, explored substitutions, and shared step-by-step instructions. Tips for serving, variations, and storage were also discussed. These tips help ensure your cheesecake turns out perfectly every time. Remember, baking is fun, and experimenting with flavors leads to great treats. Enjoy your baking journey and share your creations with friends and family!](https://goldendishy.com/wp-content/uploads/2025/07/2e10f80d-a440-4f9c-b53b-c6e4b2946195-768x768.webp)


