Garlic Parmesan Roasted Cauliflower Flavor Boost Recipe

Are you ready to take your side dishes to the next level? This Garlic Parmesan Roasted Cauliflower recipe packs bold flavor and charm. You just need a few simple ingredients to turn this veggie into a star on your plate. It’s easy, tasty, and perfect for any meal. Let’s dive into this delicious way to enjoy cauliflower that brings warmth to your table!
Why I Love This Recipe
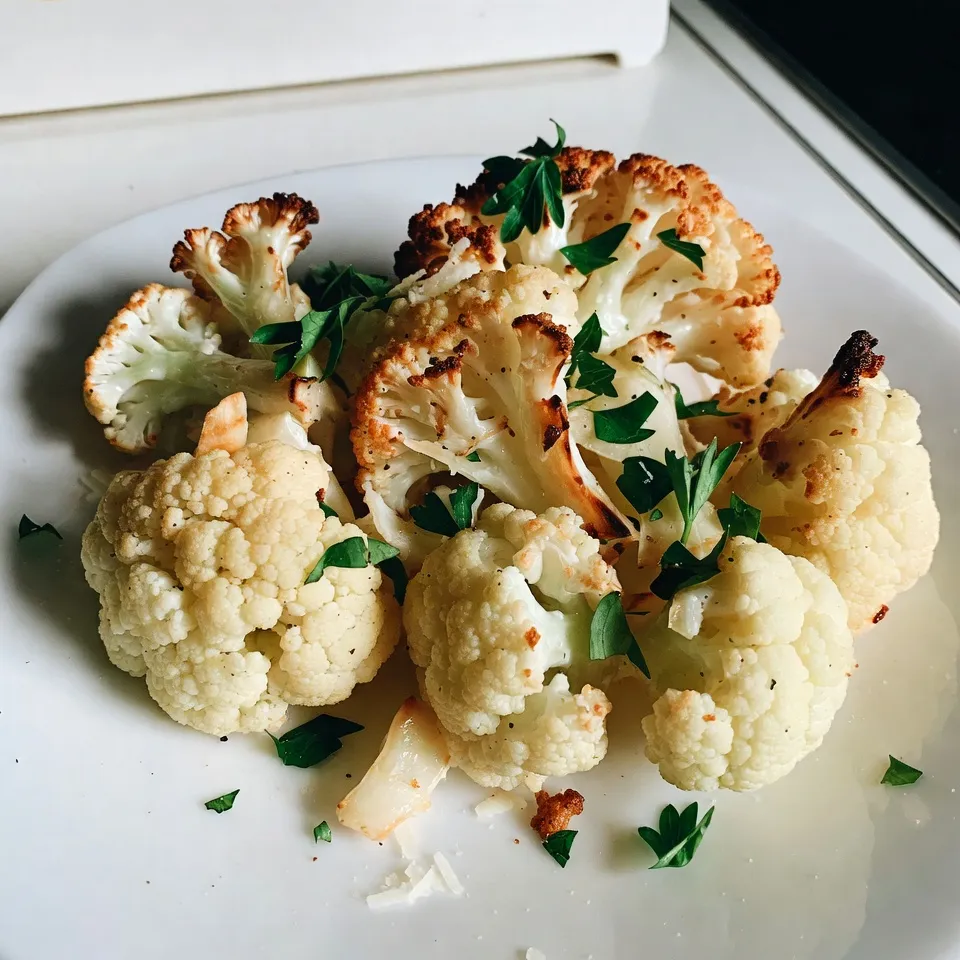
- Delicious Flavor Combination: The rich garlic and savory Parmesan meld beautifully with the roasted cauliflower, creating a mouthwatering dish that excites the taste buds.
- Healthy Yet Satisfying: This recipe transforms cauliflower into a nutritious side dish that’s both filling and guilt-free, making it perfect for any meal.
- Easy Preparation: With minimal chopping and quick assembly, this recipe is simple enough for weeknight dinners yet impressive enough for entertaining guests.
- Versatile Serving Options: Whether as a side dish, a snack, or a salad topper, this roasted cauliflower adapts to any occasion and pairs well with a variety of main dishes.
Ingredients
Main Ingredients
– 1 large head of cauliflower
– 4 cloves of fresh garlic
– 1/4 cup finely grated Parmesan cheese
Seasoning and Oils
– 3 tablespoons extra virgin olive oil
– 1 teaspoon smoked paprika
– 1 teaspoon dried Italian herb blend
Garnish
– Sea salt
– Freshly cracked black pepper
– Fresh parsley
The main ingredients for Garlic Parmesan Roasted Cauliflower create a strong base of flavor. The cauliflower, with its hearty texture, absorbs the garlic’s rich taste. I love using fresh garlic because it brings a punch that dried garlic cannot match. The Parmesan adds a creamy, salty note that melts beautifully as it roasts.
The seasoning and oils enhance the dish even more. Extra virgin olive oil not only helps the cauliflower roast evenly but also adds healthy fats. Smoked paprika gives a subtle warmth and depth that makes each bite exciting. The Italian herb blend brings classic flavors that round out the dish perfectly.
Garnishing with sea salt and freshly cracked black pepper elevates the taste. Fresh parsley adds a bright touch and makes the dish visually appealing. Together, these ingredients create a side dish that is both simple and gourmet. You can feel the love in each bite!

Step-by-Step Instructions
Preheating and Preparation
– Preheat the oven to 425°F (220°C).
– Cut the cauliflower into bite-sized florets.
Start by making sure your oven is hot. This helps the cauliflower roast well. Next, grab your cauliflower. Cut it into small pieces. These bite-sized florets will cook evenly and get crispy.
Mixing Ingredients
– Combine cauliflower, garlic, olive oil, and seasonings in a bowl.
In a large bowl, add the florets. Throw in minced garlic, olive oil, smoked paprika, and dried herbs. Use your hands or a spatula to mix. Make sure every piece is covered well. This step adds great flavor to your cauliflower.
Roasting in the Oven
– Spread on a baking sheet in a single layer.
– Roast for 25-30 minutes, stirring halfway.
Line a baking sheet with parchment paper. Spread the seasoned cauliflower in one layer. This allows it to roast nicely. Place it in the oven. Roast for 25 to 30 minutes. Halfway through, stir the florets. This helps them brown and become tender. You want them golden and crisp at the edges.
Once done, remove the baking sheet. The smell will be amazing!
Tips & Tricks
Achieving Perfect Roasting
To get the best roasted cauliflower, spread the florets out evenly on the baking sheet. This helps each piece cook well. Stir the florets halfway through the cooking time. This step ensures that all sides brown nicely and become crispy.
Enhancing Flavor
For a fresh twist, add lemon zest. It brings out the flavors and makes the dish brighter. You can also try different cheeses. Asiago or Pecorino can add a unique taste that complements the garlic and cauliflower.
Serving Suggestions
Presentation matters! Serve your roasted cauliflower in a stylish bowl. This makes it more appealing. Before serving, drizzle a little olive oil over the top. It adds flavor and gives a nice shine to the dish.
Pro Tips
- Choose Fresh Cauliflower: Always select a cauliflower head that is firm and free from blemishes for the best flavor and texture.
- Customize Seasonings: Feel free to experiment with different spices such as cumin or curry powder to give your roasted cauliflower a unique twist.
- Serve Immediately: Roasted vegetables are best enjoyed fresh from the oven when they are still warm and crispy.
- Store Properly: If you have leftovers, store them in an airtight container in the refrigerator and reheat them at a low temperature to retain their texture.

Variations
Flavor Variations
You can easily change the flavor of your roasted cauliflower.
– Add crushed red pepper flakes for heat. This gives it a nice spicy kick.
– Substitute garlic powder for fresh garlic. This makes prep quicker and still tasty.
Dietary Adjustments
You can make this dish fit your diet needs.
– Make it vegan by using nutritional yeast instead of Parmesan. It still gives a cheesy flavor.
– Verify that all ingredients are gluten-free. This is key for those with gluten issues.
Additional Ingredients
Want to make it even better? Try these additions.
– Incorporate roasted nuts for crunch. Almonds or walnuts work great.
– Add in other vegetables like Brussels sprouts or broccoli. This makes the dish colorful and diverse.
Feel free to mix and match these ideas. Your roasted cauliflower will be unique and delicious!
Storage Info
Storing Leftovers
After enjoying your Garlic Parmesan Roasted Cauliflower, let it cool down first. This step is key. Once cool, place it in an airtight container. This keeps your leftovers fresh and tasty.
Reheating Instructions
When you want to enjoy the cauliflower again, I recommend using the oven. Preheat the oven to 350°F (175°C) and place the cauliflower on a baking sheet. Heat for about 10-15 minutes for the best texture. If you’re in a hurry, you can use the microwave. Just heat for 1-2 minutes, but know it won’t be as crispy.
Shelf Life
You can keep your roasted cauliflower for about 3-5 days in the fridge. For the best taste and texture, try to eat it within those days. Enjoy the flavors while they last!
FAQs
How do I make Garlic Parmesan Roasted Cauliflower vegan?
To make Garlic Parmesan Roasted Cauliflower vegan, simply substitute the Parmesan cheese with nutritional yeast. Nutritional yeast has a cheesy flavor and works well in many dishes. It adds a nice depth to your cauliflower without using dairy.
Can I use frozen cauliflower?
Yes, you can use frozen cauliflower for this recipe. Just remember to adjust the roasting time. Frozen cauliflower may take a little longer to roast. Keep an eye on it and make sure it gets hot and crispy.
What can I serve with Garlic Parmesan Roasted Cauliflower?
Garlic Parmesan Roasted Cauliflower pairs well with grilled meats, making it a great side dish. You can also serve it alongside pasta dishes for a tasty meal. It adds a nice crunch and flavor to any plate.
This blog post detailed how to make Garlic Parmesan Roasted Cauliflower. We covered ingredients like fresh garlic, olive oil, and Parmesan cheese. Next, I shared a step-by-step guide for roasting and seasoning. You learned helpful tips for perfecting the dish and ways to add your own twist.
In conclusion, this tasty side will impress anyone. Try different cheeses or veggies to make it your own. Enjoy a healthy treat that fits any mea

Garlic Parmesan Roasted Cauliflower
Ingredients
- 1 large head cauliflower, cut into bite-sized florets
- 4 cloves fresh garlic, minced
- 1/4 cup finely grated Parmesan cheese
- 3 tablespoons extra virgin olive oil
- 1 teaspoon smoked paprika
- 1 teaspoon dried Italian herb blend
- to taste sea salt
- to taste freshly cracked black pepper
- to garnish fresh parsley, chopped
Instructions
- Begin by preheating your oven to 425°F (220°C) to ensure it reaches the perfect roasting temperature.
- In a large mixing bowl, combine the cauliflower florets, minced garlic, olive oil, smoked paprika, dried Italian herbs, sea salt, and freshly cracked black pepper. Use your hands or a spatula to toss the ingredients thoroughly until every floret is well-coated with the mixture.
- Line a baking sheet with parchment paper for easy cleanup, then spread the seasoned cauliflower in a single layer to ensure even roasting.
- Place the baking sheet in the preheated oven and roast the cauliflower for 25-30 minutes. Be sure to stir the florets halfway through the cooking time to promote even browning and tenderness; you want the edges to be golden and crisp.
- Once the cauliflower is perfectly roasted, remove it from the oven and immediately sprinkle the finely grated Parmesan cheese over the hot cauliflower, allowing it to melt into the nooks and crannies.
- Pop the baking sheet back in the oven for an additional 5 minutes, just until the cheese has melted and forms a slightly crispy, golden layer atop the cauliflower.
- After the final roasting, take the baking sheet out and garnish the dish generously with freshly chopped parsley for a pop of color and freshness before serving.


![For a delightful Easy Cucumber Slaw, you need simple, fresh ingredients. Here’s what you will gather: - Cucumbers - Carrot - Red bell pepper - Green onions - Fresh cilantro - Dressing components: - Rice vinegar - Honey or maple syrup - Sesame oil - Soy sauce - Seasoning: - Salt - Pepper - Sesame seeds This vibrant mix of veggies adds color and crunch. The dressing ties everything together with its sweet and tangy flavor. Each ingredient plays a role in making this slaw both refreshing and satisfying. You can find the full recipe for preparation details. Enjoy making this easy side dish that complements any meal! To start, gather your fresh veggies. You need 2 large cucumbers, 1 medium carrot, 1 red bell pepper, and 3 green onions. First, slice the cucumbers into thin rounds. Next, julienne the carrot into thin strips. Then, slice the red bell pepper into strips. Finally, chop the green onions into small pieces. Place all the veggies in a large mixing bowl. Next, let’s make the dressing. In a small bowl, combine 1/4 cup of rice vinegar, 1 tablespoon of honey or maple syrup, 1 tablespoon of sesame oil, and 1 teaspoon of soy sauce. Whisk this mixture until it is smooth and well combined. This dressing will add a delightful flavor to your slaw. Now it’s time to put everything together. Pour the dressing over the mixed vegetables in the large bowl. Toss gently to coat all the veggies evenly. Add 1/4 cup of freshly chopped cilantro and season with salt and freshly cracked pepper to taste. Mix it all again with gentle motions. Let the slaw sit for at least 10 minutes. This resting time helps the flavors blend nicely. Just before serving, sprinkle sesame seeds on top for extra crunch. Enjoy your Easy Cucumber Slaw! For the full recipe, please check the link. Letting the slaw sit is key. After you mix the veggies and dressing, rest it for at least 10 minutes. This time helps the flavors blend. The cucumbers soften just a bit, making every bite tasty. The longer you wait, the better the slaw tastes. You can even let it sit for up to 30 minutes if you want a stronger flavor. Presentation makes a big difference. Serve the slaw in a bright, shallow bowl. This way, the colors of the veggies shine. Add a few sprigs of cilantro on top. This adds extra green and freshness. You can also serve the slaw with a side of lime wedges. This gives guests a chance to add a zesty kick. Want to boost the taste? Consider adding lime juice. Just a squeeze before serving brightens the whole dish. You could also add sliced jalapeños for some heat. If you like crunch, try adding chopped nuts like peanuts or cashews. For a sweet twist, mix in some diced mango or pineapple. These small changes can make your Easy Cucumber Slaw unique and exciting. {{image_4}} You can mix in many other vegetables for added crunch and flavor. Try adding shredded cabbage for a nice texture. Radishes also bring a peppery bite that pairs well with cucumbers. You might enjoy diced tomatoes, which can add some juiciness. You can swap in green bell peppers for a milder taste. Even thinly sliced snap peas can add a fun pop! Feel free to experiment based on what you have at home. The dressing can change the whole vibe of the slaw. For a creamier option, mix in some Greek yogurt or mayo. You can also try a zesty citrus dressing with lime or lemon juice. If you want a spicy kick, add some chili paste or Sriracha. A sesame peanut dressing can give a rich, nutty flavor. By changing the dressings, you can create a new dish each time! If you're vegan, simply use maple syrup instead of honey. This slaw is already gluten-free if you choose gluten-free soy sauce. You can also leave out the soy sauce for a fresh taste. If you want a low-carb version, try using spiralized zucchini instead of cucumbers. These options make this slaw friendly for many diets, so everyone can enjoy it! To keep your Easy Cucumber Slaw fresh, store it in an airtight container. This keeps moisture out and prevents sogginess. If you have leftover slaw, ensure it cools to room temperature first. Once cooled, seal it tightly and place it in the fridge. I recommend eating it within three days for the best taste. For the best quality, consume the slaw within three days. After that, the cucumbers can become too soft. If you notice any signs of spoilage, like an off smell or sliminess, it’s best to throw it away. The quicker you eat it, the fresher it will taste. You don’t need to reheat cucumber slaw. It’s best enjoyed cold. If you want to freshen it up after storage, add a little more dressing or a splash of vinegar. This will revive the flavors and keep it crisp. Enjoy it straight from the fridge for a refreshing bite! For the full recipe, check out the [Full Recipe]. For the best slaw, I recommend using English cucumbers. They are long and slender, with thin skin and few seeds. Their taste is mild and crisp, which makes them perfect for salads. You can also use Persian cucumbers. They are smaller, crunchy, and sweet. Avoid regular garden cucumbers, as they can be bitter and watery. The right cucumber gives your slaw a fresh flavor. Yes, you can prep your cucumber slaw the night before. Just cut the cucumbers and other veggies, and store them in an airtight container. Keep the dressing separate until you are ready to serve. Mixing them right before serving keeps the veggies crisp and fresh. This way, you save time and still get great taste. Cucumber slaw can last about 2 to 3 days in the fridge. To keep it fresh, store it in an airtight container. As time passes, the cucumbers may release water. If that happens, just drain the excess liquid before serving. Always check for any off smells or changes before eating. Enjoy your slaw while it’s still at its best! This blog post covered the key ingredients and steps to make a fresh cucumber slaw. I shared tips for storage, serving, and variations that keep it tasty. Remember that resting the slaw boosts its flavor. Whether you use different veggies or dressings, make it your own. Storing leftovers properly helps maintain freshness. Enjoy your slaw as a side dish or snack. It’s easy, fun, and delicious! Happy cooking!](https://goldendishy.com/wp-content/uploads/2025/07/45f43f4c-bd14-4cdb-930e-3d5f55452c18-768x768.webp)


![To make Cheesy Ranch Potatoes, you will need a few simple items. Gather these ingredients before you start cooking: - 2 pounds baby potatoes, halved - 1 cup shredded sharp cheddar cheese - ½ cup creamy sour cream - 1 packet ranch dressing mix (about 1 ounce) - 3 tablespoons extra virgin olive oil - 1 teaspoon garlic powder - 1 teaspoon onion powder - Salt and freshly ground black pepper to taste - 2 green onions, finely sliced (for garnish) Each ingredient plays a key role in creating that cheesy, ranch-flavored goodness. The baby potatoes serve as the base, providing a tender texture. Sharp cheddar cheese adds a rich, creamy taste. Sour cream brings a tangy flavor, while the ranch dressing mix ties everything together with its herby notes. The garlic and onion powders enhance the overall taste, making every bite delicious. Don't forget the green onions; they add a fresh crunch on top! For the complete recipe, check out the [Full Recipe]. - Preheat the oven to 400°F (200°C). This makes sure your potatoes cook evenly. - In a large bowl, mix the olive oil, ranch dressing mix, garlic powder, onion powder, salt, and pepper. Stir until well combined. - Add the halved baby potatoes to the bowl. Toss them until every piece is coated in the ranch mixture. This step adds great flavor. - Line a baking sheet with parchment paper. This helps with easy cleanup. - Spread the coated potatoes on the lined baking sheet in a single layer. This helps them roast evenly. - Roast the potatoes for 25-30 minutes. They should turn golden brown and be tender when pierced. - Take the baking sheet out of the oven and sprinkle cheddar cheese over the hot potatoes. - Return the baking sheet to the oven for 5-7 minutes. Wait until the cheese melts and bubbles. - Drizzle sour cream over the cheesy potatoes and top with sliced green onions. This adds a fresh touch. Check out the Full Recipe for more details! To make Cheesy Ranch Potatoes, start by preheating your oven to 400°F (200°C). This helps the potatoes roast evenly. Spread the potatoes out on a lined baking sheet. This ensures they cook well and get crispy. Check for doneness by piercing them with a fork. They should be tender and golden brown. To boost flavor, try adding herbs like parsley or dill. You can also mix in spices like paprika or cayenne for a kick. If you want a different cheese, use mozzarella or pepper jack. Each type brings a unique taste and texture to the dish. For serving, use a colorful bowl to show off the cheesy ranch potatoes. Add a sprinkle of extra cheddar on top for flair. You can also place whole green onion tops around the edge for a fresh look. These simple steps make your dish appealing and ready for guests. For the full recipe, follow the steps provided in the earlier sections. Enjoy your cooking! {{image_4}} You can make Cheesy Ranch Potatoes even more fun with simple swaps. - Using different types of cheese: Try mozzarella for a milder taste or pepper jack for a kick. You can even mix cheeses for a rich flavor. - Substituting Greek yogurt for sour cream: Greek yogurt gives you a nice tang and adds protein. It’s a healthier option that keeps your potatoes creamy. Change the flavor to keep things exciting. - Spicy ranch version: Add a teaspoon of cayenne pepper to the ranch mix. This will give your potatoes a nice heat. - Herb-infused options: Mix in dried herbs like thyme or rosemary. This adds a fresh taste that pairs well with the cheese. Making Cheesy Ranch Potatoes work for everyone is easy! - Vegan adaptations: Swap the cheese for a vegan cheese and use coconut yogurt. This keeps all the creamy goodness without dairy. - Gluten-free adjustments: Use a gluten-free ranch mix. Most ranch mixes are gluten-free, but always check the labels. Feel free to explore these variations to make this dish your own! For the full recipe, check out Cheesy Ranch Potatoes Delight. To keep your cheesy ranch potatoes fresh, store them in the fridge. Place them in an airtight container. They will last about 3 to 5 days. Make sure they cool completely before sealing. For longer storage, you can freeze them. Put the cooled potatoes in a freezer-safe bag. They can last up to 2 months in the freezer. To reheat your potatoes, the best method is using an oven. Preheat the oven to 350°F (175°C). Spread the potatoes on a baking sheet. Heat them for about 15 to 20 minutes. This will help keep the texture crispy. You can also use a microwave. Place the potatoes in a microwave-safe dish. Heat them in short bursts of 1 minute. Stir in between to ensure even heating. To keep flavor and texture, avoid reheating them too long. If they dry out, add a little bit of sour cream or cheese on top. These tips will help you enjoy the cheesy ranch potatoes just as much as the first time. You can tell the potatoes are done by checking a few signs. First, they should be golden brown and crispy on the outside. Second, when you poke them with a fork, they should feel soft inside. If the fork slides in easily, your potatoes are ready to enjoy! Yes, you can prepare Cheesy Ranch Potatoes ahead of time! Start by following the recipe steps, but stop before roasting. Cover the potatoes and store them in the fridge for up to 24 hours. When you’re ready to bake, simply add extra time in the oven if they are cold. This way, you can enjoy them fresh without much fuss. These cheesy potatoes pair well with many dishes. Serve them alongside grilled chicken or steak for a filling meal. They also go great with a fresh salad or steamed veggies. For a fun twist, try them with barbecue or as a side for tacos. The options are endless, making it easy to create a delicious meal. For the complete cooking steps, check out the Cheesy Ranch Potatoes Delight 🥔. In this blog post, we covered how to make Cheesy Ranch Potatoes. We started with the ingredients, then walked through easy steps to prepare and roast them. I shared helpful tips, variations, and storage info to keep your dish fresh. These potatoes are a tasty side for any meal. You can customize them to fit your taste. Enjoy making this dish, and let it add flavor to your table!](https://goldendishy.com/wp-content/uploads/2025/06/4f138a04-3393-4361-b7e8-8b602e29b2ef-768x768.webp)