Are you ready for a tasty twist on a classic veggie? Garlic Parmesan Asparagus Fries are your new go-to snack! They’re crispy, flavorful, and easy to make. In this post, I’ll guide you through every step, from ingredient tips to creative serving ideas. You’ll also learn how to keep them crunchy and tasty. Let’s dive into this delicious recipe that will impress your family and friends!
Ingredients
List of Ingredients
– 1 bunch of fresh asparagus, trimmed (about 16-20 spears)
– 1 cup freshly grated Parmesan cheese
– 1/2 cup panko breadcrumbs
– 3 cloves garlic, finely minced
– 1 teaspoon garlic powder
– 1/2 teaspoon fine sea salt
– 1/4 teaspoon freshly ground black pepper
– 2 large eggs, lightly beaten
– 2 tablespoons extra virgin olive oil
– 1 tablespoon fresh parsley, finely chopped
Measurement and Quality Tips
For the best flavor, choose fresh asparagus that is bright green with firm stalks. Look for Parmesan cheese that you grate yourself. Pre-grated cheese often lacks the rich taste you want. When selecting panko breadcrumbs, ensure they are light and airy for that perfect crunch. It’s important to use fresh garlic for the best taste. Always measure your ingredients accurately for consistent results.
Nutritional Information
Each serving of Garlic Parmesan Asparagus Fries offers a tasty balance of nutrients. These fries are low in calories and high in vitamins A and C. They provide healthy fats from olive oil and protein from eggs and cheese. One serving typically contains around 200 calories, 10g of protein, and 15g of fat. This makes them a healthier alternative to regular fries. Enjoy them guilt-free as a snack or side dish!
Step-by-Step Instructions
Preparation Steps
To make Garlic Parmesan Asparagus Fries, start by gathering your ingredients. You will need fresh asparagus, Parmesan cheese, panko breadcrumbs, garlic, eggs, and olive oil. Next, preheat your oven to 425°F (220°C) and line a baking sheet with parchment paper for easy cleanup.
In a shallow bowl, mix the panko breadcrumbs, grated Parmesan cheese, minced garlic, garlic powder, sea salt, and black pepper. Stir well to combine all the flavors. In another bowl, beat the eggs until they are smooth and a bit frothy.
Now, take each asparagus spear and dip it in the egg mixture. Make sure to coat it well, but let any extra egg drip off. Then, roll the asparagus in the breadcrumb mix, pressing gently to ensure an even coat. Place the coated spears on your prepared baking sheet in a single layer.
Baking Instructions
Drizzle the olive oil over the asparagus. This helps them get that nice crispy texture as they bake. Place the baking sheet in your oven. Bake the asparagus fries for about 15 to 20 minutes. Keep checking until they are fork-tender and the coating is a beautiful golden brown.
Once done, take the baking sheet out of the oven. Let the fries cool for a few minutes. This step is important as it helps them crisp up even more.
Serving Suggestions
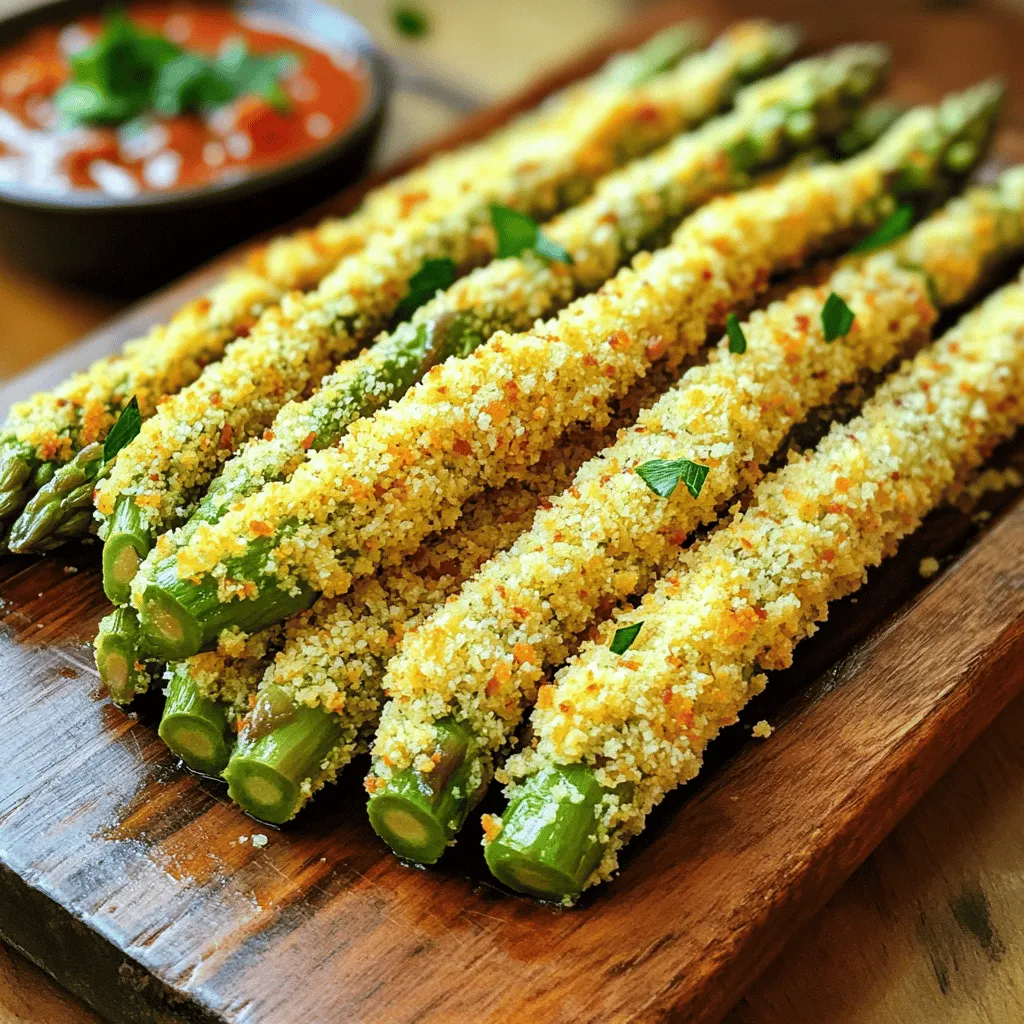
For a lovely presentation, serve your Garlic Parmesan Asparagus Fries on a long platter. Add a small bowl of marinara sauce or garlic aioli for dipping. This adds a tasty twist that everyone will love. Finally, sprinkle some fresh parsley on top for a touch of color and flavor.
Tips & Tricks
How to Ensure Perfect Crispiness
To get your Garlic Parmesan Asparagus Fries crispy, follow a few steps. First, use fresh asparagus. The fresher, the better! Next, coat each spear well with the egg and breadcrumb mixture. This helps the coating stick. Press the breadcrumbs onto the asparagus for a nice layer. Finally, drizzle olive oil over the fries. This adds flavor and aids crispiness.
Common Mistakes to Avoid
I’ve seen a few common mistakes in the kitchen. One is overcrowding the baking sheet. It causes steaming, making your fries soggy. Arrange the asparagus in a single layer. Another mistake is not preheating the oven. A hot oven ensures that the fries cook evenly. Lastly, don’t skip the panko breadcrumbs. They give the perfect crunch.
Creative Garnishing Ideas
Garnishing adds fun to your dish. Try these ideas to elevate your fries! First, sprinkle more parsley for color. You can also add lemon zest for a fresh taste. If you like heat, sprinkle some red pepper flakes on top. For a dip, serve marinara sauce or a creamy garlic aioli. These little touches make your Garlic Parmesan Asparagus Fries stand out.

Variations
Vegan Adaptations
You can easily make these fries vegan. Instead of eggs, use a flax egg. Mix one tablespoon of ground flaxseed with three tablespoons of water. Let it sit for a few minutes to thicken. This mixture works great to bind the panko and cheese. For cheese, try using a vegan Parmesan. It adds flavor without dairy. This way, everyone can enjoy these tasty fries!
Gluten-Free Options
To make Garlic Parmesan Asparagus Fries gluten-free, swap regular breadcrumbs for gluten-free panko. You can also use crushed nuts or almond flour. Both options give a nice crunch. Just ensure all your ingredients are gluten-free. This way, you can enjoy these fries without worry.
Flavor Tweaks
Want to spice things up? Add some cayenne pepper or chili flakes to the breadcrumb mixture. This gives your fries a nice kick. You can also mix in some dried herbs like oregano or thyme. Fresh herbs like rosemary can add an amazing flavor too. Feel free to experiment and find your favorite taste!
Storage Info
Refrigeration Tips
You can store leftover Garlic Parmesan Asparagus Fries in the fridge. Use an airtight container. They will stay fresh for up to three days. Make sure the fries are cool before sealing the container. This helps keep them crisp.
Reheating Instructions
To reheat, use an oven or air fryer. Preheat the oven to 350°F (175°C). Place the fries on a baking sheet. Heat for about 10 minutes. This keeps them crispy. Avoid using the microwave, as it makes them soggy.
Freezing Guidelines
You can freeze these fries for later use. First, let them cool completely. Then, place them in a freezer-safe bag. Remove as much air as possible. They can last for up to three months. When ready to eat, bake from frozen at 425°F (220°C) for 20-25 minutes. Enjoy the crunch just like fresh!
FAQs
How to make Garlic Parmesan Asparagus Fries?
To make Garlic Parmesan Asparagus Fries, you start by preheating your oven to 425°F (220°C). Next, line a baking sheet with parchment paper. This helps with easy cleanup. Combine panko breadcrumbs, grated Parmesan cheese, minced garlic, garlic powder, sea salt, and black pepper in a shallow bowl. Mix them well. In another bowl, beat two eggs until they look frothy. Dip each asparagus spear into the eggs, letting the excess drip off. Roll them in the breadcrumb mix, ensuring they are coated evenly. Place the spears on the baking sheet in one layer. Drizzle olive oil on top. Bake for 15-20 minutes until crispy and golden. Finally, sprinkle fresh parsley on top for a nice finish.
Can I use frozen asparagus for this recipe?
Yes, you can use frozen asparagus, but it may not be as crisp. Frozen asparagus tends to have more moisture. This can lead to soggy fries. If you use frozen asparagus, thaw and drain it well before coating. Pat it dry with a paper towel to remove excess water. This step helps keep the fries crispy when baked.
What can I substitute for Parmesan cheese?
If you need a substitute for Parmesan cheese, try nutritional yeast for a vegan option. It has a cheesy flavor and works well in this recipe. Grated Pecorino Romano offers a similar taste, though it is saltier. If you want a milder cheese, use grated mozzarella. Just remember, the flavor may change with these swaps, but they will still be tasty!
This guide covers all you need for perfect Garlic Parmesan Asparagus Fries. We explored key ingredients, measurements, and nutrition. I provided step-by-step instructions to help you bake and serve. Plus, we shared tips for crispiness, mistakes to watch for, and fun garnishing ideas.
In the end, try out variations like vegan or gluten-free. Proper storage can keep your fries fresh and tasty. With these insights, you can make delicious fries every time. Enjoy experimenting and sharing these yummy treats!


