Garlic Herb Mashed Cauliflower Creamy and Flavorful

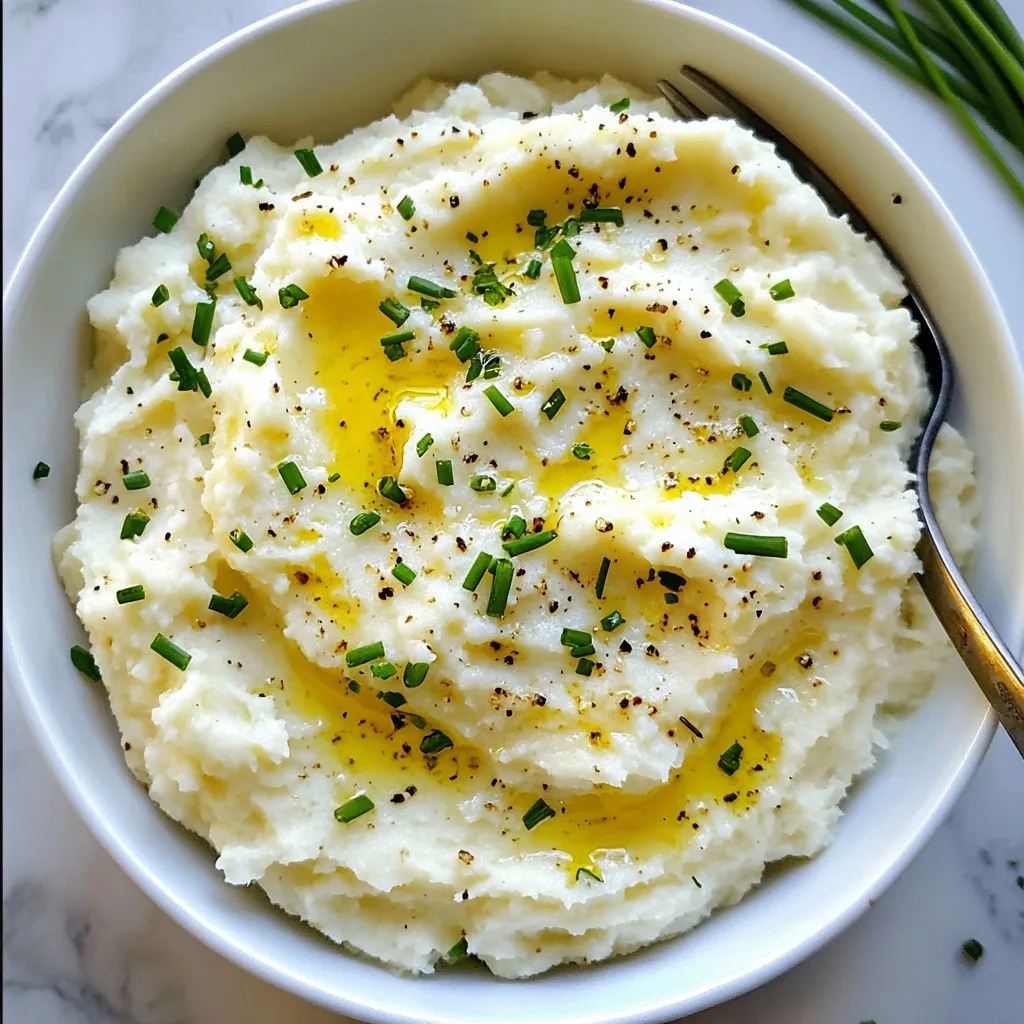
Looking for a tasty side dish that’s creamy and full of flavor? Garlic Herb Mashed Cauliflower might be your new favorite recipe! It’s a healthy twist on classic mashed potatoes, packed with garlic and herbs. Whether you’re a home chef or just starting out, I’ll guide you through each simple step. Let’s dive into making this scrumptious dish that will impress your family and friends!
Why I Love This Recipe
- Healthier Alternative: This garlic herb mashed cauliflower is a deliciously creamy substitute for traditional mashed potatoes, making it a great option for those looking to reduce carbs without sacrificing flavor.
- Flavor Packed: The combination of garlic and herbs adds a depth of flavor that elevates this dish, making it a standout side for any meal.
- Quick and Easy: With a prep time of just 10 minutes and a total time of 25 minutes, this recipe is perfect for busy weeknights when you want something tasty but don’t have a lot of time.
- Versatile Dish: This mashed cauliflower can be paired with a variety of main courses, from grilled meats to vegetarian dishes, making it a versatile addition to your meal rotation.
Ingredients
List of Required Ingredients
– 1 large head of cauliflower, cut into equal-sized florets
– 4 cloves of garlic, finely minced
– 3 tablespoons extra virgin olive oil
– 1/4 cup sour cream or Greek yogurt
– 1 teaspoon dried thyme
– 1 teaspoon dried rosemary
– Sea salt and freshly ground black pepper, to taste
– Fresh chives, finely chopped (for garnish)
To make garlic herb mashed cauliflower, you need fresh ingredients. The cauliflower should be firm. Look for bright, white florets. Garlic gives a rich flavor and aroma. Use extra virgin olive oil for a smooth taste.
Optional Ingredients for Customization
– Fresh herbs like parsley or basil
– A splash of lemon juice for brightness
– Grated cheese for extra creaminess
– Nutritional yeast for a cheesy flavor in vegan versions
You can tweak this recipe to fit your taste. Fresh herbs add a lovely touch. Lemon juice brightens the dish and balances flavors. Cheese or nutritional yeast brings more creaminess and depth.
Notes on Ingredient Quality
Always choose the best quality ingredients for great flavor. Fresh cauliflower tastes better than frozen. For olive oil, look for brands that use high-quality olives. Sour cream or yogurt should be rich and creamy. Good ingredients lead to a tasty dish.

Step-by-Step Instructions
Preparing the Cauliflower
Start by bringing a large pot of salted water to a boil. You want the water to be bubbling. Cut the cauliflower into equal-sized florets. This helps them cook evenly. Once the water is boiling, carefully add the cauliflower florets. Cook them for about 10 to 12 minutes. You want them to be fork-tender. This means a fork should easily go through them. After cooking, drain the cauliflower well. Make sure to get rid of all the water.
Sautéing the Garlic
While the cauliflower cooks, heat a small skillet over medium heat. Add three tablespoons of extra virgin olive oil. Let it warm up for a minute. Once hot, add four finely minced cloves of garlic. Sauté the garlic for about 2 to 3 minutes. It should become fragrant and lightly golden. Be careful not to let it burn. Burnt garlic can taste bitter and ruin your dish.
Mashing and Mixing
After draining the cauliflower, return it to the pot. Pour in the sautéed garlic and olive oil mix. Add a quarter cup of sour cream or Greek yogurt. You can choose based on your taste or dietary needs. Next, sprinkle in one teaspoon each of dried thyme and dried rosemary. Season with sea salt and freshly ground black pepper to taste. Now, it’s time to mash! Use a potato masher or an immersion blender. Mash until smooth and creamy. If you prefer a chunkier texture, mash less. Once you’ve reached your desired consistency, mix well to combine all the flavors. Finally, transfer the mashed cauliflower to a serving dish and garnish with finely chopped fresh chives. This adds a nice pop of color and flavor!
Tips & Tricks
Best Cooking Techniques
To make garlic herb mashed cauliflower, use a large pot for boiling. Start with salted water to enhance the flavor. Boil the cauliflower florets until they are fork-tender, about 10 to 12 minutes. This cooking time ensures they are soft and easy to mash. For the garlic, sauté it in olive oil over medium heat. This method brings out the garlic’s rich flavor without burning it.
How to Achieve the Perfect Texture
For a creamy texture, use a potato masher or an immersion blender. If you prefer it chunkier, mash gently. The key is to combine the sautéed garlic and olive oil with the hot cauliflower. Adding sour cream or Greek yogurt also helps create a smooth finish. Adjust the consistency by adding more or less of your creamy ingredient.
Common Mistakes to Avoid
One common mistake is overcooking the cauliflower. If you cook it too long, it can become mushy. Another mistake is not draining the cauliflower well after boiling. Excess water can make the mash watery instead of creamy. Lastly, be careful with the salt. Taste as you go to find the right balance. This ensures your garlic herb mashed cauliflower is full of flavor.
Pro Tips
- Choose the Right Cauliflower: Select a large head of cauliflower that is firm and free of blemishes for the best flavor and texture.
- Customize the Creaminess: Adjust the amount of sour cream or Greek yogurt to achieve your desired creaminess. For a lighter option, consider using low-fat yogurt.
- Experiment with Herbs: Feel free to mix in other fresh or dried herbs like parsley or oregano for added flavor and variation.
- Perfect Mash Technique: For a creamier consistency, use an immersion blender instead of a potato masher, but be careful not to over-blend to avoid a gluey texture.

Variations
Vegan Options
To make this dish vegan, swap the sour cream with a plant-based yogurt. Cashew cream is a great choice too. You can blend soaked cashews with water for a rich, creamy texture. This keeps the dish smooth and tasty while being dairy-free.
Flavor Add-Ins
Want more flavor? Try adding roasted garlic instead of sautéed garlic. Roasting brings out a sweet, mellow taste. You can also mix in some nutritional yeast for a cheesy flavor without dairy. A splash of lemon juice adds a bright kick. Fresh herbs like parsley or basil can also spice things up.
Serving Suggestions
Serve this creamy mash as a side dish with grilled chicken or fish. It also pairs well with vegetable dishes. Top with sautéed mushrooms or caramelized onions for extra depth. For a fun twist, use it as a filling for stuffed peppers or as a bed for your favorite protein.
Storage Info
How to Store Leftovers
After enjoying your garlic herb mashed cauliflower, store leftovers in an airtight container. Make sure the dish is cool before sealing. This will keep the freshness and flavor intact. Place the container in the fridge. It should last for about 3 to 4 days.
Reheating Instructions
To reheat, scoop the desired amount into a microwave-safe bowl. Add a splash of water or a drizzle of olive oil to keep it moist. Cover the bowl with a damp paper towel. Microwave for about 1 to 2 minutes, stirring halfway through. You can also reheat on the stove over low heat. Stir often to prevent sticking.
Freezing for Later Use
If you want to freeze your garlic herb mashed cauliflower, use a freezer-safe container. Leave some space at the top for expansion. It can be stored for about 2 to 3 months. When you’re ready to enjoy it again, thaw it in the fridge overnight. Reheat as mentioned above for the best texture.
FAQs
Is Garlic Herb Mashed Cauliflower Healthy?
Yes, garlic herb mashed cauliflower is healthy. Cauliflower is low in calories and packed with nutrients. It’s rich in fiber, vitamins, and minerals. Using olive oil and herbs adds flavor without many calories. Sour cream or Greek yogurt gives creaminess and protein. This dish is a great substitute for mashed potatoes.
Can I Use a Different Type of Cauliflower?
You can use different types of cauliflower, like purple or orange. Each type has its own flavor and color. Purple cauliflower looks nice on the plate. Orange cauliflower is a bit sweeter and rich in vitamin A. Feel free to mix different types for a fun twist.
How Do I Make It Without Dairy?
To make garlic herb mashed cauliflower dairy-free, swap sour cream with a dairy-free yogurt. You can also use coconut cream for a richer taste. Almond milk is another option to add creaminess. Just adjust the amount until you reach your desired texture. Enjoy your tasty, dairy-free dish!
To wrap up, we covered the core elements of garlic herb mashed cauliflower. We explored required and optional ingredients, emphasizing quality. The step-by-step instructions helped you prepare and mix the cauliflower just right. You learned tips for great texture and common mistakes to avoid. Variations like vegan options and serving ideas offer fun twists. Lastly, we discussed how to store leftovers properly. As you try this dish, remember: quality ingredients and techniques matter greatly. Enjoy your cookin

Garlic Herb Mashed Cauliflower
Ingredients
- 1 large head cauliflower, cut into equal-sized florets
- 4 cloves garlic, finely minced
- 3 tablespoons extra virgin olive oil
- 1/4 cup sour cream or Greek yogurt
- 1 teaspoon dried thyme
- 1 teaspoon dried rosemary
- to taste sea salt and freshly ground black pepper
- to taste fresh chives, finely chopped (for garnish)
Instructions
- In a large pot, bring salted water to a rolling boil. Carefully add the cauliflower florets and allow them to cook until they are fork-tender, which should take about 10-12 minutes.
- Meanwhile, in a small skillet, heat the extra virgin olive oil over medium heat. Once hot, add the minced garlic and sauté gently for approximately 2-3 minutes. Cook until fragrant and the garlic is lightly golden, taking care not to let it burn.
- When the cauliflower is tender, drain it thoroughly to remove excess water and return it to the pot.
- Pour in the sautéed garlic along with its olive oil, then add the sour cream (or Greek yogurt), dried thyme, and dried rosemary to the pot containing the hot cauliflower.
- Using a potato masher or an immersion blender, mash the cauliflower until you achieve a creamy, smooth texture. You can adjust the consistency according to your own preference—if you like it chunkier, mash gently!
- Season generously with sea salt and freshly ground black pepper, mixing well to combine all the flavors.
- Transfer the fluffy garlic herb mashed cauliflower to a serving dish. Finish with a sprinkle of chopped fresh chives on top for a vibrant garnish.


![To make a fresh Mediterranean quinoa salad, gather these key ingredients: - 1 cup quinoa, thoroughly rinsed - 2 cups vegetable broth (preferably low-sodium) - 1 bell pepper (either red or yellow), finely diced - 1 medium cucumber, diced into bite-sized pieces - 1 cup cherry tomatoes, halved - 1/4 of a medium red onion, finely chopped - 1/2 cup Kalamata olives, pitted and sliced - 1/2 cup feta cheese, crumbled - 1/4 cup fresh parsley, finely chopped - 1/4 cup extra virgin olive oil - 2 tablespoons freshly squeezed lemon juice - 1 teaspoon dried oregano - Sea salt and freshly cracked black pepper to taste These ingredients blend well together. Each one adds a unique flavor. The quinoa forms the base, while the vegetables add crunch and color. Kalamata olives give it a salty twist, and feta cheese adds creaminess. You can customize your salad with these optional add-ins: - Avocado for creaminess - Grilled chicken for protein - Chickpeas for extra fiber - Spinach or arugula for leafy greens - Sun-dried tomatoes for a tangy kick These add-ins can enhance the salad's taste and texture. Feel free to experiment with what you love! This salad is a healthy choice. It is packed with nutrients. Here’s a quick look at its benefits: - Quinoa: High in protein and fiber - Vegetables: Rich in vitamins and minerals - Olive oil: A source of healthy fats - Feta cheese: Adds calcium and flavor One serving provides a balanced mix of protein, healthy fats, and carbs. Eating this salad can support your health while satisfying your taste buds. For the full recipe, check out Mediterranean Quinoa Salad Delight! To start, rinse 1 cup of quinoa under cold water. This step removes the bitter coating. Next, combine the rinsed quinoa and 2 cups of vegetable broth in a medium saucepan. Bring this mixture to a rolling boil over medium-high heat. Once boiling, reduce the heat to a gentle simmer. Cover the saucepan and let it cook for about 15 minutes. The quinoa is ready when it absorbs all the liquid and becomes fluffy. After cooking, fluff it with a fork and transfer it to a large mixing bowl. Let it cool for a few minutes. While the quinoa cools, prepare the vegetables. Dice 1 bell pepper and 1 medium cucumber. Halve 1 cup of cherry tomatoes. Finely chop 1/4 of a medium red onion, and slice 1/2 cup of Kalamata olives. In the same large bowl with the quinoa, add all these diced vegetables along with 1/2 cup of crumbled feta cheese. Gently stir to mix everything together. For the dressing, take a separate small bowl. Whisk together 1/4 cup of extra virgin olive oil, 2 tablespoons of freshly squeezed lemon juice, and 1 teaspoon of dried oregano. Add sea salt and freshly cracked black pepper to taste. Whisk until the dressing is well combined and emulsified. Pour the dressing over the quinoa and vegetable mixture. Toss everything together until the quinoa and veggies are well coated with the dressing. Finally, fold in 1/4 cup of finely chopped fresh parsley. Be careful not to break the feta or overcrowd the grains. Cover the bowl and let the salad sit at room temperature for at least 30 minutes. This time helps the flavors blend beautifully. For the full recipe, check out the Mediterranean Quinoa Salad Delight. To cook quinoa, rinse it well in cold water. This removes bitterness. Use a ratio of 1 part quinoa to 2 parts vegetable broth. Boil the mixture, then reduce the heat to simmer. Cover and cook for about 15 minutes. When done, fluff it gently with a fork. Let it cool before mixing it with other ingredients. To boost flavors, add fresh herbs like basil or mint. You can also toss in some garlic or lemon zest for a zing. Experiment with different olives or cheese types. Each will give a unique twist. Don't forget to season with salt and pepper to taste. Serve the salad in a large bowl for sharing. For individual servings, use small plates. Garnish with lemon wedges and extra parsley for color. A drizzle of olive oil on top adds shine and flavor. You can also pair it with grilled chicken or fish for a complete meal. Find the full recipe in the article to enjoy a fresh and tasty meal. {{image_4}} You can easily boost the protein in your Mediterranean quinoa salad. Adding cooked chicken gives a hearty touch. Simply grill or roast chicken breasts, then slice them up and mix them in. If you prefer a meatless option, chickpeas work great. Use canned chickpeas for quick prep. Rinse and drain them before adding. While the olive oil and lemon dressing is tasty, you can try other dressings too. A balsamic vinaigrette adds a sweet tang. For a creamy twist, mix Greek yogurt with lemon juice and herbs. This will make the salad richer and even more satisfying. Swap in seasonal veggies for fresh flavor. In the spring, add sweet peas or asparagus. In summer, try zucchini or fresh corn. Autumn brings squash or roasted root vegetables. Winter is great for kale or Brussels sprouts. These swaps keep your salad exciting and varied all year round. Feel free to check the Full Recipe for more details! After enjoying your Mediterranean quinoa salad, store leftovers in the fridge. Place the salad in a bowl and cover it tightly with plastic wrap or a lid. This helps keep the salad fresh and tasty. If you want to save some for later, portion it out into meal prep containers. When storing your salad, use airtight containers. Glass containers work great because they don't stain or retain odors. If you prefer plastic, choose BPA-free containers. Ensure they are deep enough to hold the salad without squishing it. If you have a dressing, keep it separate until you are ready to eat to avoid sogginess. Your Mediterranean quinoa salad will last in the fridge for about 3 to 5 days. If you notice any change in smell or color, it’s best to toss it out. Reheating is not recommended for salads with fresh veggies. Instead, enjoy the salad cold or at room temperature. If you want to warm it up, heat the quinoa-only portion in a microwave for about 30 seconds, but avoid reheating the veggies and feta. For the full recipe, check [Full Recipe]. Quinoa is a tiny seed rich in protein, fiber, and vitamins. It is gluten-free and very nutritious. It helps in building muscles and keeps you full longer. Quinoa contains all nine essential amino acids, making it a complete protein. This is great for vegans and vegetarians. It also has antioxidants that help fight inflammation. Eating quinoa may support heart health and improve digestion. Yes, you can make this salad ahead of time. It tastes even better after sitting for a few hours. Just keep it in the fridge for up to three days. The flavors meld together nicely. If you add the dressing later, it stays fresh longer. Just remember to mix it before serving to spread the flavors. To make this salad vegan, skip the feta cheese. You can use avocado instead for creaminess. You can also add extra olives or nuts for texture. The dressing is already vegan with olive oil and lemon juice. This way, you keep it tasty without any animal products. This salad pairs well with many dishes. You can serve it with grilled chicken or fish for protein. It also goes nicely with roasted vegetables or hummus. For a lighter meal, enjoy it with pita bread. This salad is great as a side or a main dish. The Mediterranean quinoa salad is a tasty and healthy dish. We covered key ingredients, from quinoa and fresh veggies to possible add-ins. I shared easy steps for preparing the salad and tips for cooking quinoa just right. You learned about variations and how to store leftovers properly. Remember, this salad is very flexible; you can change the protein and dressing as you like. Enjoy this dish for its flavor and nutrition. It’s simple, refreshing, and great for any meal!](https://goldendishy.com/wp-content/uploads/2025/06/0bb42d2e-6f0a-4b63-945d-06b8684c6b2f-768x768.webp)

