Garlic Butter Steak and Potatoes Skillet Delight

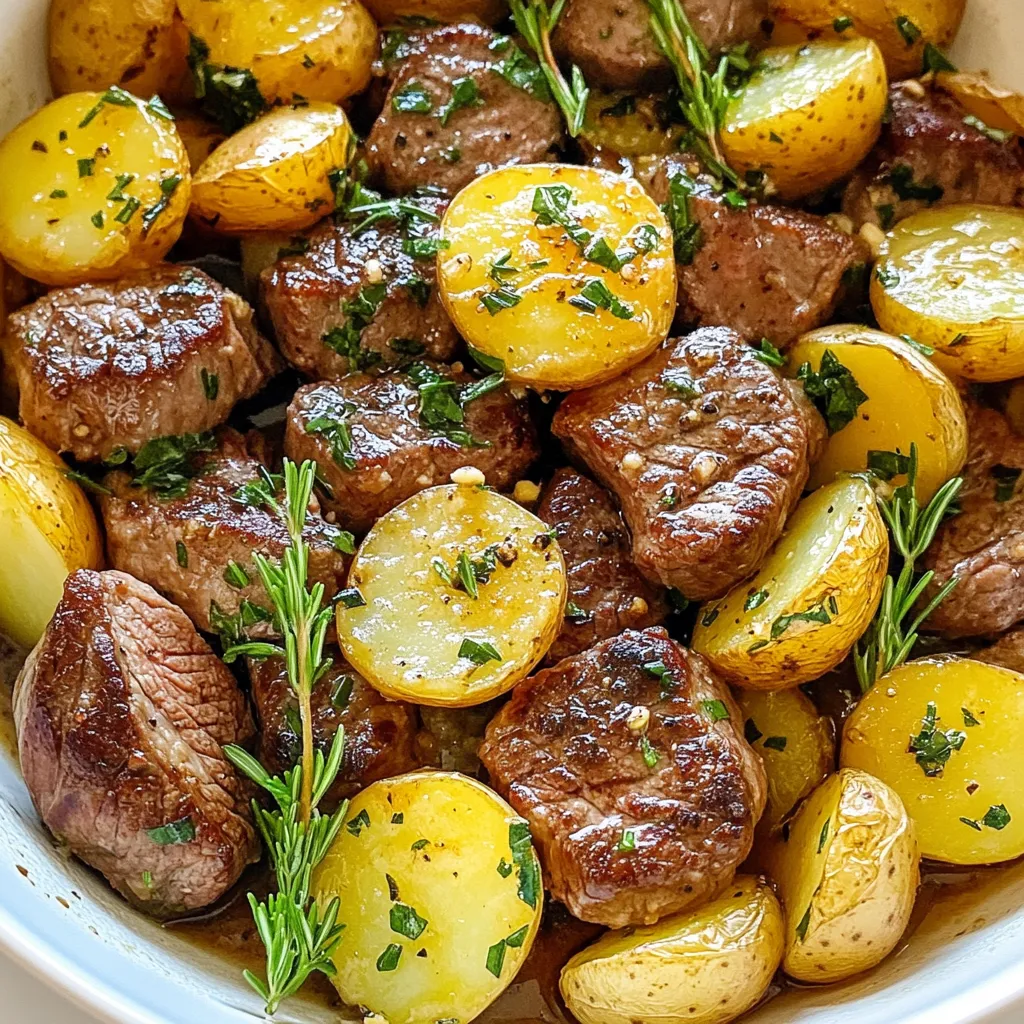
Are you ready to elevate your dinner game? My Garlic Butter Steak and Potatoes Skillet is a rich and satisfying dish that brings the flavors of a steakhouse right to your kitchen. With tender sirloin, crispy baby potatoes, and a heavenly garlic butter sauce, it’s a meal everyone will love. Read on to learn how to whip up this delightful dish in no time—your taste buds will thank you!
Why I Love This Recipe
- Quick and Easy: This recipe comes together in just 40 minutes, making it perfect for a weeknight dinner.
- One-Pan Wonder: With everything cooked in a single skillet, clean-up is a breeze, allowing you to enjoy your meal without the hassle.
- Flavor Packed: The combination of garlic, butter, and fresh herbs elevates the dish, creating a rich and savory experience.
- Versatile Ingredients: Using sirloin steak and baby potatoes, this dish is both hearty and adaptable to different ingredients you may have on hand.
Ingredients
Main Ingredients
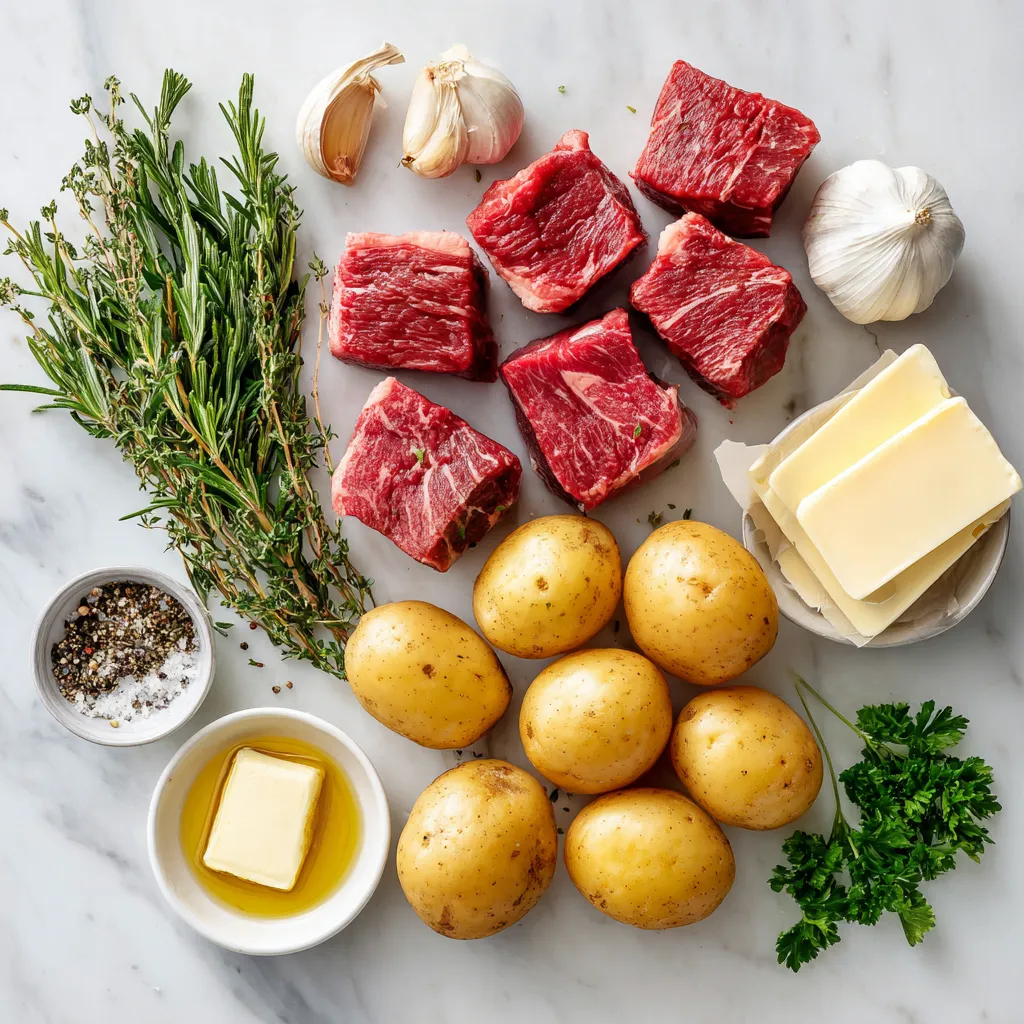
– 1 pound sirloin steak, cut into bite-sized cubes
– 1 pound baby potatoes, halved
– 4 tablespoons unsalted butter
– 5 cloves garlic, minced
Herbs and Spices
– 1 teaspoon fresh rosemary, finely chopped
– 1 teaspoon fresh thyme, finely chopped
– Salt and pepper, to taste
Cooking Essentials
– 2 tablespoons olive oil
– Fresh parsley, chopped for garnish
When I prepare garlic butter steak and potatoes, I focus on using fresh ingredients. The sirloin steak is tender and flavorful. I cut it into bite-sized cubes for easy cooking and eating. Baby potatoes are my favorite choice because they cook quickly and have a nice texture.
For the garlic butter, I use unsalted butter. It blends well with the steak and potatoes, giving a rich flavor. Minced garlic adds a wonderful aroma and taste. I always use fresh herbs like rosemary and thyme. They enhance the dish and create a lovely balance with the garlic.
I season everything with salt and pepper. This simple step makes a big difference. Olive oil is a must for cooking the potatoes. It helps them brown nicely and adds flavor. Finally, I sprinkle fresh parsley on top for a pop of color and freshness.
These ingredients come together to create a delicious meal. Each item plays a role in the overall flavor and texture. You will love how they work together in this skillet dish!

Step-by-Step Instructions
Cooking the Potatoes
– Heat a large skillet over medium heat. Add 2 tablespoons of olive oil.
– Place the halved baby potatoes in the skillet. Season them with salt and pepper.
– Cook for about 15-20 minutes. Stir them occasionally for even browning.
– Once they are golden-brown and fork-tender, transfer the potatoes to a plate and set aside.
Searing the Steak
– Increase the heat to medium-high in the same skillet.
– Add 1 pound of cubed sirloin steak to the pan. Season it generously with salt and pepper.
– Sear the steak for about 3-4 minutes. Stir occasionally to ensure even browning and tenderness.
Adding Flavor with Garlic and Herbs
– Lower the heat back to medium. Sprinkle in 5 cloves of minced garlic and 1 teaspoon each of chopped rosemary and thyme.
– Sauté for about 1 minute. This step releases a fragrant aroma. Be careful not to burn the garlic.
Making the Garlic Butter Sauce
– Introduce 4 tablespoons of unsalted butter into the skillet.
– Stir well to mix the melted butter with the steak and herbs. Ensure everything is coated evenly and looks luscious.
Combining All Ingredients
– Gently return the cooked potatoes to the skillet.
– Mix everything together and heat through for another 2-3 minutes.
Garnishing and Serving
– Remove the skillet from heat. Add freshly chopped parsley for garnish.
– For a rustic look, serve the dish straight from the skillet. You can also portion it into bowls. Drizzle any remaining garlic butter on top. Enjoy your delicious creation!
Tips & Tricks
Cooking Tips for Perfect Steak
To make great steak, focus on doneness. I recommend using a meat thermometer for the best results. Aim for 130°F for medium-rare. For medium, go for 140°F. Searing is key to flavor. Start with a hot skillet. Place the steak in the pan without crowding. This helps it brown nicely.
Potato Cooking Tips
For even cooking, cut your potatoes into similar sizes. This ensures they cook at the same rate. Stir them every few minutes to promote browning. If you want to try something different, use Yukon Gold or red potatoes. They add a nice twist to the dish.
Flavor Enhancements
Don’t be shy with herbs and spices. Fresh parsley, oregano, or even a pinch of chili flakes can elevate your meal. For garlic butter variations, consider adding lemon zest or a splash of soy sauce. These small changes can bring new life to your dish!
Pro Tips
- Choose the Right Cut: Opt for sirloin steak for its balance of flavor and tenderness, but feel free to substitute with ribeye or filet mignon for a richer taste.
- Perfect Potato Prep: Halve the baby potatoes to ensure they cook evenly and become beautifully golden-brown. A little extra salt during cooking enhances their flavor.
- Don’t Rush the Sear: Allow the steak to sear undisturbed for a few minutes to achieve a nice crust. Avoid overcrowding the pan to ensure even cooking.
- Herb Variations: Experiment with different herbs like thyme, oregano, or even fresh basil for a unique flavor profile that can elevate the dish.

Variations
Dietary Substitutions
You can easily make this dish gluten-free by using gluten-free products. Just check the labels on your butter and any seasonings. For a dairy-free option, substitute the unsalted butter with a plant-based alternative. This keeps the dish rich and creamy without dairy.
If you’d like to swap out the meat, try chicken or shrimp. Both cook quickly and absorb the garlic butter well. For a vegetarian version, use tofu or tempeh instead of steak. Both options provide protein and texture.
Ingredient Swaps
You don’t have to stick to baby potatoes. You can use Yukon gold or red potatoes. They add a different taste and texture. If you want something lower in carbs, try cauliflower. Simply steam it before adding it to the skillet.
When it comes to steak, sirloin is great, but you can try flank or ribeye for more flavor. These cuts will still give you that tender bite you want. If you prefer leaner meat, opt for filet mignon.
Flavor Profile Changes
If you love a bit of heat, sprinkle in some chili flakes while cooking. This adds a nice kick without overpowering the dish. You can also try different herbs like basil or oregano. They change the flavor and make it unique.
Add a splash of lemon juice for a zesty twist. It brightens up the rich garlic butter and makes each bite pop. Don’t be afraid to experiment with spices you enjoy!
Storage Info
Refrigerating Leftovers
Store your garlic butter steak and potatoes in an airtight container. This keeps the flavors fresh. Make sure to refrigerate within two hours of cooking. When you reheat, use a skillet over medium heat. This way, you bring back the tasty garlic butter flavor. Stir gently to avoid burning the potatoes.
Freezing Instructions
You can freeze leftovers for up to three months. Let the dish cool completely before packing it in freezer-safe bags. Make sure to squeeze out as much air as possible. When ready to eat, thaw overnight in the fridge. To reheat, use a skillet on low heat. Add a splash of water to help steam and warm it through.
Shelf Life
In the fridge, your garlic butter steak and potatoes last about three to four days. If frozen, they stay good for up to three months. Always check for signs of spoilage before eating. Enjoying your leftovers safely is key to a great meal experience!
FAQs
What can I serve with Garlic Butter Steak and Potatoes Skillet?
You can serve this dish with many sides. Here are some tasty options:
– Steamed broccoli: This adds color and nutrients.
– Green salad: A fresh salad balances the richness of the meal.
– Garlic bread: Perfect for dipping into the garlic butter sauce.
– Grilled asparagus: Adds a nice crunch and flavor.
– Coleslaw: The crunch and tang will complement the steak.
How can I make this dish spicier?
To spice things up, add chili flakes or diced jalapeños. Here’s how:
– Chili flakes: Sprinkle them into the skillet after adding garlic.
– Jalapeños: Dice fresh ones and sauté with the steak.
These additions will give you heat without losing flavor.
Can I use a different type of steak?
Yes, you can swap out the sirloin for other cuts. Here are some great options:
– Ribeye: Rich and fatty, perfect for flavor.
– Filet mignon: Tender and lean, a bit pricier.
– Flank steak: Great for a chewy texture and marinated flavor.
Choose based on your taste and budget.
What is the best way to know when my steak is done?
To check if your steak is done, use the touch test. Here’s how:
– Rare: Soft, like the base of your thumb.
– Medium: Firm, like the middle of your palm.
– Well-done: Very firm, like your wrist.
This method helps you judge without a thermometer.
Can I make this dish in advance?
Yes, you can prepare parts of this dish ahead of time. Here are some tips:
– Cook the potatoes: You can boil them the day before.
– Prep the steak: Cube and season it in advance.
– Combine and heat: When ready to eat, stir everything in the skillet over low heat.
This way, you save time on busy days.
This blog post covered making a delicious garlic butter steak and potatoes dish. You learned about the key ingredients, step-by-step cooking instructions, and helpful tips. We also explored variations and storage tips to keep your dish fresh.
Remember, cooking is about trying new things. Don’t be afraid to switch ingredients or add your favorite flavors. Enjoy this meal with friends or family. Prepare to impress with your tasty creatio

Garlic Butter Steak and Potatoes Skillet
Ingredients
- 1 pound sirloin steak, cut into bite-sized cubes
- 1 pound baby potatoes, halved
- 4 tablespoons unsalted butter
- 5 cloves garlic, minced
- 1 teaspoon fresh rosemary, finely chopped
- 1 teaspoon fresh thyme, finely chopped
- to taste salt and pepper
- 2 tablespoons olive oil
- to garnish fresh parsley, chopped
Instructions
- In a large skillet, heat 2 tablespoons of olive oil over medium heat. Add the halved baby potatoes, ensuring they are evenly seasoned with salt and pepper. Cook for approximately 15-20 minutes, occasionally stirring to promote even browning, until the potatoes are golden-brown and fork-tender. Once cooked, transfer the potatoes to a plate and set aside.
- Using the same skillet, increase the heat to medium-high. Add the cubed sirloin steak to the pan, seasoning generously with salt and pepper. Sear the steak for about 3-4 minutes, stirring occasionally, until it’s browned on all sides while remaining tender.
- Lower the heat back to medium, and sprinkle in the minced garlic, chopped rosemary, and thyme. Sauté for about 1 minute, or until the garlic releases its fragrant aroma, being careful not to let it burn.
- Introduce the unsalted butter into the skillet. Stir well to incorporate the melted butter with the steak and aromatic herbs, ensuring everything is evenly coated and luscious.
- Gently return the cooked potatoes to the skillet, mixing them with the steak and garlic butter mixture. Stir everything together to combine and allow it to heat through for an additional 2-3 minutes.
- Remove the skillet from the heat and generously garnish with freshly chopped parsley.


![To make maple glazed butternut squash, you’ll need the following items: - 1 medium butternut squash, peeled and cut into 1-inch cubes - 3 tablespoons pure maple syrup - 2 tablespoons extra virgin olive oil - 1 teaspoon ground cinnamon - 1/2 teaspoon freshly grated nutmeg - 1/4 teaspoon cayenne pepper (optional, for a kick) - Sea salt and freshly cracked black pepper, to taste - 1/4 cup pecans, roughly chopped (for garnish) - Fresh parsley, finely chopped (for garnish) When cooking, measuring accurately is key. Use dry measuring cups for solid items like squash and nuts. For liquids, use a liquid measuring cup. Always level off dry ingredients with a straight edge. This step ensures you get the right amount for best results. You can swap ingredients based on your needs. If you prefer a sweeter taste, try honey instead of maple syrup. For a nut-free option, skip the pecans or use seeds like pumpkin seeds. Always check for allergies, especially with nuts and spices. To make maple glazed butternut squash, start by gathering your ingredients. You'll need: - 1 medium butternut squash, peeled and cut into 1-inch cubes - 3 tablespoons pure maple syrup - 2 tablespoons extra virgin olive oil - 1 teaspoon ground cinnamon - 1/2 teaspoon freshly grated nutmeg - 1/4 teaspoon cayenne pepper (optional) - Sea salt and freshly cracked black pepper, to taste - 1/4 cup pecans, roughly chopped (for garnish) - Fresh parsley, finely chopped (for garnish) First, preheat your oven to 400°F (200°C). This step is key for good roasting. Next, peel and cube the butternut squash. Place the cubes in a large bowl. Drizzle the olive oil and maple syrup over the squash. Then, sprinkle the ground cinnamon, nutmeg, cayenne, sea salt, and black pepper. Toss gently until all the pieces are well coated. Now, it's time to roast your squash. Line a baking sheet with parchment paper. This helps prevent sticking and makes cleanup easy. Spread the coated squash in a single layer on the sheet. Place the baking sheet in the oven. Roast the squash for 25-30 minutes. About halfway through the cooking time, stir the squash. This ensures all sides caramelize and cook evenly. When the squash is fork-tender and has a nice golden color, it's done. Remove it from the oven and let it cool for 2-3 minutes. To get that perfect caramelization, watch your cooking time closely. Stirring halfway through helps. The key is to spread the squash out evenly. If it's too crowded, it will steam instead of roast. You can also adjust the maple syrup for sweetness. A little extra can help with caramelization. If you like a kick, add the cayenne pepper. It balances the sweet and savory flavors beautifully. Once cooked, transfer the squash to a serving dish. Top with chopped pecans and parsley for a fresh touch. This dish is sure to impress! For the complete recipe, check out the [Full Recipe]. When making maple glazed butternut squash, avoid cutting the squash too small. Smaller pieces cook too fast and can burn. Also, don’t skip the olive oil. It helps the squash caramelize and adds flavor. Overcrowding the baking sheet is another mistake. Leave space between the cubes to ensure even cooking. To boost the flavor, add a splash of balsamic vinegar before roasting. This adds depth to the sweetness. Try different spices, too. A pinch of smoked paprika can give a nice twist. For a savory touch, mix in garlic powder or fresh garlic. These will elevate your dish. Use a sturdy baking sheet lined with parchment paper. This helps with easy cleanup and prevents sticking. A large mixing bowl is great for tossing the squash and spices. If you have one, a vegetable peeler makes peeling the squash quick and easy. For a perfect roast, an oven thermometer ensures your oven is at the right temperature. For the full recipe, refer to the above instructions. {{image_4}} You can make this dish even better by adding other veggies. Try sweet potatoes for a richer flavor. Carrots add sweetness and color, while red onions bring a slight bite. Just cut them into similar sizes as the squash. Toss them in the same maple glaze for a yummy blend. You’ll create a colorful and flavorful dish that everyone will love. Want to change the taste? You can use different spices. Try ginger for a warm kick. If you like it spicy, add more cayenne pepper. You can also use smoked paprika for a smoky flavor. Experiment with herbs like thyme or rosemary. Just remember to keep it balanced, so no single flavor overpowers the dish. This recipe is naturally vegan and gluten-free. You can enjoy it without worry. If you want to add protein, try chickpeas. They pair well with the flavors and add a nice crunch. For those who need low-carb options, skip the maple syrup and use a sugar substitute. It’s easy to adapt this dish to fit your needs. For the full recipe, check out the detailed instructions above. To keep your maple glazed butternut squash fresh, store it in an airtight container. Let the squash cool down after cooking. Then, place it in the fridge. It will stay fresh for about 3 to 5 days. If you want to keep it longer, consider freezing. Reheat your butternut squash in the oven for the best results. Preheat your oven to 350°F (175°C). Spread the squash on a baking sheet. Heat it for about 10-15 minutes or until warm. You can also use the microwave. Place it in a microwave-safe dish and cover it. Heat in short bursts, checking to avoid overcooking. Freezing is a great way to save this dish for later. First, let the squash cool completely. Then, spread it on a baking sheet in a single layer. Freeze it for about 1-2 hours until firm. Once frozen, transfer the squash to a freezer-safe bag or container. It can last for up to 3 months in the freezer. When ready to eat, thaw overnight in the fridge before reheating. For more details, check the Full Recipe. Yes, you can prepare this dish ahead of time. Cook the butternut squash and let it cool. Store it in an airtight container in the fridge. You can make it up to two days in advance. When you're ready to eat, just reheat it in the oven or microwave. This makes it great for meal prep. Maple glazed butternut squash lasts about 3 to 5 days in the fridge. Make sure it’s in a sealed container. Check for any signs of spoilage before eating. If it looks or smells off, it’s best to toss it. Freshness is key for enjoying this tasty dish. You can pair this dish with many foods. It goes well with roasted chicken or turkey. You can also serve it with quinoa or brown rice for a healthy meal. For a vegetarian option, pair it with a bean salad. The sweet and savory flavors work well with many sides. For more details on how to whip up this incredible dish, check out the Full Recipe. This guide walked you through each step of making Maple Glazed Butternut Squash. We covered ingredients, how to prepare, cook, and store your dish. I shared tips to avoid mistakes and ideas for adding your own twist. Remember, the key to perfect caramelization is patience. Enjoy experimenting with flavors and variations. This dish can be a crowd-pleaser and is easy to adapt. I hope you feel ready to try it out. Enjoy your cooking!](https://goldendishy.com/wp-content/uploads/2025/07/e9e7eb41-1a1b-4d7a-9d20-35ffe8b1aa92-768x768.webp)


![To make this simple and tasty chicken and rice soup, gather these ingredients: - 2 boneless, skinless chicken breasts - 1 cup jasmine rice, thoroughly rinsed - 6 cups chicken broth (preferably low-sodium) - 2 carrots, peeled and diced - 2 stalks celery, chopped - 1 small onion, finely diced - 3 garlic cloves, minced - 1 teaspoon dried thyme - 1 bay leaf - 1 tablespoon extra virgin olive oil - Salt and freshly ground pepper, to taste - 1 cup frozen peas - Juice from 1 fresh lemon - Fresh parsley, roughly chopped (for garnish) Each serving of this chicken and rice soup is packed with nutrition. Here’s a quick look at what you get: - Calories: 300 - Protein: 25g - Carbohydrates: 40g - Fat: 6g - Fiber: 2g This soup is low in fat and rich in protein and carbs, making it a cozy choice for any meal. If you need to swap out some items, here are some ideas: - Chicken: Use shredded rotisserie chicken for a quick option. - Rice: Substitute with brown rice or quinoa for a different texture. - Broth: Vegetable broth works well for a lighter flavor. - Vegetables: Add bell peppers, corn, or spinach for extra nutrition. - Herbs: Fresh herbs like rosemary or dill can replace thyme for a new taste. These substitutions help you make this soup work for your pantry or dietary needs. Enjoy creating your version! Start by gathering your ingredients. You need chicken breasts, jasmine rice, broth, carrots, celery, onion, garlic, thyme, a bay leaf, olive oil, and peas. 1. Heat the olive oil: In a large pot, place the olive oil over medium heat. Wait until it shimmers. 2. Add the vegetables: Toss in the diced onion, carrots, and celery. Sauté these for about 5 minutes. You want them to soften and the onion to look clear. 3. Incorporate garlic: Stir in the minced garlic. Cook this for one minute. The smell should fill your kitchen. 1. Add chicken and broth: Place the chicken breasts into the pot. Pour in the chicken broth. Add thyme, bay leaf, salt, and pepper. 2. Bring to a boil: Turn up the heat until the mixture boils. Then, lower the heat to a gentle simmer. 3. Cook the chicken: Cover the pot and let it simmer for 15-20 minutes. Make sure the chicken cooks fully (165°F or 75°C inside). 1. Shred the chicken: Once cooked, remove the chicken and let it cool. Use two forks to shred it into smaller pieces. 2. Add rice: Stir in the rinsed jasmine rice into the pot. Cover it again and let it simmer for about 15 minutes. The rice should be tender. 3. Finish the soup: Return the shredded chicken to the pot. Add the frozen peas and lemon juice. Taste and adjust salt and pepper if needed. 4. Serve: Remember to take out the bay leaf. Serve hot in bowls. Top with fresh parsley for a nice touch. For the complete recipe, visit [Full Recipe]. To make your chicken and rice soup shine, focus on fresh ingredients. Start with quality chicken broth. Low-sodium broth gives you control over salt levels. Add fresh herbs like thyme and parsley for a bright taste. A splash of lemon juice at the end brightens the flavor too. You can also toss in some fresh garlic for depth. One big mistake is overcooking the chicken. Remove it from the pot once it reaches 165°F. Letting it simmer too long can make it dry. Another common error is not rinsing the rice. Rinsing removes excess starch, which helps keep the soup clear. Avoid adding too much water or broth. You want a nice balance of soup and rice. For a creamy texture, add a splash of heavy cream or coconut milk. Stir it in after you add the chicken back to the pot. You can also blend a portion of the soup. Use an immersion blender to create a creamy base while keeping some chunks intact. This mix gives you both texture and creaminess in every spoonful. Follow the [Full Recipe] for a step-by-step guide to making this comforting dish. {{image_4}} You can easily add veggies to your chicken and rice soup. Chopped carrots, celery, and peas work well. You can also try adding spinach, kale, or zucchini for more color and nutrition. These vegetables add flavor and make your soup more filling. Just toss them in during the last few minutes of cooking. This way, they will stay bright and fresh. If you like a kick, make a spicy version. Add diced jalapeños or red pepper flakes for heat. A splash of hot sauce or a spoonful of sriracha can also spice things up. Just keep in mind to adjust the salt. You want a balance of flavors. This spicy twist can warm you up on a cold day! Using a slow cooker makes this recipe even easier. Simply add all your ingredients into the slow cooker. Set it on low for 6-8 hours or high for 3-4 hours. This method allows all the flavors to blend beautifully. Plus, you can come home to a warm, tasty meal. Check out the Full Recipe for detailed steps and measurements. After you finish your chicken and rice soup, let it cool down. This helps keep the soup fresh. Transfer it to an airtight container. It will stay good in the fridge for 3 to 4 days. Make sure to label the container with the date. This way, you’ll know when to eat it. If you want to save some soup for later, freezing works great. First, let the soup cool completely. Then, pour it into freezer-safe bags or containers. Leave some space at the top for expansion. You can freeze it for up to 3 months. When you’re ready to eat, just thaw it overnight in the fridge. To reheat your soup, pour it into a pot. Heat it on medium-low heat. Stir it often to ensure it warms evenly. If the soup seems too thick, add a splash of broth or water. You can also microwave it in a safe bowl. Heat it in short intervals, stirring in between. This ensures every bite is warm and tasty. Enjoy your cozy meal! For the full recipe, check out the Cozy Chicken & Rice Delight section. Yes, you can use brown rice. Brown rice adds a nutty flavor and is more nutritious. However, it takes longer to cook. You should adjust the cooking time. Add brown rice early when you add the broth, and let it simmer for 40-45 minutes. This way, the rice becomes tender and blends well with the soup. To make the soup gluten-free, you need to check a few things. First, use a gluten-free chicken broth. Many brands offer gluten-free options. Also, make sure your rice is certified gluten-free. Jasmine rice is usually safe, but always check the label. By following these steps, your soup will be gluten-free and just as tasty. You can serve many tasty sides with your soup. Here are some great options: - A fresh green salad - Crusty bread or rolls - Garlic breadsticks - Steamed vegetables These sides will make your meal complete and satisfying. For more ideas, feel free to check the Full Recipe and explore different serving suggestions. We reviewed the key steps to make Chicken and Rice Soup, from choosing the right ingredients to cooking methods. You learned helpful tips to enhance flavor and avoid common mistakes. Variations and storage details ensure this dish suits your taste and convenience. Trust these insights to create a tasty soup every time. Enjoy warm bowls of nourishment that you made with care. Happy cooking!](https://goldendishy.com/wp-content/uploads/2025/06/7617fd4a-61d9-414c-8819-76abcb6635e5-768x768.webp)