Garlic Butter Shrimp Pasta Quick and Flavorful Dish

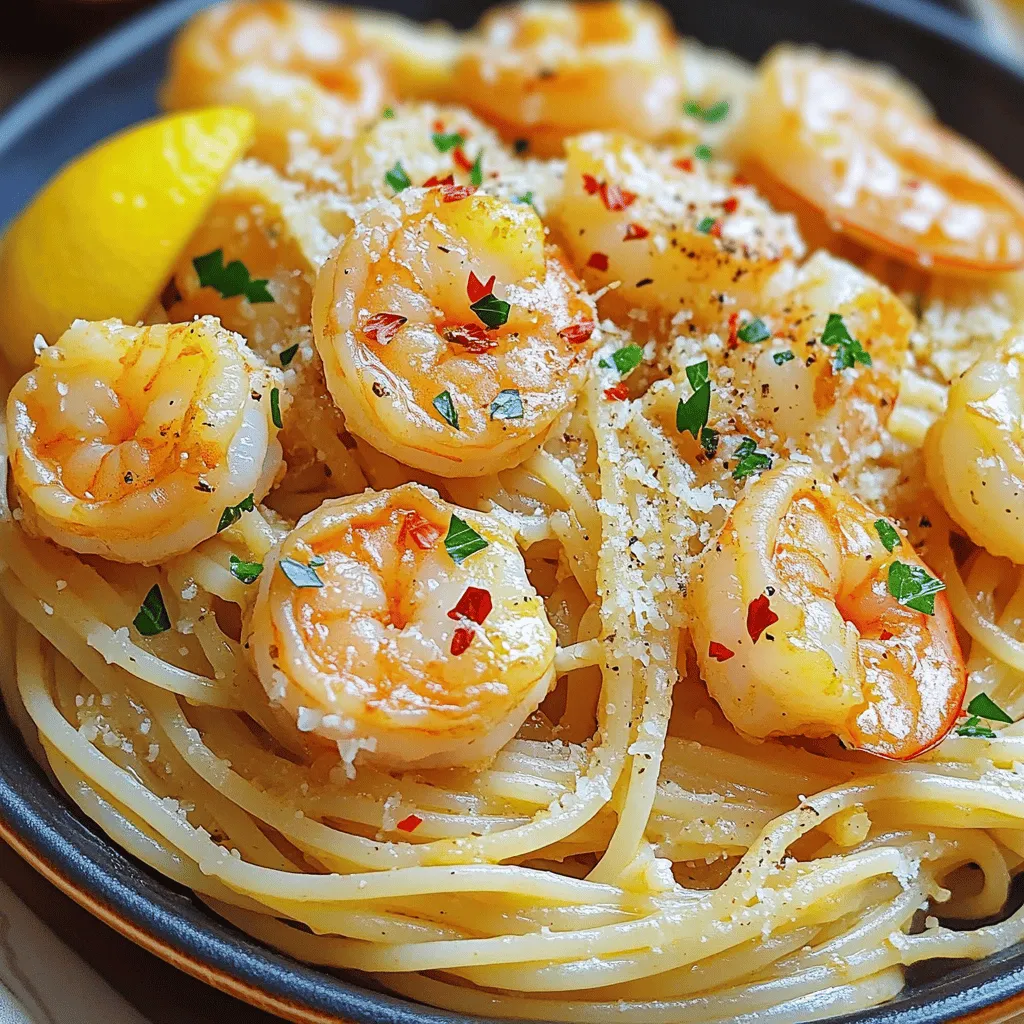
Craving a quick and tasty meal? Garlic Butter Shrimp Pasta is your answer! This dish combines tender shrimp with rich garlic butter and zest lemon for a flavor explosion. In just 30 minutes, you can whip up a delightful dinner that impresses without stressing. Discover the simple ingredients and easy steps to make this dish a favorite in your home. Let’s dive into the deliciousness!
Ingredients
Here’s what you need to make garlic butter shrimp pasta. Gather these items before you start.
– 8 oz spaghetti or linguine
– 1 lb large shrimp, peeled and deveined
– 6 tablespoons unsalted butter
– 5 cloves garlic, minced
– 1 teaspoon red pepper flakes (adjust to taste)
– Zest and juice of 1 lemon
– 1/4 cup fresh parsley, chopped
– Salt and pepper, to taste
– Grated Parmesan cheese, for serving (optional)
Using fresh ingredients makes a big difference in taste. The shrimp should be large and tender. The garlic adds a rich flavor, while the lemon brings brightness. Adjust the red pepper flakes based on your spice preference. You can skip the cheese if you want a lighter dish. For the best results, prepare everything before you cook. This way, you will have a smooth cooking experience.
Step-by-Step Instructions
Cooking the Pasta
First, fill a large pot with water and add salt. Bring the water to a boil. This step is key because it helps flavor the pasta. Once the water boils, add 8 oz of spaghetti or linguine. Cook the pasta for about 8-10 minutes until it is al dente. Before you drain the pasta, remember to reserve about 1 cup of the starchy water. This will help thicken your sauce later. After reserving the water, drain the pasta and set it aside.
Cooking the Shrimp
In a large skillet over medium-high heat, melt 2 tablespoons of unsalted butter until it bubbles. Add 1 lb of large, peeled, and deveined shrimp to the skillet. Season the shrimp with salt, pepper, and red pepper flakes to taste. Cook the shrimp for about 2-3 minutes on each side. You want them to turn pink and opaque. Once cooked, take the shrimp out of the skillet and place them on a plate.
Preparing the Sauce
In the same skillet, lower the heat to medium and add the remaining 4 tablespoons of butter. Next, add 5 minced garlic cloves. Sauté the garlic for about 1-2 minutes while stirring often. Be careful not to let it brown. If garlic browns, it can taste bitter. This step is critical for getting the best flavor.
Tips & Tricks
Perfecting the Sauce
To make the sauce just right, adjust the pasta water you save. You want it creamy but not too thick. Start with a half cup of the reserved pasta water. If it seems dry, add more until you reach the creaminess you like. Using fresh ingredients is key for flavor. Fresh garlic and lemon zest make a big difference. They add bright notes that elevate the dish.
Cooking Timing
Cooking shrimp takes just a few minutes. You want them pink and opaque. This usually takes about 2-3 minutes on each side. For the pasta, cook it until al dente. This means it should be firm to the bite but not hard. Typically, this takes 8-10 minutes. Remember to taste the pasta as it cooks.
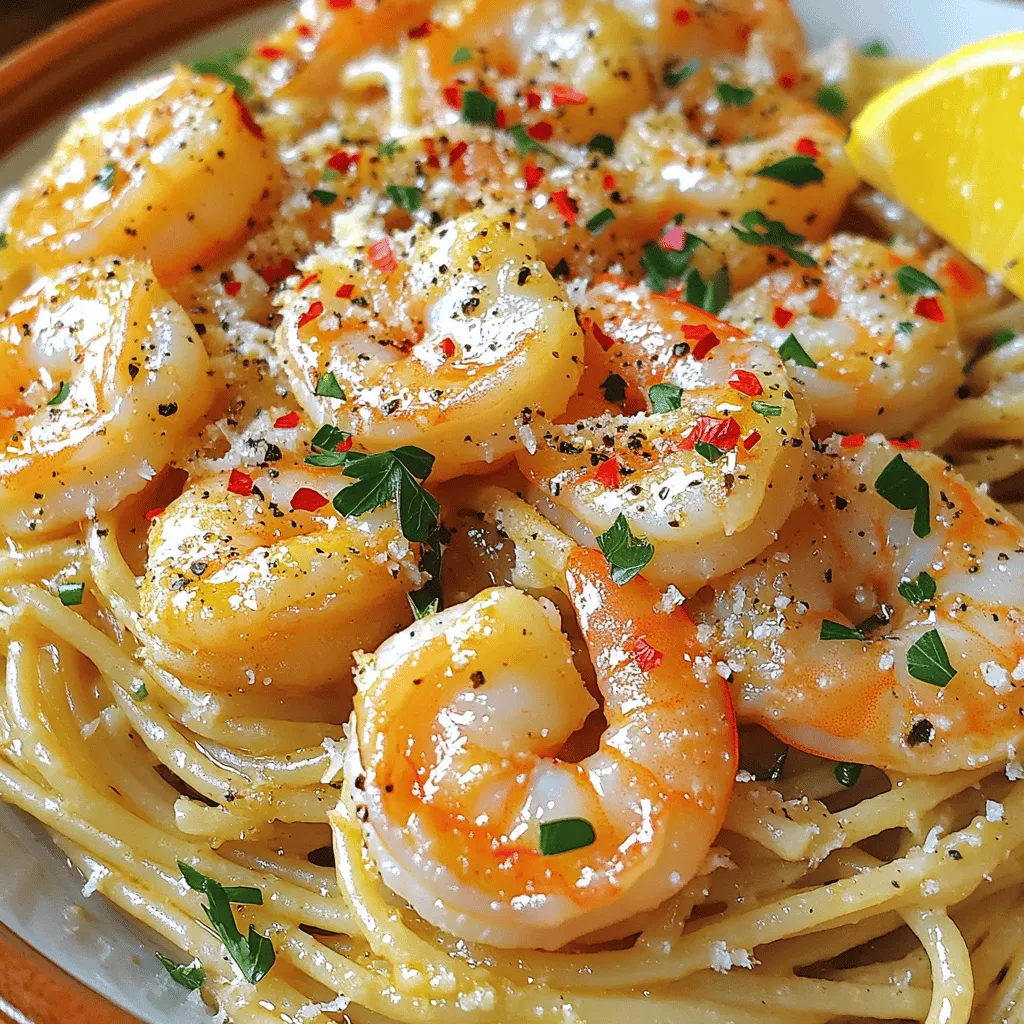
Presentation Tips
When serving, top the dish with grated Parmesan cheese. This adds a rich flavor and makes it look nice. Fresh parsley is a great garnish too. Sprinkle it on top for a pop of color. This makes your plate look inviting and fresh. Enjoy the beauty of your dish as much as the taste!

Variations
Adding Vegetables
You can make this dish even better by adding veggies. Spinach adds a nice color and nutrition. Just toss in a handful when you add the pasta to the sauce. Cherry tomatoes also work well. They give a burst of sweetness. You can also use broccoli or peas. They add crunch and extra vitamins.
Spice Adjustments
Want more heat? Increase the red pepper flakes. Just be careful not to overdo it. You can also try other spices to boost flavor. A pinch of smoked paprika adds a nice smoky taste. Fresh herbs like basil or thyme can brighten the dish. Experiment to find what you like best.
Dietary Adjustments
If you need gluten-free options, choose gluten-free pasta. Many brands taste great and cook well. For a vegan twist, substitute shrimp with mushrooms or tofu. You can replace butter with olive oil or vegan butter. This way, everyone can enjoy this tasty meal.
Storage Info
Refrigerating Leftovers
To store your Garlic Butter Shrimp Pasta, let it cool first. Place it in an airtight container. This helps keep it fresh and tasty. You can store it in the fridge for up to 3 days. When you’re ready to eat, just reheat it on the stove or in the microwave.
Freezing Tips
If you want to save some for later, freezing works great too! Divide the pasta and shrimp into portions. Use freezer bags or containers that are safe for freezing. Press out as much air as you can to prevent freezer burn. You can freeze it for up to 2 months.
To reheat, thaw it in the fridge overnight. Then, warm it gently in a skillet over low heat. Add a splash of water or broth to help it heat evenly. Enjoy your dish just like the first time!
FAQs
How long does it take to make Garlic Butter Shrimp Pasta?
It takes about 25 minutes to make Garlic Butter Shrimp Pasta. You spend 10 minutes prepping and 15 minutes cooking. This quick dish is perfect for busy nights when you want something tasty.
Can I use frozen shrimp for this recipe?
Yes, you can use frozen shrimp. Just thaw them first. To thaw, place shrimp in a bowl of cold water for about 15 minutes. Pat them dry before cooking. Fresh shrimp taste great, but frozen shrimp work well too. Just make sure they are peeled and deveined.
What can I serve with Garlic Butter Shrimp Pasta?
You can serve Garlic Butter Shrimp Pasta with several side dishes. Here are some ideas:
– Garlic bread for extra flavor.
– A fresh salad with lemon vinaigrette.
– Steamed vegetables like broccoli or asparagus.
These sides add fresh touches and balance the meal.
This garlic butter shrimp pasta recipe is simple and delicious. You have tasty ingredients that combine well. Follow the steps closely for perfect pasta and shrimp. Use fresh ingredients for the best flavor. Feel free to make variations with veggies or spice adjustments. Store leftovers properly to keep them fresh. Enjoy this meal with family or friends. Remember, cooking is about having fun and sharing good food!


![To make a delightful vegan sweet potato curry, gather these simple ingredients: - 2 medium sweet potatoes, peeled and diced - 1 can (400ml) coconut milk - 1 can (400g) chickpeas, drained and rinsed - 1 medium onion, finely diced - 3 cloves of garlic, minced - 1 inch piece of fresh ginger, grated - 2 tablespoons of red curry paste - 1 bell pepper, chopped - 2 cups of fresh baby spinach - 1 tablespoon of olive oil - Salt and freshly ground pepper to taste - Fresh cilantro leaves for garnish - Lime wedges for serving Each ingredient plays a key role in the flavor and texture of the dish. The sweet potatoes give a creamy and sweet base, while the coconut milk adds richness. Chickpeas give protein and heartiness, making this dish filling. The fresh ginger and garlic bring a boost of flavor that warms your soul. Don't worry if you want to switch things up! The beauty of this curry is its flexibility. You can mix in other veggies or spices. Just keep the core ingredients for the best results. For the full recipe, check the reference above. Enjoy cooking! 1. Start by heating olive oil in a large pot over medium heat. 2. Add the diced onion and sauté for about 5 minutes. The onion should become soft and clear. 3. Mix in the minced garlic and grated ginger. Let it cook for one minute. This will make your kitchen smell amazing! 4. Next, add the red curry paste. Stir it in well and let it cook for 2 minutes. This helps deepen the flavors. 5. Now, add the diced sweet potatoes and chopped bell pepper. Stir everything well so the veggies are coated with the curry mix. 1. Pour in the creamy coconut milk and add the rinsed chickpeas. Stir everything together. 2. Turn up the heat slightly to bring the mixture to a gentle simmer. 3. Once it's simmering, lower the heat and cover the pot. Let it cook for about 20 minutes. The sweet potatoes should be tender by now. 4. After 20 minutes, gently fold in the baby spinach. Let it wilt into the curry for another 2 to 3 minutes. 5. Season with salt and freshly ground pepper. Adjust to your taste for the best flavor. 1. Serve the curry hot, garnished with fresh cilantro leaves. 2. Add lime wedges on the side for a zesty touch. 3. For a beautiful dish, use shallow bowls. This helps show off the vibrant colors. 4. Drizzle a bit of extra coconut milk on top for a stunning finish. A sprinkle of chopped cilantro looks great, too. For the complete recipe, check out the [Full Recipe]. To make your curry just right, focus on the texture. The curry should be thick but not dry. If it seems too thick, add a splash of water or more coconut milk. Stir often to keep it from sticking to the pot. When it comes to spice, taste is key. Start with a little red curry paste. You can always add more for some heat. If you prefer a milder dish, reduce the paste or add more coconut milk to balance. Want to add more color and nutrition? Toss in some extra veggies! Zucchini, carrots, or peas work great. You can also use frozen mixed veggies for convenience. Looking for protein? Try adding tofu or tempeh. These options soak up the curry flavor well. You can also use lentils for a hearty twist. To elevate the dish, consider adding spices like cumin or turmeric. These spices bring warmth and depth. A squeeze of lime juice can also brighten the flavors. Pair your curry with fluffy rice or warm naan. These sides soak up the sauce and make each bite special. You can also serve it with a fresh salad for a crunchy contrast. For the full recipe, check out the detailed instructions above. {{image_4}} You can easily adjust the spice level in your vegan sweet potato curry. For a mild dish, use less red curry paste. A medium heat works well with the standard amount of paste. If you want spice, add extra paste or mix in cayenne pepper. Different curry pastes offer unique flavors too. Try green curry paste for a fresh twist or massaman paste for a warm, nutty taste. You can play with various vegetables in your curry. Carrots, peas, or zucchini work well. For extra nutrition, add protein sources like tofu or tempeh. These options boost the dish's texture and flavor. If you want a heartier meal, consider adding lentils or quinoa. The right grain or bread makes your curry shine. Serve it with fluffy jasmine rice or warm naan. They soak up the delicious sauce and complement the curry's taste. If you have leftovers, use them in a wrap or as a topping on a salad. This way, you enjoy the flavors in different ways. For the full recipe, check the earlier section. You can keep the vegan sweet potato curry in the fridge for about 4 to 5 days. To store it, let the curry cool down first. Then, transfer it to an airtight container. This keeps the flavors fresh and tasty. When you want to eat it again, just scoop out what you need. If you want to save it for later, freezing is a great option. Pour it into a freezer-safe container. Leave some space at the top because it will expand when frozen. You can freeze the curry for up to 3 months. When you're ready to eat, take it out and place it in the fridge to thaw overnight. To reheat, warm it on the stove over low heat. Stir it well, and if needed, add a splash of coconut milk to bring back its creamy texture. Enjoy this cozy dish anytime! For the full recipe, check out the details above. Can I make this curry ahead of time? Yes, you can make this curry ahead of time. It tastes even better after a day. Just store it in the fridge. Heat it on the stove or in the microwave before serving. What other toppings can I use besides cilantro? You can use many toppings! Try fresh parsley, green onions, or avocado slices. These add color and flavor. Toasted nuts or seeds also bring a nice crunch. Is this dish gluten-free? Absolutely! This vegan sweet potato curry is gluten-free. All the ingredients in the recipe are safe for a gluten-free diet. Overview of caloric content per serving Each serving has about 350 calories. This makes it a hearty meal without being too heavy. Breakdown of key nutrients - Fiber: 10 grams - Protein: 12 grams - Carbohydrates: 45 grams This curry is rich in fiber and plant protein, making it filling and satisfying. What can I use instead of chickpeas? If you want a different protein, use lentils or black beans. Both are great choices and will still taste yummy. Alternative ingredients for coconut milk You can swap coconut milk for almond milk or oat milk. Just make sure to use a full-fat version for creaminess. If you want a richer flavor, try cashew cream. This blog covered how to make a tasty sweet potato curry. We explored essential ingredients, step-by-step cooking instructions, and tips for customizing your dish. I shared ideas for serving and storing your curry, along with answers to common questions. Incorporating these tips will help you create a flavorful meal. Enjoy experimenting with different spices and ingredients to make it your own. Cooking should be fun, and this curry recipe makes it easy to add joy to your table.](https://goldendishy.com/wp-content/uploads/2025/07/0119eb20-3e5b-446c-8228-d1dcea4a67d2-768x768.webp)


