Garlic Butter Roasted Mushrooms Savory and Simple Dish

Are you ready to transform your dinner routine with an easy and delicious dish? Garlic Butter Roasted Mushrooms bring savory flavors to the table in just a few simple steps. With just five key ingredients, you can create a dish that impresses friends and family alike. Let’s dive into how to select the best mushrooms, prepare them perfectly, and serve them with style!
Ingredients
List of Required Ingredients
– 500g mixed mushrooms
– 4 tablespoons unsalted butter
– 4 cloves garlic, finely minced
– 1 tablespoon fresh thyme leaves
– 1 tablespoon fresh parsley, finely chopped
– Optional: red pepper flakes
Tips for Selecting Mushrooms
When you want the best mushrooms for roasting, choose a mix. I love using button, cremini, and portobello. These mushrooms roast well and offer great flavors.
To pick fresh mushrooms, look for ones that are firm and smooth. Avoid mushrooms that are slimy or have dark spots. The caps should be closed and dry. This means they are fresh and ready to cook.
Nutritional Information
Garlic butter roasted mushrooms are not just tasty; they are healthy too. A serving has about 100 calories. They are low in fat and high in vitamins. Mushrooms are rich in antioxidants, which help protect your cells. They also have fiber, which aids digestion and keeps you full longer. Enjoying mushrooms can boost your health in many ways.
Step-by-Step Instructions
Preparation Steps
To start, you need to clean and cut the mushrooms. Use a damp cloth to gently wipe off dirt. This keeps them fresh and clean. If the mushrooms are big, cut them in half or quarters. This helps them cook evenly.
Next, it’s time to melt the butter with garlic and herbs. In a medium saucepan, melt the butter over low heat. Add the minced garlic, fresh thyme, salt, black pepper, and red pepper flakes if you like some heat. Stir it for 1-2 minutes. The garlic should smell good, but do not let it brown.
Roasting Instructions
Now, preheat the oven to 200°C (400°F). Make sure the oven rack is in the center. Line a baking sheet with parchment paper. This makes clean-up easy.
After that, spread the mushrooms on the baking sheet. Make sure they are in a single layer. This helps them roast evenly.
Roast the mushrooms in the oven for 15-20 minutes. Halfway through, stir them gently. This ensures that they cook well. When they are done, they should be soft and golden brown.
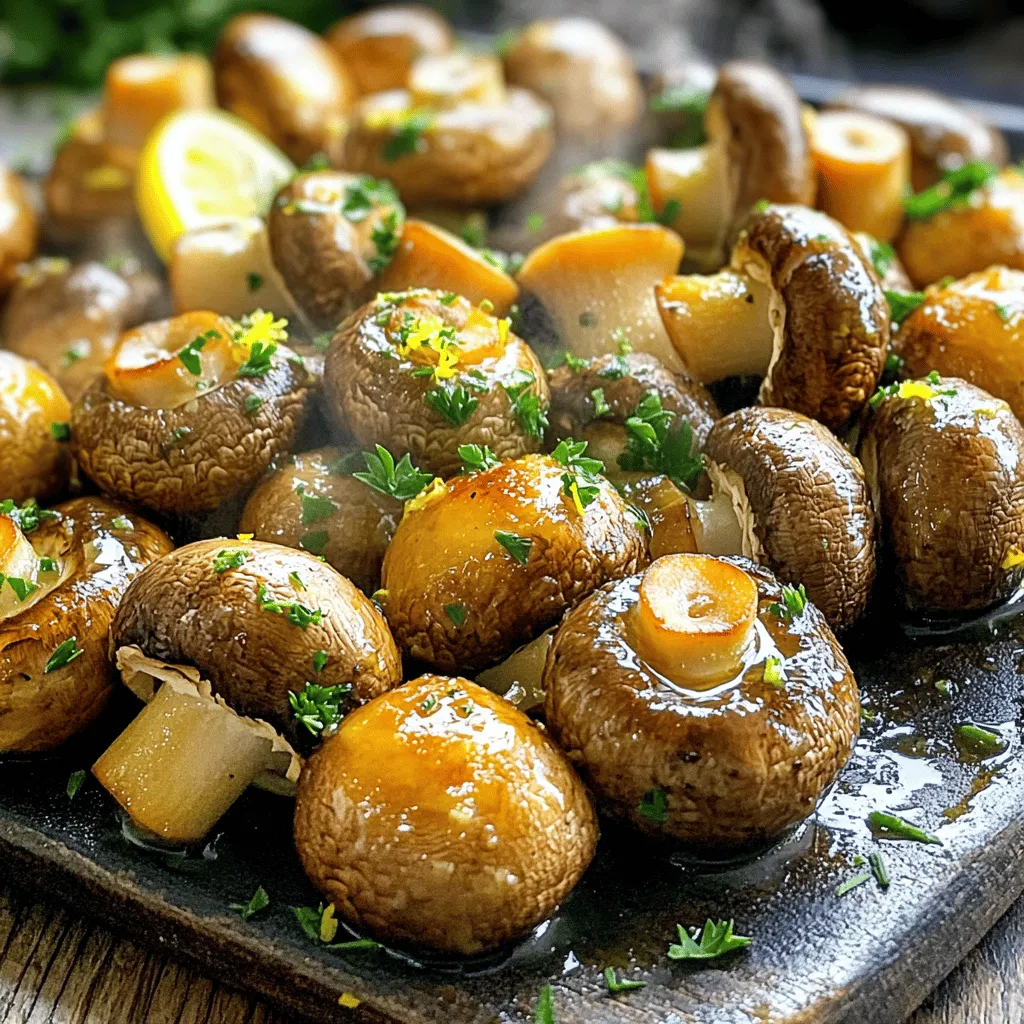
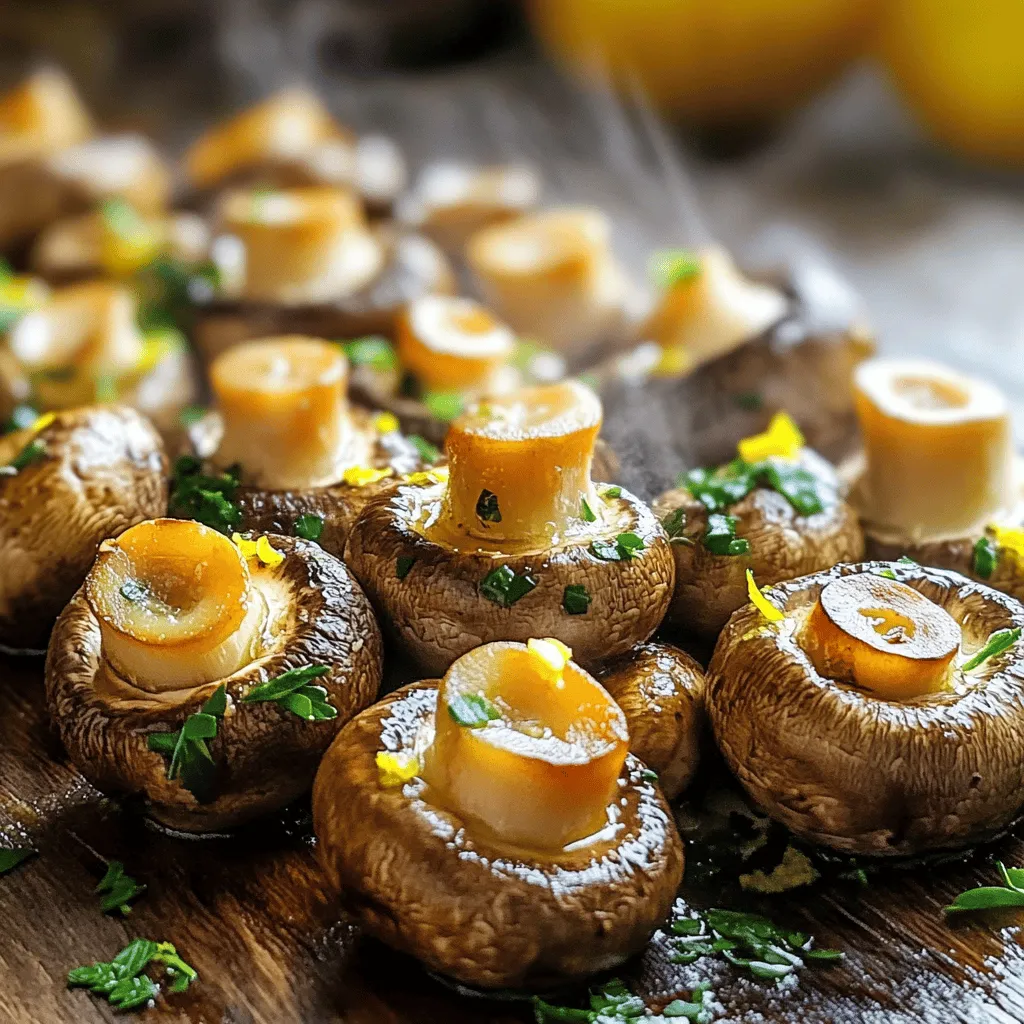
Serving Suggestions
Serve the garlic butter roasted mushrooms warm. They taste best when hot. You can pair them with crusty bread or a fresh salad. Dips like ranch or aioli go well too. For a nice touch, sprinkle lemon zest and parsley on top just before serving.Enjoy your savory dish!
Tips & Tricks
Perfecting the Recipe
To adjust flavors, start with the garlic butter. You can add more garlic for a stronger taste. If you want a hint of heat, try adding red pepper flakes. For seasoning, taste before serving. This helps balance salt and pepper.
For the right texture, avoid mushy mushrooms. Cut larger ones in halves or quarters. This helps them roast evenly. Always spread mushrooms out on the baking sheet. This keeps them from steaming and helps them crisp up.
Common Mistakes to Avoid
One big mistake is overcrowding the baking sheet. When you pack mushrooms too close, they steam instead of roast. This makes them soggy. Always use a large enough pan.
Another mistake is cooking at the wrong temperature. If your oven is too low, mushrooms won’t get that nice golden color. Set your oven to the right heat, 200°C (400°F), for the best results.
Enhancing Presentation
Garnishing can make your dish pop. Try adding fresh parsley on top for color. A sprinkle of lemon zest adds brightness.
For creative plating, use a rustic bowl or a wooden platter. This makes your garlic butter roasted mushrooms look inviting. You can also add a lemon wedge to the side. This gives a fresh touch and looks beautiful.

Variations
Flavor Variations
You can change the taste of garlic butter roasted mushrooms easily. Try adding herbs like rosemary or oregano for a new flavor. You can also mix in spices like paprika or cumin for a warm kick. If you want some fun, add a splash of balsamic vinegar or soy sauce. This brings a tangy taste that pairs well with the mushrooms.
Adding other veggies can enhance your dish too. Consider bell peppers, zucchini, or even asparagus. Chop them up and toss them in with the mushrooms. This makes the dish colorful and adds more nutrients. The oven will roast them perfectly together.
Dietary Adjustments
If you follow a vegan diet, you can still enjoy this dish. Replace the butter with olive oil or a vegan butter. The garlic and herbs will keep the flavor rich and tasty. For a nutty hint, use sesame oil instead. Just keep the same cooking steps.
For gluten-free diets, this dish is already safe! Just ensure any added sauces are gluten-free. You can serve these mushrooms with your favorite gluten-free bread or rice. This makes a great meal without any worry.
Serving Style Variations
Garlic butter roasted mushrooms can be served in many ways. As an appetizer, serve them hot in small bowls. You can pair them with toothpicks for easy eating. They also shine as a side dish. Serve them alongside meats or grains for a hearty meal.
You can enhance the dish with different sauces. Try a creamy garlic dip or a spicy aioli. These sauces add more depth and flavor. You might find new favorites by mixing and matching!
Storage Info
How to Store Leftovers
To keep your garlic butter roasted mushrooms fresh, place them in an airtight container. This helps keep moisture in and air out. Store them in the fridge. They will stay good for about three to four days. If you want to save them for longer, freezing is an option. Yes, frozen roasted mushrooms hold well. Just make sure to spread them out on a baking sheet and freeze until solid before putting them in a freezer bag.
Reheating Tips
When reheating, you want to keep the flavor and texture. The best method is to use an oven. Preheat it to 180°C (350°F). Spread the mushrooms on a baking sheet and heat for about 10 minutes. If you prefer a microwave, use a low power setting. Heat them for one to two minutes. Check often to avoid overcooking.
Shelf Life
Roasted mushrooms can last in the fridge for up to four days. After this, they may spoil. Signs of spoilage include a slimy texture, off smell, or dark spots. If you see these signs, it’s best to throw them away. Always trust your senses when it comes to food safety.
FAQs
How long do roasted mushrooms last?
Roasted mushrooms last about 3-5 days in the fridge. Store them in an airtight container. Make sure they cool before sealing. If they smell off or look slimy, it’s best to toss them. You can also freeze roasted mushrooms. They keep well for about 2-3 months in the freezer. Just thaw and reheat when you’re ready to eat.
Can I make garlic butter roasted mushrooms in advance?
Yes, you can prep garlic butter roasted mushrooms ahead of time. Cook the mushrooms, then let them cool. Store them in the fridge for up to 3 days. When you want to eat them, simply reheat in a pan or oven. This keeps the flavors fresh and tasty. Just be careful not to overcook them when reheating.
What can I pair with garlic butter roasted mushrooms?
Garlic butter roasted mushrooms pair well with many dishes. Serve them with steak or grilled chicken for a hearty meal. They also go well on pasta or rice. Toss them in salads for added flavor. You can even use them as a savory topping on toast or bruschetta. The options are endless, so get creative!
Can I use different types of butter?
Yes, you can use different butters to change the flavor. Try garlic-infused butter for extra garlic taste. Herb butter adds a nice twist too. If you want a rich flavor, use brown butter. Each type brings a new taste to the dish. Experiment with what you have for a fun cooking adventure.
You now have a complete guide to making garlic butter roasted mushrooms. From selecting the right mushrooms to perfecting your cooking technique, this recipe has something for everyone. Remember to keep an eye on your baking sheet and adjust flavors to suit your taste. With these tips and variations, you can enjoy diverse and tasty dishes every time. Enjoy your kitchen adventure with mushrooms, and don’t hesitate to get creative!


![- 1 can (15 oz) chickpeas, drained and rinsed - 2 ripe avocados - 1 tablespoon fresh lemon juice - 1 clove garlic, finely minced Chickpeas and avocados are the stars of this dish. Chickpeas give a nice, hearty feel. They are rich in protein and fiber. Ripe avocados add creaminess and healthy fats. Lemon juice brightens the mix, while garlic adds depth. - 1/4 teaspoon ground cumin - Salt and freshly ground black pepper - 4 slices of whole grain bread Cumin brings warmth to the mix. Salt and pepper help enhance the flavors. Whole grain bread gives a hearty base that complements the toppings well. Choose bread that toasts nicely for the best crunch. - 1 small red onion, finely chopped - 1/2 cup cherry tomatoes, halved - Fresh cilantro or parsley, chopped - Extra virgin olive oil for drizzling Toppings add fun and flavor. Red onion gives a sweet bite, while cherry tomatoes add freshness. Fresh herbs like cilantro or parsley add color and taste. A drizzle of olive oil adds richness that ties everything together. For the full recipe, check the [Full Recipe]. 1. Start by opening the can of chickpeas. Drain and rinse them well. This helps remove extra sodium and gives a cleaner taste. 2. In a medium bowl, use a fork or potato masher to lightly mash the chickpeas. Aim for a mix of chunky and smooth. This texture makes the spread more fun to eat. 3. Next, scoop out the ripe avocados and add them to the bowl. The creaminess of the avocado balances the chickpeas perfectly. 4. Pour in the fresh lemon juice and add the minced garlic. This gives your mixture a zesty kick. 5. Sprinkle in the ground cumin, salt, and black pepper. Adjust the seasonings based on your taste. Mix everything together until it’s creamy but still a bit chunky. 1. Take your slices of whole grain bread. Lightly toast them in a toaster or on a skillet. Aim for a golden brown color. 2. For a perfect crunch, keep an eye on the bread while toasting. Too light and it’s soft; too dark and it burns. You want that nice, crispy bite. 1. Once your bread is ready, take a generous scoop of the chickpea-avocado mixture. Spread it evenly over each slice of toast. 2. Now, chop the red onion finely and halve the cherry tomatoes. Scatter these colorful toppings over the spread for a fresh crunch. 3. Drizzle a touch of extra virgin olive oil over the top. This adds richness and a lovely finish. 4. Finish with a sprinkle of fresh cilantro or parsley. This not only looks great but also adds a burst of flavor. For the full recipe, check out the [Full Recipe]. Enjoy your vibrant and flavorful chickpea avocado toast! To make your chickpea avocado toast burst with flavor, start by adjusting the seasonings. Everyone's taste is different, and you may want more lemon or salt. Adding spices can also elevate the taste. Fresh ingredients are key. Ripe avocados give a creamy texture that blends beautifully with chickpeas. Use freshly squeezed lemon juice for the best zing. When mashing chickpeas, aim for a mix of chunky and smooth. This gives a nice texture that feels great on the palate. Use a fork or potato masher for this. Avoid over-mashing; you want some bits to stay whole. Ripe avocados are essential too. If they are too firm, the mixture won’t be creamy. Look for avocados that yield slightly when pressed. Presentation matters when serving your toast. Arrange the toasts on a wooden or elegant platter. This adds a rustic charm. You can also place extra cherry tomatoes around the toasts. This makes the dish look colorful and fresh. Drizzle olive oil on top for a glossy finish. A sprinkle of herbs adds a pop of green and invites your guests to dig in. {{image_4}} You can easily change the flavor of your chickpea avocado toast. Start by adding spices like smoked paprika or chili flakes. They give a warm kick that brings out the creaminess of the avocado. You might also try adding fresh herbs like basil or dill. These herbs add a fresh twist and brighten up your dish. Explore different toppings to make your toast unique. Adding protein like feta cheese crumbles or a poached egg can boost flavor and nutrition. For extra crunch, consider adding thinly sliced radishes or refreshing cucumbers. These toppings not only add texture but also enhance the color of your dish. Chickpea avocado toast is great for brunch or a light lunch. You can serve it with a side salad or crispy sweet potato fries for a hearty meal. Pair it with a refreshing iced tea or a glass of lemonade to complete the experience. Each bite is a fresh and flavorful delight that you can enjoy any time of day. Check out the Full Recipe for more tips! To keep your chickpea mixture fresh, store it in an airtight container. This helps lock in flavors. Always refrigerate the mixture right after you finish your meal. For the toasted bread, keep it separate from the chickpeas. Wrap the slices in foil or place them in a zip-top bag. This prevents the bread from getting soggy. Yes, you can freeze the chickpea-avocado mixture! Just place it in a freezer-safe container. Leave some space at the top, as it will expand. When you're ready to use it, take it out and thaw it in the fridge overnight. For serving, give it a quick stir. This helps bring back its creamy texture. You can refrigerate leftovers for about three days. After that, the quality drops. Always check for signs of spoilage. If the mixture smells off or looks discolored, it’s best to toss it. Keep an eye out for any mold or an unusual texture. It’s better to be safe than sorry when it comes to food! For chickpea avocado toast, I love using whole grain bread. Its dense texture holds the spread well. Sourdough also works great; it adds a tangy taste. If you want something softer, try multigrain bread. Look for bread that is sturdy enough to support the toppings without getting soggy. Yes, this recipe is vegan! Both chickpeas and avocados are plant-based. You can enjoy this dish without any animal products. Just ensure that your bread is vegan-friendly too. Most whole grain and multigrain breads are vegan. To make this recipe gluten-free, choose gluten-free bread. Many stores offer a variety of gluten-free options now. Check the label to ensure it’s truly gluten-free. Also, all other ingredients in this recipe are gluten-free. You can enjoy this delicious toast without worry. Chickpeas are high in protein and fiber. They help keep you full and satisfied. Avocados provide healthy fats, which are good for your heart. Together, they make a nutritious combo. In terms of calories, this dish is balanced. One serving has around 300 calories, depending on the bread. Each ingredient adds its own nutrients. This makes chickpea avocado toast great for a snack or meal. This blog post covered the ingredients for chickpea avocado toast, how to prepare it, and tips for great flavor and texture. You learned about various toppings, ways to store leftovers, and how to adapt the recipe to meet dietary needs. Remember, chickpea avocado toast is fun to make and packed with nutrients. You can customize it for any meal. Try different flavors and toppings to keep things exciting. Enjoy experimenting and creating your own delicious versions!](https://goldendishy.com/wp-content/uploads/2025/07/d91d2ffa-6d2b-4892-832e-374b5d5b44d0-768x768.webp)
![- 1 can (15 oz) chickpeas, thoroughly drained and rinsed - 1 large cucumber, diced into bite-sized pieces - 1 cup cherry tomatoes, halved for a burst of flavor - 1 red bell pepper, diced for sweetness and crunch - 1 small red onion, finely chopped for subtle sharpness - 1/4 cup fresh parsley, roughly chopped for a fresh aroma - 1/4 cup feta cheese, crumbled (optional; adds creaminess) - Juice of 2 fresh lemons, providing that zesty kick - 3 tablespoons extra-virgin olive oil for richness - 1 teaspoon Dijon mustard for a hint of tang - 1 teaspoon honey (or maple syrup for a vegan option) to balance flavors - Salt and freshly ground black pepper to taste This salad is packed with nutrients. It has about 200 calories per serving. You get protein from chickpeas, fiber from veggies, and healthy fats from olive oil. Plus, it provides vitamins A and C. This makes it not just tasty, but also good for you. Start by gathering a large mixing bowl. Add the chickpeas, diced cucumber, halved cherry tomatoes, red bell pepper, red onion, and parsley. Mix these fresh ingredients well. You want each piece to shine in your salad. If you enjoy cheese, sprinkle in the crumbled feta for a creamy touch. This adds a nice contrast to the crunch of the veggies. For the dressing, take a smaller bowl. Whisk together the lemon juice and olive oil. This forms the base of your zesty dressing. Next, add the Dijon mustard and honey. These ingredients give a perfect balance of flavor. Season with salt and black pepper. Whisk until the mixture looks smooth and well combined. Now it’s time to bring everything together. Drizzle the dressing over your salad mix. Use a spatula or wooden spoon to toss gently. You want all the ingredients to be evenly coated without mashing them. If you added feta, do a light toss to keep the cheese intact. Taste your salad and adjust the seasoning if needed. Cover it and let it chill in the fridge for at least 30 minutes. This helps the flavors meld beautifully. For the full recipe, you can refer back to the recipe card. To make your Zesty Lemon Chickpea Salad shine, focus on seasoning. Start with salt and pepper. Taste as you go. You may want more lemon juice for tang. If you like a sweeter flavor, drizzle more honey. For different dressings, try balsamic vinegar or apple cider vinegar. You can also mix in tahini for creaminess. Each option gives a new twist to the salad. Serving your salad well makes it more enticing. Use a large, colorful bowl for a rustic look. Add fresh parsley on top for a pop of green. You can even place lemon wedges around the bowl for a bright touch. If you want individual servings, use clear cups. This way, the layers show off the bright colors. A light drizzle of olive oil on each cup adds elegance. Prepping this salad in advance is easy. Make it a few hours before serving. The flavors develop more when they sit. For best results, chill the salad for at least 30 minutes. This helps the flavors mix well. You can store leftovers in the fridge for up to three days. Just keep the dressing separate if you want it fresh. For the full experience, check out the Full Recipe. {{image_4}} You can make this salad even better by adding veggies. Try adding avocados. They bring creaminess and healthy fats. Carrots can add a nice crunch. You can also toss in diced mango or apple. These fruits add sweetness and a fun twist. Want to make this salad heartier? Add some protein! Grilled chicken works great for meat lovers. Shrimp is a tasty option too. For a plant-based choice, use tofu. It soaks up flavors well and adds nutrition. Switch up the dressing for a new taste! Try using different vinegars, like balsamic or apple cider. You can also squeeze in more citrus juice for extra zing. For a creamier touch, mix in yogurt or tahini. Both add richness and make the salad more filling. Check out the [Full Recipe] to see how these variations can fit into your meal! Store your Zesty Lemon Chickpea Salad in a sealed container. This keeps it fresh and tasty. It lasts about 3 to 5 days in the fridge. Make sure to check for any signs of spoilage before eating. Freezing this salad is not ideal. The vegetables may lose their crunch. If you want to freeze it, consider freezing just the chickpeas. Place them in an airtight bag. When you want to use them, thaw overnight in the fridge. Leftover salad is great for new meals! You can add it to wraps for a quick lunch. Toss it in grain bowls for added flavor. Or, layer it in sandwiches for a fresh twist. You can even mix it into soups for a hearty touch. Enjoy creating new dishes with your leftover salad! For the full recipe, refer to the [Full Recipe]. Yes, you can make this salad ahead of time. In fact, it often tastes better after chilling. The flavors mix well when you let it sit. I suggest making it a few hours before serving. Just cover it with plastic wrap and place it in the fridge. This way, the lemon juice and olive oil soak into the chickpeas and veggies. You will enjoy a zesty and bright flavor profile! Yes, this salad is gluten-free. Chickpeas, fresh veggies, and the dressing contain no gluten. If you want to check other ingredients, always read the labels. Most items are safe, but it’s best to confirm. This makes the salad a great option for those with gluten sensitivities. You can serve it to everyone without worry! If you can’t eat chickpeas, no problem! You can use other beans like black beans or kidney beans. These will add protein and texture. Another option is to use cooked quinoa or lentils. These alternatives keep the salad hearty and filling. Each will bring a unique taste, so feel free to explore. Get creative based on what you have! This blog post provided a clear guide to making a Zesty Lemon Chickpea Salad. We covered the key ingredients, from fresh veggies to the zesty dressing. You learned how to prepare, dress, and assemble the salad for the best flavor. I shared tips for meal prep, variations to try, and how to store leftovers. Remember, this salad is not just easy to make; it’s also packed with nutrients. Enjoy your creation, explore the variations, and make it your own!](https://goldendishy.com/wp-content/uploads/2025/07/e89bc11c-d040-4055-8bd2-d62839faab5f-768x768.webp)

