Garlic Butter Lemon Shrimp Quick and Tasty Delight

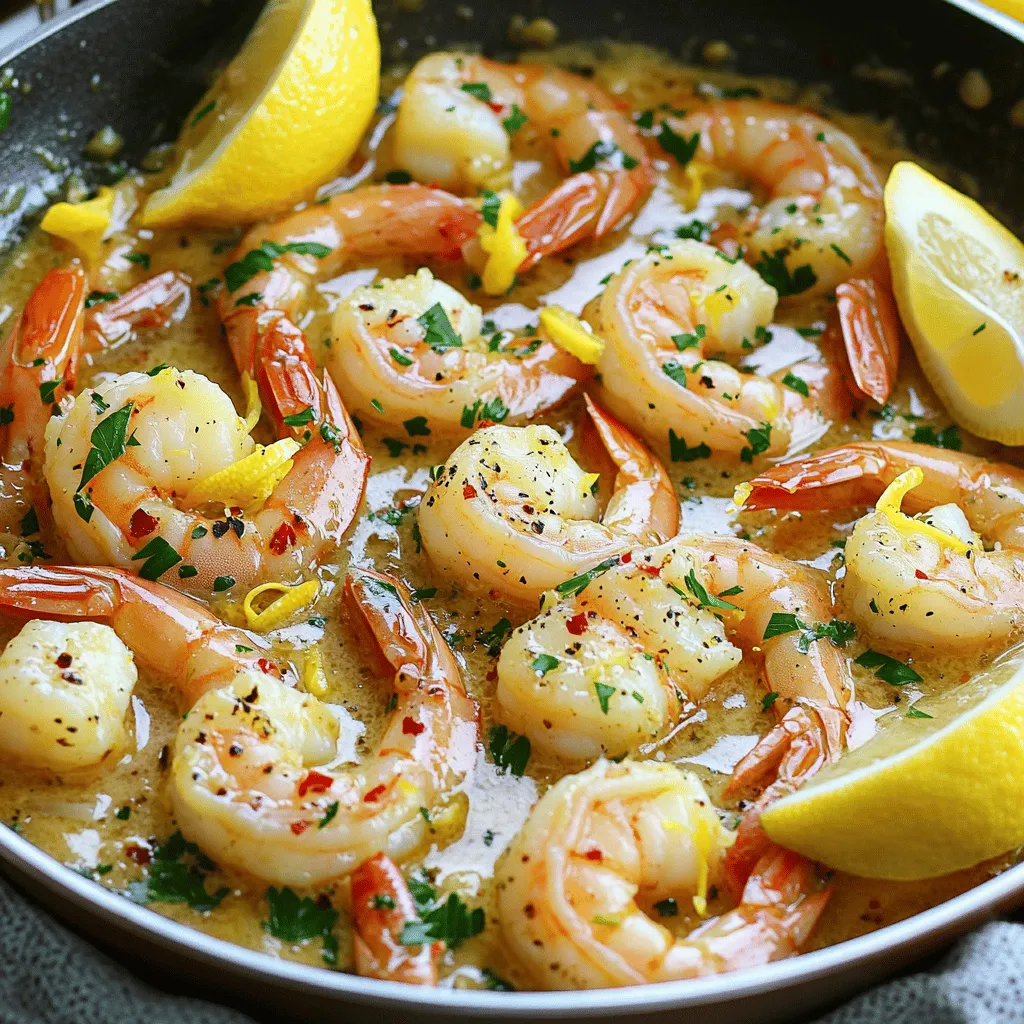
Craving a quick and tasty meal? Look no further than Garlic Butter Lemon Shrimp! This dish combines juicy shrimp with rich butter and zesty lemon for a flavor explosion. In just a few easy steps, you’ll have a delightful dinner that impresses everyone. With simple ingredients and prep, you can whip this up in no time. Let’s dive into this shrimp sensation that’s both easy and utterly delicious!
Ingredients
Main Ingredients
– 1 lb large shrimp, peeled and deveined
– 4 tablespoons unsalted butter
– 6 cloves garlic, finely minced
– 1 teaspoon red pepper flakes
– Zest and juice of 1 lemon
Seasoning and Garnish
– Salt and pepper, to taste
– 2 tablespoons freshly chopped parsley
– Lemon wedges for garnish
The main ingredients in Garlic Butter Lemon Shrimp create a big flavor. You start with large shrimp because they cook quickly and taste great. The unsalted butter adds richness. Garlic gives it a tasty kick, while red pepper flakes add just the right heat. Fresh lemon zest and juice brighten the dish and enhance the shrimp’s flavors.
Seasoning is also key. You will use salt and pepper to make everything pop. Fresh parsley adds a nice touch and color. Lemon wedges give you an extra burst of flavor when served.
This dish is not just quick but also simple to make.Enjoy cooking!
Step-by-Step Instructions
Preparation Steps
– Drying the Shrimp
Start by patting the shrimp dry with paper towels. This step is key. Dry shrimp sear better. If they are wet, they will steam and not brown. Set the shrimp aside after drying.
– Preparing the Skillet
Grab a large skillet and place it over medium heat. Add 4 tablespoons of unsalted butter. Let the butter melt fully. Once it bubbles lightly, you’re ready for the next step.
Cooking Process
– Sautéing Garlic and Red Pepper Flakes
Add 6 finely minced garlic cloves to the skillet. Also, toss in 1 teaspoon of red pepper flakes. Sauté for about 1 minute. Stir often to avoid burning the garlic. You want it fragrant, not brown.
– Cooking the Shrimp to Perfection
Turn the heat to medium-high. Carefully add the shrimp to the skillet. Season them with salt and pepper. Cook the shrimp for 2-3 minutes on each side. They should turn pink and opaque. Keep an eye on them; size may affect cooking time.
– Adding Lemon Zest and Juice
Once the shrimp are cooked, add the zest and juice of 1 lemon. Stir gently so the shrimp soak up that buttery flavor. This adds a fresh and zesty kick that brightens the dish.
Finishing Touches
– Incorporating Parsley
Remove the skillet from the heat. Add 2 tablespoons of freshly chopped parsley. Mix it in well. The parsley adds a pop of color and freshness.
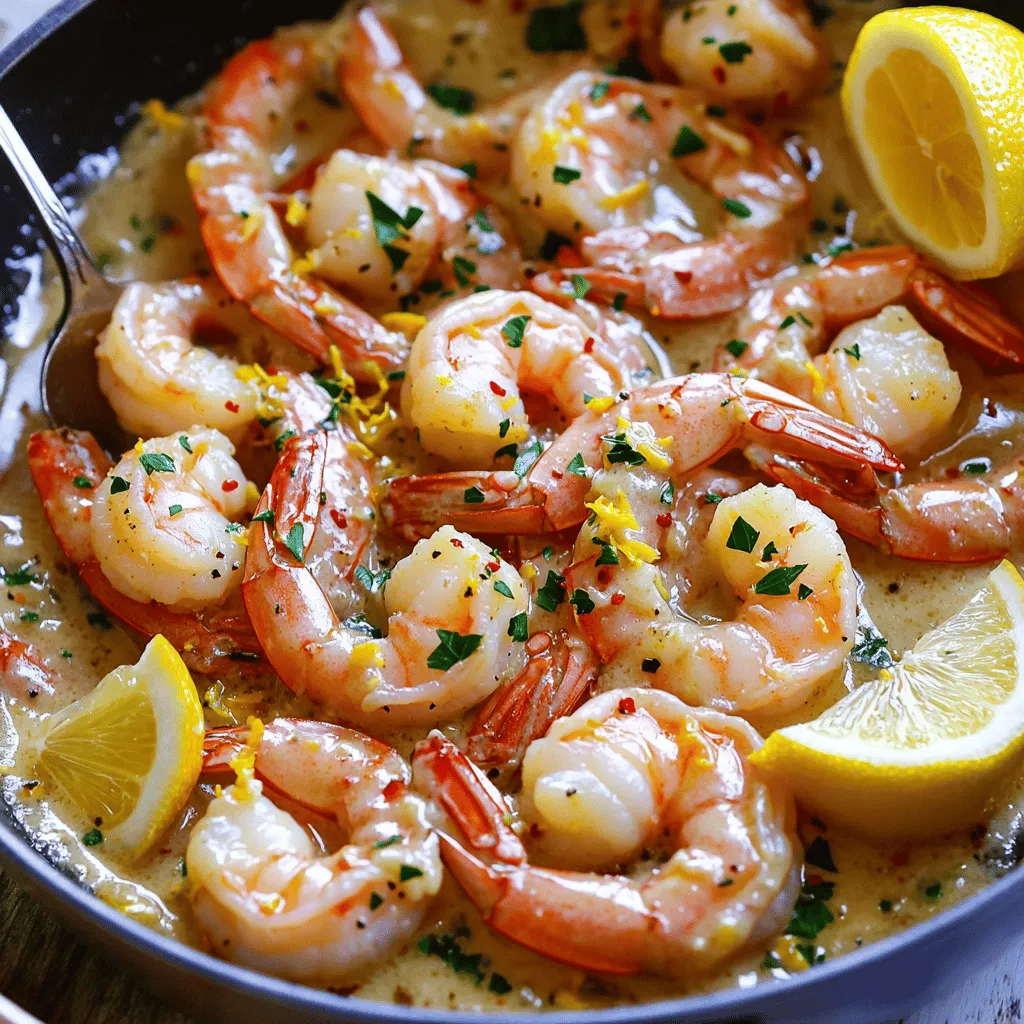
– Serving Suggestions
Serve the shrimp right away. Garnish with lemon wedges on the side. They look great and add more zest. This dish is quick and makes a lovely meal.
Tips & Tricks
Perfecting the Shrimp
Patting Shrimp Dry
Patting shrimp dry is a must. Use paper towels to soak up moisture. This step helps achieve a nice sear. If shrimp are wet, they will steam instead of sear. A good sear adds flavor and texture.
Adjusting Cooking Time
Cooking time depends on shrimp size. For large shrimp, cook about 2-3 minutes on each side. Watch for a pink color and firm texture. If they turn rubbery, you’ve cooked them too long. Remember, shrimp cook fast!
Enhancing Flavor
Garlic Preparation Tips
Use fresh garlic for the best taste. Mince it finely to release its oils. This way, it infuses the butter better. Be careful not to burn the garlic while cooking. Burnt garlic tastes bitter and ruins the dish.
Adjusting Spice Level
Red pepper flakes add heat, but you can change that. Start with a small amount if you’re unsure. Taste as you go! You can always add more for a spicier kick.
Presentation Ideas
Creative Ways to Serve
Serve the shrimp in a bowl with some sauce. This keeps the shrimp juicy. You can also serve them over a bed of rice or pasta. This adds texture and makes the dish heartier.
Plating Suggestions
Garnish with chopped parsley and lemon wedges. This adds color and freshness. Use a white plate to make the shrimp pop visually. A good plate makes any dish look gourmet. For a fun touch, add a sprinkle of lemon zest on top.

Variations
Ingredient Swaps
You can switch up the protein in this dish. Try using chicken or scallops instead of shrimp. Both options pair well with the garlic butter and lemon flavors. You can easily adapt the cooking time. For chicken, cook it until it’s no longer pink. For scallops, cook them for about two minutes per side.
You can also play with the herbs and spices. Add fresh basil, rosemary, or thyme for more flavor. A touch of smoked paprika will give it a nice twist. Experiment and find your favorite mix!
Dietary Adjustments
If you need a gluten-free option, this recipe already fits the bill! The ingredients are naturally gluten-free. Just make sure to check any spice blends for hidden gluten.
For a low-carb version, skip the butter and use olive oil. This will cut down on carbs but keep the dish rich. You can also serve it over zucchini noodles or cauliflower rice for a tasty base.
Serving Pairings
This dish shines with simple sides. I recommend a fresh salad with lemon vinaigrette. It balances the rich garlic butter well. Try roasted asparagus or steamed broccoli for veggies that add color and crunch.
For drinks, a crisp white wine like Sauvignon Blanc complements the shrimp nicely. If you prefer something non-alcoholic, a sparkling lemon water will add a refreshing touch.
Storage Info
Storing Leftovers
How do I store Garlic Butter Lemon Shrimp?
To keep your shrimp fresh, let them cool to room temperature first. Transfer them into an airtight container. This helps lock in moisture and flavors. Store the container in the fridge if you plan to eat them within a few days.
What are the recommended storage containers?
Use glass or plastic containers with tight-fitting lids. These containers keep the shrimp safe from air and bacteria. If you want to store them longer, consider using freezer-safe bags. Remove as much air as you can to prevent freezer burn.
Reheating Guidelines
What are the best methods to reheat?
The best way to reheat Garlic Butter Lemon Shrimp is on the stovetop. Heat a skillet over medium heat. Add a small amount of butter or oil, and then add the shrimp. Stir gently until warmed through.
How do I maintain flavor and texture?
To keep the shrimp tender, do not overcook them. Heat just until they are warm. You can also reheat them in the microwave. Place them in a microwave-safe dish and cover it. Heat in short bursts, checking every 30 seconds to avoid overcooking.
FAQs
Common Questions
How long do I cook the shrimp?
You cook the shrimp for about 2-3 minutes on each side. They should turn pink and not be translucent. Watch them closely to avoid overcooking.
Can I use frozen shrimp?
Yes, you can use frozen shrimp. Just thaw them first in cold water. Pat them dry before cooking for the best results.
What is the best type of shrimp for this recipe?
Large shrimp work best for this dish. They cook evenly and hold up well in the sauce. Look for shrimp labeled as “U/10” or “16/20” for great size.
Recipe Adjustments
Can I make this dish without garlic?
You can skip the garlic, but you lose a lot of flavor. Try adding herbs like basil or thyme for some taste.
What can I substitute for butter?
If you want to avoid butter, use olive oil or coconut oil. These oils add a nice flavor and keep the dish healthy.
Nutritional Information
Caloric content per serving
Each serving has about 250 calories. This includes the shrimp, butter, and lemon. It’s a light meal that’s packed with protein.
Recipe variations for health benefits
To make it healthier, use less butter or add more veggies. You can serve the shrimp over zucchini noodles or brown rice for extra fiber.
In this blog post, we covered how to make tasty garlic butter lemon shrimp using simple ingredients. You learned about preparing and cooking the shrimp perfectly while adding flavor. We shared helpful tips, variations, and how to store your leftovers for future meals.
Remember, cooking can be fun and easy. Try new flavors and enjoy your delicious shrimp dish! By following these steps, you’ll impress family and friends alike. Happy cooking!


![To make Caprese Pasta with Balsamic Glaze, gather these key ingredients: - 12 oz pasta (fusilli or penne recommended) - 2 cups cherry tomatoes, halved - 1 cup fresh mozzarella balls (bocconcini), drained and patted dry - 1/2 cup fresh basil leaves, roughly torn - 1/4 cup extra virgin olive oil - 2 tablespoons balsamic glaze (store-bought or homemade) - 1 teaspoon garlic powder - Salt and freshly ground black pepper to taste Each ingredient plays a vital role. The pasta serves as the base. Cherry tomatoes add sweetness and color. Fresh mozzarella adds creaminess. Basil brings freshness, while balsamic glaze ties everything together with a sweet-tangy kick. You can enhance your dish with a few optional garnishes: - Freshly grated Parmesan cheese - Extra basil leaves for a pop of color - A drizzle of olive oil before serving These garnishes boost flavor and make your pasta look stunning. They add a gourmet touch that impresses everyone. Choosing high-quality ingredients makes a big difference. Here are some tips: - Use fresh pasta for a softer texture and richer flavor. - Select ripe cherry tomatoes for better sweetness. - Buy mozzarella balls packed in water for the best taste. - Pick fresh basil with vibrant green leaves. When you use quality ingredients, your Caprese Pasta will shine. Each bite will burst with flavor, making your meal truly special. For the full recipe, check the section above. Start by boiling a large pot of salted water. Once it reaches a rolling boil, add 12 ounces of pasta. I recommend using fusilli or penne for this dish. Cook the pasta according to the package instructions, usually around 8 to 10 minutes. You want it al dente, which means it should remain firm to the bite. After cooking, drain the pasta in a colander. Rinse it under cold water to stop the cooking process, then set it aside. In a small mixing bowl, combine 1/4 cup of extra virgin olive oil, 1 teaspoon of garlic powder, and salt and black pepper to taste. Whisk these ingredients together until they form a smooth mixture. This dressing adds flavor to your pasta and brings all the ingredients together. Set the dressing aside for now. In a large mixing bowl, add the drained pasta, 2 cups of halved cherry tomatoes, and 1 cup of fresh mozzarella balls. Use a spatula or wooden spoon to gently mix these ingredients together. Next, pour the prepared dressing over the pasta mix. Toss everything until all the ingredients are coated with the dressing. Then, gently fold in 1/2 cup of torn fresh basil leaves. Be careful not to bruise them. Just before serving, drizzle 2 tablespoons of balsamic glaze over the pasta. Toss the dish again for an even flavor. You can serve this pasta warm or chill it in the fridge for about 30 minutes for a cold salad. Enjoy your Caprese Pasta with Balsamic Glaze! For the complete recipe, check the Full Recipe section. To boost the flavors in your Caprese pasta, focus on fresh ingredients. The magic lies in ripe cherry tomatoes and creamy mozzarella. Use extra virgin olive oil for a rich taste. If you want a zesty kick, add a bit of lemon juice. It brightens the dish. Consider also using garlic powder for depth—just a teaspoon will do. Lastly, a sprinkle of salt and pepper can make all the difference. Cooking pasta to the right texture is key. Aim for al dente, which means it should be firm but cooked. Start with a large pot of salted boiling water. This helps flavor the pasta. Follow the package’s recommended cook time, usually about 8-10 minutes. Once cooked, drain it but do not rinse. Rinsing washes away the starch, which helps sauce cling to the pasta. A beautiful presentation makes any meal special. Use a large, shallow bowl for serving. This allows the colors to pop. Top your pasta with fresh basil leaves and a sprinkle of Parmesan cheese. You can drizzle a bit more balsamic glaze on top for that extra visual appeal. Serve it warm or chill it for a refreshing treat. Remember, we eat with our eyes first! For the full recipe, check out the Caprese Pasta Delight. {{image_4}} You can mix up this Caprese pasta recipe easily. Use different pasta shapes like spaghetti or farfalle for fun. Swap cherry tomatoes for sun-dried tomatoes if you want a bolder taste. You can also try adding grilled chicken or shrimp for protein. Instead of fresh mozzarella, use feta for a tangy twist. Seasonal ingredients can brighten this dish. In spring, add asparagus or peas for freshness. Summer is perfect for zucchini or bell peppers. In fall, consider roasted butternut squash for a sweet flavor. Winter calls for hearty greens like kale or spinach. These additions can enhance color and taste. You can make this dish fit many diets. To make it vegan, skip the mozzarella and use avocado or cashew cheese instead. For a gluten-free option, choose gluten-free pasta made from rice or quinoa. Adjust the dressing by using a vegan-friendly oil. This way, everyone can enjoy Caprese pasta. For the full recipe, check [Full Recipe]. To keep your Caprese pasta fresh, store it properly. Place any leftovers in an airtight container. This helps keep moisture in and prevents the pasta from drying out. If you have extra balsamic glaze, store it separately. This way, you can drizzle it on just before serving. When it's time to eat your leftovers, reheat the pasta gently. Use a microwave or a pan on low heat. If using the microwave, heat in short bursts to avoid overcooking. Add a splash of olive oil or a bit of water to keep it moist. Stir well to ensure even heat. Caprese pasta stays fresh for about 3 days in the fridge. After that, the flavors can fade. If you want to keep it longer, consider freezing it. But remember, the texture might change once it's thawed. Enjoy your delicious meal within those days for the best taste! To make balsamic glaze, start with balsamic vinegar. Pour one cup of vinegar into a small saucepan. Heat it over medium heat. Stir it often as it heats. Once it boils, reduce the heat. Let it simmer for about 15 to 20 minutes. The vinegar will reduce and thicken. You want it to coat the back of a spoon. Take it off the heat and let it cool. The glaze will thicken more as it cools. Yes, you can use many types of pasta. Fusilli and penne are great choices. You can also try rotini, farfalle, or spaghetti. Each type offers a unique texture. Choose what you like best. Just remember to cook it until it is al dente. Absolutely! Caprese pasta is great for meal prep. You can make it ahead of time. Store it in an airtight container in the fridge. It keeps well for up to three days. Just add the balsamic glaze right before serving. This will keep the flavors fresh. For the full recipe, check out the Caprese Pasta Delight section. This article covered key ingredients for Caprese pasta, how to cook it, and tips for flavor and texture. We also explored variations for different diets and seasonal tastes. Remember, quality ingredients make a big difference. Experiment with flavors and enjoy your meals. It’s all about making food that you love. Enjoy creating your perfect Caprese pasta!](https://goldendishy.com/wp-content/uploads/2025/05/8e484e0a-c503-4741-abc1-b7211b9a34a5-768x768.webp)


![To make Easy Chicken Tortilla Soup, gather these key ingredients: - 2 tablespoons olive oil - 1 medium onion, finely diced - 2 cloves garlic, minced - 1 bell pepper (any color), finely diced - 2 medium tomatoes, diced - 4 cups low-sodium chicken broth - 1 teaspoon ground cumin - 1 teaspoon chili powder - 1 teaspoon smoked paprika - 1 pound cooked chicken breast, shredded - 1 can (15 oz) black beans, thoroughly rinsed and drained - 1 cup corn (fresh or frozen) - Salt and freshly ground black pepper, to taste These ingredients create a rich flavor base for your soup. The spices, like cumin and chili powder, add warmth. Using low-sodium broth helps control salt levels. For a delightful finish, consider adding these garnishes: - Tortilla chips, for garnish and added crunch - Fresh cilantro, roughly chopped, for garnish - 1 ripe avocado, diced, for garnish - Lime wedges, for serving These garnishes enhance the soup's look and taste. The crunch of tortilla chips contrasts nicely with the tender soup. A squeeze of lime adds a zesty touch. To prepare this soup, have these tools on hand: - A large pot - A sharp knife - A cutting board - A measuring spoon - A ladle for serving Having the right tools makes cooking easier. A large pot holds all the ingredients while they cook together. A sharp knife and cutting board help you chop veggies quickly. For the full recipe, check out the [Full Recipe]. Gather your ingredients before you start. This makes cooking easier and faster. You will need: - 2 tablespoons olive oil - 1 medium onion, finely diced - 2 cloves garlic, minced - 1 bell pepper (any color), finely diced - 2 medium tomatoes, diced - 4 cups low-sodium chicken broth - 1 teaspoon ground cumin - 1 teaspoon chili powder - 1 teaspoon smoked paprika - 1 pound cooked chicken breast, shredded - 1 can (15 oz) black beans, thoroughly rinsed and drained - 1 cup corn (fresh or frozen) - Salt and freshly ground black pepper, to taste - Tortilla chips, for garnish and added crunch - Fresh cilantro, roughly chopped, for garnish - 1 ripe avocado, diced, for garnish - Lime wedges, for serving 1. Heat the olive oil in a large pot over medium heat. 2. Add the diced onion and sauté for about 3-4 minutes until it turns soft. 3. Stir in the minced garlic and diced bell pepper. Cook these for 2 more minutes. 4. Now, add diced tomatoes, chicken broth, cumin, chili powder, smoked paprika, and shredded chicken. Mix well. 5. Raise the heat until it boils, then reduce it and let it simmer for 15 minutes. 6. After simmering, stir in the black beans and corn. Heat for another 5-7 minutes. 7. Taste and season with salt and pepper as needed. Adjust spices if you want more heat. Ladle the hot soup into bowls. Top with crumbled tortilla chips for crunch. Add diced avocado and fresh cilantro for color and flavor. Serve with lime wedges on the side. Squeeze lime juice over the soup before eating for a zesty kick! For the full recipe, check the section above. Enjoy your tasty chicken tortilla soup! To make your chicken tortilla soup taste amazing, focus on fresh ingredients. Use ripe tomatoes and fresh herbs. They add a burst of flavor. Toast your spices in the olive oil to release their aromas. This small step can boost the taste of your soup. Consider adding a splash of lime juice for brightness. It really makes a difference! If you like heat, add more chili powder or a diced jalapeño. For milder soup, use less spice. Remember to taste as you cook. You can add more spice later if needed. Also, consider serving hot sauce on the side. This way, everyone can adjust the heat to their liking. To speed up cooking, use pre-cooked chicken. Shredded rotisserie chicken works well. It saves time and adds flavor. Chop your veggies small for quicker cooking. Use a sharp knife for safety and ease. Lastly, keep your broth warm before adding it to the pot. This helps your soup come together faster. For the full recipe, check out the earlier section. {{image_4}} You can easily make a vegetarian version of chicken tortilla soup. Swap out the chicken for hearty vegetables. Use black beans for protein and fiber. Sweet corn adds a nice crunch. You can also add diced zucchini or bell peppers for more flavor. Use vegetable broth instead of chicken broth. This keeps the soup light yet filling. Top it with tortilla chips, avocado, and cilantro for the best taste. This version is perfect for a healthy meal. If you love heat, then spicy chicken tortilla soup is for you. Start with the original recipe and add more spices. Include diced jalapeños or serrano peppers for a kick. You can also add some cayenne pepper or hot sauce to the pot. Adjust the spice level to your liking. Serve it with sour cream to cool down the heat. This soup is sure to warm you up on a chilly night. For a creamy twist, turn your chicken tortilla soup into a creamy delight. After cooking the soup, stir in some heavy cream or sour cream. This gives the soup a rich and smooth texture. You can also blend a portion of the soup for extra creaminess. Just blend it in a blender and stir it back in. This version is comforting and perfect for those who enjoy a velvety finish. Don't forget to garnish with tortilla chips and avocado for a crunchy contrast. For the full recipe, check out the details above! After making Easy Chicken Tortilla Soup, allow it to cool. Use an airtight container. Store the soup in the fridge for up to three days. Make sure to keep it covered to preserve flavor. When you're ready to enjoy leftovers, pour the soup into a pot. Heat it over medium heat until warm. Stir it often to prevent sticking. You can also use the microwave. Place the soup in a bowl and cover it loosely. Heat for about 2-3 minutes, stirring halfway. Always check the temperature before eating. If you want to save some soup for later, freezing is perfect. Let the soup cool completely. Pour it into freezer-safe bags or containers. Leave some space for the soup to expand. Seal tightly and label with the date. You can freeze it for up to three months. When you want to eat it, thaw it overnight in the fridge before reheating. This method helps keep all the flavors intact. Enjoy the full recipe and indulge in this delightful dish! I recommend using cooked chicken breast for this soup. It stays tender and juicy. You can use leftover rotisserie chicken or poach chicken breasts to save time. Shredded chicken blends well with the soup flavors. Yes, you can make this soup in a slow cooker. Start by sautéing the onion and garlic in a pan. Then add all the ingredients to the slow cooker. Set it on low for 6-8 hours or high for 3-4 hours. This method lets the flavors meld nicely. Chicken Tortilla Soup stays fresh for about 3-4 days in the refrigerator. Store it in an airtight container. Make sure it cools before you put it in the fridge. If you want it to last longer, consider freezing it. You can find the Full Recipe for more details on storage. This blog post covered everything you need for easy chicken tortilla soup. We explored essential ingredients, tools, and garnishes. You learned the clear steps for prep and cooking, plus tips for flavor and spice. Variations let you customize the soup to your taste. Lastly, we discussed how to store and reheat leftovers. Now, you can enjoy this tasty meal any time. Get creative with flavors and make it your own!](https://goldendishy.com/wp-content/uploads/2025/06/e0a7fe5b-d8f8-4d99-83cb-06f3f9771105-768x768.webp)
![To make these crispy fish tacos, gather these key items: - 1 lb white fish fillets (cod or tilapia work great) - 1 cup all-purpose flour - 1 cup cornmeal - 1 teaspoon paprika - 1/2 teaspoon cayenne pepper - 1/2 teaspoon garlic powder - 1/2 teaspoon salt - 1/4 teaspoon black pepper - 2 large eggs, beaten - Vegetable oil, for frying - 8 small corn tortillas The toppings add flavor and texture to your tacos. Here are my favorites: - 1/2 cup red cabbage, thinly sliced - 1 avocado, sliced - Fresh cilantro leaves, for garnish - Lime wedges, for serving To round out your meal, consider these sides: - Fresh salsa for a zesty kick - A drizzle of spicy crema for creaminess - Mexican rice for a hearty addition These ingredients make crispy fish tacos a fun and tasty weeknight meal. For the full recipe, be sure to check out the details above! Start by drying the fish fillets with paper towels. This step helps the coating stick better. Cut the fish into strips that are about 1 inch wide. This size cooks evenly and fits nicely in the tacos. In a medium bowl, mix the flour, cornmeal, paprika, cayenne pepper, garlic powder, salt, and black pepper. Stir until well combined. In another bowl, beat the eggs until smooth. This egg wash will help the coating stick. Heat about 1 inch of vegetable oil in a large skillet over medium-high heat. Check if the oil is hot by dropping in a pinch of the flour mix; if it sizzles, it's ready. Dip each fish strip into the egg wash, letting excess drip off. Then coat it in the flour mixture, pressing lightly to ensure it sticks. Place the coated fish in the hot oil, frying in batches to prevent overcrowding. Cook for 3-4 minutes on each side until golden brown. Transfer the fried fish to a plate lined with paper towels to absorb extra oil. Warm each corn tortilla in a dry skillet for about 30 seconds on each side. This makes them soft and easy to fold. For each tortilla, place 2-3 pieces of crispy fish. Top with sliced red cabbage, avocado, and fresh cilantro. Don’t forget to serve the tacos with lime wedges. A squeeze of lime adds a bright, fresh flavor. For the full recipe, you can check the complete details above. To get that perfect crunch, follow these steps: - Dry the Fish: Start by patting the fish fillets with paper towels. This removes moisture and helps them get crispy. - Use Cornmeal: Mixing cornmeal with flour gives extra texture and crunch. It makes the coating thicker and crispier. - Hot Oil: Make sure the oil is hot enough before frying. If it’s too cool, the fish will absorb oil and turn soggy. - Don’t Overcrowd: Fry the fish in batches. Too many pieces at once cools the oil and affects crispiness. Here are some common mistakes you should steer clear of: - Skipping the Egg Wash: The egg wash helps the coating stick. Don’t skip this step! - Not Heating the Oil Properly: Always test the oil. If it’s not hot, you’ll end up with greasy fish. - Using Wet Fish: Wet fish won’t fry well. Always dry them before coating. - Flipping Too Soon: Let the fish cook fully on one side before flipping. This helps it stay intact and crispy. Enhance your tacos with these tasty garnishes: - Fresh Cilantro: Adds a burst of freshness and color. - Avocado: Creamy avocado pairs well with crispy fish. - Lime Wedges: A squeeze of lime brightens up the flavors. - Salsa or Crema: A drizzle of spicy crema or your favorite salsa adds flavor and moisture. For the full recipe, check out [Full Recipe]. {{image_4}} If you want to try a different protein, shrimp works great. Just peel and devein before cooking. You can also use chicken strips. They need a bit more time to cook, so adjust frying time. Another option is tofu for a different texture. Press it to remove water and cut into strips. For a vegetarian twist, use cauliflower. Cut it into small florets, coat, and fry. It gets nice and crispy. If you want a vegan option, tempeh is fantastic. Slice it thin and marinate for flavor before frying. Just make sure to use a plant-based egg wash or a mixture of flour and water. To boost flavor, add lime zest to the coating mix. It brightens each bite. For spice, increase the cayenne pepper in the coating. You can also create a spicy sauce for drizzling on top. Mix yogurt or mayo with hot sauce for a creamy kick. Fresh herbs like cilantro or parsley can add freshness too. These variations keep the dish exciting, ensuring you can enjoy crispy fish tacos in many ways! Try out the full recipe to explore these options. To keep your crispy fish tacos fresh, store leftovers in an airtight container. Place the fish in one container and the toppings in another. This keeps the fish crispy and the toppings fresh. You can also wrap the tortillas in foil for better storage. To reheat, use the oven or an air fryer for best results. Preheat your oven to 350°F (175°C). Place the fish on a baking sheet and bake for about 10 minutes. If using an air fryer, heat it to 350°F (175°C) and fry for 5 minutes. This way, the fish stays crispy. Cooked fish lasts about 2-3 days in the fridge. Fresh toppings, like cabbage and avocado, can last 1-2 days. Store each item separately. If you have leftover tortillas, they can stay fresh in a sealed bag for up to a week. Always check for signs of spoilage before using any of the ingredients. For the full recipe, check the complete list of ingredients. I recommend using white fish like cod or tilapia. These fish have a mild flavor and cook well. They stay tender inside while getting crispy on the outside. Other good options include haddock or snapper. Yes, you can prepare the fish ahead of time. Cut the fish into strips and coat them. Keep the coated fish in the fridge for up to an hour. This helps the coating stick better when you fry them. If you can't find corn tortillas, flour tortillas are a good choice. You can also use lettuce leaves for a low-carb option. They add a nice crunch and freshness to your tacos. Crispy fish tacos can be gluten-free if you use gluten-free flour. Make sure to check the labels on your ingredients. Corn tortillas are naturally gluten-free, so they work well for this dish. For the best results, use gluten-free breadcrumbs or a gluten-free flour blend for coating the fish. Crispy fish tacos are a fun dish to make at home. We discussed key ingredients, topped it with tasty options, and paired it with sides. The steps from preparing the fish to frying it were simple and clear. Use my tips for crispy results and avoid common mistakes. You can also explore variations for flavors and dietary choices. Proper storage will keep your tacos fresh. Now, enjoy making and sharing your crispy fish tacos! They’re sure to impress.](https://goldendishy.com/wp-content/uploads/2025/06/e15c4a6f-d152-43b4-ae39-d2f9004115b6-768x768.webp)