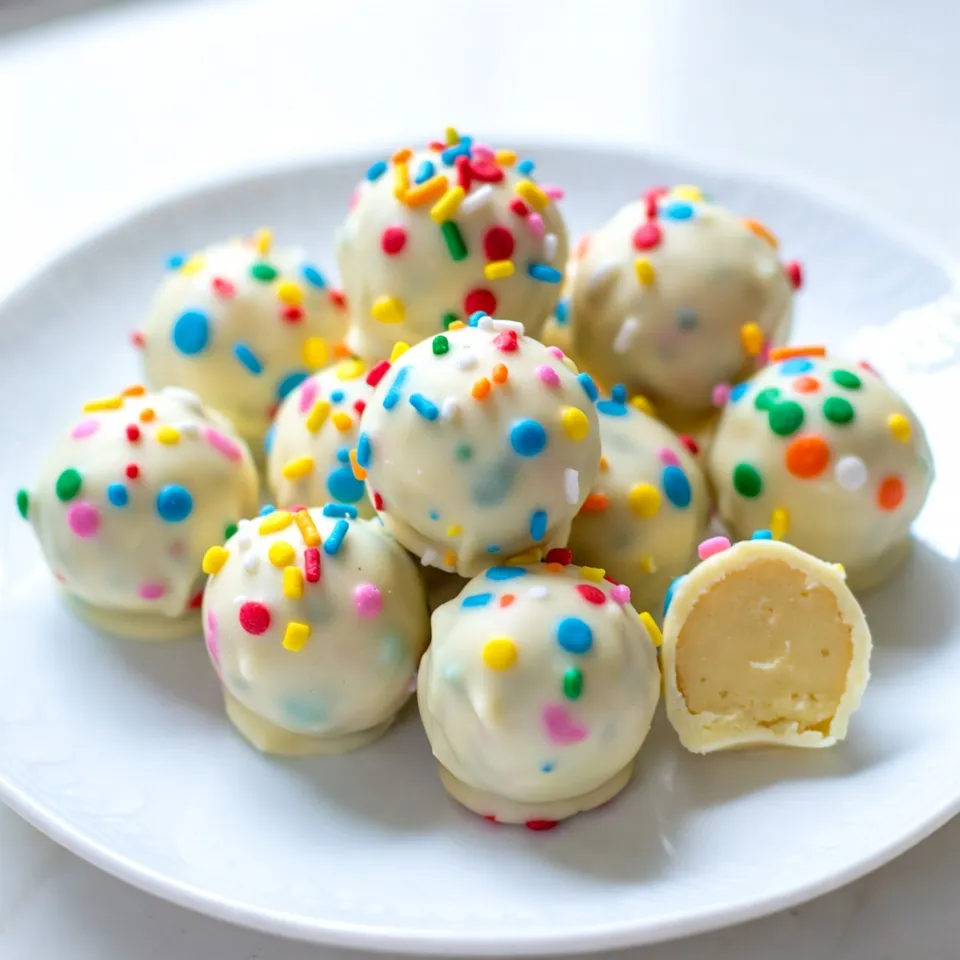
Get ready to indulge in a sweet treat that looks as great as it tastes! Funfetti Sugar Cookie Truffles are your next favorite dessert. I’ll guide you through each step, making it easy and fun to create these delightful bites. With sprinkles that pop and a creamy center, these truffles are perfect for any occasion. Let’s dive into the ingredients and start your tasty adventure!
Why I Love This Recipe
- Fun and Festive: These Funfetti Sugar Cookie Truffles are perfect for any celebration, adding a pop of color and joy to your dessert table.
- Easy to Make: With simple ingredients and straightforward steps, this recipe is a breeze to whip up, even for novice bakers.
- Deliciously Indulgent: The combination of cookie dough and cream cheese, coated in smooth white chocolate, offers a rich and satisfying treat.
- Customizable Delight: You can easily swap out the sprinkles or add flavors to the truffles, making them unique for any occasion!
Ingredients
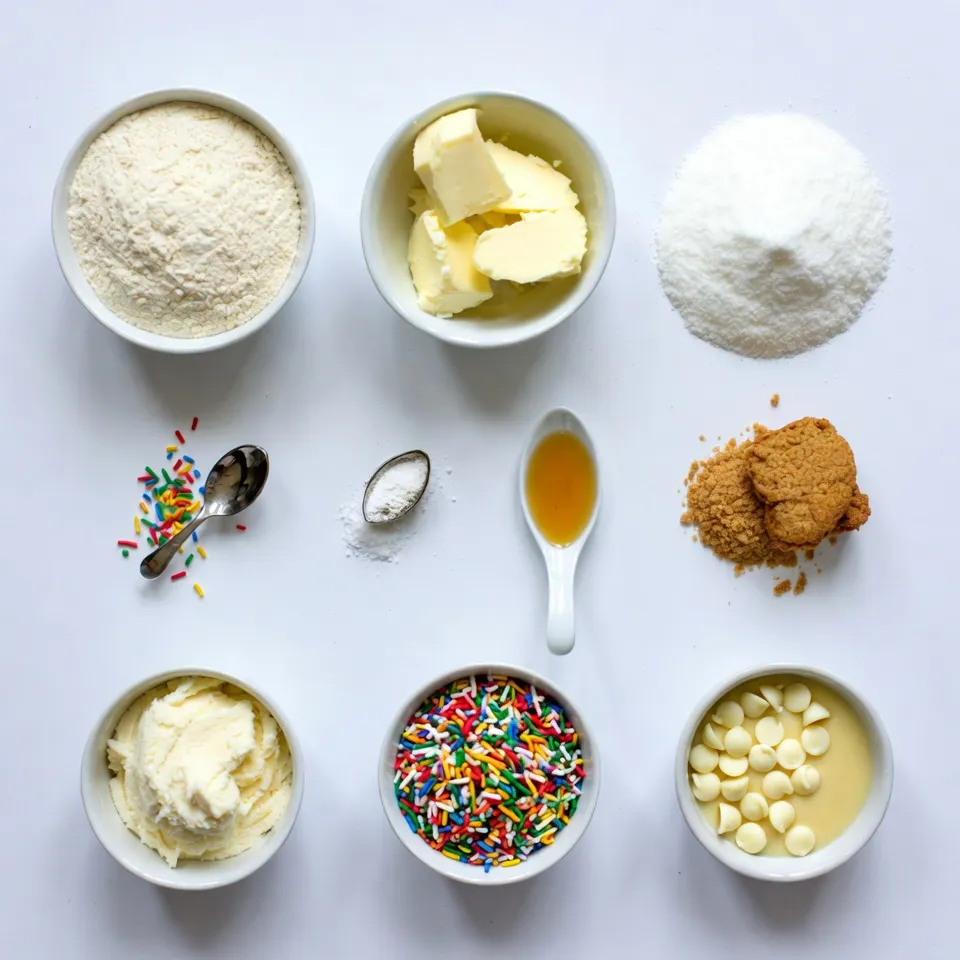
Complete List of Ingredients
– 1 cup all-purpose flour
– 1/2 cup unsalted butter, softened
– 1/2 cup granulated sugar
– 1/4 cup brown sugar, firmly packed
– 1/2 teaspoon baking powder
– 1/4 teaspoon salt
– 1 teaspoon pure vanilla extract
– 1 cup Funfetti sprinkles (plus extra for coating)
– 1/2 cup cream cheese, softened
– 1 cup white chocolate chips (for melting)
– Additional sprinkles for a festive coating
Key Ingredient Descriptions
– All-purpose flour: This is the base for our cookie dough. It gives structure to the truffles.
– Unsalted butter: Softened butter helps create a rich, creamy texture.
– Granulated sugar: This sugar sweetens the truffles and helps them hold their shape.
– Brown sugar: This adds moisture and a hint of caramel flavor.
– Baking powder: It helps the dough rise slightly, making it lighter.
– Salt: A pinch of salt enhances the sweet flavors.
– Pure vanilla extract: This adds a warm, sweet flavor.
– Funfetti sprinkles: These colorful bits make our truffles fun and festive.
– Cream cheese: It adds creaminess and richness to the dough.
– White chocolate chips: These melt down to coat the truffles in sweet, creamy chocolate.
Importance of Each Ingredient
Each ingredient plays a key role in making these Funfetti Sugar Cookie Truffles amazing.
– The flour provides structure, while the butter and sugars create a creamy base.
– Adding baking powder gives the truffles a light texture.
– Salt balances the sweetness and makes flavors pop.
– The vanilla extract gives a warm, inviting aroma.
– Funfetti sprinkles bring joy and color, making each bite fun.
– Cream cheese adds a rich taste, making the truffles extra special.
– Finally, the white chocolate chips create a smooth coating that makes these treats irresistible.
Use these ingredients to create delightful and cute treats that everyone will love!
Step-by-Step Instructions
Preparation of Dry Ingredients
First, gather your dry ingredients. In a medium bowl, combine 1 cup of all-purpose flour, 1/2 teaspoon of baking powder, and 1/4 teaspoon of salt. Whisk them together well. This mix helps give your truffles the right texture.
Creaming Butter and Sugars
Next, grab a large bowl for mixing. Take 1/2 cup of softened butter and add 1/2 cup of granulated sugar and 1/4 cup of brown sugar. Use a hand mixer or stand mixer to beat this mixture for about 2-3 minutes. You want it to be creamy and light in color. This step is key for a fluffy truffle.
Incorporating Flavor and Mixing Dough
Now, add 1 teaspoon of pure vanilla extract to your creamy mix. Beat it until everything is combined. Slowly add your dry ingredient mix to the butter and sugar blend. Mix on low speed just until the dough comes together. Be careful not to overmix.
Forming and Coating the Truffles
Gently fold in 1 cup of Funfetti sprinkles and 1/2 cup of softened cream cheese into the dough. Make sure the sprinkles are evenly spread. Now, cover the bowl with plastic wrap. Chill the dough in the fridge for 30 minutes to 1 hour until it’s firm.
Once chilled, use a tablespoon to scoop dough. Roll each scoop into a ball and place them on a parchment-lined baking sheet. Leave some space between them.
Melt 1 cup of white chocolate chips in a microwave-safe bowl. Stir every 30 seconds until smooth. Dip each dough ball into the melted chocolate. Let any excess chocolate drip off.
While the chocolate is still wet, sprinkle more Funfetti on top. This adds a fun and colorful finish. Return the truffles to the parchment sheet. Chill them for another 20-30 minutes to let the chocolate harden. Enjoy your delightful and cute treats!
Tips & Tricks
Common Mistakes to Avoid
When making Funfetti sugar cookie truffles, it’s easy to slip up. Here are some common mistakes:
– Overmixing the Dough: Mixing too much makes the truffles tough. Stop mixing as soon as the dough forms.
– Skipping the Chill Time: If you skip chilling, the dough will be too soft to roll. Always chill for at least 30 minutes.
– Not Using Room Temperature Ingredients: Cold butter or cream cheese can lead to lumpy dough. Let them warm up first.
How to Achieve the Perfect Texture
To get the best texture for your truffles, follow these tips:
– Use Softened Butter: Softened butter blends well with sugars, making a creamy base.
– Incorporate Cream Cheese: Adding cream cheese gives a smooth texture and richness.
– Don’t Overbake: If you bake the dough, it should be just set. This helps retain moisture.
Presentation Tips for Serving
Presentation makes your truffles look even cuter:
– Use Fun Serving Dishes: Place truffles in a colorful bowl or on a tiered stand.
– Add Extra Sprinkles: Sprinkle more Funfetti on top for a festive look.
– Drizzle with Chocolate: A drizzle of melted chocolate adds flair and taste.
These simple tips will help you create delightful and beautiful Funfetti sugar cookie truffles. Enjoy your baking!
Pro Tips
- Chill for Better Texture: Make sure to chill the dough for at least 30 minutes. This helps the truffles hold their shape and ensures a firmer texture when rolling.
- Use Quality Chocolate: For the best results, choose high-quality white chocolate chips. They melt smoothly and provide a rich flavor that enhances the truffles.
- Experiment with Sprinkles: Feel free to mix different types of sprinkles for a unique look. Try using chocolate sprinkles or themed sprinkles for holidays and celebrations!
- Store Properly: Keep the truffles in an airtight container in the refrigerator to maintain their freshness. They can last up to a week, perfect for sharing or enjoying later!
Variations
Different Types of Sprinkles
Sprinkles add fun and color to your truffles. You can use many types. Classic rainbow sprinkles are great for a cheerful look. You could also try chocolate sprinkles for a richer taste. For a holiday theme, use red and green or pastel colors. Edible glitter can give a magical touch. Get creative and mix different sprinkles for a unique style!
Flavor Additions and Substitutions
You can add new flavors to your truffles. Try almond extract instead of vanilla for a twist. A pinch of cinnamon can add warmth and spice. For a fruity touch, mix in some lemon or orange zest. If you want a nutty flavor, add finely chopped nuts or nut butter. You can even switch out cream cheese for ricotta or mascarpone for a different texture.
Alternate Coatings (Dark Chocolate, etc.)
While white chocolate is classic, you can explore other coatings. Dark chocolate gives a bold flavor and looks elegant. Milk chocolate is sweeter and loved by many. If you want a healthier option, use yogurt coating. For a crunchy texture, you can roll the truffles in crushed nuts or graham crackers. Each coating brings its own special touch to the truffles!
Storage Info
How to Store Leftover Truffles
To keep your Funfetti sugar cookie truffles fresh, store them in an airtight container. Place a layer of parchment paper between layers to prevent sticking. You can keep them at room temperature for up to two days. If you want to keep them longer, refrigerate them for up to a week.
Freezing Truffles for Later Use
If you want to save some truffles for later, freezing is a great option. First, place the truffles on a baking sheet. Freeze them for about one hour until firm. Then, transfer them to a freezer-safe container or bag. Label it with the date and type. You can freeze them for up to three months. Thaw them in the fridge before serving.
Shelf Life of Funfetti Sugar Cookie Truffles
The shelf life of Funfetti sugar cookie truffles varies by storage method. At room temperature, they last about two days. In the fridge, they stay fresh for about one week. If frozen, they can last up to three months. Always check for any off smells or changes in texture before eating.
FAQs
Can I make these truffles ahead of time?
Yes, you can make these truffles ahead of time. You can prepare the dough and chill it in the fridge. Keep it covered with plastic wrap. You can also form the truffles and store them in the fridge. They will stay fresh for about three days. If you want to keep them longer, freeze them for up to three months. Just let them thaw before serving.
What can I replace cream cheese with?
If you want a substitute for cream cheese, try using mascarpone cheese. It has a similar texture and taste. You can also use Greek yogurt for a lighter option. Just make sure it’s plain and thick. Both options work well and keep the truffles creamy.
How do I fix truffles that are too soft?
If your truffles are too soft, it’s easy to fix them. First, chill them in the fridge for about 30 minutes. If they still don’t hold their shape, add a little more flour. Just one tablespoon at a time is enough. Mix it in gently until you reach the right texture. This should help them firm up nicely.
In this article, I shared the key ingredients and steps for making funfetti sugar cookie truffles. I detailed tips to avoid common mistakes and offered variations for added fun. Storing these truffles correctly ensures they stay fresh. Remember, small changes can make a big difference in taste and texture. Enjoy making these treats, and feel free to experiment with flavors. You will impress your friends and family with these simple delights. Happy trufflin


