Fresh Tomato Cucumber Salad Vibrant and Easy Recipe

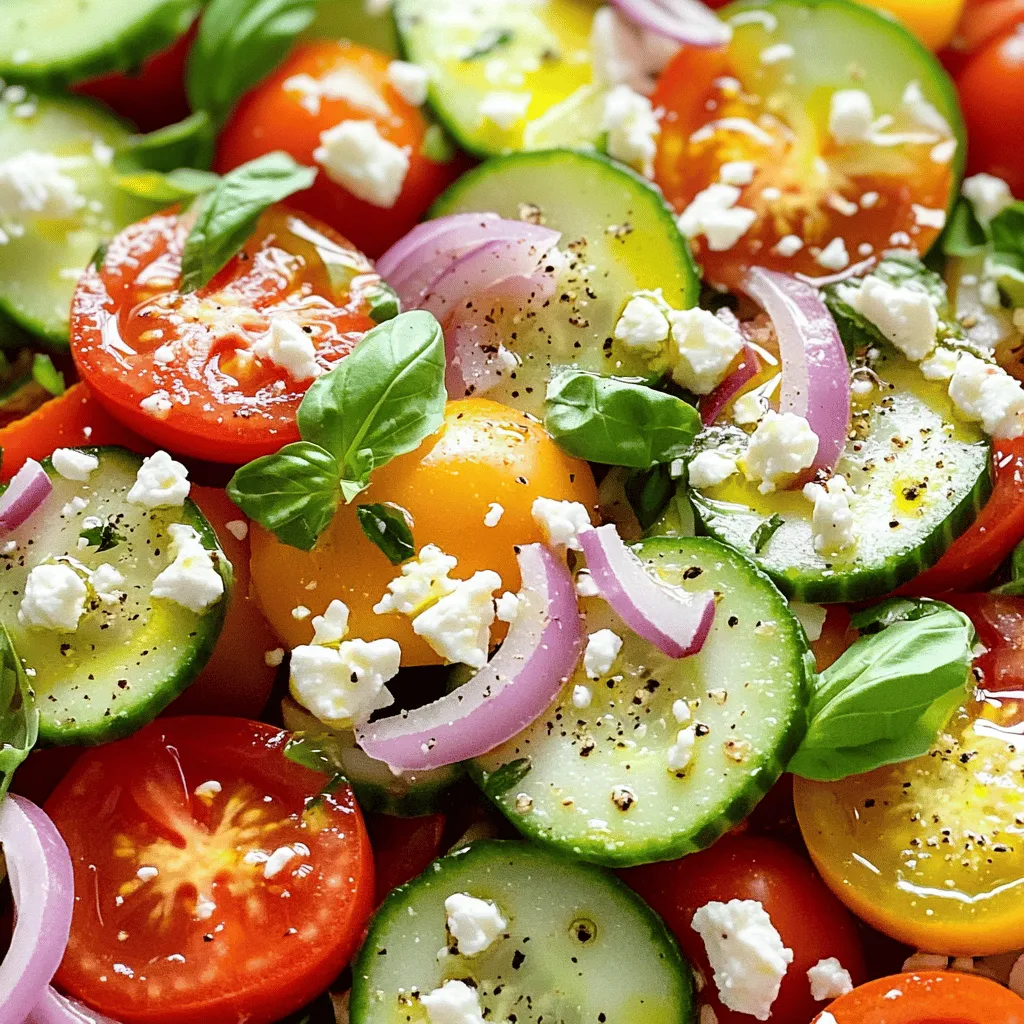
Looking for a simple way to enjoy fresh flavors? This Fresh Tomato Cucumber Salad is vibrant and satisfying. It combines juicy tomatoes, crisp cucumbers, and zesty onions, all topped with a tangy dressing. In just a few easy steps, you can create a dish perfect for summer BBQs or a light lunch. Let’s dive into this tasty recipe, packed with flavor and all the good-for-you ingredients you need!
Ingredients
Main Ingredients
– 3 medium ripe tomatoes, diced
– 1 large cucumber, peeled and diced
– 1/2 red onion, finely chopped
Additional Flavor Enhancers
– 1/4 cup fresh basil leaves, torn
– 1/4 cup feta cheese, crumbled
– Salt and pepper to taste
Dressing Ingredients
– 2 tablespoons extra virgin olive oil
– 1 tablespoon balsamic vinegar
– 1 teaspoon honey (optional)
Using fresh and ripe ingredients is key. The tomatoes should be juicy and sweet. Choose a cucumber that is firm and crisp. The red onion adds a nice bite and sweetness.
Fresh basil gives the salad a vibrant aroma. Crumbled feta cheese adds creaminess and a tangy flavor. Don’t shy away from salt and pepper; they enhance all flavors.
For the dressing, opt for high-quality olive oil. Balsamic vinegar adds a rich depth to the dish. The honey is optional but can balance the acidity if you desire.
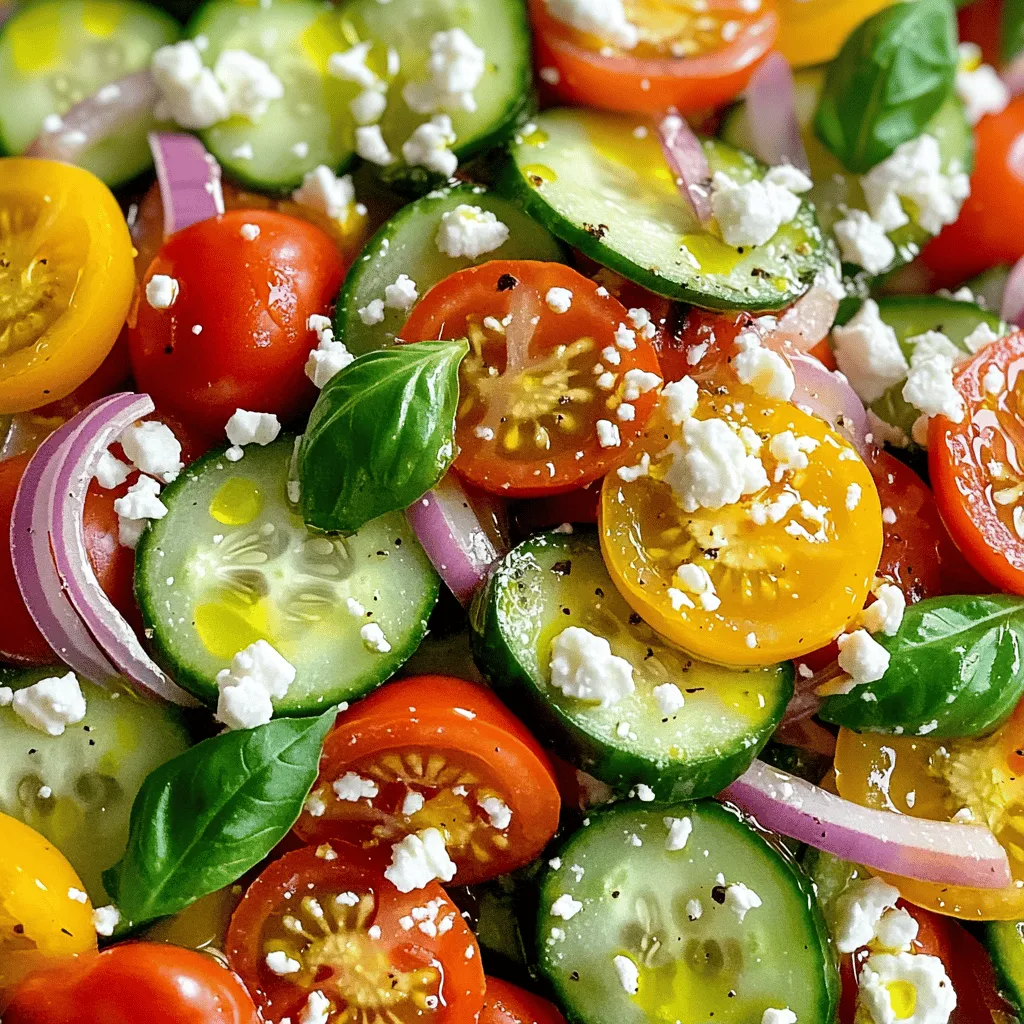
This combination creates a colorful and tasty salad.
Step-by-Step Instructions
Preparation of Vegetables
– Start by combining the diced tomatoes and cucumber in a big bowl. Make sure the pieces mix well.
– Next, add the finely chopped red onion. This gives a nice touch of sweetness. Toss in the torn basil leaves too. Their aroma will make the salad even better.
Mixing the Dressing
– In a small bowl, whisk together the extra virgin olive oil and balsamic vinegar. This creates a rich dressing.
– Add salt and freshly cracked pepper to taste. If you like a hint of sweetness, mix in the honey. Whisk until everything blends smoothly.
Assembling the Salad
– Drizzle the dressing over the salad mix. Toss gently but thoroughly. You want every piece to be coated nicely.
– Finally, sprinkle the crumbled feta cheese over the top. Give it another light toss to spread out the cheese.
– For the best flavor, let the salad sit for about 10 minutes before serving. This allows the flavors to meld beautifully.
Tips & Tricks
Best Practices for Freshness
– Use ripe, organic tomatoes and cucumbers. They taste better and are healthier.
– Chill the salad for enhanced flavors. Cold salad feels refreshing, especially on hot days.
Balancing Flavors
– Adjust the salt and vinegar to taste. Start with a little and add more if needed.
– Consider adding a squeeze of lemon juice for brightness. It gives the salad a zesty kick.
Serving Suggestions
– This salad pairs well with grilled meats. The fresh flavors balance the richness of the meat.
– Serve as a refreshing side dish at gatherings. Everyone loves a light salad on a warm day.

Variations
Ingredient Swaps
You can easily switch up the flavors in this salad. Instead of feta cheese, try goat cheese. It adds a creamy texture and tangy taste. You can also use arugula or spinach in place of basil for added greens. These swaps keep the salad fresh and exciting.
Different Dressing Options
Want to mix things up? Use a lemon vinaigrette instead of balsamic vinegar. The bright flavor of lemon gives a new twist. You can also add minced garlic to the dressing for extra flavor. This small change makes a big impact.
Dietary Modifications
If you want a vegan salad, simply leave out the cheese. The salad will still taste great without it. For a healthier option, use low-sodium ingredients. This helps you enjoy the salad while keeping your health in mind.
Try these variations to find your favorite version of this fresh tomato cucumber salad.
Storage Info
Short-term Storage
To keep your Fresh Tomato Cucumber Salad fresh, store it in an airtight container. You can keep it in the fridge for up to 2 days. This way, your veggies stay crisp and tasty.
Long-term Storage Tips
For long-term storage, freeze your ingredients separately. This helps maintain their flavor. Do not dress the salad until you are ready to eat. Adding dressing early can make the vegetables soggy.
Signs of Quality Degradation
Watch for wilting vegetables or any off smells. If your salad shows signs of spoilage, it’s best to discard it. Freshness is key to enjoying this vibrant dish.
FAQs
Can I make Fresh Tomato Cucumber Salad ahead of time?
Yes, you can make this salad ahead of time. To do this, prepare the veggies first. Dice the tomatoes and cucumber, then chop the onion and basil. Keep these in the fridge. You can mix them in a bowl before serving. For the dressing, whisk olive oil, vinegar, salt, and pepper in a separate jar. Keep the dressing chilled. This way, the veggies stay fresh, and the salad tastes great. Just drizzle the dressing on before serving. This keeps everything crisp.
What types of tomatoes are best for this salad?
For this salad, I love using ripe tomatoes. Roma tomatoes are firm and tasty. They have less juice, which keeps the salad crunchy. Beefsteak tomatoes are juicy and full of flavor, great for a burst in each bite. Cherry tomatoes are sweet and fun; they add a pop of color. Each type brings a unique taste. Mixing different tomatoes can make your salad even better. Choose what you like best for a taste that suits you.
Is this salad gluten-free?
Absolutely, this salad is gluten-free! All the ingredients, like tomatoes, cucumber, and feta, do not contain gluten. Always check labels if you use packaged items. Some dressings may have gluten, but the olive oil and vinegar in this recipe are safe. This makes the salad perfect for anyone with gluten concerns. You can enjoy it without worry!
This blog post covered an easy and fresh Tomato Cucumber Salad recipe. We discussed key ingredients like tomatoes, cucumbers, and onions. You learned how to mix the dressing and assemble your salad. I shared tips to enhance freshness and flavor, plus fun variations. This salad is quick to prep and perfect for many occasions. I encourage you to try it out. Use fresh ingredients for the best taste and enjoy this healthy dish at your next meal or gathering.


![To make the best roasted garlic hummus, gather these key ingredients: - 1 can (15 oz) chickpeas, thoroughly drained and rinsed - 1/4 cup creamy tahini - 1/4 cup high-quality olive oil, plus extra for drizzling - 4 cloves of roasted garlic - 2 tablespoons freshly squeezed lemon juice - 1/2 teaspoon ground cumin - Sea salt, to taste - Water, as needed for desired consistency - Sweet paprika and finely chopped fresh parsley for garnish These ingredients create a rich and creamy dip that bursts with flavor. The roasted garlic adds a sweet, mellow taste that enhances the overall profile of the hummus. You can customize your hummus with these optional ingredients: - Spices like smoked paprika or cayenne for heat - Fresh herbs such as basil or cilantro for added freshness - A splash of balsamic vinegar for depth - Roasted red peppers for a sweet and smoky twist These additions can help you explore new flavors and keep your hummus exciting. Here’s a quick look at the health benefits of the main ingredients: - Chickpeas: High in protein and fiber, they help keep you full. - Tahini: Made from sesame seeds, it provides healthy fats and calcium. - Olive oil: A heart-healthy fat that can lower bad cholesterol levels. - Garlic: Known for its immune-boosting properties and flavor. - Lemon juice: Adds vitamin C and brightens the flavor. This hummus is not just tasty; it’s also packed with nutrients. You can enjoy it guilt-free as a snack or appetizer. For the complete recipe, check out the full recipe section. To roast garlic, first, preheat your oven to 400°F (200°C). Take your garlic cloves and wrap them in aluminum foil. Drizzle a little olive oil over the cloves before sealing the packet. Place the foil packet in the oven and roast for about 30-35 minutes. The garlic should turn soft and golden brown. After roasting, let it cool for a few minutes before you touch it. This step brings out the sweet, rich flavor of the garlic. In a food processor, add the following ingredients: - 1 can (15 oz) chickpeas, thoroughly drained and rinsed - 1/4 cup creamy tahini - 1/4 cup high-quality olive oil, plus extra for drizzling - 4 cloves of roasted garlic - 2 tablespoons freshly squeezed lemon juice - 1/2 teaspoon ground cumin - Sea salt, to taste Blend these ingredients until they become silky smooth. You may need to stop and scrape down the sides to ensure even mixing. This step creates a rich and creamy base for your hummus. If your hummus is too thick, add water a little at a time. Start with one tablespoon and blend again until you reach your preferred creamy texture. Taste your hummus and adjust the seasoning. You might want more sea salt, lemon juice, or roasted garlic to suit your taste. For the full recipe, refer to the provided instructions. Enjoy making this delicious dip! To make your hummus extra creamy, use dry chickpeas. Soak them overnight and cook until soft. This gives a smoother texture. If you use canned chickpeas, rinse them well. It helps remove some of the canning liquid, which can make hummus taste tinny. Always blend your mixture well. Stop and scrape the sides of the bowl as needed. This step ensures every bit gets mixed in. Roasting garlic is easy and adds great flavor. Start by preheating your oven to 400°F (200°C). Wrap the garlic cloves in aluminum foil. Drizzle a little olive oil on top. Seal the foil tightly and bake for about 30-35 minutes. The cloves should be soft and golden brown. Let them cool before you handle them. You can use the roasted garlic in your hummus or on bread for a tasty treat. Roasted garlic hummus is very versatile. You can serve it with fresh veggie sticks like carrots, cucumbers, and bell peppers. Pita bread, toasted or soft, makes a great dipper too. For a fun twist, try pairing it with warm pita chips. Add a sprinkle of sweet paprika and fresh parsley on top for color. This makes your dish look beautiful and tasty. Don't forget to check out the Full Recipe for more details! {{image_4}} You can boost the taste of your roasted garlic hummus with spices and herbs. Try adding paprika for a smoky kick or chili powder for heat. Fresh herbs like cilantro or basil can add a bright touch. A pinch of za'atar brings an earthy flavor, while a dash of black pepper enhances the taste. Mix and match to find your favorite combination! Though chickpeas are classic, other beans and peas work well too. White beans like cannellini add creaminess and a mild taste. Black beans give a rich color and unique flavor. You can even use peas for a sweet twist. Each option brings its own character, so experiment to discover what you love! Roasted garlic hummus shines as a dip, but it can do much more. Spread it on sandwiches or wraps for a flavorful layer. Use it as a base for veggie pizzas or flatbreads. Pair it with crackers or pita chips for a fun snack. You can even dollop it on salads for added creaminess. The options are endless! For the full recipe, check out the detailed steps to make your own roasted garlic hummus. To keep your roasted garlic hummus fresh, place it in an airtight container. Make sure to press a piece of plastic wrap against the hummus before sealing. This helps to keep the air out and maintain its creamy texture. Store it in the fridge for up to one week. Always use a clean spoon when scooping out hummus. This avoids introducing bacteria that can spoil your dip. You can freeze roasted garlic hummus for longer storage. Use a freezer-safe container or a resealable bag. Leave some space at the top, as the hummus may expand when frozen. It can last for about three months in the freezer. To use, thaw it overnight in the fridge before serving. Stir well after thawing to restore its smooth consistency. Homemade hummus can last for about a week when stored correctly in the fridge. If you notice any off smells or changes in color, it’s best to discard it. Always trust your senses. Freshness is key for the best flavor. If you made a big batch, consider freezing a portion for later use. Check the [Full Recipe] for tips on making the perfect hummus. You can easily make roasted garlic hummus vegan. The main ingredients are already plant-based. Just use chickpeas, roasted garlic, olive oil, lemon juice, and seasoning. Ensure your tahini is vegan too. Most brands are, but it’s good to check the label. If you don’t have tahini, don’t worry! You can use sunflower seed butter or almond butter. These will change the flavor a bit, but they still taste great. You can also skip it entirely. Just add a bit more olive oil for creaminess. Check the texture while blending. If the hummus feels hard to mix, it’s too thick. Add water, one tablespoon at a time, until it smooths out. If it’s runny, add more chickpeas or tahini to thicken it. Always taste as you go! For the full recipe and precise steps, check the Full Recipe section. Roasted garlic hummus is simple to make and enjoy. You learned about key ingredients, how to roast garlic, and tips for creamy texture. Variations add excitement to the dish, while proper storage keeps it fresh. This tasty dip fits many diets and pairs well with many foods. Now, it’s time to get creative in the kitchen. Make your version and share it with friends. You’ll love the flavor and fun it brings! Enjoy your hummus journey!](https://goldendishy.com/wp-content/uploads/2025/07/73315b96-5df4-4df6-b272-95a468d12cec-768x768.webp)