French Onion Chicken Skillet Flavorful Dinner Delight

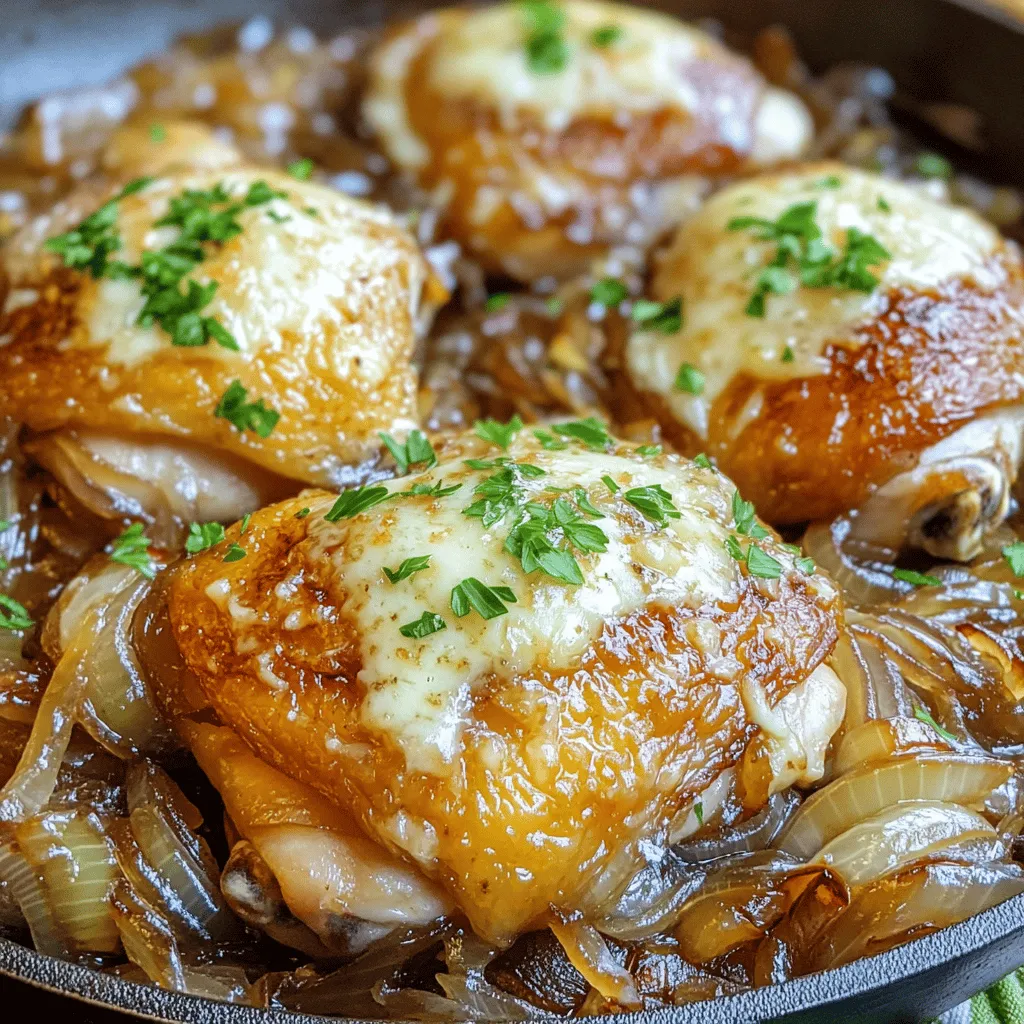
Looking for a dinner that’s both easy and packed with flavor? Look no further! My French Onion Chicken Skillet is a delightful blend of caramelized onions, savory chicken thighs, and melted Gruyère cheese. This dish not only satisfies your taste buds but also comes together quickly. Whether you’re an expert cook or just starting, this recipe will impress your family. Let’s dive into the ingredients and see how you can make this tasty meal tonight!
Ingredients
To make a delicious French Onion Chicken Skillet, gather the following ingredients:
– 4 boneless, skinless chicken thighs
– 2 large onions, thinly sliced
– 2 cloves garlic, minced
– 1 teaspoon dried thyme
– 1 teaspoon balsamic vinegar
– 1 cup low-sodium chicken broth
– 1 cup shredded Gruyère cheese
– 2 tablespoons olive oil
– Salt and pepper to taste
– Fresh parsley, chopped for garnish
These ingredients create a rich and savory dish. The chicken thighs are juicy and tender, while the onions add sweetness. Gruyère cheese melts beautifully, giving a creamy texture. The garlic and thyme bring depth, and a splash of balsamic vinegar adds a nice tang. This combination makes each bite a delight.Enjoy cooking!
Step-by-Step Instructions
Preparation Overview
First, gather all your ingredients. This makes cooking easier and faster. You will need:
– 4 boneless, skinless chicken thighs
– 2 large onions, thinly sliced
– 2 cloves garlic, minced
– 1 teaspoon dried thyme
– 1 teaspoon balsamic vinegar
– 1 cup low-sodium chicken broth
– 1 cup shredded Gruyère cheese
– 2 tablespoons olive oil
– Salt and pepper to taste
– Fresh parsley, chopped for garnish
Choosing the right skillet is key. I recommend a large, heavy skillet. This helps cook the chicken evenly. A non-stick skillet works well too, as it prevents sticking.
Detailed Cooking Steps
Start by heating the olive oil over medium heat. Season your chicken thighs with salt and pepper on both sides. Once the oil shimmers, add the chicken. Sear each side for about 5-7 minutes. Look for a nice golden brown color. Once cooked, move the chicken to a plate.
In the same skillet, toss in the thinly sliced onions. Sauté them for around 10 minutes. Stir often to avoid burning. You want them tender and caramelized, turning a deep golden-brown.
Next, add the minced garlic and dried thyme. Stir for one more minute. This brings out the flavors. After that, pour in the chicken broth and balsamic vinegar. Use a wooden spoon to scrape the browned bits from the skillet. This adds depth to your dish.
Now, gently return the chicken to the skillet. Nestle it into the onion mixture. Let everything simmer for about 5 minutes. This allows the flavors to mix well.
Finishing Touches
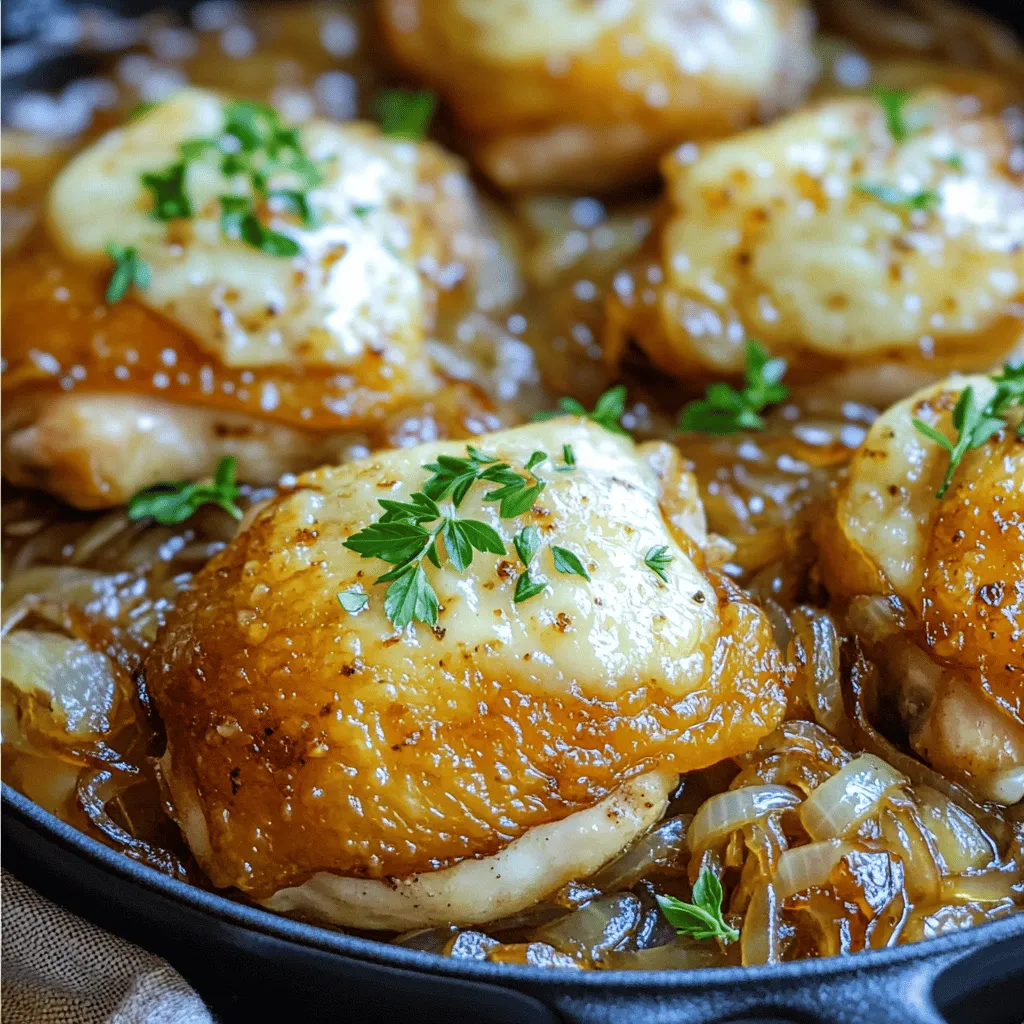
Sprinkle the shredded Gruyère cheese evenly over the chicken and onions. Cover the skillet with a lid. Cook for another 3-5 minutes until the cheese is melted and bubbly.
Remove the skillet from heat. Garnish with chopped parsley for a pop of color. For serving, I suggest bringing the skillet to the table. It looks rustic and inviting. Pair it with crusty bread to soak up the tasty juices. Enjoy your delicious French Onion Chicken Skillet!
Tips & Tricks
Cooking Tips
– To sear chicken perfectly, start with a hot skillet.
– Use olive oil to coat the pan.
– Season the chicken well with salt and pepper.
– Sear each side for about 5-7 minutes.
– Look for a golden color to know it’s ready.
– For onions, slice them thinly for even cooking.
– Cook them low and slow to caramelize.
– Stir often to prevent burning.
– Aim for a deep golden-brown color.
Flavor Enhancements
– Fresh thyme pairs well, adding a bright note.
– A pinch of smoked paprika gives depth.
– Try a bit of rosemary for a woodsy flavor.
– You can also add a splash of white wine for richness.
– Pair this dish with crusty bread for dipping.
– A fresh green salad brings a nice contrast.
– Mashed potatoes or rice can soak up the sauce well.
Presentation Advice
– Serve the dish right from the skillet for a rustic feel.
– Use a large spoon to scoop out portions.
– Add a sprinkle of parsley on top for color.
– For a cozy touch, place a loaf of bread on the table.
– Use a wooden board for a charming display.
– A side of cheese can elevate the meal further.
This dish is a heartwarming blend of flavors, and these tips will help you shine in the kitchen.

Variations
Ingredient Swaps
You can easily switch up the cheese in this dish. Gruyère is rich and nutty, but you might try Swiss or mozzarella. Both give a nice melt. They will alter the taste slightly, but they will still be delicious.
For chicken, you don’t have to stick to thighs. You can use boneless breasts or even tenders. Just remember, cooking times will change. Breasts may cook faster, so keep an eye on them to avoid dryness.
Dietary Adaptations
If you need a gluten-free option, this recipe is easy to modify. Make sure your chicken broth is gluten-free. All other ingredients are naturally gluten-free.
For vegetarian versions, replace the chicken with hearty vegetables. Try using mushrooms or eggplant for a satisfying bite. You can also use firm tofu, which takes on flavors well. The cooking times may vary, so adjust as needed.
Flavor Profile Changes
Want to add more veggies? Bell peppers and spinach work great in this dish. They add color and nutrition. Just sauté them along with the onions for a tasty mix.
You can also adjust the spice level. Add red pepper flakes for heat or fresh herbs for a fresh taste. Thyme is great, but rosemary or basil can add a new twist. Play around with what you like best!
Storage Info
Short-Term Storage
To keep your French Onion Chicken Skillet fresh, store it in the fridge. Place the dish in an airtight container. This keeps the flavors intact and prevents spoilage. You can store it for up to four days. When reheating, use the stovetop or microwave. If using the stovetop, add a splash of chicken broth to keep the dish moist while warming.
Long-Term Storage
For long-term storage, freezing is your best option. Allow the dish to cool completely first. Then, transfer it to a freezer-safe container or bag. This dish can be frozen for up to three months. When you’re ready to enjoy it, thaw it in the fridge overnight. To reheat, place it in a skillet over low heat until warmed through. Stir occasionally to ensure even heating.
Shelf Life
Leftovers in the fridge last about four days. Always check for signs of spoilage. If you see any mold or off smells, it’s best to toss it. If the chicken looks dry or discolored, that’s also a sign it’s past its prime. Always trust your senses. Keeping your food safe is key to enjoying your delicious meal!
FAQs
Common Questions
How to make French Onion Chicken Skillet at home?
To make French Onion Chicken Skillet, gather the ingredients first. You need chicken thighs, onions, garlic, thyme, balsamic vinegar, chicken broth, Gruyère cheese, olive oil, salt, and pepper. Heat olive oil in a skillet. Season the chicken with salt and pepper, then sear it until golden brown. Cook the onions until caramelized. Add garlic and thyme, then stir in broth and vinegar. Return chicken to the skillet, cover with cheese, and let it melt.
What can I serve with French Onion Chicken Skillet?
This dish pairs well with crusty bread. The bread soaks up the tasty juices. You can also serve it with a fresh salad. A green salad with light dressing complements the rich flavors. Roasted vegetables can add color and texture to your meal.
Can I use boneless chicken breasts instead of thighs?
Yes, you can use boneless chicken breasts. They will cook faster than thighs. Thighs have more flavor and stay juicy, but breasts can work too. Just make sure to adjust the cooking time.
Cooking Techniques
What’s the best way to caramelize onions?
To caramelize onions, slice them thinly and heat olive oil in a skillet. Add the onions and a pinch of salt. Stir often and cook on medium heat. Let them cook for about 10-15 minutes. Patience is key! The onions will turn a nice golden brown. This brings out their natural sweetness.
How do I know when the chicken is fully cooked?
The chicken is fully cooked when it reaches an internal temperature of 165°F (75°C). You can check this with a meat thermometer. The juices should run clear, not pink. If you cut into it, the meat should be opaque.
Ingredient Specifics
What types of cheese work best for this recipe?
Gruyère cheese is the star of this dish. It melts beautifully and adds a rich flavor. You can also try Swiss cheese for a milder taste. Mozzarella can work if you prefer a stretchier cheese.
Can I use fresh herbs instead of dried thyme?
Yes, you can use fresh herbs instead of dried thyme. Fresh thyme has a brighter flavor. Use about three times the amount of fresh herbs. This means use three teaspoons of fresh thyme for every teaspoon of dried.
This blog post provided a clear guide for making a tasty French Onion Chicken Skillet. We discussed the key ingredients, cooking steps, and helpful tips. I shared some great variations to suit your taste. You can easily store leftovers for later use. Remember, cooking is about experimenting and enjoying the process. You now have the tools to make this dish your own. Happy cooking, and enjoy every bite!


. First, preheat your oven to 400°F (200°C). This step is key for even roasting. Gather your ingredients. You should have baby carrots, honey, olive oil, garlic, thyme, and lemon juice ready. In a large bowl, combine the honey, olive oil, minced garlic, and thyme. Add a good pinch of salt and pepper. Next, squeeze in the lemon juice. Whisk the mixture well until it is smooth. This glaze will give your carrots a sweet and savory flavor. Now, it's time to coat the carrots. Add them to your bowl with the glaze. Toss them gently until they are well coated. Line a baking sheet with parchment paper for easy cleanup. Spread the carrots out in a single layer, avoiding crowding. Place the baking sheet in the preheated oven. Roast the carrots for 25-30 minutes. Halfway through, toss the carrots again for even cooking. They should become tender and caramelized. Once done, let them cool for a few minutes. If you like, drizzle some extra glaze over the top for added flavor. Finally, garnish with fresh parsley before serving. This adds a pop of color and freshness. If you want the full recipe, check it out [Full Recipe]. To ensure your carrots roast perfectly, choose fresh carrots. Baby carrots work well, but regular ones are great too. If using regular carrots, slice them into sticks for even cooking. Spread the carrots out in a single layer on the baking sheet. This step keeps them from steaming and helps them caramelize nicely. Toss them halfway through cooking for even browning. For a great glaze, mix the honey, olive oil, garlic, and thyme well. The oil helps the honey coat the carrots. If your glaze feels too thick, add a splash of water or lemon juice. This can help thin it out and ensure it coats the carrots evenly. Remember, a smooth glaze means more flavor in every bite! To make your dish pop, use a nice platter. Once the carrots are roasted, transfer them carefully. Drizzle with extra honey for shine. Sprinkle fresh parsley or thyme over the top for color. This simple touch makes your dish look gourmet. Enjoy serving them at your next meal! For the full recipe, check out the details above. {{image_4}} You can easily change this dish by adding other vegetables. Try sweet potatoes or parsnips. They roast well and add new flavors. Just cut them to a similar size as the carrots. This helps them cook evenly. If you want to switch up the sweet taste, use maple syrup or agave. Both give a nice flavor and work well with the garlic. You can use the same amount as honey. Just mix it well with the other ingredients. Adding spices can boost the taste of your honey garlic roasted carrots. You might try a pinch of cumin or chili powder for warmth. Fresh herbs like rosemary or dill can also add a bright note. Experiment with what you love! Each change can make this dish new and exciting. You can find the full recipe to guide you through these variations. To store leftover honey garlic roasted carrots, first let them cool down. Use an airtight container to keep them fresh. If you have a lot, divide them into smaller portions. Place the container in the fridge. They will stay good for about 3 to 5 days. Keeping them sealed helps avoid drying out. When you're ready to enjoy the leftovers, preheat your oven to 350°F (175°C). Spread the carrots on a baking sheet. You can drizzle a little olive oil for extra moisture. Heat them for about 10 to 15 minutes, or until they feel warm. You can also use a microwave if you're in a hurry. Just cover them with a damp paper towel and heat in 30-second bursts. If you want to keep the carrots longer, freezing is a great option. First, let the carrots cool completely. Spread them in a single layer on a baking sheet. Freeze them for about 1 hour. This step prevents them from sticking together. After that, transfer the carrots to freezer bags. Remove as much air as possible before sealing. They can last for up to 3 months in the freezer. To eat, thaw them in the fridge overnight before reheating. For more details, check the Full Recipe. Yes, you can use frozen carrots. However, fresh carrots will taste better. Frozen carrots may lose some crunch. If you use them, roast them longer to ensure they cook fully. Just remember to thaw them before roasting for the best results. Honey garlic roasted carrots pair well with many dishes. You can serve them with grilled chicken, beef, or fish. They also taste great with rice or quinoa. Try them with a fresh salad for a balanced meal. Their sweet and savory flavor adds depth to any plate. You can make this dish ahead of time. Prepare the honey garlic glaze and coat the carrots. Store them in the fridge for up to 24 hours. When ready to serve, just roast them in the oven. This saves time and still gives you that amazing flavor. For the full recipe, check out the complete instructions above. We explored the key ingredients and steps to make honey garlic roasted carrots. You learned how to mix the glaze, roast the carrots, and personalize the dish. We also discussed useful tips for perfect roasting and presentation. Lastly, we covered variations and storage tips to keep your dish fresh. Use this guide to make a tasty meal. Enjoy these carrots with your loved ones for a delightful experience.](https://goldendishy.com/wp-content/uploads/2025/06/04a56f10-aefe-4807-b100-2b1e29675843-768x768.webp)
. You learned how to make Jalapeno Cheddar Cornbread step by step. This recipe includes a complete ingredient list, tips for substitutions, and ways to adjust spice levels. You also discovered how to achieve the best texture and flavor. Finally, I shared variations, storage info, and answers to common questions. Now, enjoy this tasty cornbread at your next meal. It pairs well with soups or stews and is perfect for sharing. Happy baking!](https://goldendishy.com/wp-content/uploads/2025/06/9d5f618c-dadf-46fc-a447-7ca9d5a4ec71-768x768.webp)
![To make this simple and tasty chicken and rice soup, gather these ingredients: - 2 boneless, skinless chicken breasts - 1 cup jasmine rice, thoroughly rinsed - 6 cups chicken broth (preferably low-sodium) - 2 carrots, peeled and diced - 2 stalks celery, chopped - 1 small onion, finely diced - 3 garlic cloves, minced - 1 teaspoon dried thyme - 1 bay leaf - 1 tablespoon extra virgin olive oil - Salt and freshly ground pepper, to taste - 1 cup frozen peas - Juice from 1 fresh lemon - Fresh parsley, roughly chopped (for garnish) Each serving of this chicken and rice soup is packed with nutrition. Here’s a quick look at what you get: - Calories: 300 - Protein: 25g - Carbohydrates: 40g - Fat: 6g - Fiber: 2g This soup is low in fat and rich in protein and carbs, making it a cozy choice for any meal. If you need to swap out some items, here are some ideas: - Chicken: Use shredded rotisserie chicken for a quick option. - Rice: Substitute with brown rice or quinoa for a different texture. - Broth: Vegetable broth works well for a lighter flavor. - Vegetables: Add bell peppers, corn, or spinach for extra nutrition. - Herbs: Fresh herbs like rosemary or dill can replace thyme for a new taste. These substitutions help you make this soup work for your pantry or dietary needs. Enjoy creating your version! Start by gathering your ingredients. You need chicken breasts, jasmine rice, broth, carrots, celery, onion, garlic, thyme, a bay leaf, olive oil, and peas. 1. Heat the olive oil: In a large pot, place the olive oil over medium heat. Wait until it shimmers. 2. Add the vegetables: Toss in the diced onion, carrots, and celery. Sauté these for about 5 minutes. You want them to soften and the onion to look clear. 3. Incorporate garlic: Stir in the minced garlic. Cook this for one minute. The smell should fill your kitchen. 1. Add chicken and broth: Place the chicken breasts into the pot. Pour in the chicken broth. Add thyme, bay leaf, salt, and pepper. 2. Bring to a boil: Turn up the heat until the mixture boils. Then, lower the heat to a gentle simmer. 3. Cook the chicken: Cover the pot and let it simmer for 15-20 minutes. Make sure the chicken cooks fully (165°F or 75°C inside). 1. Shred the chicken: Once cooked, remove the chicken and let it cool. Use two forks to shred it into smaller pieces. 2. Add rice: Stir in the rinsed jasmine rice into the pot. Cover it again and let it simmer for about 15 minutes. The rice should be tender. 3. Finish the soup: Return the shredded chicken to the pot. Add the frozen peas and lemon juice. Taste and adjust salt and pepper if needed. 4. Serve: Remember to take out the bay leaf. Serve hot in bowls. Top with fresh parsley for a nice touch. For the complete recipe, visit [Full Recipe]. To make your chicken and rice soup shine, focus on fresh ingredients. Start with quality chicken broth. Low-sodium broth gives you control over salt levels. Add fresh herbs like thyme and parsley for a bright taste. A splash of lemon juice at the end brightens the flavor too. You can also toss in some fresh garlic for depth. One big mistake is overcooking the chicken. Remove it from the pot once it reaches 165°F. Letting it simmer too long can make it dry. Another common error is not rinsing the rice. Rinsing removes excess starch, which helps keep the soup clear. Avoid adding too much water or broth. You want a nice balance of soup and rice. For a creamy texture, add a splash of heavy cream or coconut milk. Stir it in after you add the chicken back to the pot. You can also blend a portion of the soup. Use an immersion blender to create a creamy base while keeping some chunks intact. This mix gives you both texture and creaminess in every spoonful. Follow the [Full Recipe] for a step-by-step guide to making this comforting dish. {{image_4}} You can easily add veggies to your chicken and rice soup. Chopped carrots, celery, and peas work well. You can also try adding spinach, kale, or zucchini for more color and nutrition. These vegetables add flavor and make your soup more filling. Just toss them in during the last few minutes of cooking. This way, they will stay bright and fresh. If you like a kick, make a spicy version. Add diced jalapeños or red pepper flakes for heat. A splash of hot sauce or a spoonful of sriracha can also spice things up. Just keep in mind to adjust the salt. You want a balance of flavors. This spicy twist can warm you up on a cold day! Using a slow cooker makes this recipe even easier. Simply add all your ingredients into the slow cooker. Set it on low for 6-8 hours or high for 3-4 hours. This method allows all the flavors to blend beautifully. Plus, you can come home to a warm, tasty meal. Check out the Full Recipe for detailed steps and measurements. After you finish your chicken and rice soup, let it cool down. This helps keep the soup fresh. Transfer it to an airtight container. It will stay good in the fridge for 3 to 4 days. Make sure to label the container with the date. This way, you’ll know when to eat it. If you want to save some soup for later, freezing works great. First, let the soup cool completely. Then, pour it into freezer-safe bags or containers. Leave some space at the top for expansion. You can freeze it for up to 3 months. When you’re ready to eat, just thaw it overnight in the fridge. To reheat your soup, pour it into a pot. Heat it on medium-low heat. Stir it often to ensure it warms evenly. If the soup seems too thick, add a splash of broth or water. You can also microwave it in a safe bowl. Heat it in short intervals, stirring in between. This ensures every bite is warm and tasty. Enjoy your cozy meal! For the full recipe, check out the Cozy Chicken & Rice Delight section. Yes, you can use brown rice. Brown rice adds a nutty flavor and is more nutritious. However, it takes longer to cook. You should adjust the cooking time. Add brown rice early when you add the broth, and let it simmer for 40-45 minutes. This way, the rice becomes tender and blends well with the soup. To make the soup gluten-free, you need to check a few things. First, use a gluten-free chicken broth. Many brands offer gluten-free options. Also, make sure your rice is certified gluten-free. Jasmine rice is usually safe, but always check the label. By following these steps, your soup will be gluten-free and just as tasty. You can serve many tasty sides with your soup. Here are some great options: - A fresh green salad - Crusty bread or rolls - Garlic breadsticks - Steamed vegetables These sides will make your meal complete and satisfying. For more ideas, feel free to check the Full Recipe and explore different serving suggestions. We reviewed the key steps to make Chicken and Rice Soup, from choosing the right ingredients to cooking methods. You learned helpful tips to enhance flavor and avoid common mistakes. Variations and storage details ensure this dish suits your taste and convenience. Trust these insights to create a tasty soup every time. Enjoy warm bowls of nourishment that you made with care. Happy cooking!](https://goldendishy.com/wp-content/uploads/2025/06/7617fd4a-61d9-414c-8819-76abcb6635e5-768x768.webp)