Everything Bagel Chicken Tenders Crispy and Flavorful

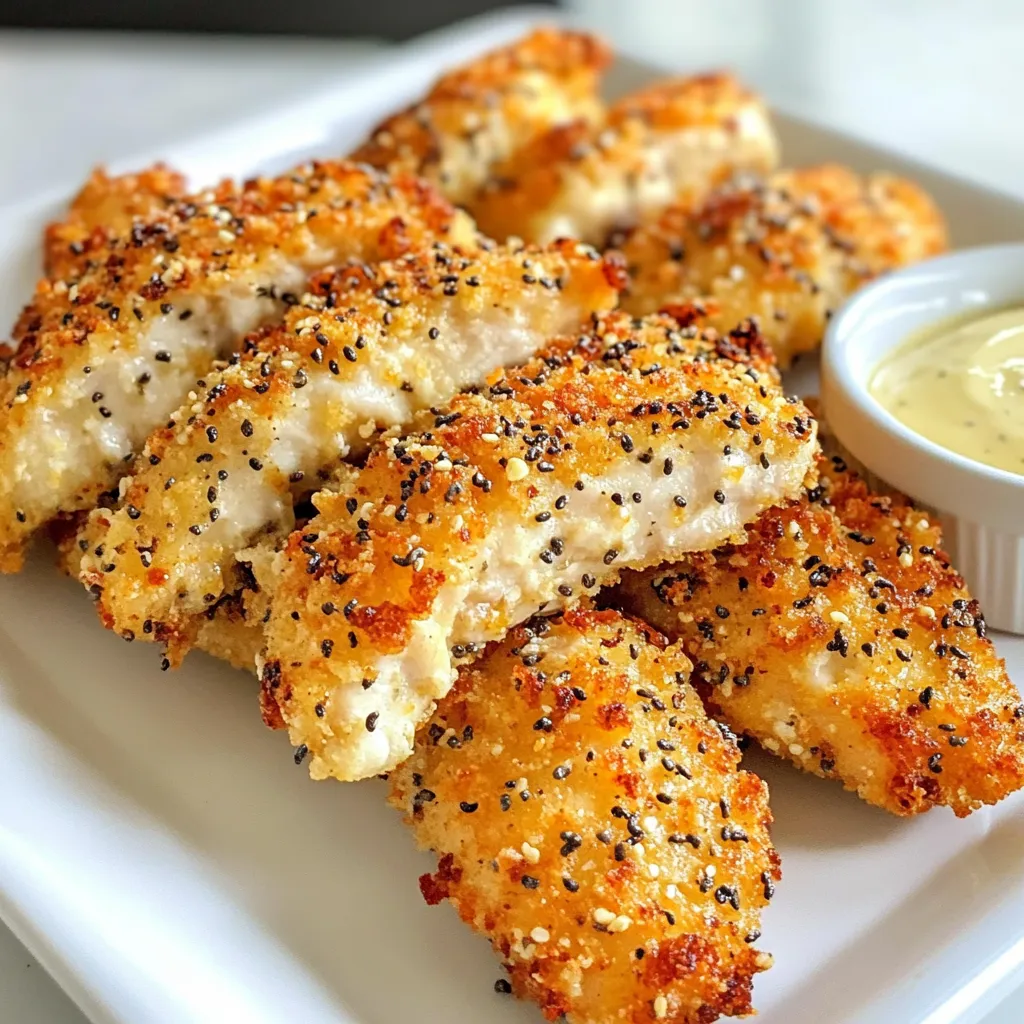
If you love crispy, flavorful chicken, you need to try Everything Bagel Chicken Tenders. This easy recipe brings the famous flavor of everything bagels to juicy chicken. It’s a fun twist on a classic dish, perfect for a snack or dinner. I’ll guide you through each step, sharing tips to make your tenders extra crunchy and delicious. Get ready to impress your taste buds with this quick and tasty meal!
Why I Love This Recipe
- Unique Flavor Combination: The everything bagel seasoning adds a delightful twist to classic chicken tenders, making them stand out at any meal.
- Easy to Prepare: This recipe is simple and quick, perfect for a weeknight dinner or a fun family meal.
- Healthier Option: Baking instead of frying keeps these tenders lighter while still achieving a crispy texture.
- Customizable: You can easily adjust the seasoning or serve them with various dipping sauces to suit any palate.
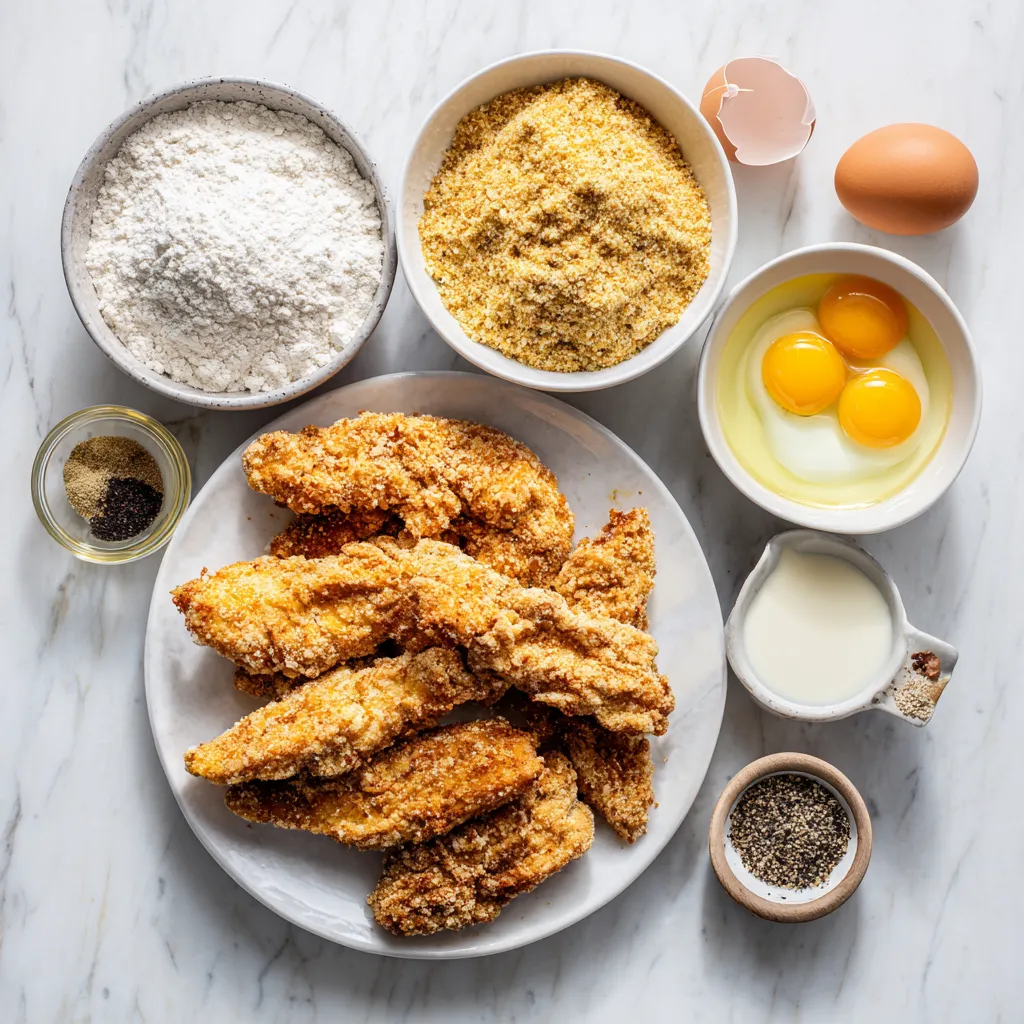
Ingredients
List of Ingredients
– 1 lb chicken tenders
– 1 cup all-purpose flour
– 2 large eggs, beaten
– 1 cup panko breadcrumbs
– 3 tablespoons everything bagel seasoning
– 1 teaspoon salt
– 1 teaspoon black pepper
– 1/2 teaspoon garlic powder
– 1/2 teaspoon onion powder
– 1/2 cup buttermilk (or plain yogurt)
– Olive oil spray (for baking)
Ingredient Highlights
The chicken tenders make a great base for this dish. They cook quickly and stay juicy. The flour gives a nice coating. The panko breadcrumbs add crunch. Everything bagel seasoning brings a unique flavor. This mix includes sesame seeds, poppy seeds, garlic, and onion. These spices add depth to each bite. The buttermilk creates moisture, making the tenders tender and flavorful.
Possible Substitutions
You can swap chicken tenders with chicken breasts if you prefer. Just cut them into strips. If you need a gluten-free option, use almond flour or gluten-free breadcrumbs. Instead of buttermilk, any plain yogurt works well. You can also use ranch seasoning instead of everything bagel seasoning for a twist.

Step-by-Step Instructions
Prepping the Oven and Baking Sheet
Start by preheating your oven to 425°F (220°C). This step is key for crispy chicken. While the oven heats, line a baking sheet with parchment paper. This helps prevent sticking and makes cleanup easy.
Setting Up Dredging Stations
Create three shallow dishes for dredging. In the first dish, mix 1 cup of flour, 1 teaspoon of salt, 1 teaspoon of black pepper, 1/2 teaspoon of garlic powder, and 1/2 teaspoon of onion powder. Stir until well combined. In the second dish, beat 2 large eggs until smooth. In the third dish, combine 1 cup of panko breadcrumbs with 3 tablespoons of everything bagel seasoning. Mix well to ensure even flavor.
Coating the Chicken Tenders
Take each chicken tender and coat it in the seasoned flour first. Shake off any extra flour. Next, dip the tender into the beaten eggs, ensuring it’s fully covered. Finally, roll it in the panko-bagel mixture. Press gently to help the crumbs stick well to the chicken.
Baking Instructions
For added moisture, dip each coated chicken tender in 1/2 cup of buttermilk right before placing it on the baking sheet. This step makes the chicken tender and juicy. Arrange the tenders on the baking sheet, leaving space between each piece. Lightly spray the tops with olive oil to achieve a crispy, golden crust. Bake in the preheated oven for 15-20 minutes. The chicken should turn golden brown and reach an internal temperature of 165°F (74°C) for safe eating.
Tips & Tricks
How to Achieve Maximum Crispiness
To get your chicken tenders crispy, follow these tips:
– Use panko breadcrumbs. They are lighter and crisp up better than regular bread crumbs.
– Make sure to coat the chicken well. Each piece should have a thick layer of the panko-bagel mix.
– Lightly spray the tenders with olive oil before baking. This helps them brown and crisp up.
– Bake on parchment paper. It keeps the tenders from sticking and allows for even cooking.
– Don’t overcrowd the baking sheet. Give each tender some space for proper heat circulation.
Enhancing Flavor with Variations
You can mix things up with these fun ideas:
– Add some spice. Try mixing in cayenne pepper or paprika to the flour for heat.
– Get zesty! Add lemon zest to the panko for a bright flavor.
– Experiment with herbs. Fresh dill or parsley can add a nice touch to the everything bagel mix.
– Try different dips. Ranch, honey mustard, or a spicy sriracha sauce can change the whole meal.
Common Mistakes to Avoid
Avoid these common errors for the best results:
– Skipping the buttermilk step. It adds moisture and flavor, making the chicken tender.
– Not preheating the oven. Always start with a hot oven for even cooking.
– Dipping the chicken too quickly. Make sure each layer is thick for maximum crunch.
– Forgetting to check the temperature. Use a meat thermometer to ensure they reach 165°F for safe eating.
– Leaving no space on the baking sheet. Space is key for crispy tenders!
Pro Tips
- Choose Quality Chicken: Opt for fresh or high-quality chicken tenders for the best flavor and texture. Organic or free-range chicken can enhance the taste significantly.
- Customize the Seasoning: Feel free to add your favorite spices or herbs to the flour mixture for extra flavor. Smoked paprika or cayenne pepper can give a nice kick!
- Experiment with Coatings: Try substituting the panko breadcrumbs with crushed cornflakes or potato chips for a unique crunch and different flavor profile.
- Make Ahead: You can prepare the chicken tenders in advance and store them in the refrigerator for up to 24 hours before baking. This allows the flavors to meld beautifully.

Variations
Alternative Seasonings
You can play with the seasoning to make these chicken tenders your own. Try using taco seasoning for a spicy twist. Lemon pepper adds a fresh taste. You can also use ranch seasoning for a creamy flavor. If you want something sweeter, go for a cinnamon-sugar mix. Just remember to keep the flavor balance right.
Different Dipping Sauce Ideas
The right sauce makes every bite better. For a classic choice, try honey mustard. It brings a nice sweetness. BBQ sauce adds a smoky flavor that pairs well too. If you like heat, sriracha mixed with mayo makes a zesty dip. You could also mix yogurt with dill and garlic for a fresh taste. Feel free to explore and find your favorite!
Serving Suggestions with Side Dishes
When serving these chicken tenders, think about what sides to pair. A simple garden salad adds freshness. Sweet potato fries give a nice crunch. You can also serve them with roasted veggies for a healthy touch. For a fun twist, try them with a bagel-themed platter. Include cream cheese, pickles, and cucumbers to keep the theme going. These ideas make your meal exciting and tasty!
Storage Info
How to Store Leftovers
After enjoying your Everything Bagel Chicken Tenders, store any leftovers in an airtight container. Keep them in the fridge. They stay fresh for about three to four days. Let the tenders cool down before sealing them up. This prevents moisture buildup, which can make them soggy.
Reheating Instructions
When you’re ready to enjoy your leftovers, preheat the oven to 375°F (190°C). Line a baking sheet with parchment paper. Place the chicken tenders on the sheet and cover them loosely with foil. Bake for about 10 to 15 minutes. This keeps them crispy on the outside and warm on the inside. You can also reheat them in an air fryer for about 5 to 7 minutes for extra crunch.
Freezing Options
If you want to save some for later, you can freeze the tenders. First, let them cool completely. Then, place them in a single layer on a baking sheet and freeze for about an hour. After that, transfer them to a freezer-safe bag. They can last up to three months in the freezer. When you’re ready to eat, thaw them overnight in the fridge before reheating.
FAQs
Can I use chicken breast instead of tenders?
Yes, you can use chicken breast instead of tenders. Just cut the chicken breast into strips. This will help them cook evenly. Keep in mind, the cooking time may be slightly longer. Always check for an internal temperature of 165°F (74°C) to ensure safety.
What is everything bagel seasoning made of?
Everything bagel seasoning includes several tasty ingredients. It typically has poppy seeds, sesame seeds, garlic flakes, onion flakes, and salt. This mix gives a great flavor to your chicken tenders. You can also find some blends with added spices like black pepper.
How do I know when the chicken tenders are done?
To know when the chicken tenders are done, check their color. They should be golden brown. The best way is to use a meat thermometer. Insert it into the thickest part of the chicken. If it reads 165°F (74°C), your tenders are safe to eat and ready to enjoy!
This blog post covered everything you need to know about making tasty chicken tenders. We explored the key ingredients, gave step-by-step baking instructions, and shared tips for great results. Different variations and storage tips were included to keep it fresh. Remember to experiment with flavors and avoid common mistakes. Making chicken tenders can be fun and easy. Enjoy trying out these ideas in your kitche

Everything Bagel Chicken Tenders
Ingredients
- 1 lb chicken tenders
- 1 cup all-purpose flour
- 2 large eggs, beaten
- 1 cup panko breadcrumbs
- 3 tablespoons everything bagel seasoning
- 1 teaspoon salt
- 1 teaspoon black pepper
- 1 2 teaspoon garlic powder
- 1 2 teaspoon onion powder
- 1 2 cup buttermilk (or plain yogurt)
- N/A Olive oil spray (for baking)
Instructions
- Prep Your Oven: Start by preheating your oven to 425°F (220°C). While the oven heats up, line a baking sheet with parchment paper to prevent sticking and ease cleanup.
- Set Up Dredging Stations: Create three separate shallow dishes for your dredging process. In the first dish, combine the flour, salt, black pepper, garlic powder, and onion powder. Mix well until evenly incorporated. In the second dish, beat the eggs until smooth. In the third dish, mix the panko breadcrumbs with the everything bagel seasoning, ensuring even distribution.
- Coat the Chicken: Take each chicken tender and first coat it in the seasoned flour, shaking off any excess. Then, dip the tender into the beaten eggs, ensuring it’s fully coated. Finally, roll it in the panko-bagel mixture, pressing gently to ensure the crumbs stick well to the chicken.
- Dairy Bath: For an extra boost of moisture and flavor, dip each coated chicken tender into the buttermilk right before placing them on the baking sheet. This step enhances the tenderness while baking.
- Prepare for Baking: Arrange the chicken tenders on the prepared baking sheet, making sure to leave some space between each piece for even cooking. Lightly spray the tops of the tenders with olive oil, which will help achieve a crispy and golden exterior.
- Bake: Place the baking sheet in the preheated oven and bake the chicken tenders for approximately 15-20 minutes. They should turn golden brown and reach an internal temperature of 165°F (74°C) for safe consumption.
- Serve: Once they are done baking, carefully remove the chicken tenders from the oven and let them sit for a few minutes to cool slightly. Serve them warm alongside your favorite dipping sauce for a delightful treat.


![- 1 medium head of cauliflower, cut into bite-sized florets - 4 cloves fresh garlic, finely minced - 3 tablespoons extra virgin olive oil - 1 teaspoon smoked paprika - 1 teaspoon fine sea salt - ½ teaspoon freshly ground black pepper The main ingredients create a base of flavor. Cauliflower gives a nice texture and absorbs the garlic well. Garlic adds a strong taste that enhances the dish. Olive oil helps with roasting and adds richness. Smoked paprika brings depth, while salt and pepper balance the flavors. - 2 tablespoons grated Parmesan cheese - Fresh parsley, finely chopped You can add Parmesan cheese for a cheesy twist. It melts nicely and adds a savory note. Fresh parsley adds color and freshness on top. These add-ins make the bites even more delightful. - Baking sheet - Mixing bowl - Parchment paper A baking sheet is essential for roasting. Use a mixing bowl to combine all the ingredients. Parchment paper helps with easy cleanup and prevents sticking. These tools make the cooking process smooth and simple. You can find the Full Recipe above for more details. 1. Preheat the Oven: Start by preheating your oven to 425°F (220°C). This heat helps make the bites crispy and golden. 2. Prepare the Cauliflower: Cut one medium head of cauliflower into bite-sized florets. Make sure they are all similar in size. This helps them cook evenly. 1. Combine Cauliflower and Seasonings: In a large mixing bowl, add the cauliflower florets. Then, add 4 minced garlic cloves, 3 tablespoons of olive oil, 1 teaspoon of smoked paprika, 1 teaspoon of sea salt, and ½ teaspoon of black pepper. 2. Ensure Even Coating: Toss everything together well. You want the florets to be fully coated with the olive oil and seasonings. This gives them great flavor. 1. Arrange on Baking Sheet: Line a baking sheet with parchment paper for easy cleanup. Spread the cauliflower in a single layer. Make sure the florets have space. This helps them roast well. 2. Roast Duration and Tips: Place the sheet in the oven. Roast for 25-30 minutes. Keep an eye on them. Toss the florets halfway through. This helps them cook evenly. If you like cheese, sprinkle 2 tablespoons of grated Parmesan cheese on top in the last 5 minutes. This adds a nice touch. Enjoy the full recipe for all the details and tips for these delicious bites! Ensuring Tender Florets To get tender florets, cut them into uniform pieces. This helps them cook at the same rate. Toss them well with oil and seasonings. The olive oil locks in moisture and adds a nice flavor. Roasting at 425°F (220°C) gives the perfect balance of crispiness and tenderness. Avoiding Soggy Cauliflower Space the florets on the baking sheet. If they are too close, steam will build up and make them soggy. Use parchment paper to keep them from sticking. This also helps with cleanup. Remember to toss them halfway through roasting for even cooking. Adding Spices Spices can elevate the taste of your cauliflower bites. I love using smoked paprika for depth. You can also try garlic powder, cayenne, or cumin for a twist. Start with small amounts and adjust to your taste. Using Different Oils While olive oil is great, try other oils for different flavors. Avocado oil works well for high heat. You can also use sesame oil for a nutty taste. Just ensure the oil has a high smoke point to avoid burning. Serving Suggestions Serve the roasted garlic cauliflower bites on a rustic wooden platter. This adds warmth to your meal. You can also arrange them in a circle with a bowl of dipping sauce in the center. This invites guests to dig in. Garnishing Techniques Garnish with fresh parsley for a pop of color. You can also sprinkle some lemon zest on top for a refreshing zing. If you used Parmesan, let some shavings fall over the bites to enhance the look and flavor. For the complete recipe, check the [Full Recipe]. {{image_4}} Vegan Alternatives You can easily make these bites vegan. Just skip the Parmesan cheese. The garlic and spices keep the taste rich and satisfying. You can also add nutritional yeast for a cheesy flavor without dairy. Gluten-Free Options This recipe is naturally gluten-free! You can enjoy it without any worry. Always check labels on packaged spices or sauces to ensure they are gluten-free. Spice Variations Want a kick? Add cayenne pepper or chili powder. For a milder flavor, use paprika or turmeric. You can also try curry powder for an exotic twist. Herb Infusions Fresh herbs make a big difference. Add rosemary or thyme for earthy notes. Basil or cilantro can brighten the dish. Mix and match to find your favorite combination. Air Fryer Instructions Using an air fryer makes these bites super crispy. Set your air fryer to 400°F (200°C). Cook them for about 15-20 minutes, shaking the basket halfway through. Grilling Method Grilling adds a smoky flavor. Toss the cauliflower in a grill basket. Grill over medium heat for about 10-15 minutes. Turn occasionally for even cooking. Enjoy the charred bits! Store any leftovers in an airtight container. This helps keep them fresh. You can place them in the fridge. They stay good for about 3 to 5 days. If you see any signs of spoilage, throw them away. You have two options for reheating: oven or microwave. The oven keeps the bites crispy. Preheat it to 350°F (175°C) and heat for about 10 minutes. The microwave is faster, but it can make them soggy. If using a microwave, heat in 30-second intervals. You can freeze roasted cauliflower bites if you want to save some. Let them cool completely first. Place them in a freezer-safe bag. They can last up to 3 months in the freezer. When ready to eat, thaw them in the fridge overnight. Reheat in the oven for the best texture. To make your roasted garlic cauliflower bites crispy, follow these tips: - Cut the cauliflower into small, even pieces. - Make sure to coat every floret with olive oil. - Spread the florets out on the baking sheet, leaving space between them. - Roast at a high temperature, around 425°F (220°C). - Toss the cauliflower halfway through cooking to ensure even roasting. - If you want extra crunch, broil for the last few minutes. Yes, you can use frozen cauliflower. However, it’s best to thaw it first. Pat it dry with a towel. This helps remove excess moisture, which can make your bites soggy. The cooking time may be shorter, so check for doneness a few minutes early. A great dipping sauce pairs well with roasted garlic cauliflower bites. Here are some tasty options: - Ranch dressing for a classic taste. - Garlic aioli for a creamy twist. - Spicy sriracha for a kick of heat. - Hummus for a healthy choice. Feel free to try different sauces to find your favorite! To adjust the recipe for more servings, simply multiply the ingredients. For example: - Use two heads of cauliflower for eight servings. - Keep the same ratio for olive oil and seasonings. - Roast in batches if your baking sheet is too small. This way, you’ll still get delicious, crispy bites! For the complete instructions, check the Full Recipe. Roasted garlic cauliflower is easy to make and very tasty. We covered the main ingredients, like cauliflower and garlic, and shared tips for perfect texture and flavors. You learned about storage and reheating methods to keep your dish fresh. Try different variations to suit your tastes or dietary needs. Enjoy this dish as a side or snack. It’s healthy, fun, and simple. You'll love making it again and again!](https://goldendishy.com/wp-content/uploads/2025/06/58dc371e-82c7-47cc-93f2-9c36524126f6-768x768.webp)


![To make teriyaki chicken lettuce wraps, you need a few key ingredients. These create the rich flavors and fresh textures. Here’s what you’ll need: - 1 lb (450g) boneless, skinless chicken breast, finely diced - 1 tablespoon canola oil - 1/2 cup bell pepper, finely chopped (choose red or yellow for sweetness) - 1/2 cup carrot, grated (for a touch of crunch) - 3 green onions, beautifully sliced - 2 cloves garlic, minced (for aromatic depth) - 1/4 cup low-sodium soy sauce (to control saltiness) - 2 tablespoons honey (for a hint of natural sweetness) - 1 tablespoon rice vinegar (to balance flavors) - 1 teaspoon sesame oil (for a nutty aroma) - 1 teaspoon fresh ginger, grated (adds a zesty kick) - 1 head of butter lettuce or iceberg lettuce, with leaves gently separated These ingredients come together to create a joyful, tasty meal. Garnishes can elevate your dish. While not required, they add flair and flavor. Here are some great options: - Sesame seeds (for garnish, optional but recommended) - Fresh cilantro or parsley, for garnish (optional) Adding these garnishes can make your wraps look and taste even better. Lettuce is key for wraps. It holds the filling perfectly. Here are tips to choose the best lettuce: - Look for crisp, fresh leaves. Avoid any wilting or browning. - Butter lettuce has a soft, pliable texture, perfect for wrapping. - Iceberg lettuce offers a nice crunch but can be thicker. Choose what you like best for your teriyaki chicken lettuce wraps. To start, gather your ingredients. You need: - 1 lb boneless, skinless chicken breast, finely diced - 1 tablespoon canola oil - 1/2 cup bell pepper, finely chopped - 1/2 cup carrot, grated - 3 green onions, beautifully sliced - 2 cloves garlic, minced - 1/4 cup low-sodium soy sauce - 2 tablespoons honey - 1 tablespoon rice vinegar - 1 teaspoon sesame oil - 1 teaspoon fresh ginger, grated - 1 head of butter or iceberg lettuce, leaves separated - Sesame seeds and fresh herbs for garnish Make sure your chicken is chopped small. This helps it cook evenly. Chop the bell pepper finely for sweetness and color. Grate the carrot for crunch. Slice the green onions thin. Mince the garlic and grate the ginger to release their flavors. Heat the canola oil in a large skillet over medium heat. Wait until the oil shimmers. Add the diced chicken and cook it for 5-7 minutes. Stir often until the chicken is brown and fully cooked. Then, add the minced garlic, grated ginger, and chopped bell pepper. Sauté this mixture for 2-3 minutes. The bell pepper should soften and blend with the chicken. In a small bowl, whisk together the soy sauce, honey, rice vinegar, and sesame oil. When well combined, pour this sauce into the skillet. Now, gently fold in the grated carrots and sliced green onions. Cook for another 2-3 minutes. This helps the sauce coat everything and thicken slightly. Remove the skillet from heat. Let the teriyaki chicken cool for a few minutes. This resting time allows the flavors to meld beautifully. To serve, take a lettuce leaf and place a generous spoonful of the teriyaki chicken mixture in the center. This creates your wrap. For added flavor, sprinkle sesame seeds and fresh herbs on top. Serve the wraps right away. Encourage everyone to wrap them up and enjoy the fresh, vibrant flavors. For the full details on making this dish, check out the Full Recipe. For juicy chicken, choose fresh chicken breast. Cut it into small, even pieces. This helps it cook evenly. Heat your skillet before adding oil. Use medium heat to avoid burning. Stir the chicken often. This keeps it from sticking and ensures even cooking. Add garlic and ginger early. This builds a great flavor base. Cook until the chicken is completely brown and firm. To wrap your lettuce, use large, whole leaves. Butter or iceberg lettuce works best. Place a spoonful of chicken in the center. Fold the sides in first, then roll it up. This keeps the filling secure. Make sure the wrap is tight but not too tight. You want it to hold together without falling apart. Arrange your wraps on a platter. Add extra garnishes like sesame seeds for a beautiful look. You can change the flavor of your wraps easily. Add extra veggies like cucumbers or radishes. They give a nice crunch. For a spicy kick, include sliced jalapeños or sriracha sauce. If you like nuts, add chopped peanuts or cashews. You can also switch the protein. Try ground turkey or tofu for a new taste. Mix and match to find your favorite flavor combo. For the complete recipe, check out the [Full Recipe]. {{image_4}} You can switch up the protein in your wraps. If you like beef, use ground beef or diced steak. For a lighter choice, try shrimp or fish, like salmon. If you prefer turkey, ground turkey works well too. Each protein brings its own flavor and texture. Just adjust the cooking time to ensure everything cooks through. To make these wraps vegetarian or vegan, use tofu or tempeh. Both options absorb flavors well. Press and cube the tofu before cooking to remove extra moisture. For a tasty twist, you can use cooked lentils or chickpeas. These options give a hearty bite while keeping your meal plant-based. Add fun flavors to your wraps! You can mix in crushed peanuts or cashews for crunch. Fresh herbs like basil or mint can add a fresh taste. Spice lovers may enjoy a dash of sriracha or chili flakes for heat. You can also add diced pineapple or mango for a sweet twist. These enhancements make your wraps even more exciting! For the complete recipe, check the [Full Recipe]. After enjoying your teriyaki chicken lettuce wraps, you may have leftovers. To store them, place the wraps in an airtight container. Keep the chicken mixture and lettuce leaves separate. This helps keep the lettuce crisp and fresh. Store in the fridge for up to three days. When you're ready to enjoy your leftovers, simply reheat the chicken mixture. Use a skillet over medium heat. Stir until heated through, about 5 minutes. Avoid microwaving the lettuce, as it may become soggy. Assemble the wraps just before eating for the best taste. Meal prepping makes weeknight cooking easy. You can prepare the chicken mixture ahead and store it in the fridge. Use the Full Recipe to guide your prep. To save time, chop vegetables on the weekend. This way, you have everything ready to go when you need a quick dinner. Enjoy your healthy wraps any night! To make the sauce, start with low-sodium soy sauce for a savory base. Add honey for sweetness and rice vinegar for a tangy kick. Then, mix in sesame oil for a nutty aroma. Combine these in a bowl and whisk until smooth. This sauce balances flavors, making your wraps burst with taste. Yes, you can make this dish ahead of time. Prepare the teriyaki chicken mixture and store it in an airtight container. Keep it in the fridge for up to three days. When ready to eat, reheat the mixture in a skillet over medium heat. Serve it with fresh lettuce leaves for a quick meal. Pair your lettuce wraps with some light side dishes. Here are a few great options: - Steamed jasmine rice for a filling side. - Edamame sprinkled with sea salt for a healthy snack. - A simple cucumber salad for a refreshing crunch. - Miso soup for warmth and depth. These sides complement the flavors of the wraps beautifully. For the full recipe, check out [Full Recipe]. Teriyaki chicken lettuce wraps are fun and tasty. We covered key ingredients, cooking steps, and tips to make them juicy. You learned how to customize and store your wraps for busy nights. This dish fits many diets with easy variations and great sides. Enjoy trying new flavors and sharing with friends. You now have all the tools to create delicious wraps that anyone can love. Keep experimenting and have fun in the kitchen!](https://goldendishy.com/wp-content/uploads/2025/06/72f6a023-630c-4819-9e2f-2135bf5b7418-768x768.webp)

![To make Cranberry Orange Energy Bites, you need the right mix of flavors and textures. Here’s what you will need: - 1 cup rolled oats - 1/2 cup almond butter - 1/4 cup honey or maple syrup - 1/2 cup dried cranberries, finely chopped - Zest of 1 medium orange - 1/4 cup freshly squeezed orange juice - 1/4 cup chia seeds - 1/2 teaspoon ground cinnamon - Pinch of sea salt - Optional: 1/4 cup chopped nuts or seeds These ingredients come together to create a tasty and healthy snack. The oats provide fiber and energy. Almond butter adds protein and a creamy texture. Honey or maple syrup gives a touch of sweetness, while dried cranberries add a chewy burst of flavor. The zest and juice of the orange brighten the bites, making them refreshing. Chia seeds add crunch and healthy omega-3s. You can also mix in nuts or seeds for extra texture. They can make your bites even more filling. You can find the full recipe for the perfect energy bites in the recipe section above. - Mixing the Base Ingredients Start by taking a large bowl. Add 1 cup of rolled oats, 1/2 cup of almond butter, and 1/4 cup of honey or maple syrup. Mix with a sturdy spoon until everything blends well. This base forms the heart of your energy bites. - Adding Flavorful Components Next, stir in 1/2 cup of finely chopped dried cranberries, the zest of 1 medium orange, and 1/4 cup of freshly squeezed orange juice. Also, add 1/4 cup of chia seeds, 1/2 teaspoon of ground cinnamon, and a pinch of sea salt. Keep mixing until you see a uniform color and texture. - Achieving the Right Texture Use your hands or a spatula to mix the ingredients thoroughly. You want a sticky but manageable consistency. If it feels too dry, add a bit more orange juice. If it’s too wet, sprinkle in extra oats until it feels just right. - Rolling Into Balls After you’ve mixed everything, cover the bowl with plastic wrap or a lid. Chill the mixture in the fridge for about 30 minutes. Once chilled, take portions and roll them into 1-inch balls. You should get about 15 to 20 bites. - Optional Coating with Nuts or Seeds For added crunch and flavor, roll some of the balls in chopped nuts or seeds. This step is optional, but it gives a nice touch to each bite. - Chilling the Mixture After rolling, arrange the energy bites on a plate. You can chill them for an extra 10 to 15 minutes to firm them up even more. This makes them easier to eat. - Presentation Tips For a pretty display, stack the energy bites or place them in a rustic jar. You can sprinkle some extra orange zest on top for color and aroma. Enjoy your tasty, nutritious snack! Check the [Full Recipe] for more details. - Best Practices for Freshness: Store energy bites in an airtight container. This keeps them moist and tasty. - Duration of Shelf Life: These bites last up to 1 week in the fridge. After that, they may dry out. - Freezing Energy Bites for Later Use: You can freeze these bites. Place them in a single layer on a tray. Once frozen, store them in a bag. They can last for up to 3 months. - Preparing in Bulk: Make a double batch! This way, you always have a quick snack ready. - Overmixing or Undermixing: Mix just enough to combine all ingredients. Too much mixing can make them tough. - Adjusting Consistency: If the mixture is too dry, add more juice. If too wet, mix in more oats. Always aim for a sticky but manageable mixture. For the full recipe, check out Cranberry Orange Energy Bites. {{image_4}} You can mix things up by adding different nuts. Walnuts, almonds, or pecans give a nice crunch. Just chop them finely and fold them into the mix. You can use about 1/4 cup of your choice. Incorporating other fruits can also change the flavor. Try using dried apricots, raisins, or figs. They add sweetness and texture. Just chop them to match the size of the cranberries. If you want a vegan option, swap honey for maple syrup. This keeps the bites sweet without using animal products. Almond butter is already vegan, so you’re set there! For gluten-free substitutions, choose certified gluten-free oats. Most oats are naturally gluten-free but can get cross-contaminated. Make sure to check the label. Using different nut butters can change the taste and texture. Peanut butter or cashew butter works great. Just use the same amount as almond butter. Adjusting crunchiness with seeds is another fun option. Add chia seeds or flaxseeds for some extra bite. You can also toss in sunflower seeds for a nut-free crunch. The cranberry orange energy bites are packed with nutrients. Each ingredient brings unique health benefits. - Rolled oats offer fiber, which helps digestion and keeps you full. - Almond butter is a great source of healthy fats and protein. - Dried cranberries add antioxidants that fight free radicals. - Chia seeds are rich in omega-3s and help with heart health. - Orange juice boosts your immune system with vitamin C. These bites provide energy and nutrients to fuel your day. They are perfect for a quick boost before a workout or during a busy afternoon. How many bites should you eat for a snack? I suggest two to three bites. This gives you enough energy without overdoing it. Each bite is satisfying. Dietary recommendations may vary. Listen to your body. If you feel hungry after two bites, enjoy another! Balance is key. Each bite contains about 70 calories. This makes it easy to track your snack intake. If you want fewer calories, consider adjusting the recipe. You can reduce the honey or use less nut butter. This way, you can fit these bites into your dietary goals without losing flavor. For more details, check the full recipe. Enjoy these tasty energy bites while staying mindful of your nutrition! Cranberry orange energy bites can last up to one week in the fridge. Store them in an airtight container to keep them fresh. If you want to keep them longer, you can freeze them. They can last up to three months in the freezer. Just thaw them in the fridge before enjoying. Yes, you can substitute almond butter with other nut butters. Peanut butter, cashew butter, or sunflower seed butter work well. Each will give a unique taste. Make sure to choose one that fits your dietary needs. You can use the mixture for various snacks. Try spreading it on toast or mixing it into yogurt. You can also make energy bars by pressing the mixture into a pan and slicing it. This way, you have more options for your snack. To make them sweeter, you can add more honey or maple syrup. You can also mix in some chocolate chips or dried fruits like dates. Adjust the sweetness based on your taste. This way, you can create a snack that you love. Yes, there are many alternatives for honey or maple syrup. You can use agave nectar, brown rice syrup, or coconut nectar. Each of these will add a different sweetness. Just make sure to adjust the amount based on how sweet you want your bites to be. For the full recipe, check out the recipe section above. These Cranberry Orange Energy Bites are simple to make and taste great. You mix healthy ingredients, shape them into bites, and enjoy a tasty snack. Remember to store them properly to keep them fresh. You can also tweak ingredients for your tastes or diet. With these tips and flavor ideas, you’ll enjoy these bites any time you need a quick boost. Get creative and make this snack your own!](https://goldendishy.com/wp-content/uploads/2025/06/5774e534-56b3-4e6d-8a48-215f930e3d22-768x768.webp)