Are you ready for a dinner that’s both tasty and easy to make? This Eggplant Rollatini recipe will delight your taste buds and impress your family. You’ll learn how to prepare eggplants, mix a creamy cheese filling, and roll these up perfectly. With simple steps and helpful tips, you’ll make a dish that looks fancy but is quick to cook. Let’s dive into this delicious recipe!
Ingredients
List of Essential Ingredients
– 2 large eggplants
– 1 cup ricotta cheese
– 1 cup grated mozzarella cheese, plus extra for topping
– 1/2 cup grated Parmesan cheese
– 1 large egg
– 2 cups marinara sauce
– 1 teaspoon dried oregano
– 1 teaspoon garlic powder
– Salt and pepper
– Fresh basil leaves
– 2 tablespoons olive oil
Measurement Details
For this dish, you need two large eggplants. Slice them lengthwise into 1/4-inch thick pieces. This thickness helps them cook well and roll easily.
For the cheese filling, combine 1 cup of ricotta, 1 cup of grated mozzarella, and 1/2 cup of grated Parmesan. Add one large egg to bind the filling. The egg helps to keep the filling together when you roll it.
When selecting eggplants, look for ones that feel heavy for their size. They should have smooth, shiny skin. Avoid any with blemishes or wrinkles. Fresh cheese gives the best taste, so choose high-quality ricotta and mozzarella.
Use 2 cups of marinara sauce for a rich flavor. You can use store-bought or homemade. It adds moisture and taste to the dish. Dried oregano and garlic powder enhance the flavor; adjust them to suit your taste.
This recipe serves four, making it perfect for a family dinner or a small gathering. Enjoy the process and feel free to add your unique twist!
Step-by-Step Instructions
Preparation Steps
To start, slice the eggplants. Cut them lengthwise into 1/4-inch thick slices. This helps them cook evenly. Next, arrange the slices on a baking sheet in a single layer. Brush both sides with olive oil. Sprinkle salt and pepper on top. Bake them in a preheated oven at 375°F (190°C) for about 20 minutes. Remember to flip the slices halfway through. They should be tender and lightly caramelized.
Crafting the Cheese Filling
While the eggplant bakes, prepare the cheese filling. In a large bowl, mix together the ricotta cheese, grated mozzarella, and grated Parmesan. Add the egg, dried oregano, garlic powder, and a pinch of salt and pepper. Stir until the mixture is smooth and creamy. This blend gives a rich flavor and a great texture.
Assembling the Rollatini
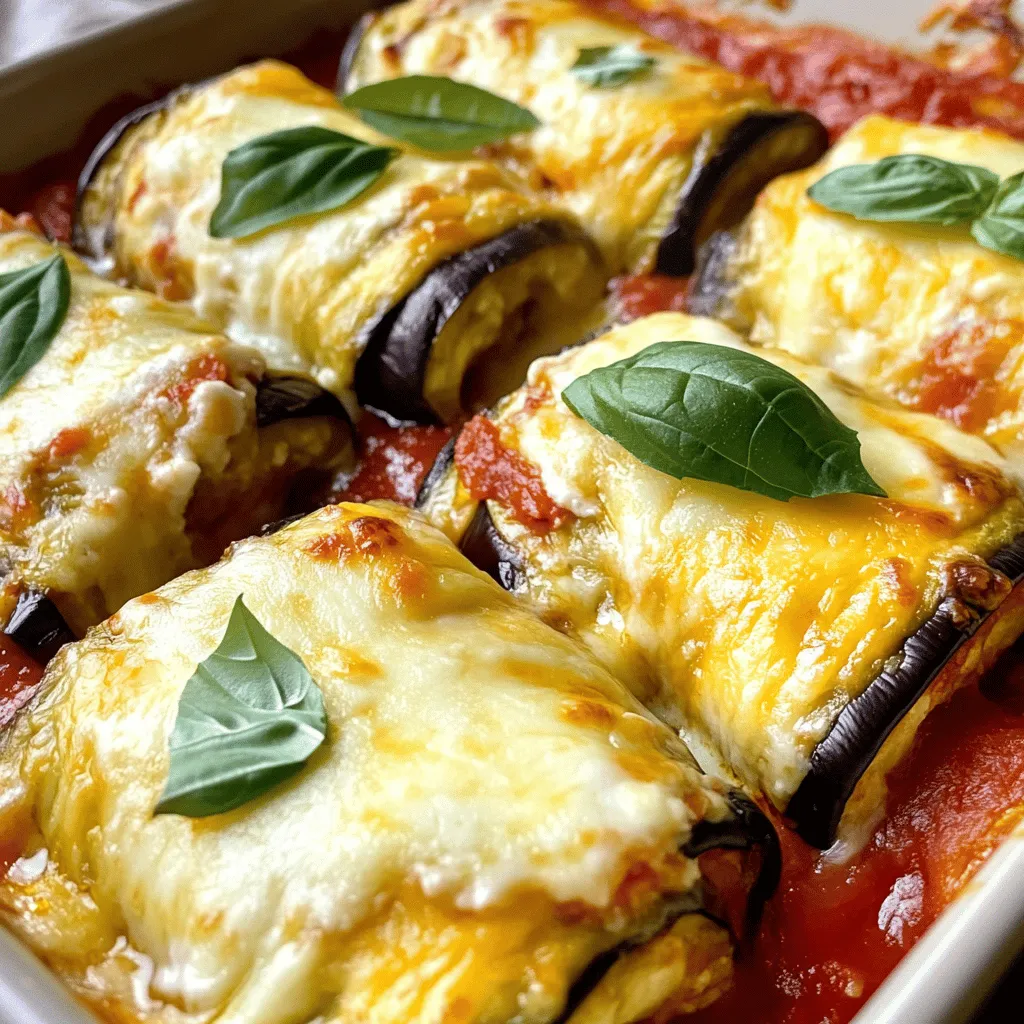
Once your eggplant slices cool, it’s time to roll them. Spread a thin layer of marinara sauce at the bottom of a 9×13-inch baking dish. Take one eggplant slice and place about 2 tablespoons of the cheese filling at one end. Carefully roll it up tightly and place it seam-side down in the dish. Repeat this for all the slices. After placing all the rollatini in the dish, pour the remaining marinara sauce on top. Finish with extra grated mozzarella cheese for a gooey finish. Cover with foil and bake for 25 minutes. Then, remove the foil and bake for an additional 10 minutes until the cheese is bubbly and golden.
Tips & Tricks
Cooking Techniques
To keep your eggplant from becoming soggy, salt it first. Here’s how:
– Slice the eggplants and lay them flat.
– Sprinkle salt on both sides of the slices.
– Let them sit for about 30 minutes.
– Rinse off the salt and pat them dry.
This draws out excess moisture, making them firmer when cooked.
For flavor enhancement, try adding herbs. Fresh basil and oregano pair well. You can also mix in some red pepper flakes for a hint of spice. Another tip is to use high-quality olive oil. It adds depth to the dish and a rich taste.
Presentation Tips
When serving, you have options. Serve the rollatini straight from the baking dish for a rustic feel. For a fancier touch, place them on individual plates. Drizzle some extra marinara sauce around the plate for color.
Garnishing makes a big difference. Add fresh basil leaves on top for a pop of green. Consider a sprinkle of extra grated cheese as well. It makes the dish look appealing and inviting.
This recipe not only tastes great but also looks beautiful. Enjoy making your Eggplant Rollatini with these simple tips!

Variations
Ingredient Substitutions
You can swap out cheeses in this dish. If you want a lighter option, try cottage cheese instead of ricotta. For a plant-based twist, use cashew cheese or tofu. Both choices work well in the filling.
You can also add more veggies to your rollatini. Spinach, zucchini, or mushrooms can mix nicely with the cheese. This not only adds flavor but also boosts nutrition. Feel free to get creative with your fillings!
Recipe Adaptations
Making this dish gluten-free is easy. Just ensure your marinara sauce is gluten-free. Most are, but check the label to be sure. You can also use gluten-free breadcrumbs if you want a crunch on top.
For a vegetarian option, stick with the original recipe. If you want a vegan version, replace the egg and cheese. You can use a flax egg and a vegan cheese blend instead. Both will give you that creamy texture without dairy!
Storage Info
How to Store Leftovers
To keep your eggplant rollatini fresh, store leftovers in an airtight container. Refrigerate them if you plan to eat them in a few days. They will stay good for about 3 to 5 days in the fridge. If you want to keep them longer, freezing is a great option. Wrap each rollatini in foil or plastic wrap and place them in a freezer-safe bag. They can last up to 3 months in the freezer.
Reheating Instructions
When you’re ready to enjoy your leftovers, reheat them gently. The best way is to use the oven. Preheat it to 350°F (175°C). Place the rollatini in a baking dish, cover with foil, and heat for about 20 minutes. This helps keep the cheese soft and the eggplant moist.
Avoid reheating in the microwave if you can. It can dry out the rollatini. If you must use the microwave, cover them with a damp paper towel. This adds moisture and helps prevent dryness. Enjoy your meal just as tasty as the first time!
FAQs
Common Questions about Eggplant Rollatini
What can I use instead of ricotta cheese?
You can use cottage cheese or vegan cream cheese. Both give a creamy texture. For a dairy-free option, try tofu blended with a bit of lemon juice. This will mimic the flavor and texture of ricotta.
How do I know when eggplant is cooked properly?
Eggplant is done when it feels soft and tender. Use a fork to check; it should pierce easily. The edges may brown slightly, which adds flavor. Keep an eye on it to avoid overcooking.
Dietary Considerations
Can this recipe be made low-carb?
Yes! You can swap eggplant for zucchini or use a low-carb cheese mix. Using fewer eggplant slices per roll can also help keep the carbs low. Adjust the sauce to fit your diet.
What is the nutritional value of Eggplant Rollatini?
Eggplant Rollatini is low in calories and rich in fiber. It provides protein from cheese and essential vitamins from eggplant. Each serving typically has around 250 calories, depending on ingredients used.
Serving Suggestions
What to serve with Eggplant Rollatini?
Pair it with a fresh salad or garlic bread for a full meal. A side of steamed veggies also complements the dish well. You can drizzle extra marinara sauce on the plate for added flavor.
Can it be made ahead of time?
Absolutely! You can prepare the rollatini and store them in the fridge. Just cover it well. When you’re ready to eat, bake it straight from the fridge, adding a few extra minutes to the cooking time.
In this post, we explored how to make a delicious eggplant rollatini. We covered key ingredients, helpful preparation tips, and specific cooking techniques. You learned how to assemble and present your dish beautifully. We also discussed alternatives to fit different diets and storage methods for leftovers.
Eggplant rollatini is both tasty and flexible. With these steps, you can customize it to your taste. Enjoy making this dish for friends or family!


