Easy Skillet Cornbread Simple and Tasty Recipe
. In this post, we covered essential ingredients for cornbread, substitutions, and tips for fresh picks. I shared step-by-step instructions to ensure your cornbread turns out great. We discussed ways to perfect texture, enhance flavor, and explore different variations. Proper storage and reheating tips help keep your cornbread fresh for later. Remember, cornbread can be sweet or savory, so choose what you love. Get creative and enjoy the process! Your next batch will be delicious and fun to make.](https://goldendishy.com/wp-content/uploads/2025/07/3215032b-f688-44a5-9882-4fc644314e18.webp)
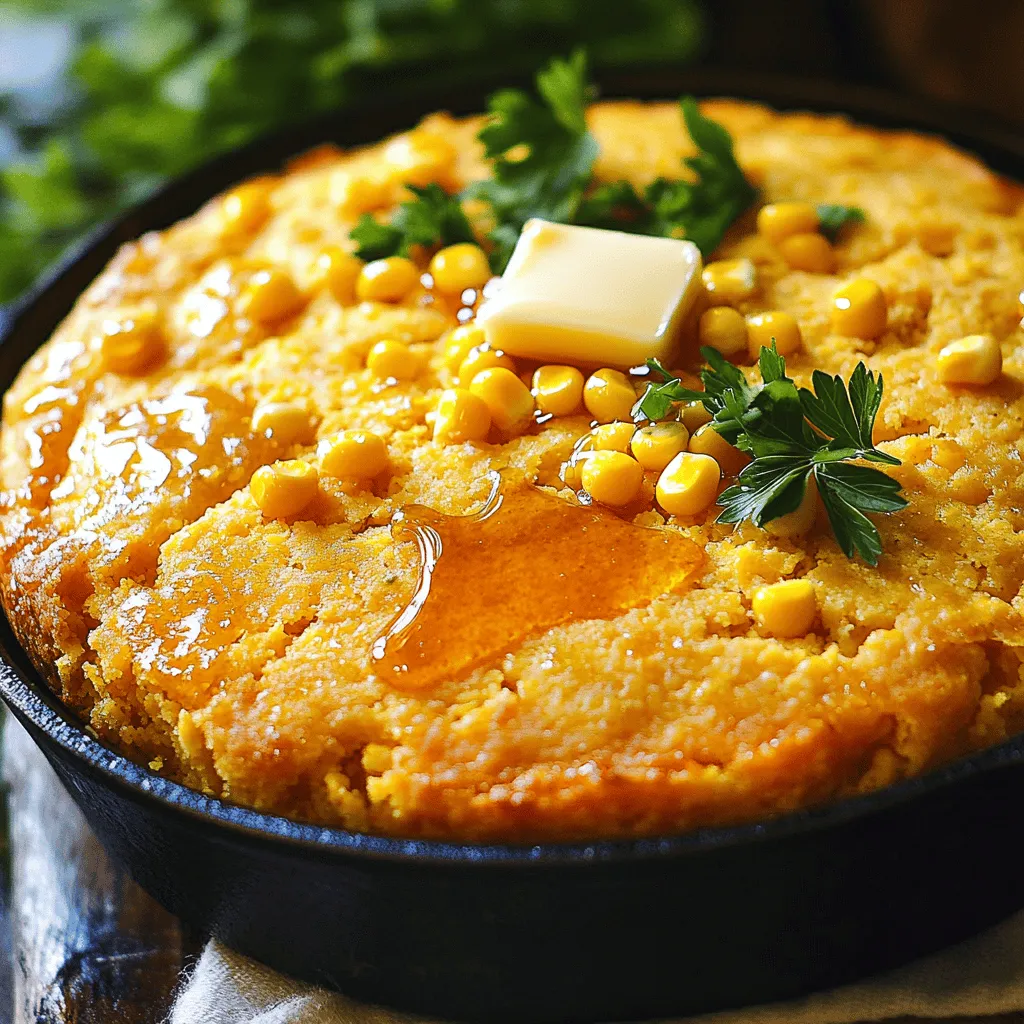
If you’re craving warm, fluffy cornbread that’s easy to whip up, you’ve come to the right place! This Easy Skillet Cornbread recipe combines simple ingredients for a perfect side dish. In just a few steps, you’ll learn how to make cornbread that’s great on its own or paired with your favorite meals. Let’s dive into all the tips and tricks to make your cornbread a crowd-pleaser!
Ingredients
List of Essential Ingredients
– 1 cup cornmeal
– 1 cup all-purpose flour
– 1/4 cup granulated sugar
– 1 tablespoon baking powder
– 1/2 teaspoon sea salt
– 1 cup whole milk
– 2 large eggs, at room temperature
– 1/4 cup unsalted butter, melted (plus extra for greasing)
– 1 cup corn kernels (fresh, frozen, or canned)
– 1/2 cup sharp cheddar cheese, grated (optional)
– 1 jalapeño, minced (optional)
The main ingredients for this cornbread are simple. You will need cornmeal, flour, and sugar. These make the base. Baking powder makes it rise, while salt adds flavor. Milk and eggs keep it moist. Butter gives it richness. You can add corn for texture and sweetness. Cheese and jalapeño make it even tastier.
Ingredient Substitutions
If you need a gluten-free option, you can use gluten-free flour. There are many blends available now that work well. For a dairy-free option, use almond milk or soy milk instead of whole milk. Replace butter with coconut oil or a vegan butter.
Tips for Selecting Fresh Ingredients
When choosing cornmeal, look for a fine texture. Check the package date to ensure freshness. If you want corn kernels, fresh is best. If using frozen, ensure they are free of ice crystals. Canned corn must be drained well to avoid excess moisture. Fresh corn will give the best flavor and texture.
Step-by-Step Instructions
Preparation Steps
First, preheat your oven to 425°F (220°C). Place a 10-inch cast-iron skillet inside. This helps it heat up evenly. Next, grab a large mixing bowl. Add 1 cup cornmeal, 1 cup all-purpose flour, 1/4 cup granulated sugar, 1 tablespoon baking powder, and 1/2 teaspoon sea salt. Whisk these dry ingredients together well. This step is key for a nice texture in your cornbread.
Combining Wet and Dry Ingredients
In a separate bowl, whisk together 1 cup whole milk, 2 large eggs, and 1/4 cup melted unsalted butter. The eggs should be at room temperature for best results. Once mixed, pour the wet ingredients into the dry ones. Use a spatula to stir gently. You want to mix just until combined. A few lumps are perfectly fine; don’t overmix.
Final Steps Before Baking
Now, it’s time to prepare your skillet. Carefully remove the hot skillet from the oven using oven mitts. Grease it with some melted butter. Make sure to coat the bottom and sides well. Pour the cornbread batter into the skillet. Spread it out evenly with your spatula. Now, it’s ready to bake! Return the skillet to the oven and bake for 20-25 minutes.
Tips & Tricks
Perfecting the Texture
To check if your cornbread is done, use a toothpick. Insert it in the center. If it comes out clean, your cornbread is ready. If it has batter on it, bake for a few more minutes.
Common pitfalls include overmixing the batter. This can make your cornbread tough. Mix just until you see no dry flour. A few lumps are okay. Also, make sure your skillet is hot before pouring in the batter. This creates a nice crust.
Enhancing Flavor
You can enhance the flavor of your cornbread by adding herbs and spices. Try adding a teaspoon of garlic powder or a pinch of cayenne for a kick. Fresh herbs like chives or thyme can also add a nice touch.
Pair your cornbread with sides or toppings. Serve it with chili, soup, or a fresh salad. You can also top it with honey, butter, or even some jam for a sweet touch.
Improvements for Future Bakes
You might want to adjust the sweetness of your cornbread. If you like it sweeter, add more sugar. If you prefer it less sweet, cut down on the sugar.
Incorporating seasonal ingredients can elevate your cornbread. In fall, add some pumpkin puree or spices. In summer, try folding in some fresh corn or zucchini. These changes will keep your cornbread exciting and fresh.

Variations
Sweet vs. Savory Cornbread
You can choose to make cornbread sweet or savory. Sweet cornbread uses sugar or honey. Try adding maple syrup for a unique taste. For savory cornbread, think about using jalapeños. These spicy peppers give a nice kick. You can mix in cheese for extra flavor, too.
Seasonal Variants
Cornbread can fit any season. In the fall, use pumpkin spice. This adds warmth and a hint of sweetness. In summer, try adding zucchini or roasted corn. These fresh ingredients keep the cornbread light and bright. Each season brings new tastes to explore.
Dietary Adjustments
If you want a vegan version, swap milk with plant-based milk. Use flax eggs instead of regular eggs. For those watching carbs, consider almond flour. This will keep the cornbread low in carbs. You can still enjoy great flavor with these swaps.
Storage Info
Proper Cooling Techniques
Let your cornbread cool down in the skillet for about 10 minutes. This helps set the texture. When it is cool enough to handle, slice it into wedges. Use a sharp knife to make clean cuts. This way, you keep the edges neat and avoid tearing.
Storing Leftovers
If you have leftover cornbread, store it in the fridge. Place it in an airtight container. It stays fresh for about 3 to 4 days. You can also freeze it for longer storage. Wrap the cornbread tightly in plastic wrap, then place it in a freezer bag. It can last up to 3 months in the freezer.
Reheating Your Cornbread
To enjoy your cornbread again, you can reheat it in several ways. The oven works best for even heating. Preheat your oven to 350°F (175°C). Place the cornbread on a baking sheet for 10-15 minutes. Alternatively, you can use the microwave. Heat a slice for about 15-20 seconds. This works well for quick snacks. Enjoy your cornbread warm and tasty, just like when it was fresh!
FAQs
How long does it take to bake cornbread?
Baking cornbread takes about 20 to 25 minutes. I like to check it at 20 minutes. The top should look golden brown. A toothpick inserted in the center should come out clean. If it’s still wet, give it a few more minutes.
Can I make cornbread ahead of time?
Yes, you can make cornbread ahead of time. I often bake it a day before a meal. Just store it in an airtight container at room temperature. Reheat it in the oven for best results.
What kind of skillet is best for cornbread?
A cast-iron skillet is best for cornbread. It holds heat well and gives a nice crust. If you don’t have one, any oven-safe skillet will work. Just make sure it is well greased.
How do I know when the cornbread is done?
You know cornbread is done when it’s golden brown on top. A toothpick or knife inserted in the center should come out clean. If it sticks to the toothpick, bake it a bit longer.
Can I add other ingredients like bacon or veggies?
Absolutely! You can add cooked bacon or veggies. I love adding jalapeños for a kick. Just fold them into the batter before baking. This adds great flavor and texture.
What is the best way to serve cornbread?
Serve cornbread warm from the skillet. I like to drizzle it with honey or add pats of butter. You can also add fresh herbs for a nice touch. It pairs well with chili or soup.
In this post, we covered essential ingredients for cornbread, substitutions, and tips for fresh picks. I shared step-by-step instructions to ensure your cornbread turns out great. We discussed ways to perfect texture, enhance flavor, and explore different variations. Proper storage and reheating tips help keep your cornbread fresh for later. Remember, cornbread can be sweet or savory, so choose what you love. Get creative and enjoy the process! Your next batch will be delicious and fun to make.
. In this post, we covered essential ingredients for cornbread, substitutions, and tips for fresh picks. I shared step-by-step instructions to ensure your cornbread turns out great. We discussed ways to perfect texture, enhance flavor, and explore different variations. Proper storage and reheating tips help keep your cornbread fresh for later. Remember, cornbread can be sweet or savory, so choose what you love. Get creative and enjoy the process! Your next batch will be delicious and fun to make.](https://goldendishy.com/wp-content/uploads/2025/07/3215032b-f688-44a5-9882-4fc644314e18-300x300.webp)

. It includes detailed steps and all the ingredients needed for this dish. Enjoy your cooking! We explored the best ingredients for Garlic Herb Roasted Potatoes and detailed how to prepare them. I shared step-by-step instructions and helpful tips for perfect roasting. We also discussed variations to keep your dishes exciting and how to store leftovers effectively. Remember, the right techniques can make your roasted potatoes shine. With practice, you can impress friends and family with your cooking. Enjoy your culinary adventure!](https://goldendishy.com/wp-content/uploads/2025/06/ecc3322d-c379-4f60-a513-14af97ee26fb-768x768.webp)

![- Bell Peppers: I like using large bell peppers. You can choose any color you like: red, yellow, or green. They all taste great! Make sure they are firm and fresh. Each pepper should hold the stuffing well. - Ground Chicken and Dairy: Ground chicken adds a light flavor. It cooks quickly and blends well with other ingredients. Pair it with shredded cheddar cheese for a creamy touch. The cheese melts beautifully, making the dish extra yummy. - Enhancing Ingredients: I always add cooked rice to the mix. It gives the dish a nice texture. Black beans are great too; they add protein and fiber. Corn brings sweetness and color. Together, these ingredients create a hearty filling. - Essential Spices: Be sure to use chili powder, ground cumin, garlic powder, and onion powder. These spices pack flavor into the filling. A sprinkle of salt and pepper brings everything together. - Optional Garnishes: Fresh cilantro adds a burst of flavor. It makes the dish look more vibrant. You can also use a dollop of sour cream for creaminess. - Recommended Sides: Serve the stuffed peppers with a simple salad. A side of rice or quinoa pairs well too. You can also add some tortilla chips for crunch. - Display Ideas: For a beautiful presentation, place each stuffed pepper on a plate. Drizzle a bit of olive oil on top for shine. Add some chopped cilantro for color. This makes the meal look as good as it tastes! For the complete recipe, check out the Full Recipe. 1. Preheat your oven to 375°F (190°C). This step is key for even cooking. 2. Grab four large bell peppers. Cut off the tops and remove the seeds. Rinse the insides to clean them well. 3. Lightly coat the outside of each pepper with olive oil. Stand them upright in a 9x13 inch baking dish. 1. Heat a skillet over medium heat. Add 1 pound of ground chicken to the pan. 2. Cook the chicken for 5-7 minutes. Stir and break it apart until it turns brown. 3. Once cooked, mix in 1 cup of cooked rice, 1 cup of rinsed black beans, and 1 cup of corn. 4. Add 3/4 cup of shredded cheddar cheese, 1 teaspoon of chili powder, 1 teaspoon of cumin, 1 teaspoon of garlic powder, and 1/2 teaspoon of onion powder. Season with salt and pepper to taste. Stir for 2-3 minutes. 1. Generously fill each bell pepper with the chicken and cheese mixture. Pack it well. 2. Sprinkle the remaining 1/4 cup of cheese on top of the stuffed peppers. 3. Cover the dish with aluminum foil to trap steam. Bake in the preheated oven for 30 minutes. 4. After 30 minutes, remove the foil. Continue baking for 10-15 minutes, until the cheese is bubbly and golden. 5. Check if the peppers are tender by piercing them with a fork. 6. Allow them to cool for a few minutes after baking. Optionally, garnish with fresh cilantro for extra flavor. For the complete recipe, check out the [Full Recipe]. What are common mistakes to avoid? One mistake is overcooking the chicken. Cook it just until it's brown. If you use too much salt, it can ruin the flavor. Taste your mixture before stuffing the peppers. How can you ensure even cooking? Make sure all your peppers are the same size. This will help them cook at the same rate. Cover them with foil for part of the baking time. This keeps the heat in and helps them cook through. What are some suggestions for adding extra flavor? Try adding diced tomatoes or jalapeños for a kick. You can also mix in some spices like paprika or cayenne pepper. Fresh herbs like parsley or basil can brighten the dish. What are some ingredient swaps for dietary preferences? For a lower-carb option, replace rice with cauliflower rice. Use ground turkey or tofu for a different protein. You can also swap cheddar cheese for a dairy-free cheese for a vegan option. What cooking methods can you use? You can air fry the stuffed peppers for a crispy texture. Just set the air fryer to 375°F and cook them for about 15-20 minutes. Grilling is another fun method. Just wrap the peppers in foil and place them on the grill. How do you maintain moisture in stuffed peppers? Add a splash of chicken broth to the bottom of the baking dish. This creates steam as they cook. Avoid overstuffing the peppers; too much filling can lead to dryness. For the full recipe, check out the recipe section above. {{image_4}} You can change the ground chicken in your stuffed peppers. Use ground turkey or beef instead. These meats add different flavors and textures. If you want a vegetarian option, try using quinoa or lentils. These ingredients pack a protein punch and keep the dish hearty. For a vegan twist, use a mix of beans and mushrooms. They add a nice texture and flavor. You can also use tofu crumbles, which absorb spices well. This makes your meal rich and filling while keeping it plant-based. You can spice up your stuffed peppers with different flavors. Why not try a Mexican twist? Add taco seasoning or jalapeños for heat. A dash of lime juice brightens the dish. If you love Italian flavors, mix in some Italian herbs like oregano or basil. You could also add marinara sauce to the filling. This creates a rich and comforting taste. Want a twist? Try adding olives, capers, or feta cheese. These ingredients bring unique textures and flavors. They turn a simple meal into something exciting. For those needing gluten-free meals, this recipe is easy to adapt. Use rice instead of breadcrumbs for filling. Always check labels on canned items like beans and corn. They should be gluten-free. If you follow a low-carb diet, you can swap rice for cauliflower rice. This keeps the dish light and low in carbs. You can also skip the beans to reduce carbs even more. These variations help everyone enjoy this tasty meal. No matter your diet, you can find a way to enjoy chicken and cheese stuffed peppers. After you make your chicken and cheese stuffed peppers, let them cool down. This helps keep them fresh. Store them in an airtight container. They will stay good in the fridge for about 3 to 4 days. If you have leftovers, try to eat them within this time. To reheat, place them in the oven or microwave until warm. If you want to keep your stuffed peppers for a longer time, freezing is a great option. First, let them cool completely. Wrap each pepper tightly with plastic wrap. Then, put them in a freezer bag or container. This helps avoid freezer burn. They can last up to 3 months in the freezer. When you're ready to eat, take them out and thaw in the fridge overnight. Reheat them in the oven at 375°F until hot. This will keep the flavors and textures intact. Meal prepping can save time on busy weeknights. You can prepare the filling ahead of time. Cook the chicken and mix in the rice, beans, and spices. Store this mixture in the fridge for 2 to 3 days. When you're ready, stuff the peppers and bake them. For batch cooking, consider making a double recipe. Freeze half for later. This way, you have a tasty meal ready whenever you need it. How do you know when stuffed peppers are done? You can tell when stuffed peppers are done by checking the peppers and cheese. The peppers should be tender and the cheese melted and bubbly. If you pierce a pepper with a fork, it should feel soft but not mushy. Can you prepare them in advance? Yes, you can prepare stuffed peppers in advance. Just stuff them and store them in the fridge. Bake them when you're ready to eat. This makes for a quick and easy family meal. Can I use frozen peppers? Yes, you can use frozen peppers. Just thaw them before stuffing. They may cook faster, so keep an eye on them while baking. What to do if I don't have certain ingredients? If you lack certain ingredients, feel free to swap them out. For example, use quinoa instead of rice or a different type of cheese. Get creative based on what you have! Can stuffed peppers be made on the stovetop? Yes, you can make stuffed peppers on the stovetop. Just steam them in a skillet with a little water. Cover with a lid and cook until tender. How to adjust heating times for different ovens? Oven temperatures can vary. If your oven runs hot, check the peppers a few minutes early. If it runs cool, you may need to add a few extra minutes. Always trust your instincts! We covered the best way to make stuffed peppers. You learned about key ingredients like bell peppers, ground chicken, and spices. You also discovered tips for cooking and storing them. There are many ways to adjust the recipe for different diets and tastes. Incorporating these ideas will make your dish delicious. Get creative with flavors and toppings. With practice, you'll master this easy meal for any occasion. Enjoy your cooking journey!](https://goldendishy.com/wp-content/uploads/2025/06/69b5c483-258e-4498-8701-d043fb5fc497-768x768.webp)
![- 2 cups cooked jasmine rice - 1 cup cooked chicken breast, diced - 1 cup mixed vegetables - 3 tablespoons soy sauce - 2 tablespoons sesame oil - Salt and freshly ground black pepper - 2 large beaten eggs - 3 green onions, finely chopped - Garlic Gathering the right ingredients is key to making easy chicken fried rice. Start with 2 cups of cooked jasmine rice; leftover rice works best. It helps keep the grains from sticking together. Next, you need 1 cup of cooked chicken breast, diced into small pieces. You can use rotisserie chicken for speed. Add 1 cup of mixed vegetables. Frozen peas and carrots work great. They heat up quickly and add color. For flavor, use 3 tablespoons of soy sauce. This gives the rice a savory kick. 2 tablespoons of sesame oil will add a nutty taste. Don't forget to season with salt and freshly ground black pepper to your liking. If you want to enhance the dish, consider adding 2 large beaten eggs. They add richness and protein. 3 green onions, finely chopped, add a fresh taste. Lastly, garlic can bring an aromatic depth to your fried rice. These ingredients create a simple yet tasty meal. For the full recipe, check out the link above. How to pre-cook jasmine rice To cook jasmine rice, use a 1:1.5 rice-to-water ratio. Rinse the rice first. Then, add it to boiling water. Cover and simmer for 15 minutes. Let it cool afterward. Using day-old rice gives the best texture in fried rice. How to dice chicken breast Start with a cooked chicken breast. Place it on a cutting board. Cut it in half lengthwise, then slice it into small, bite-sized pieces. Aim for even sizes to ensure even cooking. Tips for measuring vegetables When measuring mixed vegetables, use a cup. Fill it with your choice of peas, carrots, and corn. Make sure to level it off with a knife for accuracy. Fresh or frozen veggies work well, but thaw frozen ones first. Heating the skillet and oils Grab a large skillet or wok. Heat it on medium-high. Add vegetable oil until it shimmers but does not smoke. This oil helps fry the ingredients evenly. Sautéing garlic and eggs Add minced garlic to the hot oil. Stir for about 30 seconds until fragrant. Push the garlic aside. Pour in beaten eggs next. Scramble the eggs gently until fully cooked. Then, mix them with the garlic. Combining ingredients systematically Next, add the diced chicken to the skillet. Stir for about 2 minutes until heated through. Now, toss in the mixed vegetables. Stir-fry for another 2-3 minutes until tender yet crisp. Add the jasmine rice next. Break apart any clumps gently as you stir. Incorporating soy sauce and sesame oil Drizzle soy sauce and sesame oil over the rice mix. Stir well to evenly coat all ingredients. This step adds flavor and richness to the dish. Garnishing and presentation tips Add chopped green onions last. Season with salt and black pepper to taste. For a nice touch, serve in a large bowl or on plates. Garnish with more green onions and sesame seeds. Serving size and suggestions This recipe serves about four people. Pair it with lime wedges for a zesty kick. Enjoy your savory chicken fried rice! For the complete recipe, check out the [Full Recipe]. - Importance of using day-old rice: Day-old rice is drier and firmer. This helps prevent clumping when cooking. Fresh rice can be too sticky and mushy. It’s best to cook the rice a day before and store it in the fridge. - Tips for achieving perfect egg texture: Beat the eggs well before cooking. Pour them into the pan and let them sit for a second. Stir gently to form soft curds. Don’t overcook the eggs; they should be fluffy and tender. - Stir-fry techniques for even cooking: Keep the heat high and work quickly. Use a large skillet or wok to ensure space for all ingredients. Stir constantly to avoid burning. This helps everything cook evenly and stay crisp. - Adding spice: How to adjust heat levels: Start with a small amount of red pepper flakes or chili sauce. You can always add more, but you can’t take it away. Taste as you go to find your perfect heat level. - Incorporating fresh herbs: Fresh herbs like cilantro or basil can brighten the dish. Add them at the end for the best flavor. Chopped green onions also add a fresh taste and a nice crunch. - Using alternative sauces or marinades: Try adding oyster sauce or hoisin sauce for a twist. These can add a deeper flavor to your fried rice. Experiment to find what you enjoy most. - Best frying pan or wok for this recipe: A non-stick skillet or a wok works best. This helps prevent sticking and makes stirring easier. Look for one that is large enough to hold all your ingredients. - Recommended utensils for mixing: Use a sturdy spatula or wooden spoon. This will help you mix everything without damaging your pan. A thin spatula is great for scraping the sides. - Importance of a good spatula: A good spatula helps in flipping and mixing your ingredients. It should have a flat edge for easy scooping and stirring. This simple tool can make a big difference in your cooking process. Enjoy crafting your Easy Chicken Fried Rice with these tips and tricks! For the complete recipe, check out the Full Recipe section above. {{image_4}} You can easily adapt this chicken fried rice recipe to fit different diets. For a gluten-free option, replace soy sauce with tamari. This keeps the flavor but removes gluten. If you want a vegetarian version, swap chicken for tofu. Tofu absorbs flavors well, making it tasty and filling. For a low-carb choice, use cauliflower rice instead of jasmine rice. It offers a light texture while still giving you that satisfying fried rice feel. You can also change the flavor of your fried rice with simple tweaks. For an Asian twist, add hoisin sauce. This adds a sweet and savory taste that will excite your palate. If you want a Mexican flair, sprinkle in some taco seasonings. This gives the rice a spicy kick that is fun to try. For a Mediterranean touch, toss in olives and feta cheese. These ingredients bring a whole new level of taste to your dish. There are many ways to boost your chicken fried rice. You can add extra protein, like shrimp, pork, or beef. This makes the meal heartier and more satisfying. Another option is to enhance nutrition by adding more vegetables. You can include bell peppers, broccoli, or snap peas for extra crunch and color. Lastly, think about creative add-ins. Nuts, spices, or a splash of dressing can elevate the dish and make it your own. For the full recipe, check out the earlier section. To keep your chicken fried rice fresh, place it in a container with a tight lid. This helps prevent moisture loss and keeps flavors intact. Make sure the rice cools down to room temperature before sealing the container. Store it in the fridge for up to four days. Use glass or plastic containers that are microwave safe. These options make reheating easy. Avoid using metal containers as they can get too hot in the microwave. You can reheat chicken fried rice on the stovetop or in the microwave. For stovetop reheating, add a splash of water or oil in a skillet. Heat it over medium heat while stirring. This method keeps the rice from drying out. If using the microwave, place the rice in a bowl and cover it with a damp paper towel. This helps steam the rice and keeps it moist. Heat in short bursts, stirring in between, until warmed through. To freeze chicken fried rice, allow it to cool completely. Then, divide it into portions and place each in a freezer-safe bag. Remove as much air as possible before sealing. Label the bags with the date and use them within three months for best taste. For thawing, you can leave the rice in the fridge overnight. If you’re in a hurry, you can use the microwave. Just set it to defrost mode and stir frequently until thawed. How long can I store leftover fried rice? You can store fried rice in an airtight container for up to four days in the fridge. Make sure it cools down before sealing. Reheat over medium heat for best results. Can I use uncooked rice for this recipe? No, you should not use uncooked rice. Cooked rice absorbs flavors and keeps the dish from being too hard. Use day-old rice for the best texture. What if I don’t have sesame oil? If you lack sesame oil, you can use olive oil or any neutral oil instead. It won't have the same nutty taste, but it will still be good. How to make this dish vegan? To make vegan fried rice, replace chicken with tofu and skip the eggs. Use extra veggies for texture and flavor. Adjust soy sauce to taste. What vegetables work best in fried rice? Mixed vegetables like peas, carrots, and corn are great. You can also add bell peppers, broccoli, or snap peas for variety. Choose what you like best! Can I make this recipe ahead of time? Yes, you can prep the veggies and chicken ahead of time. Just store them separately in the fridge. Cook the rice fresh for the best taste. What is the best way to cook chicken for fried rice? Cook chicken breast in a skillet until golden brown. Dice it into small pieces for even cooking. Use cooked chicken for easier preparation. How do I prevent the rice from becoming mushy? To avoid mushy rice, make sure to use day-old rice. Fresh rice holds too much water. If using fresh, spread it out to cool. Why use day-old rice? Day-old rice dries out slightly, making it perfect for frying. It also helps to keep the grains separate. This ensures a better texture for your fried rice. This blog post covered how to make chicken fried rice. We looked at key ingredients, cooking steps, and helpful tips. You learned about variations to suit different diets and flavor profiles. Storing and reheating options were also explained for your convenience. In closing, chicken fried rice is simple and customizable. You can create a dish that fits your taste and needs. Enjoy making this tasty meal!](https://goldendishy.com/wp-content/uploads/2025/06/daf8b8b3-55d6-4d68-b799-ba1a17e73868-768x768.webp)
![- 4 large bell peppers (any vibrant color) - 1 cup quinoa, thoroughly rinsed and drained - 2 cups vegetable broth - 1 can (15 oz) black beans, well rinsed and drained - 1 cup corn (fresh, frozen, or canned, drained) - 1 cup cherry tomatoes, halved - 1 teaspoon ground cumin - 1 teaspoon smoked paprika - 1 teaspoon garlic powder - Salt and freshly cracked black pepper to taste - 1 tablespoon extra virgin olive oil - ½ cup shredded cheddar cheese (optional but recommended) - Fresh cilantro or parsley, finely chopped for garnish - Additional vegetables (e.g., zucchini, mushrooms) - Spices and herbs (e.g., oregano, chili powder) When making stuffed bell pepper boats, you have many options. I love using colorful bell peppers. They add a fun look to your dish. Choose ones that are firm and bright. For the filling, I use quinoa. It’s not only healthy but also tasty. Rinse it well before cooking. The vegetable broth adds flavor and makes it rich. Black beans are another great choice. They are filling and packed with protein. Rinse them well too, to get rid of extra salt. Corn brings sweetness to the dish. You can use fresh, frozen, or canned corn. Cherry tomatoes add a nice juicy burst. Spices like cumin and paprika give depth. Garlic powder adds that warm flavor we all love. Don’t forget to season with salt and pepper to make it pop. Finally, I drizzle olive oil on the filling. It helps everything blend together. If you love cheese, add some cheddar on top for creaminess. Feel free to customize your stuffed peppers with optional add-ins. You can mix in other veggies like zucchini or mushrooms. Extra spices can make a big impact too. This recipe is flexible. You can adjust it to fit your taste. Explore and have fun with your stuffed bell pepper boats! For the complete guide, check out the Full Recipe I have shared. - Preheat the oven to 375°F (190°C). - Prepare the bell peppers by cutting off their tops. Carefully remove the seeds and membranes. Make sure they sit upright in a baking dish. - Combine 1 cup of quinoa and 2 cups of vegetable broth in a saucepan. - Bring this mix to a boil, then reduce the heat to low. Cover the pot and let it simmer. Cook for about 15 minutes or until the quinoa is fluffy and the broth has absorbed. - In a large mixing bowl, combine the cooked quinoa with one can of black beans, one cup of corn, and spices. - Add 1 teaspoon of ground cumin, 1 teaspoon of smoked paprika, and 1 teaspoon of garlic powder. Season with salt and black pepper. - Drizzle 1 tablespoon of olive oil over the mixture. Stir until everything is well blended. - Carefully spoon the filling into each prepared bell pepper. Press it down gently to pack it in. - If you like, top each stuffed pepper with ½ cup of shredded cheddar cheese for added flavor. - Pour a little water into the bottom of the baking dish. Cover the dish with aluminum foil. This helps keep the peppers moist. - Bake the stuffed peppers in the preheated oven for 25-30 minutes. Check for doneness; they should be fork-tender. Enjoy your delicious Stuffed Bell Pepper Boats with vibrant colors and flavors! For the full recipe, please refer back to the recipe section. To start, cutting bell peppers right matters. Slice off the tops using a sharp knife. Be careful not to cut too deep. Next, remove the seeds and white membranes inside. A small spoon works great for this. Rinse the peppers under cold water to clean them. For even cooking, place your stuffed peppers tightly in the baking dish. This helps them cook at the same rate. Mixing flavors is key, too. Use spices like cumin and smoked paprika to boost taste. You can taste the filling before you stuff the peppers. Adjust the salt and pepper as needed. Serving your stuffed bell pepper boats can be fun. Use a colorful platter to catch the eye. Arrange the peppers upright, showing off their filling. You can add a wedge of lime on the side for a fresh touch. A sprinkle of chopped cilantro or parsley adds color and flavor. You can prepare stuffed peppers ahead of time. Stuff them and cover with foil. Store them in the fridge for up to a day. This makes meal prep easy for busy nights. For sides, consider a fresh salad or crusty bread. You can also pair them with rice or quinoa for a filling meal. These peppers are great for family dinners or potlucks. For the full recipe, check out Stuffed Bell Pepper Boats. {{image_4}} You can easily make this dish vegetarian. Substituting quinoa with rice or couscous works well. Rice gives a nice texture, while couscous cooks faster. Both options taste great in these stuffed bell pepper boats. Adding different vegetables also boosts flavor and nutrition. Try diced zucchini, mushrooms, or spinach. These veggies add color and crunch. You can mix and match to fit your taste. Want to add meat? Ground turkey or beef makes a hearty filling. Just cook the meat before adding it to the quinoa mixture. This step ensures the meat is safe to eat. When adding meat, adjust the spices. You might want to use more cumin or paprika. This adjustment gives the dish a richer taste. Cheese can take your stuffed peppers to the next level. Mozzarella or feta are great choices. Mozzarella melts beautifully, while feta adds a tangy twist. For even more flavor, add layers of salsa or sauce. It keeps the filling moist and adds a kick. You can also drizzle some sauce on top before baking. This extra step makes the dish even more delicious. Check out the [Full Recipe] for all the details! To keep your stuffed bell pepper boats fresh, store them in an airtight container. This helps lock in moisture and flavor. You can keep them in the fridge for about 3 to 4 days. If you want to save them for later, allow them to cool completely before storing. You can freeze stuffed peppers both before and after baking. If you freeze them before cooking, wrap them tightly in plastic wrap and then in aluminum foil. This keeps out air and prevents freezer burn. If you choose to freeze them after baking, let them cool first. Then, place them in a freezer-safe container. They will stay good for up to 3 months. To reheat your stuffed peppers, the oven works best. Preheat it to 350°F (175°C). Place the peppers in a baking dish and cover with foil. Bake for about 20 to 25 minutes until heated through. You can also use a microwave if you're in a hurry. Just place one pepper on a plate and heat for 2 to 3 minutes. This method may make them a bit softer, but they'll still taste great! To make stuffed bell peppers in advance, prepare the filling first. Cook the quinoa and mix it with your beans, corn, and spices. Once mixed, stuff each bell pepper with the filling. You can store them in the fridge for up to two days before baking. Cover them tightly to keep them fresh. When ready to bake, just pop them into the oven. This saves you time and effort on busy nights. Yes, you can use other types of peppers! Try using poblano, Anaheim, or even jalapeño peppers. Each type adds a unique flavor and spice level. Poblano peppers are mild and have a rich taste. They also hold a good amount of filling. If you like a bit of heat, jalapeños are a great choice. Just remember to adjust the cooking time if your peppers are smaller. Stuffed bell pepper boats pair well with many side dishes. Some great options include a fresh green salad, roasted vegetables, or rice. You can also serve them with a side of guacamole or salsa for added flavor. If you want something warm, consider serving bread or cornbread. These sides complement the flavors and make for a complete meal. To adjust the spice level, you can add or reduce spices. For less heat, skip the cumin and paprika. If you want more flavor, add some chili powder or crushed red pepper. You can also mix in diced jalapeños or hot sauce. Start with a little and taste as you go. This way, you can find the perfect balance for your taste. Yes, this dish can be gluten-free! The main ingredients, like quinoa and beans, are naturally gluten-free. Just be sure to check that your vegetable broth is gluten-free as well. If you add other ingredients, like sauces or spices, check their labels. This way, you can enjoy a safe and tasty meal. Stuffed bell peppers are simple and fun to make. We covered the key ingredients and steps to prepare them. You learned how to customize flavors and presentation. Remember, you can use different spices, grains, or veggies. These peppers can please everyone, regardless of diet. Enjoy your meal prep and share these tasty, healthy treats with friends and family. Happy cooking!](https://goldendishy.com/wp-content/uploads/2025/07/06b7afd9-4005-4ab6-8aaa-ba374b5d3167-768x768.webp)
