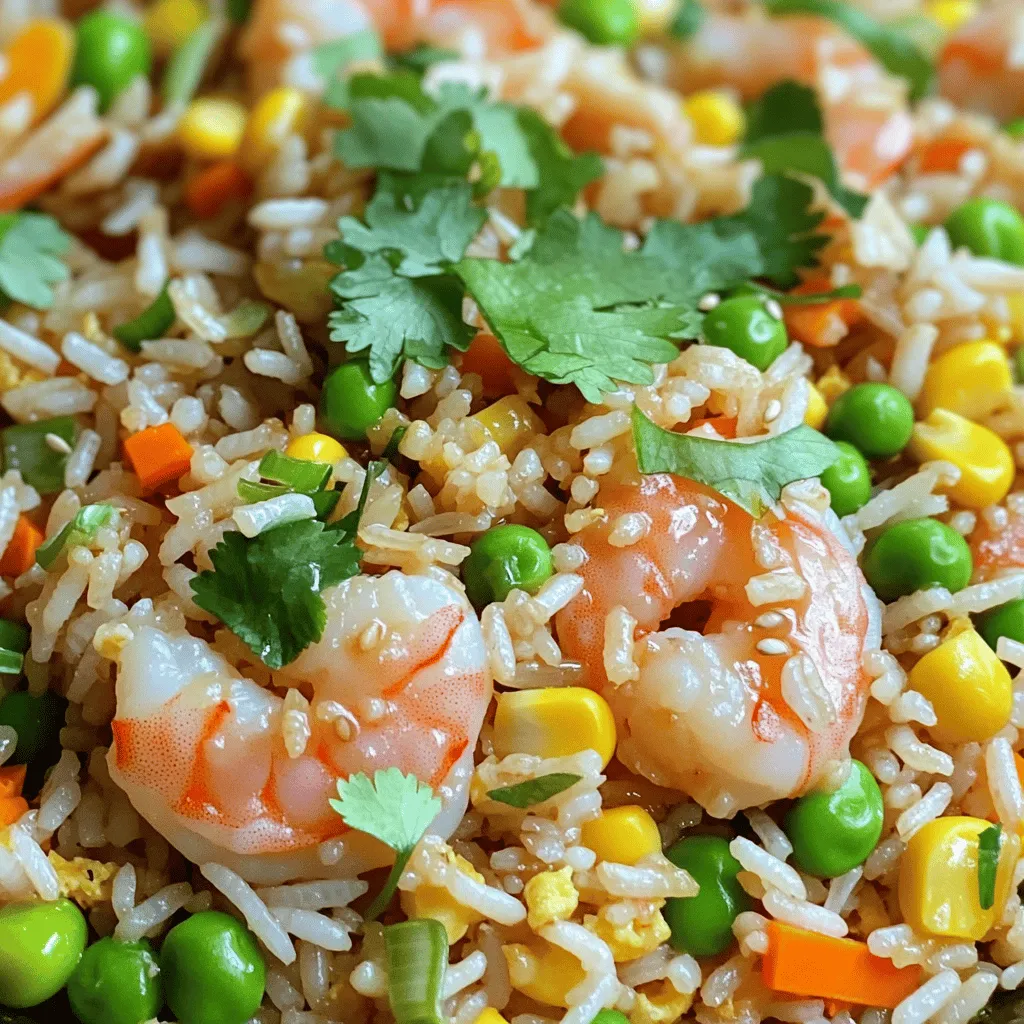
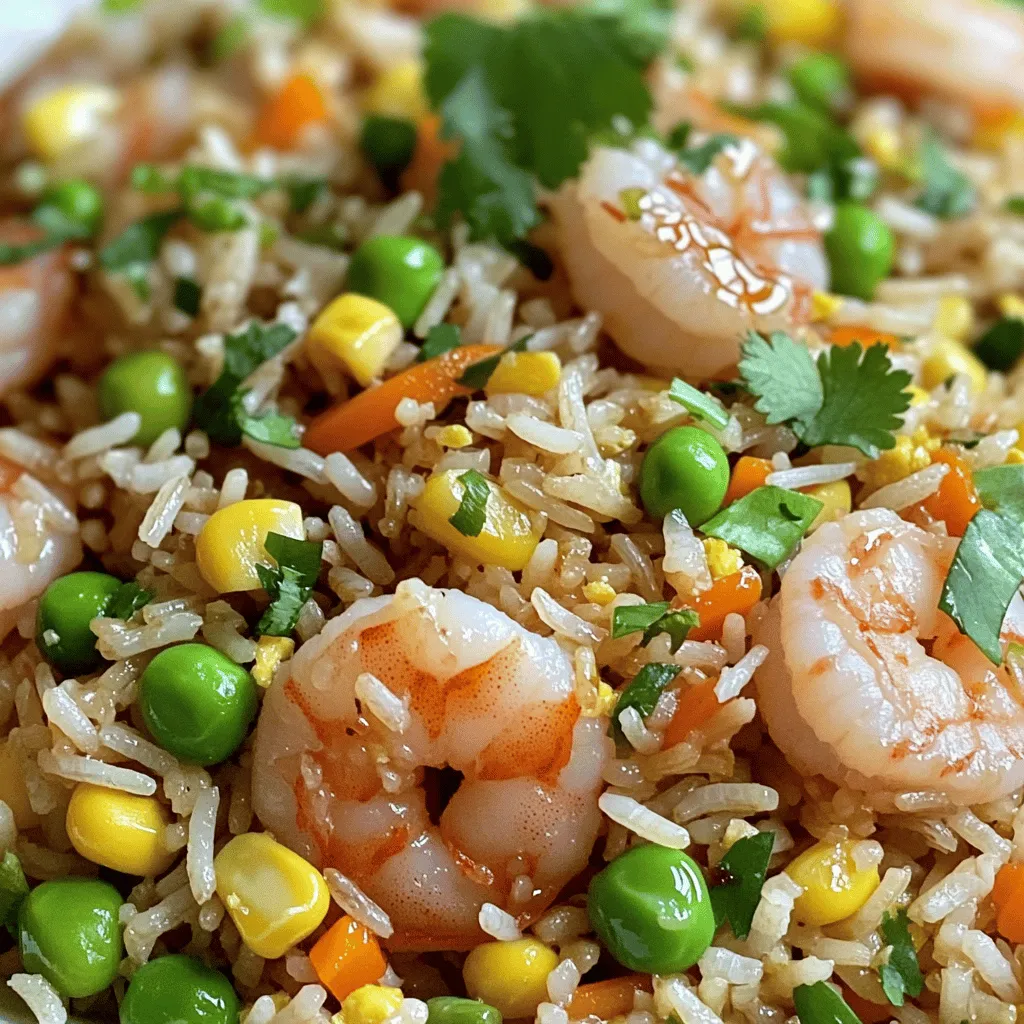
Looking to whip up a delicious meal in no time? You’re in luck! This Easy Shrimp Fried Rice recipe is quick and packed with great flavor. With just a few simple ingredients and steps, you can create a satisfying dish that’s perfect for busy weeknights. Plus, it’s versatile enough to adapt to your tastes. Let’s dive in and make your new favorite meal!
Ingredients
To make easy shrimp fried rice, you need simple and fresh ingredients. Here’s what you will need:
– 2 cups cooked jasmine rice (ideally refrigerated overnight)
– 1 cup shrimp, peeled and deveined
– 2 tablespoons vegetable oil (divided)
– 2 eggs, generously beaten
– 1 cup mixed vegetables (peas, carrots, and corn)
– 3 green onions, finely chopped
– 3 cloves garlic, minced
– 2 tablespoons soy sauce
– 1 teaspoon sesame oil
– Salt and pepper to taste
– Fresh cilantro for garnish (optional)
Each ingredient adds a layer of flavor. The jasmine rice gives a nice aroma, while the shrimp adds a sweet taste. Mixed vegetables bring color and nutrition. Green onions add a fresh crunch, and soy sauce gives the dish its savory kick.
For best results, use rice that has been cooked and cooled. This helps it fry better.
Step-by-Step Instructions
Cooking the Shrimp
To start, heat 1 tablespoon of vegetable oil in a large skillet or wok over medium-high heat. Once it’s hot, add the shrimp in a single layer. Cook the shrimp for about 2-3 minutes. They should turn pink and opaque. That’s how you know they’re done! Use a slotted spoon to take them out. Set the shrimp aside on a plate.
Scrambling the Eggs
Next, add the remaining tablespoon of vegetable oil to the same skillet. Pour in your beaten eggs. Let the eggs sit for a moment, then gently stir them. Scramble the eggs until they are fully cooked and fluffy. Once cooked, move the eggs to the plate with the shrimp.
Sautéing the Vegetables
Now, let’s add some flavor! Add the minced garlic to the skillet and sauté it for about 30 seconds. You want it fragrant, not burnt. Next, toss in the mixed vegetables. Stir-fry them for about 2-3 minutes until they are tender and colorful.
– Incorporating the Rice
Add the cooked jasmine rice to the skillet. Break apart any clumps with a spatula or wooden spoon. Mix the rice well with the vegetables. Stir-fry this mix for about 3-4 minutes until the rice is heated through and slightly crispy.
– Combining All Ingredients
It’s time to bring everything together! Return the cooked shrimp and scrambled eggs to the skillet. Drizzle soy sauce and sesame oil over the mixture. Toss all the ingredients with a spatula to ensure they are well combined. Season with salt and pepper to taste, adjusting as you like.
– Finishing Touches with Green Onions
At the end, fold in the chopped green onions. Make sure they are mixed throughout the fried rice. Then, remove the skillet from the heat.Enjoy your delicious shrimp fried rice!
Tips & Tricks
Choosing the Right Rice
For the best shrimp fried rice, use jasmine rice. This rice has a nice aroma and a fluffy texture. If you can, cook the rice a day before. Chilling it overnight helps the grains firm up. This way, the rice won’t clump when you stir-fry it. If you don’t have jasmine rice, you can use long-grain rice too. Just avoid sticky rice, as it can make your dish gummy.
Enhancing Flavor with Seasonings
To boost the taste of your shrimp fried rice, use a mix of seasonings.
– Soy Sauce: This adds a salty flavor. Use it in moderation to avoid overpowering the dish.
– Sesame Oil: Just a teaspoon adds a nutty taste. A little goes a long way.
– Salt and Pepper: Always taste your dish. Add these as needed for balance.
Ideal Vegetable Combinations
Mixing vegetables in your fried rice makes it colorful and tasty. Good choices include:
– Peas for sweetness
– Carrots for crunch
– Corn for a pop of color
Feel free to add bell peppers or broccoli too. They add great texture and flavor.
Cooking Times for Perfect Shrimp
Cook the shrimp until they turn pink and opaque. This takes about 2-3 minutes. Don’t overcook them, or they will be tough. Remember to remove them from the pan before adding the eggs. This keeps the shrimp tender and juicy.
Variations
Adding Different Proteins
You can swap shrimp for other proteins. Chicken, beef, or tofu all work great. This gives you options based on what you like. For a vegetarian meal, use tofu or a mix of veggies. Just make sure to cook your choice well to keep it tasty.
Spicy Shrimp Fried Rice
If you love heat, try spicy shrimp fried rice. Add some red pepper flakes or diced chili peppers. This will bring a kick to your dish. You can also mix in hot sauce while cooking. Adjust the spice level based on your taste.
Tropical Shrimp Fried Rice
For a fun twist, make tropical shrimp fried rice. Add pineapple chunks or coconut milk. This creates a sweet flavor that balances the salty soy sauce. You can use fresh pineapple or canned. The coconut adds a creamy texture. This variation is perfect for summer meals.
Try these variations to keep your shrimp fried rice exciting and fresh.
Storage Info
How to Store Leftover Fried Rice
Store your leftover shrimp fried rice in an airtight container. Make sure it cools down first. Place it in the fridge if you plan to eat it within a few days. For best taste and quality, eat it within three days. If you need to keep it longer, freezing is a great option.
Reheating Guidelines
When you’re ready to eat the fried rice again, you can reheat it in a few ways. A microwave works well for quick reheating. Just add a splash of water to keep it moist and cover it. Heat it in short bursts, stirring in between, until hot. You can also use a skillet. Heat it over medium-low heat, stirring often. This method gives it a nice crispy texture.
Freezing Tips and Duration
If you want to freeze your shrimp fried rice, make sure it’s cool before packing. Use freezer-safe bags or containers to prevent freezer burn. Squeeze out as much air as you can. It will stay good in the freezer for up to three months. When you’re ready to use it, thaw it in the fridge overnight before reheating. Enjoy your meal again with ease!
FAQs
Can I use frozen shrimp for this recipe?
Yes, you can use frozen shrimp. Just thaw them first. Place them in cold water for about 15 minutes. This way, they cook evenly and stay juicy.
What type of rice is best for fried rice?
I recommend jasmine rice. It has a nice aroma and fluffy texture. You can also use long-grain rice. Make sure it’s cooked and cooled before frying.
How can I make shrimp fried rice extra spicy?
To add spice, use chili paste or fresh chili peppers. You can also sprinkle some red pepper flakes. Adjust the heat to match your taste.
Is it necessary to refrigerate rice before using it?
Refrigerating rice is best for fried rice. It helps the grains firm up and prevents sticking. If you don’t have time, just cool it on the counter.
Can I add eggs to fried rice?
Yes, adding eggs is a great idea. They add richness and protein. Scramble them before mixing with the rice for a delicious flavor.
What are some good serving suggestions?
Serve shrimp fried rice in a big bowl. Add fresh cilantro on top for color. You can pair it with spring rolls or a side salad for a full meal.
To make shrimp fried rice, start with simple ingredients and follow clear steps. You learned about the best rice choices, cooking shrimp perfectly, and flavorful variations. Storing leftovers is easy with simple tips. Remember, cooking is all about experimenting and enjoying the process. Use this guide to make your fried rice tasty and fun. Keep trying new flavors and combinations. Happy cooking!


