Easy Mongolian Chicken Flavorful and Quick Recipe

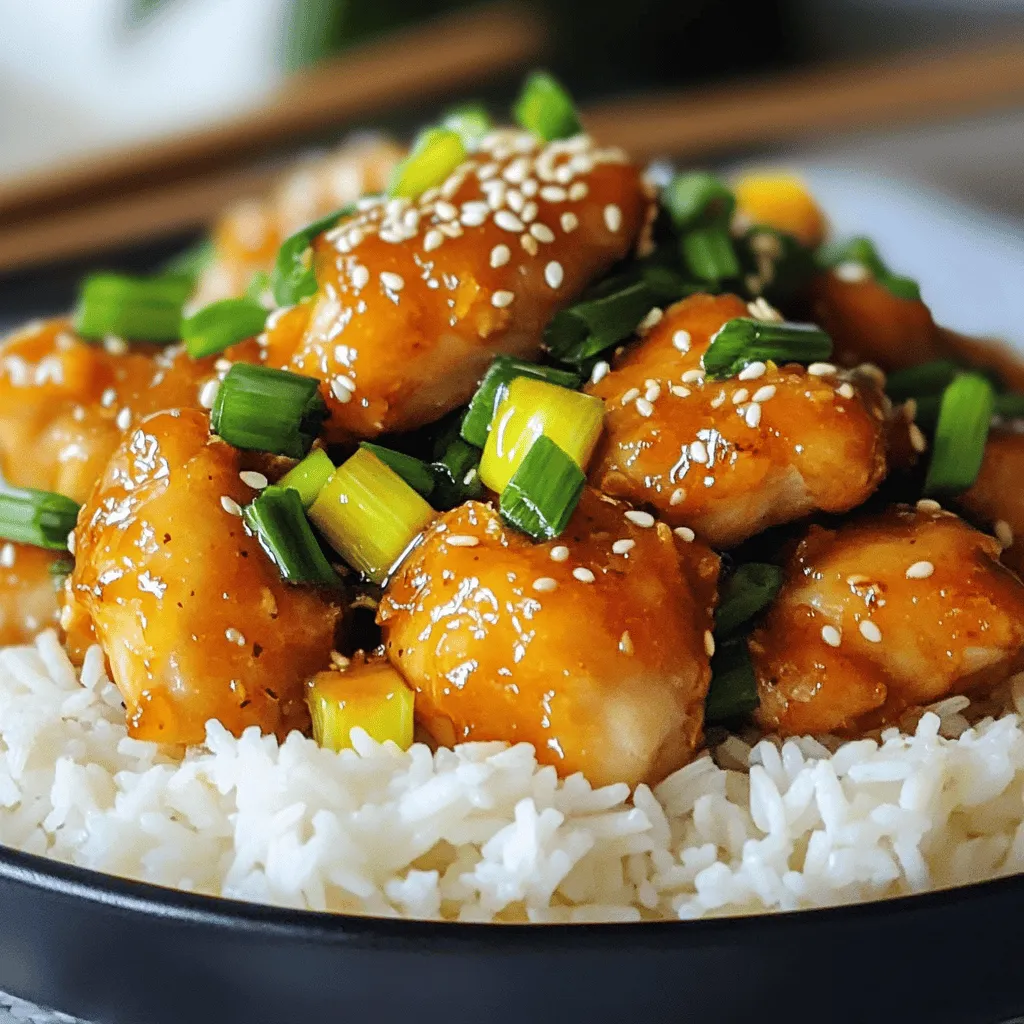
Craving something quick and tasty? Let’s dive into Easy Mongolian Chicken! This dish is perfect for busy nights when you want a satisfying meal without all the fuss. With just a few simple ingredients, you can whip up a flavor-packed dish that will impress your family and friends. I’ll guide you step-by-step, ensuring that every bite bursts with deliciousness. Ready to cook? Let’s get started!
Ingredients
Main Ingredients List
– 1 lb boneless chicken thighs, cut into bite-sized pieces
– 3 tablespoons cornstarch
– 3 tablespoons vegetable oil
– 4 green onions, chopped
– 3 cloves garlic, minced
– 1 tablespoon fresh ginger, finely minced
– 1/3 cup soy sauce
– 1/4 cup brown sugar
– 1 tablespoon rice vinegar
– 1/2 teaspoon crushed red pepper flakes
– Sesame seeds for garnish
Gathering the right ingredients is key to making easy Mongolian chicken. You will need boneless chicken thighs for a juicy texture. Cornstarch helps create a crispy coating. Vegetable oil is perfect for frying. For flavor, use fresh green onions, garlic, and ginger.
Soy sauce gives a savory taste, while brown sugar adds sweetness. Rice vinegar provides a slight tang. Adjust the heat with crushed red pepper flakes. Lastly, sesame seeds are great for finishing touches.
This list is simple, yet it creates a dish full of flavor. You can find all these items at your local store.
Step-by-Step Instructions
Preparation of Chicken
– Coat chicken pieces with cornstarch.
– Heat oil in skillet.
– Cook chicken until golden brown.
Start by placing the chicken pieces in a bowl. Sprinkle the cornstarch over the chicken. Toss gently until each piece gets coated. This helps create a crispy texture. Next, heat vegetable oil in a large skillet over medium-high heat. You want it hot enough to make the chicken sizzle. Once the oil is ready, add the chicken in a single layer. Cook it for about 5 to 7 minutes. Turn the pieces occasionally. You want them to be golden brown and fully cooked. Once done, transfer the chicken to a plate and set it aside.
Aromatic Sauté
– Add green onions, garlic, and ginger.
– Sauté until fragrant.
In the same skillet, pour in the remaining oil. This adds flavor to your dish. Now, add the chopped green onions, minced garlic, and finely minced ginger. Sauté them for about 2 to 3 minutes. Stir often. You can smell the lovely aroma as they cook. The green onions should start to soften. This step builds a base of flavor in your dish.
Combine Sauce Ingredients
– Whisk together soy sauce, brown sugar, rice vinegar, and red pepper flakes.
– Pour sauce into the skillet.
While the aromatics cook, grab a small bowl. In it, whisk together the soy sauce, brown sugar, rice vinegar, and red pepper flakes. You want the sugar to dissolve completely. Once mixed, pour this sauce into your skillet. Increase the heat slightly and bring it to a gentle simmer. This will combine all the flavors nicely.
Final Cooking Steps
– Return chicken to the skillet.
– Stir and simmer for flavor melding.
– Garnish with sesame seeds before serving.
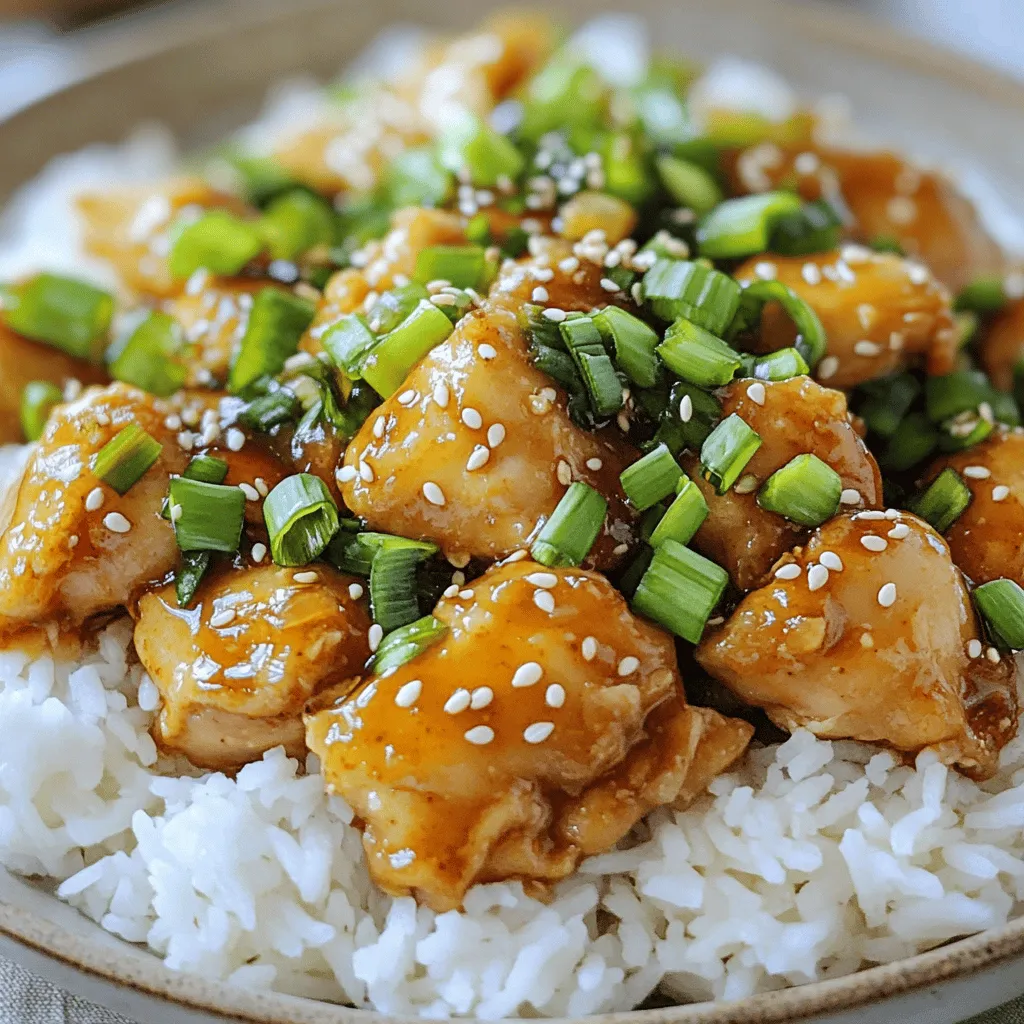
Now, add the cooked chicken back into the skillet. Stir well to coat each piece in the sauce. Let everything simmer together for another 2 to 3 minutes. This helps the flavors meld beautifully. Finally, remove the skillet from heat. Sprinkle sesame seeds over the top before you serve. This adds a lovely crunch and a nice touch to your dish. For a complete meal, serve your easy Mongolian chicken over jasmine rice or noodles. Enjoy your culinary creation!
Tips & Tricks
Cooking Tips
– Ensure chicken is in a single layer for even cooking. This helps the chicken brown nicely.
– Adjust spice level by varying red pepper flakes. Add more for heat or less for mildness.
Serving Suggestions
– Best served over jasmine rice or noodles. This adds a nice base to soak up the sauce.
– Top with extra green onions and sesame seeds for a fresh crunch and great look.
Presentation Ideas
– Use colorful dishes for visual appeal. Bright plates make the meal pop and look inviting.
– Create height with layered rice or noodles. This makes your dish look more gourmet and fun to eat.

Variations
Ingredient Swaps
You can switch out some ingredients to suit your taste. For a lighter option, use chicken breast instead of thighs. Chicken breast has less fat and cooks quickly. If you want a sweeter taste, substitute honey for brown sugar. Honey adds a nice flavor and keeps the dish moist.
Vegetarian Alternatives
If you prefer a meatless meal, try using tofu or seitan. Both options provide great protein and soak up flavors well. For those needing gluten-free options, swap soy sauce with tamari. Tamari gives a similar taste without gluten.
Flavor Enhancements
You can elevate your dish by adding more vegetables. Try bell peppers or broccoli for a pop of color and nutrition. Both veggies add crunch and flavor. For an extra layer of taste, incorporate a splash of sesame oil. This oil brings a nutty depth that complements the dish beautifully.
Storage Info
Refrigeration Guidelines
– Store leftovers in an airtight container.
– Consume within 3-4 days for best quality.
After cooking, let the Mongolian chicken cool down a bit. Place it in a container that seals tight. This helps keep it fresh. Eating it within a few days ensures it tastes great.
Freezing Tips
– Freeze portion servings in freezer-safe bags.
– Thaw overnight in the refrigerator before reheating.
If you want to save some for later, freezing is a good option. Divide the chicken into meal-sized portions. This way, you can take out just what you need. To heat, move it to the fridge the night before.
Reheating Instructions
– Use a skillet to reheat on low heat.
– Add a splash of water to avoid drying out.
When it’s time to eat again, I recommend using a skillet. Heat it on low to warm up evenly. If it seems dry, add a little water. This will keep the chicken juicy and tasty. Enjoy your meal!
FAQs
Can I make Easy Mongolian Chicken ahead of time?
Yes, you can prepare it in advance. Just store it in the fridge. When you’re ready, reheat it in a pan. This saves time on busy days. Plus, the flavors often get better overnight!
Is Mongolian Chicken spicy?
The spice level can be changed easily. Just add more or fewer red pepper flakes. If you want it mild, use less. For more heat, add more. You control the spice!
What can I serve with Mongolian Chicken?
Mongolian Chicken pairs well with many sides. It’s excellent with steamed rice or noodles. You can also serve it with a fresh salad. These options enhance your meal’s flavor.
Can I use different types of meat?
Absolutely! This recipe works great with beef or pork. You can also try it with shrimp or tofu for a twist. Feel free to get creative with your protein choice!
What’s the best way to thicken the sauce?
To thicken the sauce, mix a bit of cornstarch with water. Stir it into the sauce while it simmers. This will give you a nice, thick sauce to coat the chicken.
This blog post offered a clear recipe for Easy Mongolian Chicken. You learned the main ingredients, step-by-step cooking, and helpful tips. Remember, you can adjust the spice level and swap ingredients to suit your taste. Also, this dish is perfect with rice or noodles. Store leftovers well for later enjoyment. With simple steps and variations, you can make it your own. Enjoy cooking this dish and share it with friends and family! Update your meals with these easy tips to create something special.


![To make a delightful vegan sweet potato curry, gather these simple ingredients: - 2 medium sweet potatoes, peeled and diced - 1 can (400ml) coconut milk - 1 can (400g) chickpeas, drained and rinsed - 1 medium onion, finely diced - 3 cloves of garlic, minced - 1 inch piece of fresh ginger, grated - 2 tablespoons of red curry paste - 1 bell pepper, chopped - 2 cups of fresh baby spinach - 1 tablespoon of olive oil - Salt and freshly ground pepper to taste - Fresh cilantro leaves for garnish - Lime wedges for serving Each ingredient plays a key role in the flavor and texture of the dish. The sweet potatoes give a creamy and sweet base, while the coconut milk adds richness. Chickpeas give protein and heartiness, making this dish filling. The fresh ginger and garlic bring a boost of flavor that warms your soul. Don't worry if you want to switch things up! The beauty of this curry is its flexibility. You can mix in other veggies or spices. Just keep the core ingredients for the best results. For the full recipe, check the reference above. Enjoy cooking! 1. Start by heating olive oil in a large pot over medium heat. 2. Add the diced onion and sauté for about 5 minutes. The onion should become soft and clear. 3. Mix in the minced garlic and grated ginger. Let it cook for one minute. This will make your kitchen smell amazing! 4. Next, add the red curry paste. Stir it in well and let it cook for 2 minutes. This helps deepen the flavors. 5. Now, add the diced sweet potatoes and chopped bell pepper. Stir everything well so the veggies are coated with the curry mix. 1. Pour in the creamy coconut milk and add the rinsed chickpeas. Stir everything together. 2. Turn up the heat slightly to bring the mixture to a gentle simmer. 3. Once it's simmering, lower the heat and cover the pot. Let it cook for about 20 minutes. The sweet potatoes should be tender by now. 4. After 20 minutes, gently fold in the baby spinach. Let it wilt into the curry for another 2 to 3 minutes. 5. Season with salt and freshly ground pepper. Adjust to your taste for the best flavor. 1. Serve the curry hot, garnished with fresh cilantro leaves. 2. Add lime wedges on the side for a zesty touch. 3. For a beautiful dish, use shallow bowls. This helps show off the vibrant colors. 4. Drizzle a bit of extra coconut milk on top for a stunning finish. A sprinkle of chopped cilantro looks great, too. For the complete recipe, check out the [Full Recipe]. To make your curry just right, focus on the texture. The curry should be thick but not dry. If it seems too thick, add a splash of water or more coconut milk. Stir often to keep it from sticking to the pot. When it comes to spice, taste is key. Start with a little red curry paste. You can always add more for some heat. If you prefer a milder dish, reduce the paste or add more coconut milk to balance. Want to add more color and nutrition? Toss in some extra veggies! Zucchini, carrots, or peas work great. You can also use frozen mixed veggies for convenience. Looking for protein? Try adding tofu or tempeh. These options soak up the curry flavor well. You can also use lentils for a hearty twist. To elevate the dish, consider adding spices like cumin or turmeric. These spices bring warmth and depth. A squeeze of lime juice can also brighten the flavors. Pair your curry with fluffy rice or warm naan. These sides soak up the sauce and make each bite special. You can also serve it with a fresh salad for a crunchy contrast. For the full recipe, check out the detailed instructions above. {{image_4}} You can easily adjust the spice level in your vegan sweet potato curry. For a mild dish, use less red curry paste. A medium heat works well with the standard amount of paste. If you want spice, add extra paste or mix in cayenne pepper. Different curry pastes offer unique flavors too. Try green curry paste for a fresh twist or massaman paste for a warm, nutty taste. You can play with various vegetables in your curry. Carrots, peas, or zucchini work well. For extra nutrition, add protein sources like tofu or tempeh. These options boost the dish's texture and flavor. If you want a heartier meal, consider adding lentils or quinoa. The right grain or bread makes your curry shine. Serve it with fluffy jasmine rice or warm naan. They soak up the delicious sauce and complement the curry's taste. If you have leftovers, use them in a wrap or as a topping on a salad. This way, you enjoy the flavors in different ways. For the full recipe, check the earlier section. You can keep the vegan sweet potato curry in the fridge for about 4 to 5 days. To store it, let the curry cool down first. Then, transfer it to an airtight container. This keeps the flavors fresh and tasty. When you want to eat it again, just scoop out what you need. If you want to save it for later, freezing is a great option. Pour it into a freezer-safe container. Leave some space at the top because it will expand when frozen. You can freeze the curry for up to 3 months. When you're ready to eat, take it out and place it in the fridge to thaw overnight. To reheat, warm it on the stove over low heat. Stir it well, and if needed, add a splash of coconut milk to bring back its creamy texture. Enjoy this cozy dish anytime! For the full recipe, check out the details above. Can I make this curry ahead of time? Yes, you can make this curry ahead of time. It tastes even better after a day. Just store it in the fridge. Heat it on the stove or in the microwave before serving. What other toppings can I use besides cilantro? You can use many toppings! Try fresh parsley, green onions, or avocado slices. These add color and flavor. Toasted nuts or seeds also bring a nice crunch. Is this dish gluten-free? Absolutely! This vegan sweet potato curry is gluten-free. All the ingredients in the recipe are safe for a gluten-free diet. Overview of caloric content per serving Each serving has about 350 calories. This makes it a hearty meal without being too heavy. Breakdown of key nutrients - Fiber: 10 grams - Protein: 12 grams - Carbohydrates: 45 grams This curry is rich in fiber and plant protein, making it filling and satisfying. What can I use instead of chickpeas? If you want a different protein, use lentils or black beans. Both are great choices and will still taste yummy. Alternative ingredients for coconut milk You can swap coconut milk for almond milk or oat milk. Just make sure to use a full-fat version for creaminess. If you want a richer flavor, try cashew cream. This blog covered how to make a tasty sweet potato curry. We explored essential ingredients, step-by-step cooking instructions, and tips for customizing your dish. I shared ideas for serving and storing your curry, along with answers to common questions. Incorporating these tips will help you create a flavorful meal. Enjoy experimenting with different spices and ingredients to make it your own. Cooking should be fun, and this curry recipe makes it easy to add joy to your table.](https://goldendishy.com/wp-content/uploads/2025/07/0119eb20-3e5b-446c-8228-d1dcea4a67d2-768x768.webp)
![To make Caprese Pasta with Balsamic Glaze, gather these key ingredients: - 12 oz pasta (fusilli or penne recommended) - 2 cups cherry tomatoes, halved - 1 cup fresh mozzarella balls (bocconcini), drained and patted dry - 1/2 cup fresh basil leaves, roughly torn - 1/4 cup extra virgin olive oil - 2 tablespoons balsamic glaze (store-bought or homemade) - 1 teaspoon garlic powder - Salt and freshly ground black pepper to taste Each ingredient plays a vital role. The pasta serves as the base. Cherry tomatoes add sweetness and color. Fresh mozzarella adds creaminess. Basil brings freshness, while balsamic glaze ties everything together with a sweet-tangy kick. You can enhance your dish with a few optional garnishes: - Freshly grated Parmesan cheese - Extra basil leaves for a pop of color - A drizzle of olive oil before serving These garnishes boost flavor and make your pasta look stunning. They add a gourmet touch that impresses everyone. Choosing high-quality ingredients makes a big difference. Here are some tips: - Use fresh pasta for a softer texture and richer flavor. - Select ripe cherry tomatoes for better sweetness. - Buy mozzarella balls packed in water for the best taste. - Pick fresh basil with vibrant green leaves. When you use quality ingredients, your Caprese Pasta will shine. Each bite will burst with flavor, making your meal truly special. For the full recipe, check the section above. Start by boiling a large pot of salted water. Once it reaches a rolling boil, add 12 ounces of pasta. I recommend using fusilli or penne for this dish. Cook the pasta according to the package instructions, usually around 8 to 10 minutes. You want it al dente, which means it should remain firm to the bite. After cooking, drain the pasta in a colander. Rinse it under cold water to stop the cooking process, then set it aside. In a small mixing bowl, combine 1/4 cup of extra virgin olive oil, 1 teaspoon of garlic powder, and salt and black pepper to taste. Whisk these ingredients together until they form a smooth mixture. This dressing adds flavor to your pasta and brings all the ingredients together. Set the dressing aside for now. In a large mixing bowl, add the drained pasta, 2 cups of halved cherry tomatoes, and 1 cup of fresh mozzarella balls. Use a spatula or wooden spoon to gently mix these ingredients together. Next, pour the prepared dressing over the pasta mix. Toss everything until all the ingredients are coated with the dressing. Then, gently fold in 1/2 cup of torn fresh basil leaves. Be careful not to bruise them. Just before serving, drizzle 2 tablespoons of balsamic glaze over the pasta. Toss the dish again for an even flavor. You can serve this pasta warm or chill it in the fridge for about 30 minutes for a cold salad. Enjoy your Caprese Pasta with Balsamic Glaze! For the complete recipe, check the Full Recipe section. To boost the flavors in your Caprese pasta, focus on fresh ingredients. The magic lies in ripe cherry tomatoes and creamy mozzarella. Use extra virgin olive oil for a rich taste. If you want a zesty kick, add a bit of lemon juice. It brightens the dish. Consider also using garlic powder for depth—just a teaspoon will do. Lastly, a sprinkle of salt and pepper can make all the difference. Cooking pasta to the right texture is key. Aim for al dente, which means it should be firm but cooked. Start with a large pot of salted boiling water. This helps flavor the pasta. Follow the package’s recommended cook time, usually about 8-10 minutes. Once cooked, drain it but do not rinse. Rinsing washes away the starch, which helps sauce cling to the pasta. A beautiful presentation makes any meal special. Use a large, shallow bowl for serving. This allows the colors to pop. Top your pasta with fresh basil leaves and a sprinkle of Parmesan cheese. You can drizzle a bit more balsamic glaze on top for that extra visual appeal. Serve it warm or chill it for a refreshing treat. Remember, we eat with our eyes first! For the full recipe, check out the Caprese Pasta Delight. {{image_4}} You can mix up this Caprese pasta recipe easily. Use different pasta shapes like spaghetti or farfalle for fun. Swap cherry tomatoes for sun-dried tomatoes if you want a bolder taste. You can also try adding grilled chicken or shrimp for protein. Instead of fresh mozzarella, use feta for a tangy twist. Seasonal ingredients can brighten this dish. In spring, add asparagus or peas for freshness. Summer is perfect for zucchini or bell peppers. In fall, consider roasted butternut squash for a sweet flavor. Winter calls for hearty greens like kale or spinach. These additions can enhance color and taste. You can make this dish fit many diets. To make it vegan, skip the mozzarella and use avocado or cashew cheese instead. For a gluten-free option, choose gluten-free pasta made from rice or quinoa. Adjust the dressing by using a vegan-friendly oil. This way, everyone can enjoy Caprese pasta. For the full recipe, check [Full Recipe]. To keep your Caprese pasta fresh, store it properly. Place any leftovers in an airtight container. This helps keep moisture in and prevents the pasta from drying out. If you have extra balsamic glaze, store it separately. This way, you can drizzle it on just before serving. When it's time to eat your leftovers, reheat the pasta gently. Use a microwave or a pan on low heat. If using the microwave, heat in short bursts to avoid overcooking. Add a splash of olive oil or a bit of water to keep it moist. Stir well to ensure even heat. Caprese pasta stays fresh for about 3 days in the fridge. After that, the flavors can fade. If you want to keep it longer, consider freezing it. But remember, the texture might change once it's thawed. Enjoy your delicious meal within those days for the best taste! To make balsamic glaze, start with balsamic vinegar. Pour one cup of vinegar into a small saucepan. Heat it over medium heat. Stir it often as it heats. Once it boils, reduce the heat. Let it simmer for about 15 to 20 minutes. The vinegar will reduce and thicken. You want it to coat the back of a spoon. Take it off the heat and let it cool. The glaze will thicken more as it cools. Yes, you can use many types of pasta. Fusilli and penne are great choices. You can also try rotini, farfalle, or spaghetti. Each type offers a unique texture. Choose what you like best. Just remember to cook it until it is al dente. Absolutely! Caprese pasta is great for meal prep. You can make it ahead of time. Store it in an airtight container in the fridge. It keeps well for up to three days. Just add the balsamic glaze right before serving. This will keep the flavors fresh. For the full recipe, check out the Caprese Pasta Delight section. This article covered key ingredients for Caprese pasta, how to cook it, and tips for flavor and texture. We also explored variations for different diets and seasonal tastes. Remember, quality ingredients make a big difference. Experiment with flavors and enjoy your meals. It’s all about making food that you love. Enjoy creating your perfect Caprese pasta!](https://goldendishy.com/wp-content/uploads/2025/05/8e484e0a-c503-4741-abc1-b7211b9a34a5-768x768.webp)


