Easy Mango Salsa Fresh and Flavorful Recipe Guide

Ready to brighten your meals? This Easy Mango Salsa recipe bursts with fresh flavors! You only need simple ingredients, like ripe mangoes, crunchy veggies, and zesty lime juice. Whether you want a dip for chips or a topping for tacos, this salsa is perfect. I’ll guide you through each step, share tips, and give clever variations. Let’s dive into this tasty treat that anyone can make!
Ingredients
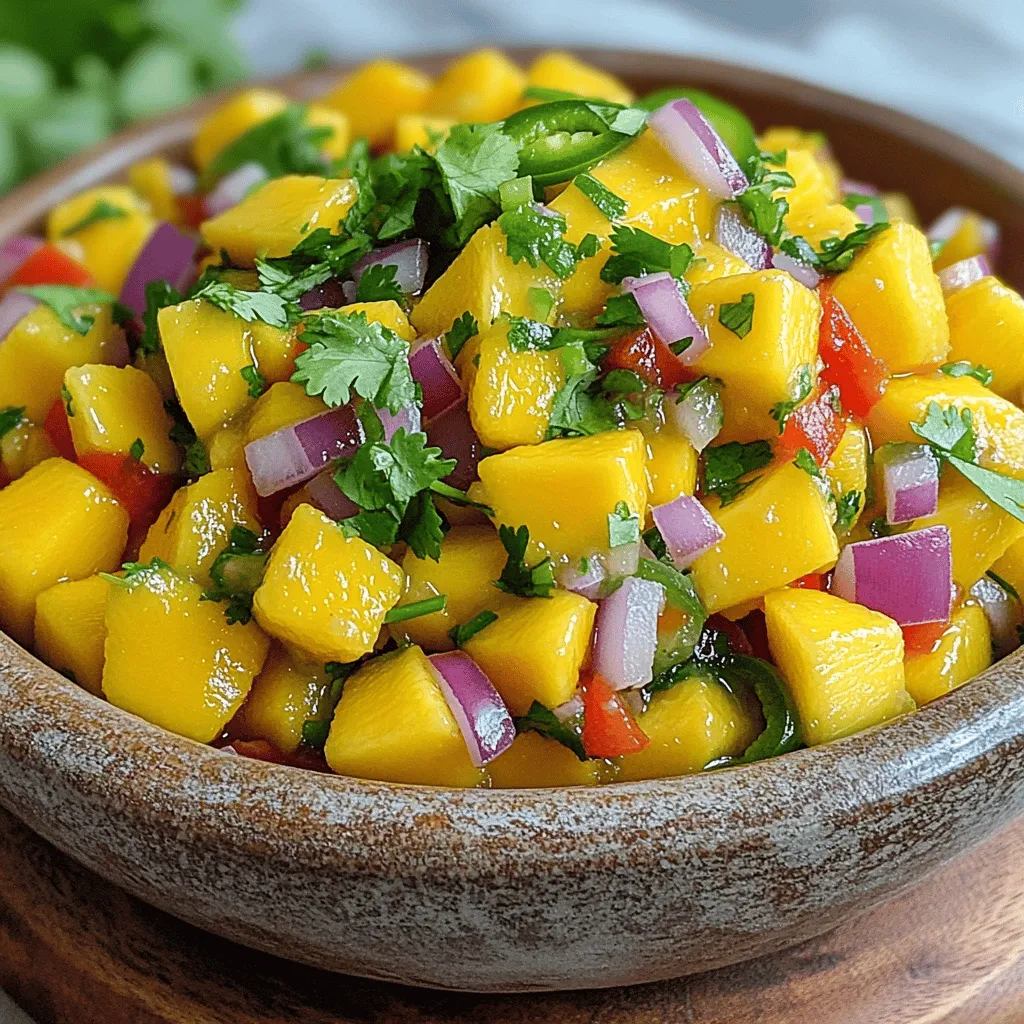
To make easy mango salsa, gather these fresh ingredients:
– 2 ripe mangoes, peeled and diced
– 1 small red onion, finely chopped
– 1 red bell pepper, diced
– 1 jalapeño pepper, minced
– 1/4 cup fresh cilantro leaves, chopped
– Juice of 2 fresh limes
– Salt and pepper to taste
Each ingredient adds a unique flavor to the salsa. The ripe mangoes bring sweetness, and the red onion adds a mild bite. The red bell pepper adds crunch and color. The jalapeño gives a spicy kick, but you can adjust it to your taste. Fresh cilantro adds a burst of herb flavor, while lime juice brightens everything up. Don’t forget to season with salt and pepper to enhance the taste.
Using fresh ingredients makes all the difference. You’ll notice the vibrant colors and fresh scents when you chop and mix everything. This salsa is not just tasty; it’s also a feast for the eyes.
Step-by-Step Instructions
Preparation Steps
– Peel and dice mangoes
– Chop red onion and red bell pepper
– Mince jalapeño pepper
First, you need to prepare your ingredients. Take ripe mangoes and peel them carefully. Next, cut the mangoes into small, even cubes. This makes sure every bite is sweet and juicy. After that, chop a small red onion finely. You want the pieces to be small, so they mix well with the mango. Then, take a red bell pepper, and dice it into tiny pieces. This adds color and crunch to your salsa. Finally, grab a jalapeño pepper. Remove the seeds, then mince it for a zesty kick.
Combining Ingredients
– Mix mango, onion, bell pepper, and jalapeño
– Add cilantro and lime juice
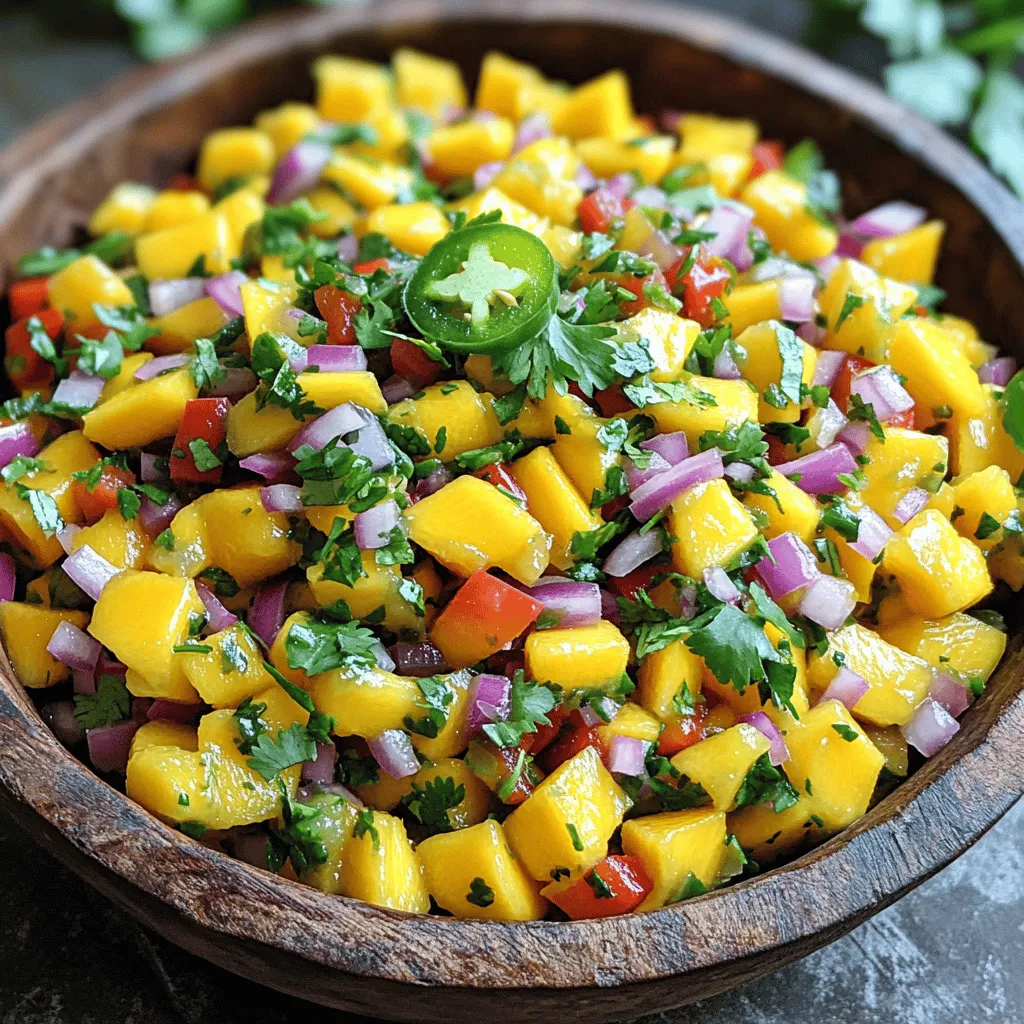
Now it’s time to combine everything in a large bowl. Start by adding the diced mango, red onion, bell pepper, and minced jalapeño. This mix should look bright and colorful! Next, add chopped cilantro. This herb brings a fresh taste that works great with mango. Squeeze the juice of two fresh limes over the mix. The lime adds a tangy flavor that brightens everything up.
Seasoning and Final Touches
– Season with salt and pepper
– Gently fold and let sit
To finish, season your salsa with salt and freshly cracked black pepper. This enhances all the flavors. Then, gently fold everything together using a spatula or wooden spoon. Be careful not to mash the mango pieces. After mixing, let the salsa sit at room temperature for about 15 minutes. This waiting time allows the flavors to blend beautifully.
Tips & Tricks
Best Practices for Fresh Ingredients
– Choosing ripe mangoes
Look for mangoes that yield slightly when you press them. Their skin should have a nice mix of green and yellow. A ripe mango smells sweet at the stem end. Avoid hard or overly bruised mangoes.
– Properly chopping vegetables
Use a sharp knife for clean cuts. This helps keep the flavors fresh. Cut all the veggies to a similar size for even mixing. Uniform pieces make for a better texture in your salsa.
Flavor Enhancements
– Additional spices or ingredients
You can add spices like cumin or garlic powder to boost flavor. These spices give the salsa a unique twist. Fresh herbs like mint can also add a fresh touch.
– Adjusting spice level with jalapeño
For a mild salsa, use less jalapeño or remove the seeds. For a kick, add more minced jalapeño. Always taste as you go to find your perfect heat level.
Serving Suggestions
– Ideal accompaniments
Serve mango salsa with tortilla chips for a crunchy snack. It pairs well with grilled chicken or fish, too. Try it as a topping for tacos or burritos.
– Creative serving ideas
Use small cups to serve salsa at a party. Garnish with lime wedges or cilantro sprigs for a colorful display. You can also layer it in a clear bowl for a beautiful effect.

Variations
Adding Additional Ingredients
You can make your mango salsa even more exciting by adding extra ingredients. Black beans or corn add a nice crunch and protein. They also make the salsa heartier. If you want a creamy touch, try adding avocado. It pairs well with mango and gives a smooth texture.
Different Sauce Options
Another way to change the flavor is by adding sauces. A splash of balsamic vinegar can bring a sweet and tangy kick. You can also experiment with different citrus juices. Lemon or orange juice can create a fresh twist to your salsa.
Customizing Heat Levels
If you like spice, you can adjust the heat levels. Try using different peppers like serrano or habanero for more heat. If you want less spice, reduce the amount of jalapeño. This way, you can enjoy the salsa just the way you like it.
Storage Info
How to Store Mango Salsa
To keep mango salsa fresh, use airtight containers. Glass or plastic containers work well. Short-term storage means keeping your salsa in the fridge. It stays fresh for about 3 to 5 days. For long-term storage, you can freeze it. Use freezer-safe bags or containers. Just make sure to leave some space for it to expand as it freezes.
Shelf Life
In the fridge, mango salsa lasts 3 to 5 days. If you want to freeze it, consume it within 2 to 3 months. When thawing, place it in the fridge overnight. This keeps the texture nice. Avoid refreezing once thawed, as it may lose its flavor.
Reusing Leftovers
You can use leftover salsa in many tasty ways. Add it to grilled chicken or fish for a burst of flavor. Mix it into a salad for a fresh twist. You can even use it as a topping for tacos or nachos. Be creative! The options are endless.
FAQs
How do I ripen mangoes quickly?
To ripen mangoes fast, place them in a paper bag. This traps the natural gases they give off. You can add a banana to speed things up even more. Check the mangoes daily. They should be soft but not mushy when ready.
Can I make mango salsa ahead of time?
Yes, you can make mango salsa ahead of time. Prepare it and store it in the fridge. Make sure to add lime juice just before serving. This keeps the salsa fresh and bright. It tastes best if you let it sit for a few hours. This allows the flavors to mix well.
What can I substitute for cilantro?
If you don’t like cilantro, try parsley or basil instead. These herbs add a fresh taste. You can also use green onions for a mild flavor. Each of these options brings its own twist to the salsa. Experiment to see which one you like best!
Mango salsa is simple and fun to make. You learned how to prepare fresh ingredients, mix flavors, and add your own twist. Remember, you can enhance spice levels and try new ingredients for variety. Proper storage helps maintain its freshness, giving it a longer shelf life. Use leftovers creatively in other dishes. Overall, this salsa adds zest to any meal. Enjoy creating your own delicious versions and sharing them with family and friends. Let your tastes guide you as you make this tasty treat.


![To make crispy air fryer chicken wings, you need the right ingredients. Here’s what you’ll need: - 2 pounds of chicken wings - 1 tablespoon baking powder - 1 teaspoon garlic powder - 1 teaspoon onion powder - 1 teaspoon smoked paprika - 1 teaspoon salt - ½ teaspoon black pepper - ½ teaspoon cayenne pepper (optional, for heat) - 2 tablespoons olive oil These ingredients help create a crunchy skin and juicy meat. The spice mix is key to adding flavor. The baking powder helps crisp the skin. Garlic and onion powders give a savory kick. Smoked paprika adds a touch of smokiness. The salt enhances all the flavors. Black pepper brings a mild heat, while cayenne adds more spice if you like it hot. You can add a few optional touches to enhance your dish. Fresh parsley, finely chopped, looks great as a garnish. It adds color and freshness to the wings. As for dipping sauces, ranch or blue cheese dressing pairs perfectly with these wings. You can also try hot sauce for an extra kick! For the full recipe, check out the main article. Start by preheating your air fryer to 400°F (200°C). This step is key for crispy wings. Make sure the fryer is empty and clean. Let it heat up while you prepare the chicken. Rinse 2 pounds of chicken wings under cold water. Pat them dry with paper towels. Dry wings help get that nice crunch. In a bowl, mix these spices: - 1 tablespoon baking powder - 1 teaspoon garlic powder - 1 teaspoon onion powder - 1 teaspoon smoked paprika - 1 teaspoon salt - ½ teaspoon black pepper - ½ teaspoon cayenne pepper (optional for heat) After mixing, add the wings to the bowl. Drizzle with 2 tablespoons of olive oil. Toss well so every wing gets coated. You want flavor in every bite! Carefully place the wings in the air fryer basket in a single layer. Avoid crowding them. This allows air to circulate and crisp them up. Cook for 25-30 minutes. Flip the wings halfway through for even cooking. Look for a golden-brown color and crispy texture. After cooking, let the wings rest for a few minutes. This keeps them juicy. Finally, garnish with fresh parsley and serve with ranch or blue cheese dressing. Enjoy your crispy air fryer chicken wings! You can find the full recipe above. To make your wings extra crispy, start with dry wings. Pat them well with paper towels. The baking powder helps create crunch. It pulls moisture away and makes the skin crisp. Air fry at 400°F (200°C) for the best results. Flip them halfway through to ensure even cooking. If you want more crunch, give them a quick broil after cooking. One mistake is overcrowding the air fryer basket. This stops air from flowing around the wings. Cook in batches if needed. Another error is not drying the wings enough. Wet wings lead to soggy skin. Lastly, avoid using too much oil. A little goes a long way. The oil helps the spices stick and adds flavor without making them greasy. Use a good air fryer that heats evenly. A basket-style air fryer works well. You’ll need mixing bowls for seasoning the wings. A set of measuring spoons is also handy for accuracy. Finally, have a good pair of tongs for flipping the wings safely. A meat thermometer can help check if they are cooked through. For the full recipe, be sure to check the linked instructions. {{image_4}} You can easily change the flavor of your wings. To make Buffalo wings, toss them in hot sauce before serving. For BBQ wings, add your favorite BBQ sauce after cooking. You can even mix flavors! Try garlic parmesan by adding garlic powder and parmesan cheese. Each variation brings a new taste to your plate. Wing sizes can change the cooking time. For small wings, cook for 20-25 minutes. Medium wings need about 25-30 minutes. Large wings may take 30-35 minutes. Always check for doneness. The internal temperature should reach 165°F (74°C). This ensures safe and tasty wings. If you don't have an air fryer, you can bake or fry wings. To bake, set your oven to 425°F (220°C) and cook wings for 40-45 minutes. Flip them halfway. For frying, heat oil to 350°F (175°C) and fry wings for 8-10 minutes. Each method offers its own delicious crunch. For the complete recipe, check out the [Full Recipe]. After enjoying your crispy air fryer chicken wings, you may have some left. To keep them fresh, place the wings in an airtight container. This helps keep moisture out. Store them in the fridge for up to three days. If you want to keep them longer, consider freezing them. To reheat your wings, the air fryer is best. Preheat it to 375°F (190°C). Place the wings in the basket in a single layer. Heat them for 5 to 10 minutes. This method helps keep the wings crispy. You can also use an oven, but the air fryer works wonders for crispiness. If you freeze your wings, they can last for up to three months. Place the cooled wings in a freezer-safe bag. Remove as much air as possible before sealing. When you want to eat them, thaw the wings overnight in the fridge. Then, reheat them in the air fryer for a crispy finish. This is a great way to enjoy your crispy air fryer chicken wings later. For the full recipe, check out the complete guide! To get crispy wings, start with dry wings. Use paper towels to remove excess moisture. Baking powder is your secret weapon! It helps make the skin crisp. Coat the wings evenly with the spice mix. Arrange them in a single layer in the air fryer. Don’t overcrowd them; air needs to flow. Flip the wings halfway through cooking for even crispiness. Keep an eye on them for a nice golden color. Yes, you can use frozen chicken wings! Just remember to thaw them first. You can leave them in the fridge overnight or run them under cold water. After thawing, pat them dry. Then, follow the same steps in the Full Recipe. Cooking time may be a bit longer, so check for doneness. When serving crispy wings, ranch and blue cheese dressings are classic choices. They add creaminess and balance the spice. You can also try honey mustard for sweetness or hot sauce for extra heat. Experiment with different sauces to find your favorite match! In this post, we explored how to make crispy air fryer chicken wings. We covered essential ingredients, step-by-step instructions, and helpful tips. You can experiment with flavors like buffalo and BBQ, too. Remember to store leftovers properly and reheat safely for the best taste. Enjoy your tasty wings and share them with friends or family. Now, you have all the tools to make crispy wings at home whenever you want. Happy cooking!](https://goldendishy.com/wp-content/uploads/2025/06/40ff0ca3-8982-419f-b213-91fbe0dabedd-768x768.webp)
![- 1 pound fresh okra - 2 tablespoons extra virgin olive oil - 1 teaspoon garlic powder - 1 teaspoon smoked paprika - 1/2 teaspoon ground cumin - 1/2 teaspoon salt - 1/4 teaspoon freshly ground black pepper - 1/4 teaspoon cayenne pepper (optional) - 2 tablespoons freshly grated Parmesan cheese (optional) Gathering the right ingredients is key to making crispy garlic okra chips. Fresh okra offers a unique taste and great texture. When you pick out okra, look for bright green pods that are firm and smooth. The olive oil serves as the base for your spices. It helps to crisp the okra and adds a rich flavor. Garlic powder brings a punch of taste without any hassle. Smoked paprika adds depth and a slight smokiness, which pairs well with the okra. Ground cumin gives the chips an earthy note. Salt and pepper enhance all the flavors, while cayenne pepper adds a spicy kick if you want it. Finally, Parmesan cheese can add richness, making the chips even more delicious. - Calories per serving: About 120 calories - Key vitamins and minerals: High in vitamins A and C, magnesium, and fiber - Health benefits of okra: Okra is low in calories and packed with nutrients. It supports digestion, boosts heart health, and provides antioxidants. Eating crispy garlic okra chips is not just tasty; it's also good for you. Enjoy this snack guilt-free while getting your nutrition. For the full recipe, check out the [Full Recipe] section! 1. Preheat your oven to 425°F (220°C). This step helps the okra get crispy. 2. Line a large baking sheet with parchment paper. This prevents sticking and makes cleanup easy. 3. Trim the ends of the okra pods, cutting off just the stem. 4. Cut the okra into halves or thirds. Aim for even sizes so they cook well. 1. In a large bowl, mix the extra virgin olive oil, garlic powder, smoked paprika, ground cumin, salt, black pepper, and optional cayenne pepper. Stir until you have a smooth paste. 2. Add the cut okra to the bowl. Toss gently but well. Make sure each piece gets coated with the paste. 1. Spread the okra in a single layer on the baking sheet. Don’t overcrowd the pan. This will keep them crispy. 2. Bake in the preheated oven for 20-25 minutes. Flip the chips halfway through to brown them evenly. 3. If you want to add Parmesan cheese, sprinkle it on during the last 5 minutes. This makes a tasty cheesy crust. 4. Once golden brown and crispy, take the baking sheet out of the oven. Let the okra cool slightly before serving for the best crunch. You can find the full recipe above to guide you through this process. To make crispy garlic okra chips, cut the okra evenly. This helps all pieces cook the same. Aim for pieces that are about the same size. When they are even, they will brown nicely. Also, avoid overcrowding the baking sheet. If you put too many pieces on one pan, they will steam instead of crisp. Spread them out and use two sheets if needed. Using fresh ingredients makes a big difference. Fresh okra has a better taste and texture. Also, feel free to adjust the spices. If you love garlic, add more garlic powder. For a kick, increase the cayenne pepper. Taste the mixture as you go. This way, you can make the flavor just right for you. Pair these chips with dips for extra flavor. A creamy ranch or spicy aioli works well. You can also serve them with salsa for a fresh twist. For presentation, use a bright bowl. Garnish with parsley or lime slices for a pop of color. This makes your dish look even more appetizing. Enjoy your crispy garlic okra chips as a fun snack or side dish. Check out the Full Recipe for more details! {{image_4}} You can easily change the taste of your okra chips. For spicy garlic okra chips, add cayenne pepper or chili powder. This will give them a nice kick. You might also try mixing in some smoked paprika for a deeper flavor. If you prefer fresh herbs, add chopped rosemary or thyme. These herb-infused options brighten the dish and add a lovely aroma. If you’re looking for vegan alternatives, skip the cheese. The chips will still taste great without it. You can also use nutritional yeast for a cheesy flavor. For gluten-free options, you’re in luck! This recipe is naturally gluten-free. Just ensure that any additional spices used are also gluten-free. Crispy okra chips are not just for snacking. Use them in salads for extra crunch. They can also be a fun topping on soups. Try mixing them into a grain bowl for added flavor. You can even crush them and use them as a crispy coating for chicken or fish. The possibilities are endless! Check out the Full Recipe for more details on how to make these tasty snacks. To keep your crispy garlic okra chips fresh, store them in airtight containers. This method helps keep moisture out and maintains that delightful crunch. When stored properly, they can last for about 3-5 days at room temperature. For best results, place them in a cool, dark spot in your kitchen. If you live in a warm climate or want to make them last longer, consider storing them in the refrigerator. This will help retain their flavor and texture for about a week. Just remember to let them cool completely before sealing them up. Want to enjoy okra chips later? You can freeze them! First, let the chips cool fully. Then, place them in a single layer on a baking sheet and pop them in the freezer for a few hours. Once frozen, transfer them to a freezer-safe bag. This way, you can enjoy them anytime. When you’re ready to eat your frozen okra chips, don’t thaw them. Just bake them straight from the freezer at 425°F (220°C) for about 10-15 minutes. This will help them regain their crispy texture. For the best flavor, eat your crispy garlic okra chips within the first couple of days. They taste freshest right after baking. If you notice any signs of spoilage, like an off smell or a soft texture, it’s best to toss them. Keeping an eye on your snacks ensures you always enjoy them at their best! To make Crispy Garlic Okra Chips, start with fresh okra. Preheat your oven to 425°F. Wash and dry your okra. Cut the okra into halves or thirds. In a bowl, mix olive oil, garlic powder, smoked paprika, cumin, salt, black pepper, and optional cayenne pepper. Toss the cut okra in this mix until well coated. Spread the okra on a baking sheet. Bake for 20-25 minutes, flipping halfway. Enjoy a tasty snack! For the full recipe, check the section above. Yes, you can use frozen okra, but it may change the texture. Frozen okra tends to be softer after cooking. This means your chips may not be as crisp. If you use frozen okra, thaw it first and pat it dry. This helps reduce moisture. For best results, fresh okra gives the best crunch. You can find pre-made garlic okra chips at many grocery stores. Look in the snack aisle or natural food sections. Brands like Southern Style and Veggie Chips offer tasty options. You can also check online retailers like Amazon or health-focused sites. Always read labels for the best flavor and quality. To add spice to your chips, try these tips: - Add more cayenne pepper for heat. - Mix in chili powder or red pepper flakes. - Use spicy seasoning blends like Cajun or taco seasoning. - Experiment with fresh jalapeños for a bold twist. These changes will give your chips a fiery kick! This blog covered the fun and tasty world of crispy okra. You learned about the ingredients, from fresh okra to spices, and how they bring flavor. The step-by-step guide made cooking easy and clear. Our tips will help you achieve the best crunch and taste. You can even try different flavors and modify the recipe to fit your diet. Remember to store your okra properly for the best taste. Now, it's time to enjoy your crispy okra chips, whether as a snack or a side dish!](https://goldendishy.com/wp-content/uploads/2025/07/49c08959-fe34-4929-8f55-872212e9bd7e-768x768.webp)

![To make Zucchini Ricotta Fritters, gather these simple ingredients: - 2 medium zucchinis, grated - 1 cup ricotta cheese - 1/2 cup all-purpose flour - 2 large eggs, beaten - 1/4 cup grated Parmesan cheese - 2 green onions, finely chopped - 1/2 teaspoon garlic powder - Salt and pepper, to taste - Olive oil, for frying - Fresh basil or parsley, for garnish These ingredients work together to create crispy, tasty fritters that everyone will love. The fresh zucchini adds moisture and flavor, while the ricotta cheese gives a creamy texture. Using grated Parmesan cheese enhances the savory taste of the fritters. Make sure to squeeze out as much moisture from the zucchini as you can. This step is key to ensure your fritters do not get soggy. You can use a clean kitchen towel for this. Want to dive deeper into making these fritters? Check out the Full Recipe for all the steps! Start by grating the zucchinis. You can use a box grater or a food processor. After grating, place the zucchini in a clean kitchen towel. Gather the towel around the zucchini and twist it. This will help squeeze out the extra moisture. Removing moisture is key. It keeps the fritters from becoming soggy. In a large bowl, combine the drained zucchini, ricotta cheese, flour, and beaten eggs. Add grated Parmesan, chopped green onions, garlic powder, salt, and pepper. Use a sturdy spoon to mix everything. The batter should be slightly chunky, not too smooth. This texture helps the fritters hold their shape when cooking. Heat a non-stick skillet over medium heat and add a few tablespoons of olive oil. Let the oil heat until it shimmers. Once hot, drop spoonfuls of batter into the skillet. Gently flatten each fritter with a spoon. Cook them for about 3-4 minutes on each side. They should turn golden brown and crispy. Don't overcrowd the skillet. If needed, cook in batches. After cooking, place the fritters on a plate lined with paper towels. This will absorb any excess oil. Serve warm with chopped basil or parsley for a fresh touch. To make your fritters crispy, start by removing moisture. Zucchini has a lot of water. When you grate it, you must squeeze it in a towel. This helps the fritters stay firm. Next, heat your oil until it shimmers. A hot skillet cooks the fritters quickly and keeps them crispy. If the oil is not hot enough, they can soak up too much oil and become soggy. Herbs and spices can elevate your fritters. I love adding fresh basil or parsley for brightness. You can also try a pinch of red pepper flakes for heat. For dips, a tangy yogurt sauce pairs well. You can also serve them with a tasty marinara. These additions make each bite even better. Avoid overcrowding your skillet. Too many fritters at once can lower the heat. This can lead to uneven cooking. Instead, cook them in small batches. Keep the cooked fritters warm by placing them on a plate in a low oven. This way, they stay warm and crisp until you serve them. {{image_4}} You can change the taste of your fritters easily. Try adding different cheeses like feta or mozzarella. You can also mix in finely chopped veggies such as bell peppers or spinach. Fresh herbs like dill or thyme add a nice touch too. These small changes can create a whole new snack experience. If you need a gluten-free version, use almond flour or coconut flour instead of all-purpose flour. Both options work well and will keep your fritters light and crispy. Just be sure to adjust the amount used, as these flours can absorb moisture differently. For a vegan twist, replace the ricotta with a plant-based cheese. Flaxseed meal can work well as an egg substitute. Just mix one tablespoon of flaxseed with three tablespoons of water and let it sit for a few minutes. If you want low-carb fritters, swap the flour for grated cauliflower. This keeps the fritters tasty while cutting down on carbs. For the full recipe, check out the [Full Recipe]. To keep your zucchini ricotta fritters fresh, you should refrigerate them. Place the leftover fritters in an airtight container. This helps prevent them from drying out. Make sure to layer them with paper towels to absorb extra moisture. You can store them for up to three days in the fridge. If you want to save some for later, freezing is a great option. First, let the fritters cool completely. Then, place them in a single layer on a baking sheet. Freeze them for about one hour. This step helps them keep their shape. After they are frozen, transfer them to a freezer bag. Label the bag with the date. They can stay good for up to two months. When you’re ready to eat your frozen fritters, reheat them in the oven. Preheat the oven to 375°F (190°C). Place the fritters on a baking sheet and bake for about 15-20 minutes. This method will help them regain their crispy texture. Enjoy your tasty snack! For the full recipe, check out the detailed instructions above. Yes, you can bake them! Place the fritters on a baking sheet lined with parchment paper. Brush them lightly with olive oil. Bake at 400°F for about 20-25 minutes. Flip them halfway through to get both sides crispy. To reheat, use an oven or an air fryer. Preheat the oven to 350°F. Place the fritters on a baking sheet and bake for about 10 minutes. This will keep them crispy. You can make the batter ahead of time! Store it in the fridge for up to 24 hours. Just remember to mix it again before cooking. The moisture from the zucchini can settle. Fritters are done when they are golden brown and crispy on both sides. You can also gently press them. If they feel firm and do not sink, they are ready. Yes, they are great for meal prep! You can cook them and store in the fridge for up to 3 days. They make a tasty snack or meal addition. For more details, check the Full Recipe. Zucchini ricotta fritters are a simple and tasty snack. You can enjoy them any time of the day. Here’s how to make them: - 2 medium zucchinis, grated - 1 cup ricotta cheese - 1/2 cup all-purpose flour - 2 large eggs, beaten - 1/4 cup grated Parmesan cheese - 2 green onions, finely chopped - 1/2 teaspoon garlic powder - Salt and pepper, to taste - Olive oil, for frying - Fresh basil or parsley, for garnish To start, I recommend grating the zucchinis. Use a box grater or food processor to make it quick. After grating, take a clean kitchen towel. Place the zucchini in the middle and twist the towel. This helps squeeze out extra moisture. It’s important to do this step to keep your fritters crispy. Next, grab a large mixing bowl. Add the drained zucchini, ricotta cheese, flour, beaten eggs, Parmesan, green onions, garlic powder, and some salt and pepper. Mix everything well with a spatula. The batter should feel a bit chunky. Now, heat a non-stick skillet over medium heat. Drizzle in some olive oil to coat the bottom. Let the oil heat until it looks shiny. This ensures a nice fry for your fritters. Once the oil is hot, drop spoonfuls of the batter into the skillet. Use the back of a spoon to flatten each fritter a bit. This helps them cook evenly. Fry for about 3-4 minutes on each side. You want them golden brown and crispy. Don’t overcrowd the skillet; work in batches if needed. When done, transfer the fritters to a plate lined with paper towels. This will soak up any extra oil. Serve them warm, topped with fresh basil or parsley. These toppings add a lovely touch to your dish. For the full recipe, check out the detailed instructions above. Enjoy making these tasty treats! In this blog post, we covered how to make Zucchini Ricotta Fritters from start to finish. We shared a list of simple ingredients and provided step-by-step cooking instructions. You learned tips to ensure crispiness and explored tasty variations. Storing and reheating tips were also discussed to help keep your fritters fresh. Overall, these fritters are easy to make and delicious. They offer a healthy twist for any meal. Enjoy experimenting with different flavors and variations!](https://goldendishy.com/wp-content/uploads/2025/06/35e9f5a9-d1bf-47b3-b252-98dbfdd31548-768x768.webp)
. Prep Time: 15 minutes Total Time: 1 hour 30 minutes Servings: 6 This potato salad is great for summer meals. You can serve it at picnics, barbecues, or potlucks. I love to garnish it with extra dill and chives for a colorful touch. Enjoy! In this post, I shared how to make a classic potato salad. We covered the ingredients, tips for cooking the potatoes, and mixing the dressing. I showed you how to add flavors and enhance your dish. Remember, you can store leftovers correctly or even try tasty variations. Potato salad is easy to make and perfect for any meal. Enjoy your cooking adventure!](https://goldendishy.com/wp-content/uploads/2025/07/3d114334-7953-4aa3-9cf8-99466b57d4b6-768x768.webp)
![To make delicious zucchini corn fritters, gather these fresh ingredients: - Zucchini: 2 medium, grated - Corn: 1 cup, kernels (fresh or frozen) - Flour: 1/2 cup, all-purpose - Cornmeal: 1/4 cup - Eggs: 2 large, beaten - Green Onions: 1/4 cup, finely chopped - Baking Powder: 1/2 teaspoon - Spices: 1 teaspoon chili powder, 1/2 teaspoon garlic powder - Seasoning: Salt and pepper to taste - Olive Oil: For frying - Optional Garnish: Sour cream or yogurt for serving Each ingredient plays a key role in creating the perfect fritters. The zucchini adds moisture and flavor, while corn gives a sweet crunch. Flour and cornmeal provide structure, keeping the fritters together. Eggs bind everything, making them light and fluffy. The spices add warmth and depth. Using fresh corn enhances the taste, but frozen works too. Green onions bring brightness and a mild onion flavor. Baking powder helps them rise, making them airy. Season with salt and pepper to balance the flavors. You can serve these fritters with a dollop of sour cream or yogurt for creaminess. This simple combination of ingredients creates a dish that is tasty, fun, and easy to make. For the full recipe, check out the details above. First, you need to grate the zucchinis. Use a box grater or a food processor for this task. Next, place the grated zucchini into a clean kitchen towel. Gather the ends of the towel and squeeze firmly. This step removes extra moisture. Dry zucchini helps the fritters hold together. If they are too wet, the fritters will be soggy. In a spacious mixing bowl, combine the flour, cornmeal, baking powder, chili powder, garlic powder, salt, and pepper. Use a whisk to blend the dry ingredients well. This ensures that the spices mix evenly. A good mix adds flavor to every bite. Now, add the squeezed zucchini, corn kernels, and chopped green onions to the dry mix. Pour in the beaten eggs. Stir everything together gently. You want the mixture to be thick but still smooth. This right consistency is key for frying. Heat a large skillet over medium heat. Add enough olive oil to cover the bottom by about 1/4 inch. To check if the oil is ready, drop a small spoonful of batter into it. If it sizzles, the oil is hot. Carefully drop heaping tablespoons of the batter into the hot oil. Flatten them slightly with the back of the spoon. Fry the fritters for 3-4 minutes on each side. They should turn golden brown and crispy. Once the fritters are cooked, use a slotted spoon to move them to a plate lined with paper towels. This helps drain excess oil, making them lighter. For a great presentation, stack the fritters on a colorful platter. Add a small bowl of sour cream on the side. You can sprinkle more chopped green onions on top for extra flair. For the full recipe, you can refer to the earlier section. To get the best texture, start by balancing moisture. Squeeze the grated zucchini well. This step is key. Too much water makes soggy fritters. Use a clean kitchen towel to help. After squeezing, you should see less liquid in the bowl. Next, adjust the flour and cornmeal ratios. If your batter feels too wet, add more flour. If it’s too dry, a little more cornmeal helps. Play around with these amounts until you find the perfect mix. A thick but smooth batter works best. Want to kick up the flavor? Try adding spices like cumin or paprika. Fresh herbs like cilantro or parsley also add a nice touch. You can even mix in some grated cheese. Feta or cheddar works great! These little changes can make your fritters feel new and exciting. You can also combine different ingredients for a twist. How about adding diced bell peppers or jalapeños? They can bring extra crunch and heat. Be creative and experiment with flavors you enjoy. When frying, the oil temperature is very important. Heat the oil over medium heat. If it’s too hot, the outside burns before the inside cooks. If it’s too low, your fritters soak up oil and become greasy. A small drop of batter should sizzle immediately when it hits the oil. Avoid overcrowding your skillet. Fry in batches. If you put too many fritters in at once, they won’t cook evenly. Leave space around each fritter so they get crispy. This way, you enjoy that golden-brown crunch with every bite. For the full recipe, check out the detailed steps above. {{image_4}} You can easily swap ingredients in your zucchini corn fritters. If you want to replace eggs, try flaxseed or applesauce. Just mix one tablespoon of ground flaxseed with three tablespoons of water. Let it sit for a few minutes to thicken, then add it to your batter. Applesauce works well too. Use 1/4 cup of unsweetened applesauce instead of eggs. For a gluten-free version, consider using almond flour or chickpea flour. Almond flour keeps the fritters light and nutty. Chickpea flour adds a nice flavor and helps bind the fritters. Both options make your dish safe for gluten-sensitive friends. You can also change up your fritters with seasonal veggies. Add bell peppers for a sweet crunch or spinach for a pop of color. Both will enhance the flavor and nutrition of your fritters. Try using different types of cheese, too. Feta adds a tangy kick, while cheddar gives a rich, creamy taste. When it comes to dipping sauces, think outside the box! A zesty yogurt dip with lemon and herbs pairs nicely with the fritters. You can also serve them with a spicy salsa or a creamy avocado dip. For creative serving ideas, stack the fritters high on a colorful platter. They make a great appetizer or snack. Add a small bowl of your favorite dip for guests to enjoy. Whether it's a party or a family meal, these fritters are sure to impress! For the full recipe, check out the ingredients and steps provided above. To keep your zucchini corn fritters fresh, store them in an airtight container. Place parchment paper between layers to prevent sticking. Refrigerate them right after they cool down. They stay good for about 3 to 4 days. If you notice any water or moisture in the container, change the paper to keep them crispy. For the best results, reheat fritters in a skillet on medium heat. This method helps them regain their crispiness. Add a little olive oil to the pan and place the fritters in it. Heat for about 2 to 3 minutes on each side. Avoid using the microwave, as it can make them soggy and lose that delightful crunch. To freeze fritters, let them cool completely first. Lay them out in a single layer on a baking sheet. Freeze until solid, then transfer them to a zip-top bag. They can last in the freezer for up to 2 months. When you’re ready to enjoy, thaw them in the fridge overnight before reheating in a skillet. This method keeps them tasty and crispy. To keep your fritters intact, proper binding is key. Always squeeze out extra moisture from the grated zucchini. This step helps your fritters hold together better. You can also add more flour if the batter seems too wet. Heat plays a big role as well. Make sure your oil is hot enough before adding the fritters. If the oil is cold, the fritters will absorb too much oil and may break apart. Fry them for about 3-4 minutes per side until golden brown. Yes, you can make zucchini corn fritters ahead of time. Prepare the batter and store it in the fridge for up to one day. Cover it tightly to keep it fresh. For storage, place cooked fritters in an airtight container. They will last for about three days in the fridge. When you are ready to eat, reheat them in a skillet. This keeps them crispy and tasty. These fritters pair well with many sides. A fresh salad adds crunch and color. You can also serve them with a yogurt dip or a tangy salsa. For drinks, consider a light beer or lemonade. They complement the flavors nicely. You can even enjoy them with a glass of refreshing iced tea. For the complete recipe, check the [Full Recipe]. To make delicious zucchini corn fritters, start with great ingredients and careful preparation. Grate zucchini and squeeze out moisture for a perfect texture. Mix the dry ingredients evenly, then combine everything for a tasty batter. Fry them in hot oil until golden brown, and drain on paper towels. Remember to get creative with variations and enjoy them with dips. By following these tips, you can impress friends and family with your cooking skills. Enjoy every bite of these delightful fritters!](https://goldendishy.com/wp-content/uploads/2025/07/84c05464-2612-47b3-960d-4590890a85a0-768x768.webp)