Delicious Apple Cider Caramel Coffee Cake Muffins

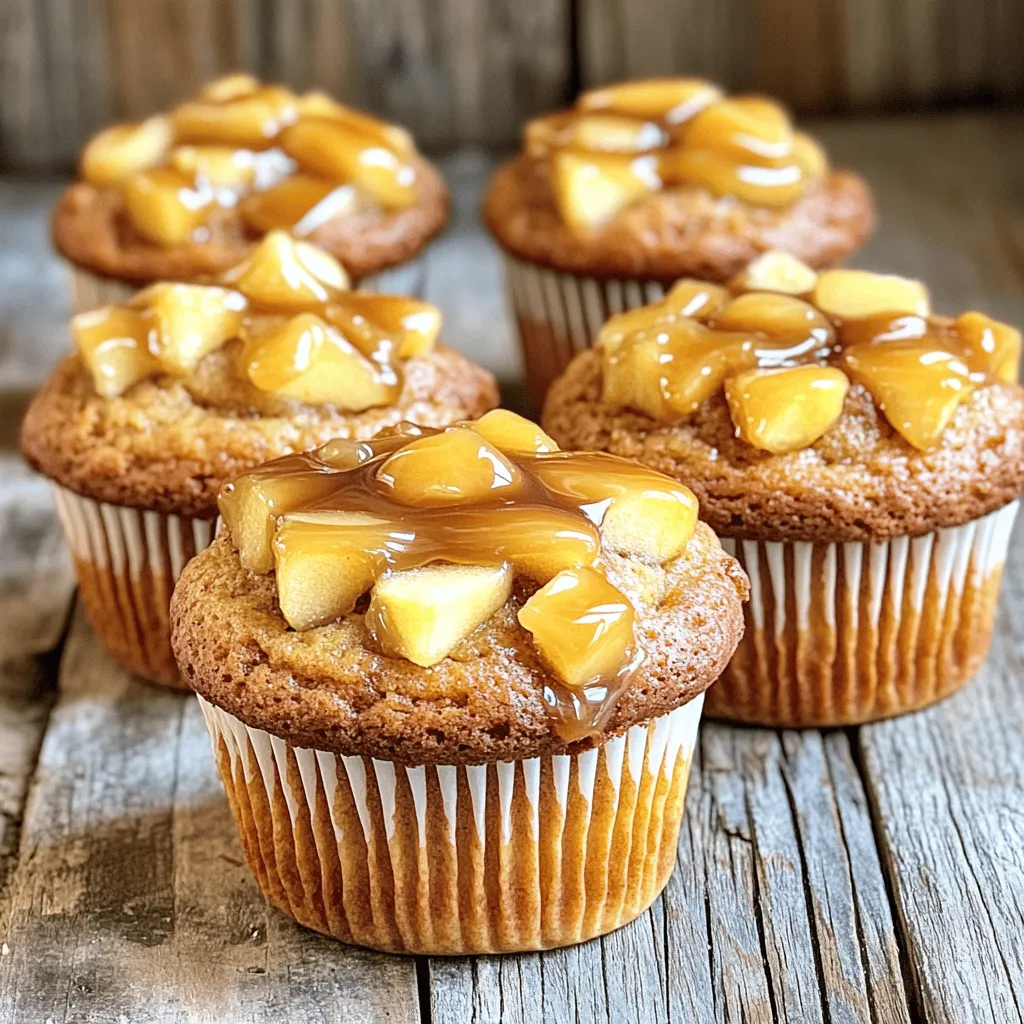
Craving something warm and sweet? You’ll love these Apple Cider Caramel Coffee Cake Muffins! They blend rich spices with delicious caramel and the fresh taste of apple cider. Whether you enjoy them for breakfast or as a treat, these muffins will make your day better. Ready to bake? Let’s dive into the ingredients and make your kitchen filled with mouthwatering aroma and joy!
Ingredients
List of Ingredients with Measurements
– 2 cups all-purpose flour
– 1 cup granulated sugar
– 1 tablespoon baking powder
– 1 teaspoon baking soda
– ½ teaspoon salt
– 1 teaspoon ground cinnamon
– 1 cup apple cider
– ½ cup vegetable oil
– 2 large eggs
– 1 teaspoon vanilla extract
– 1 cup diced Granny Smith apples (or your favorite tart apple)
– ½ cup caramel sauce (store-bought or homemade)
– Optional: extra caramel sauce for drizzling
Substitutes for Common Ingredients
You can swap all-purpose flour with whole wheat flour for a nutty flavor. Use brown sugar instead of granulated sugar for a richer taste. If you need a dairy-free option, replace vegetable oil with melted coconut oil. Applesauce can work in place of eggs for a vegan version.
Notes on Selecting Fresh Ingredients
When choosing apples, look for firm and shiny ones. Granny Smith apples are tart and perfect for this recipe. For apple cider, pick a brand with no added sugars or preservatives. Fresh spices can make a big difference, so check the date on your ground cinnamon. Always use high-quality caramel sauce for the best flavor.
Step-by-Step Instructions
Preparation Steps with Detailed Instructions
To start, preheat your oven to 350°F (175°C). This is key for getting the muffins to rise nicely. Next, get your muffin tin ready. You can line it with paper liners or grease it with cooking spray. This helps the muffins come out easily.
In a large bowl, combine the dry ingredients. Add the flour, sugar, baking powder, baking soda, salt, and ground cinnamon. Use a whisk to mix them well. This ensures an even flavor throughout.
In another bowl, mix the wet ingredients. Whisk together the apple cider, vegetable oil, eggs, and vanilla extract. Make sure this mixture is smooth. Then, pour the wet ingredients into the dry mix. Stir gently with a spatula or wooden spoon until combined. Don’t overmix; this keeps the muffins light and fluffy.
Now, fold in the diced apples. Make sure they are spread evenly through the batter. Then, fill each muffin cup with about 2 tablespoons of batter. Leave some space at the top for rising.
Use a teaspoon to add caramel sauce in the center of each muffin. Top it off with another tablespoon of batter to cover the caramel. This gives a surprise inside each muffin. Repeat this until all muffin cups are filled.
Tips for Mixing and Folding Batter
When mixing, always use gentle strokes. This helps keep air in the batter, making your muffins fluffy. If you overmix, the muffins can be tough. Mix until just combined, then fold in your apples.
To fold, use a spatula and scoop from the bottom. Turn the batter over, bringing dry ingredients up from the bottom. Do this lightly. You want to see some flour still, which is okay.
Baking Times and Checkpoints
Place the muffin tin in your preheated oven. Bake for 18-22 minutes. Check for doneness by inserting a toothpick into the center. If it comes out clean, your muffins are ready.
After baking, let the muffins cool in the tin for about 5 minutes. Then, carefully move them to a wire rack. This cooling step helps keep them soft.
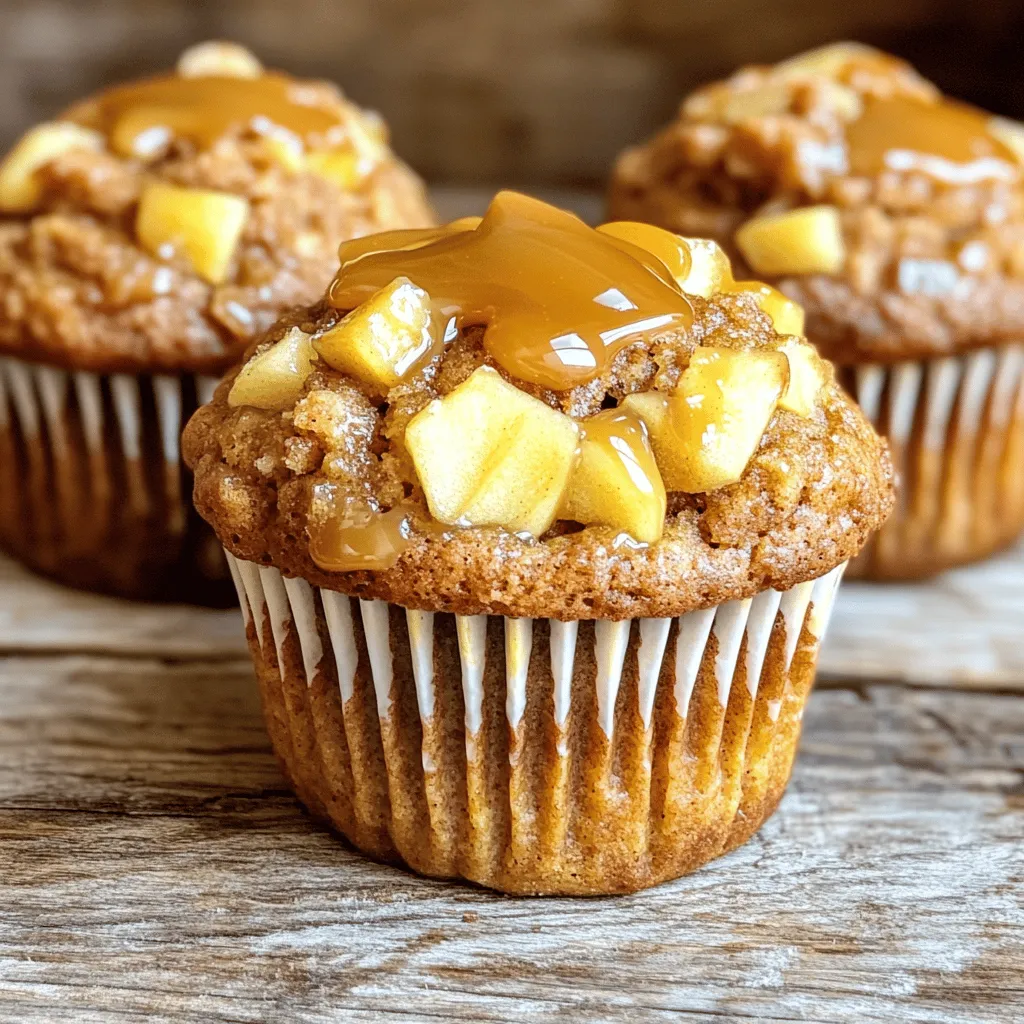
For a fun twist, drizzle extra caramel sauce over the muffins once they cool. This adds a nice touch and extra sweetness. Enjoy your baking!
Tips & Tricks
How to Avoid Dense Muffins
To keep your muffins light, don’t overmix the batter. When you combine wet and dry ingredients, mix just until you see no dry flour. Bubbles in the wet mix are good. They help the muffins rise! Another tip is to measure your flour correctly. Too much flour makes muffins heavy. Use a spoon to fill your measuring cup, then level it off.
Best Practices for Storing Muffins
Store your muffins in an airtight container. This keeps them fresh and moist. If you want to keep them longer, freeze them! Wrap each muffin in plastic wrap, then place them in a freezer bag. They can last up to three months. To enjoy, thaw them overnight in the fridge or microwave them for a quick treat.
Making Perfect Caramel Sauce
For a great caramel sauce, start with sugar in a heavy pot. Heat it slowly over medium heat. Stir gently until it melts into a golden syrup. If you want a richer taste, add butter and cream once the sugar is melted. Be careful not to burn it! Homemade caramel can elevate your muffins. Use it warm for a delicious drizzle on top of your muffins.

Variations
Possible Flavor Enhancements
You can boost the taste of your muffins in fun ways. Adding nuts like walnuts or pecans gives a nice crunch. They also add healthy fats. You might try spices like nutmeg or ginger for a warm flavor. A pinch of cardamom can also make your muffins more special. Don’t be afraid to change things up!
Gluten-Free or Vegan Options
If you need a gluten-free version, swap the all-purpose flour for a gluten-free blend. Make sure it has a binding agent. For a vegan option, use flax eggs instead of real eggs. Mix one tablespoon of ground flax with three tablespoons of water. Let it sit until it thickens. Use plant-based milk in place of apple cider for more flavor.
Seasonal Adaptations
You can switch things up based on the season. In fall, try pears instead of apples for a change. Pears add sweetness and moisture. In spring, you could add berries for a fruity twist. Each season brings new flavors, so feel free to experiment. This way, you can enjoy these muffins all year long!
Storage Info
Proper Storage Techniques for Muffins
To keep your Apple Cider Caramel Coffee Cake Muffins fresh, store them in an airtight container. This prevents air from making them dry. If you wish to keep them longer, wrap each muffin in plastic wrap first. You can then place them in a resealable bag. This method helps keep in moisture and flavor.
How Long Do They Last?
When stored properly at room temperature, these muffins can last for about 2 to 3 days. If you place them in the fridge, they can stay fresh for about a week. For longer storage, consider freezing them. They can last in the freezer for up to 3 months. Just make sure to thaw them at room temperature before enjoying.
Reheating Tips for Enjoying Leftovers
To enjoy your muffins warm, reheating is key. You can use a microwave for quick results. Heat each muffin for about 10 to 15 seconds. If you prefer, you can warm them in the oven. Set the oven to 350°F (175°C) and heat them for 5 to 10 minutes. This will bring back their fresh-baked taste. Drizzle some extra caramel sauce on top before serving for an extra treat!
FAQs
Can I make these muffins ahead of time?
Yes, you can prepare these muffins ahead of time. You can bake them a day in advance. Store them in an airtight container to keep them fresh. If you want to freeze them, wrap each muffin tightly in plastic wrap. This keeps them tasty for up to three months. When ready to eat, just thaw them in the fridge overnight. You can warm them in the oven or microwave for a few seconds.
What can I substitute for apple cider?
If you don’t have apple cider, you can use apple juice as a substitute. It gives a similar flavor, but it will be a bit sweeter. Another option is to mix water with a bit of lemon juice. This combination mimics the tartness of cider. You can also use unsweetened applesauce, but reduce the oil in your recipe because applesauce adds moisture.
How do I make my muffins rise higher?
To help your muffins rise higher, make sure your baking powder is fresh. Old baking powder may not work well. Also, don’t overmix the batter. Mixing too much can make muffins dense. Fill the muffin cups only halfway, so they have room to rise. Lastly, preheat your oven properly. A hot oven helps the muffins rise quickly, making them light and fluffy.
In this blog post, I shared key ingredients and their measurements. You learned about substitutes and how to pick fresh items. You also got step-by-step instructions for preparation, mixing, and baking times. I provided tips to avoid dense muffins and store them well. You found variations, including gluten-free and seasonal options. Finally, I explained storage techniques and answered common questions.
Enjoy your baking journey, and remember: fresh ingredients make all the difference!


![To make Lemon Blueberry Overnight Oats, you need: - 1 cup rolled oats - 1 cup milk (dairy or any plant-based alternative) - 1/2 cup Greek yogurt (or plant-based yogurt) - 1/2 cup fresh blueberries (or frozen, thawed) - Zest of 1 medium lemon - 2 tablespoons fresh lemon juice - 1 tablespoon maple syrup (optional for sweetness) - 1/2 teaspoon pure vanilla extract - Pinch of salt - Toppings: extra fresh blueberries, sliced almonds, and chia seeds You can switch out some ingredients if needed: - Use almond milk or oat milk instead of dairy milk. - Swap Greek yogurt for coconut yogurt for a dairy-free option. - Replace maple syrup with honey or agave for sweetness. - If you don’t have fresh blueberries, frozen ones work great too. Each ingredient plays a key role in this recipe: - Rolled oats provide the base. They soak up the liquid and become soft. - Milk adds creaminess and helps oats absorb flavors. - Greek yogurt offers protein and a nice texture. - Blueberries add sweetness and antioxidants. - Lemon zest and juice bring brightness and a fresh taste. - Maple syrup sweetens the dish naturally. - Vanilla extract enhances the overall flavor. - Salt balances the sweetness. - Toppings like almonds and chia seeds add crunch and nutrients. These ingredients come together to create a tasty and healthy breakfast. For the full recipe, refer to the earlier section. First, gather all your ingredients. You need rolled oats, milk, Greek yogurt, blueberries, lemon zest, lemon juice, maple syrup, vanilla extract, and salt. This simple mix brings bright flavors to your morning. It takes just ten minutes to prep. In a medium bowl, combine the rolled oats, Greek yogurt, and milk. Add in the lemon zest, lemon juice, maple syrup, vanilla extract, and a pinch of salt. Use a spoon or spatula to mix everything well. Make sure the oats soak up the liquid. This step is key for the best texture. Once mixed, gently fold in the fresh blueberries. Be careful not to mash them. Now, divide the oat mixture into two glass jars or containers. Make sure each jar has an even amount. Seal the jars tightly and place them in the fridge. Let them chill overnight or for at least four hours. This waiting time allows the oats to soften and soak in all those tasty flavors. In the morning, stir the oats. If they are too thick, add a splash of milk. Top with extra blueberries, sliced almonds, and chia seeds. Enjoy this delicious, healthy breakfast! For the full recipe, check out the provided instructions. To get the best texture, use rolled oats. They soak well and stay chewy. Mix your oats with yogurt and milk in a bowl. This makes them creamy. You can add lemon zest and juice for a bright taste. If you want more sweetness, a little maple syrup works great. Stir the mixture until it is smooth, and the oats are well covered. Don’t forget to gently fold in the blueberries. This keeps them intact, adding bursts of flavor. When serving, use clear jars to show off the colors. A sprinkle of sliced almonds gives a nice crunch. You can top it with extra blueberries for freshness. A few chia seeds add a fun texture and more nutrients. For a zesty look, place a lemon slice on the jar’s edge. This makes your oats not just tasty but also pretty! To boost nutrition, consider adding nuts or seeds. Almonds and chia seeds are great options. They add healthy fats and protein. You can also swap regular yogurt for Greek yogurt for extra protein. If you want a vegan option, use plant-based yogurt and milk. This keeps it creamy and dairy-free. By adding these ingredients, you can make your overnight oats even healthier while still enjoying the delicious flavor. For the complete recipe, check out the Full Recipe section. {{image_4}} You can switch the blueberries for other fruits. Try strawberries, raspberries, or peaches. Each fruit brings its own flavor and texture. You can also mix fruits for a fun twist. Just keep the same amount of fruit to match the recipe. If you want a different sweet taste, use honey or agave syrup. You can also skip sweeteners altogether if you prefer a tart flavor. Adjust the amount to suit your taste. Remember, the fruit adds natural sweetness too! Add spices for extra flavor. Cinnamon or nutmeg can give warmth. You might also try adding a teaspoon of almond extract for a nutty twist. If you like it creamy, add more Greek yogurt. For crunch, mix in nuts or seeds. These simple changes can make your oats unique and delicious. For the full recipe, check out the instructions above! Store your lemon blueberry overnight oats in airtight containers. This keeps them fresh and prevents spills. Glass jars work great. They also show off the beautiful layers. Always seal them tightly. Your oats will stay good in the fridge for up to five days. The flavors will blend better as they sit. Check for any off smells before eating. If they look or smell funny, toss them out. You can eat these oats cold, right from the fridge. If you prefer them warm, heat them in the microwave. Add a splash of milk if they seem too thick. Heat for about 30 seconds, then stir. Enjoy your creamy, zesty oats! Check the [Full Recipe] for details on how to make them. Yes, you can use quick oats. They will cook faster than rolled oats. Quick oats may make your mixture creamier. However, they might lose some texture. Rolled oats offer a nice chewiness. I have found that rolled oats work best for overnight oats. These oats last about 3 to 5 days in the fridge. Store them in airtight containers. This keeps them fresh and tasty. Just stir before eating. You may need to add a splash of milk if they seem thick. Yes, you can easily make these oats vegan. Use plant-based milk and yogurt. Maple syrup is a great sweetener. This keeps the recipe delicious. You won’t lose any flavor. Check the Full Recipe for more tips! This article covered the key ingredients and their roles in making Lemon Blueberry Overnight Oats. We explored step-by-step methods for mixing and chilling. Tips and tricks helped improve texture and flavor. Variations allow customization to suit your taste. Lastly, we discussed storage details to keep your oats fresh. Overall, making overnight oats is easy and flexible. Enjoy experimenting with different flavors and ingredients!](https://goldendishy.com/wp-content/uploads/2025/06/368f6847-7d49-481c-8601-ff06e206830f-768x768.webp)


. To keep your scones fresh, let them cool completely. Place them in an airtight container. You can store them at room temperature for up to three days. If you live in a humid area, refrigerate them to prevent spoilage. Use parchment paper between layers to keep them from sticking. Reheat your scones for the best taste. Preheat your oven to 350°F (175°C). Place the scones on a baking sheet. Heat them for about 5 to 10 minutes, or until warm. You can also use a microwave. Heat them for 15 to 20 seconds. This warms them quickly but may make them soft. To freeze scones, wrap each one in plastic wrap. Place them in a freezer bag or airtight container. Label with the date for easy tracking. They can last up to three months in the freezer. When ready to eat, thaw them in the fridge overnight. Reheat as mentioned above for a fresh taste. Check the Full Recipe for more tips on making these treats! To make cinnamon roll scones, follow this simple process. First, mix the dry ingredients in a bowl. This includes flour, sugar, baking powder, salt, and cinnamon. Next, cut in cold butter until the mix looks crumbly. Then, whisk buttermilk, melted butter, and vanilla in another bowl. Combine the wet and dry mixes gently. Pat the dough into a rectangle, brush melted butter, and sprinkle brown sugar for the swirl. Roll it up, slice it, and bake. For the full recipe, check the details above. Yes, you can use milk instead of buttermilk. If you do, add a splash of lemon juice or vinegar. This helps the milk mimic buttermilk's tangy flavor. It also makes the scones soft and fluffy. However, buttermilk adds a richer taste. Serve cinnamon roll scones warm for the best taste. Drizzle the icing over the top just before serving. You can also sprinkle a little cinnamon on top for added flavor. Pair them with coffee or tea for a relaxing treat. They look great on a nice platter. Cinnamon roll scones last for about two days at room temperature. To keep them fresh longer, store them in an airtight container. You can also refrigerate them for up to a week. Just warm them in the oven before serving to regain that fresh-baked taste. Yes, you can make cinnamon roll scones ahead of time. Prepare the dough, and cut the scones. Then, place them on a baking sheet and freeze until firm. After that, transfer them to a bag or container. When you’re ready, bake them straight from the freezer, adding a few extra minutes to the baking time. This way, you enjoy fresh scones anytime! Making scones is simple and fun. You learned about ingredients, tools, and baking steps. I shared tips to help you avoid mistakes and find the best flavors. You also discovered flavor variations and storage methods. Scones can be your tasty treat for any occasion. With a few easy steps, you can impress your friends. Enjoy baking, and don’t forget to share your tasty results!](https://goldendishy.com/wp-content/uploads/2025/07/878de396-77ac-4fc1-b8cf-b56551936fe1-768x768.webp)
