Dark Chocolate Sea Salt Bark Irresistible Sweet Treat

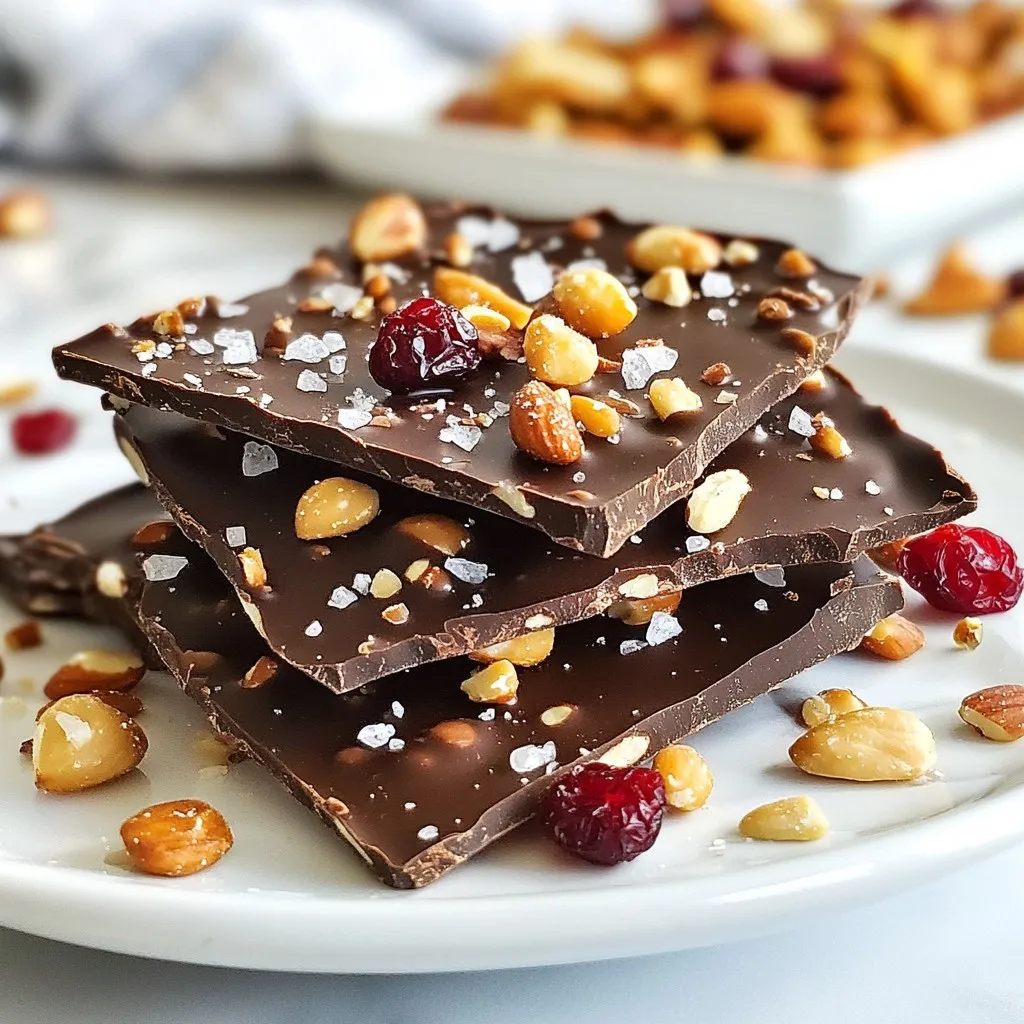
Indulging in Dark Chocolate Sea Salt Bark is a delight you simply can’t miss! This sweet treat combines rich dark chocolate with crunchy nuts and dried fruits, delivering a perfect balance of flavors. I’ll guide you through the simple steps to make your own version, ensuring each bite is irresistible. Get ready to impress your family and friends with this gourmet snack that’s easy enough for anyone to create!
Why I Love This Recipe
- Indulgent Flavor Combination: The rich dark chocolate paired with crunchy nuts and chewy dried fruit creates a symphony of textures and flavors that is simply irresistible.
- Quick and Easy: This recipe requires minimal effort and just a few simple steps, making it perfect for last-minute cravings or unexpected guests.
- Customizable: Feel free to swap in your favorite nuts and dried fruits, allowing you to tailor the bark to your personal taste preferences.
- Perfect for Gifting: Beautifully packaged, this treat makes a thoughtful and delicious gift for friends and family during the holidays or special occasions.
Ingredients
Main Ingredients Required
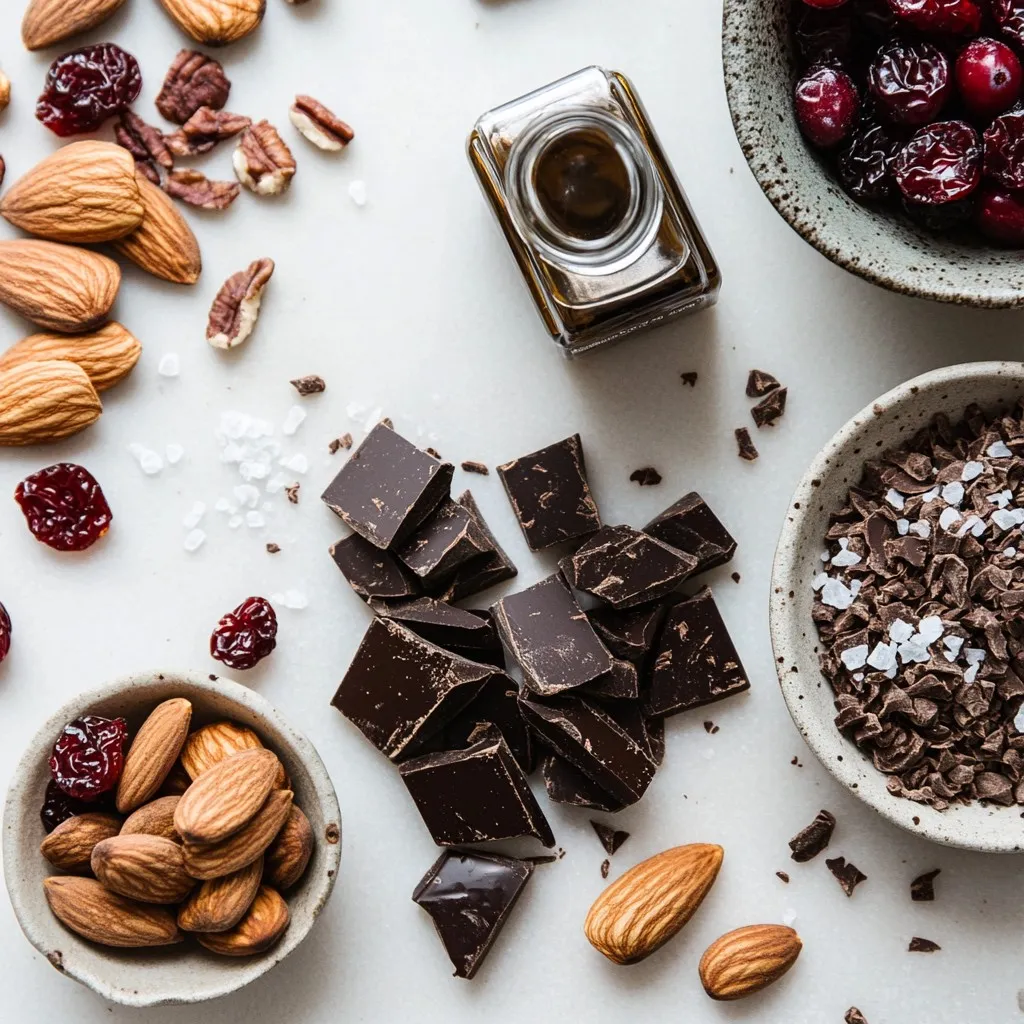
– 12 ounces of high-quality dark chocolate (70% cocoa or higher)
– 1 cup of mixed nuts (such as almonds, walnuts, and pecans)
– 1/2 cup of dried fruit (choose from cranberries, cherries, or apricots)
Flavor Enhancers
– 1 teaspoon of pure vanilla extract
– Flaky sea salt for finishing touches
Recommended Quality
Using high-quality chocolate is very important. Dark chocolate with 70% cocoa or more gives rich taste. It melts well and holds its shape. When picking nuts, choose a mix you love. Almonds, walnuts, and pecans add crunch and flavor. For dried fruits, cranberries, cherries, and apricots can bring sweetness. Fresh, good quality ingredients make the bark taste amazing. Always look for nuts without added salt or sugar. This keeps the flavors balanced and pure.

Step-by-Step Instructions
Preparing the Baking Sheet
Start by lining a baking sheet with parchment paper. This is key to your success. The parchment stops the chocolate from sticking. It also makes cleaning easy after you finish. You want to focus on the fun part—eating!
Melting the Chocolate
You can melt chocolate in two ways: the microwave or a double boiler. If you use the microwave, cut the chocolate into small pieces. Place it in a safe bowl. Heat it for 30 seconds at a time. After each round, stir it well. This keeps the chocolate from burning. If you choose a double boiler, use low heat and stir gently. The steam will melt the chocolate slowly. This method gives you a nice, smooth finish.
Combining Ingredients
Once your chocolate is melted, it’s time to mix in some flavor! Add one teaspoon of pure vanilla extract. Stir it in well to spread the flavor evenly. Next, fold in your mixed nuts and dried fruit. Use a spatula to make sure every piece gets coated in chocolate. It should all look rich and delicious!
Finalizing the Bark
Carefully pour your chocolate mix onto the lined baking sheet. Use a spatula to spread it out evenly. Aim for about a quarter inch thick. While it’s still warm, sprinkle flaky sea salt on top. This adds a nice touch! You can adjust the salt to your taste. Then, place the sheet in the fridge. Let it chill for 1 to 2 hours until it’s firm. Once set, break it into pieces. You can use your hands or a knife. The bark should look great with all the nuts and fruit visible!
Tips & Tricks
Perfecting Texture and Flavor
To melt chocolate well, I suggest using the microwave. Cut your dark chocolate into small pieces. Place them in a bowl. Heat for 30 seconds, then stir. Repeat until smooth. This keeps it glossy. If you prefer, use a double boiler. It gently melts the chocolate without burning.
For salt levels, taste is key! Start with a light sprinkle of flaky sea salt. You can always add more later. Balance the sweet and salty for the best flavor. Adjust it based on your preference. Some like it salty, while others prefer less.
Presentation Suggestions
When serving, arrange the bark pieces on a pretty plate. This makes it look festive. You can also stack them for height. For gifts, wrap each piece in cellophane. Tie with a colorful ribbon for extra charm. This makes it a perfect treat for friends or family.
Health Benefits of Ingredients
Dark chocolate has many benefits. It is rich in antioxidants. These help fight free radicals in the body. Chocolate with 70% cocoa or higher offers more health perks. It can improve heart health and boost mood.
Nuts add healthy fats and protein. They provide crunch and flavor to your bark. Almonds, walnuts, and pecans are great choices. Dried fruits like cranberries and cherries add sweetness. They also bring vitamins and minerals. Together, these ingredients create a tasty and nutritious treat.
Pro Tips
- Choose Quality Chocolate: Selecting high-quality dark chocolate will significantly enhance the flavor of your bark. Look for chocolate with a cocoa content of 70% or higher for a rich, intense taste.
- Mix and Match Ingredients: Feel free to customize your bark by using different nuts and dried fruits! Try macadamia nuts with mango or cashews with goji berries for unique flavor combinations.
- Perfecting the Salt Sprinkle: When sprinkling the sea salt, do it while the chocolate is still warm. This ensures the salt sticks well and enhances the chocolate’s flavor.
- Store for Freshness: For optimal freshness, store your bark in an airtight container. This will help maintain its texture and prevent it from absorbing moisture.

Variations
Flavor Combinations
You can change the nuts in your bark for a new taste. Try using cashews, hazelnuts, or even sunflower seeds. Each nut adds its own unique crunch and flavor. You can also mix in spices like cinnamon or chili powder. A drop of almond extract can give it a delightful twist too. These small changes can make your bark truly special.
Dietary Adjustments
If you want a vegan bark, use dairy-free dark chocolate. Many brands offer great options that taste just as good. For gluten-free needs, this recipe works perfectly. Just ensure the nuts and any dried fruit you choose are also gluten-free. This way, everyone can enjoy a sweet bite without worries.
Seasonal Inspirations
For the holidays, think about adding festive toppings. Try crushed peppermint or a sprinkle of festive sprinkles. You can also use seasonal fruits like dried figs or apricots for a fresh touch. They add color and flavor, making your bark stand out on any dessert table.
Storage Info
Best Storage Practices
Store your dark chocolate sea salt bark in an airtight container. This keeps the bark fresh and tasty. You can keep it at room temperature for easy snacking. If you like a firmer texture, put it in the fridge. Just be aware that cold storage may make it a bit harder to break into pieces.
Shelf Life
For the best taste, enjoy your bark within two weeks. You may notice it stays fresh for a bit longer, but it’s best to eat it sooner. Signs of spoilage include a change in color or texture. If it looks dull or feels sticky, it’s time to toss it.
Reusing Leftovers
If you have leftover bark, get creative! You can chop it up and mix it into ice cream. It also works well as a topping on yogurt or oatmeal. You can even sprinkle it over brownies for an extra special treat. The options are endless!
FAQs
How do I make dark chocolate sea salt bark?
To make dark chocolate sea salt bark, start by lining a baking sheet with parchment paper. Melt high-quality dark chocolate in a microwave or double boiler. Stir in vanilla extract and mix in nuts and dried fruit. Spread this mixture on the lined sheet and sprinkle with flaky sea salt. Chill in the fridge for 1 to 2 hours until set, then break into pieces.
What chocolate is best for bark recipes?
For bark, choose dark chocolate with 70% cocoa or higher. Higher cocoa percentages provide rich flavor and health benefits. Quality matters; look for brands that use high-grade cocoa beans. This choice enhances taste and texture, making your bark special.
Can I use milk chocolate instead of dark chocolate?
Yes, you can use milk chocolate. However, it has a sweeter taste and less depth than dark chocolate. Milk chocolate may not provide the same contrast with sea salt. If you love sweetness, it can be a great choice. Just note that the flavors will differ.
How long does it take for the bark to set?
The bark takes about 1 to 2 hours to set in the fridge. If you want it to firm up quickly, keep it in the cold. Make sure it’s completely firm before breaking it into pieces. This ensures a clean break and nice texture.
Can I add other toppings to the bark?
Absolutely! You can add various toppings to your bark. Try coconut flakes, seeds, or even crushed candy. Other dried fruits or spices can also work well. Get creative and make it your own! Just ensure that the toppings are evenly distributed for the best flavor.
You learned how to make dark chocolate sea salt bark using quality ingredients. We discussed the main components, flavor enhancers, and important steps for successful results. I shared tips for perfect texture and health benefits, plus fun variations to try. Remember, the quality of your chocolate and mix-ins matter most. With the right care, your bark can shine as a tasty treat or a fun gift. Enjoy making your own delicious creation

Chocolatey Bliss: Dark Chocolate Sea Salt Bark
Ingredients
- 12 ounces high-quality dark chocolate (70% cocoa or higher)
- 1 cup mixed nuts (such as almonds, walnuts, and pecans)
- 0.5 cup dried fruit (choose from cranberries, cherries, or apricots)
- 1 teaspoon pure vanilla extract
- none Flaky sea salt, for finishing touches
Instructions
- Prepare Your Baking Sheet: Start by lining a baking sheet with parchment paper. This step is essential as it will prevent the chocolate from sticking and will make cleanup a breeze afterward.
- Melt the Chocolate: Cut the dark chocolate into small, uniform pieces and place them into a microwave-safe bowl. Heat the chocolate in the microwave in 30-second increments, stirring thoroughly between each interval, until it is fully melted and has a smooth, glossy finish. If you prefer, you can opt for a double boiler on the stovetop instead, allowing the chocolate to melt gently over steam.
- Mix in Flavors: Once your chocolate is melted, add the vanilla extract. Stir it into the chocolate vigorously to ensure your flavor is evenly distributed.
- Incorporate Nuts and Dried Fruit: Gently fold in the mixed nuts and dried fruit into the melted chocolate. Make sure all pieces are well-coated in the luscious chocolate mixture.
- Spread on the Baking Sheet: Carefully pour the chocolate and nut mixture onto your lined baking sheet. Use a spatula to spread it into an even layer, aiming for a thickness of about 1/4 inch.
- Sprinkle with Sea Salt: While the chocolate mixture is still warm, generously sprinkle flaky sea salt across the surface. Adjust the salting to suit your taste—more for those who love a stronger contrast!
- Chill to Set: Transfer the baking sheet into the fridge and allow the chocolate to chill for approximately 1 to 2 hours, or until it is completely set and firm to the touch.
- Break into Pieces: After the chocolate has set, gently lift the bark from the parchment paper. Use your hands or a sharp knife to break it into irregular, bite-sized pieces, showcasing the beautiful nuts and fruit inside.
- Storage: Store your dark chocolate sea salt bark in an airtight container. You can keep it at room temperature for easier snacking or refrigerate it for a slightly firmer texture.


![- 2 cups fresh blueberries, rinsed and drained - 2 cups ripe peaches, diced (approximately 3 medium-sized peaches) - 1 tablespoon freshly squeezed lemon juice - 1/2 cup granulated sugar (adjust based on your sweetness preference) - 1 tablespoon cornstarch - 1 teaspoon pure vanilla extract - 1 1/2 cups rolled oats - 1 cup all-purpose flour - 1/2 cup packed brown sugar - 1/2 teaspoon baking powder - 1/4 teaspoon fine salt - 1/2 cup unsalted butter, melted and slightly cooled - 1 teaspoon ground cinnamon (optional, for added warmth) These simple ingredients create a tasty balance of sweet and tart flavors. The fresh blueberries and ripe peaches shine in each bite. You can change the sugar to fit your taste. I often add a bit more if the fruit is not very sweet. I love using oats for texture; they give a nice chewiness. This recipe is so flexible. You can swap out fruit or adjust flavors based on what you have at home. For example, try adding a pinch of nutmeg for a warm spice twist. This recipe takes only 15 minutes to prepare. It bakes in about 30 to 35 minutes. You will get about 12 bars from this batch, perfect for sharing with friends or family. If you want the full recipe, check the section below. - Preheat your oven to 350°F (175°C). - Grease a 9x13-inch baking dish or line it with parchment paper. - In a medium mixing bowl, combine 2 cups of fresh blueberries, 2 cups of diced peaches, 1 tablespoon of lemon juice, 1/2 cup of granulated sugar, 1 tablespoon of cornstarch, and 1 teaspoon of vanilla extract. - Gently mix the ingredients until the fruit is coated. Let it sit for a few minutes to enhance the flavor. - In a large mixing bowl, whisk together 1 1/2 cups of rolled oats, 1 cup of all-purpose flour, 1/2 cup of brown sugar, 1/2 teaspoon of baking powder, 1/4 teaspoon of salt, and 1 teaspoon of cinnamon if desired. - This mixture will give your bars that perfect crumb texture. - Pour 1/2 cup of melted butter into the dry mixture and stir until it looks like coarse crumbs. - Reserve about 1 cup of this crumb mixture for later. - Press the remaining crumb mixture into the bottom of your greased dish to form the crust. - Spread the fruit mixture evenly over the crust, then sprinkle the reserved crumbs on top. - Bake in your preheated oven for about 30-35 minutes. - Look for golden brown color and bubbling filling to know it's done. - Once baked, let the bars cool on a wire rack for 15-20 minutes before slicing into squares. - This cooling time helps the bars set well for easy serving. Enjoy making these Blueberry Peach Crumble Bars with the [Full Recipe]. - Check for doneness by ensuring the filling is bubbling and the top is golden brown. - Letting the bars cool completely aids in easier slicing. This step prevents squishing the filling and keeps the layers intact. - Use frozen blueberries or peaches if fresh ones are unavailable. Frozen fruit works well and saves time. - Substitute brown sugar with coconut sugar for a healthier option. Coconut sugar adds a nice depth to the flavor. - Serve warm or at room temperature. This allows the flavors to shine. - Pair with vanilla ice cream or whipped cream. This adds a creamy texture that balances the tartness of the fruit. For an extra touch, garnish with fresh blueberries or peach slices. You can find the Full Recipe above for detailed instructions on making these delightful bars! {{image_4}} You can mix things up with different fruits. For a fresh twist, switch blueberries and peaches for raspberries and apples. The tartness of raspberries pairs well with sweet apples. You can also try plums or cherries. Both add their unique flavors and keep the bars fun and exciting. Want to make these bars gluten-free? No problem! Just replace all-purpose flour with a gluten-free flour blend. Many good mixes are available at stores. Also, ensure that your oats are certified gluten-free. This small change lets everyone enjoy this tasty dessert. For a vegan version, swap unsalted butter for coconut oil or vegan butter. Both options work well and keep the bars rich and tasty. If your recipe includes eggs, you can use flax eggs instead. To make a flax egg, mix one tablespoon of ground flaxseed with two and a half tablespoons of water. Let it sit for five minutes. This creates a great egg substitute that still binds everything together. Store your Blueberry Peach Crumble Bars in an airtight container. They stay fresh at room temperature for up to 3 days. This makes them great for quick snacks or dessert. To keep them longer, refrigerate the bars. They will stay fresh for up to a week. For even longer storage, you can freeze the bars. Wrap them tightly in plastic wrap or aluminum foil. They can be frozen for up to 3 months. When you're ready to enjoy your frozen bars, reheating is easy. Simply pop them in the microwave for a few seconds. You can also warm them in the oven at 350°F (175°C). This brings back their delicious taste and texture. For the full recipe and tips, check out the detailed instructions above. Enjoy your tasty treat! Yes, you can make these bars a day in advance. Just store them in the fridge. This helps the flavors blend nicely. Look for bubbling filling and a golden brown topping. This shows they are ready to eat. Yes, you can add chopped nuts like almonds or walnuts. They give the bars extra crunch and flavor. I love pairing them with a scoop of ice cream or yogurt. It makes a delicious treat. Store them in an airtight container at room temperature. You can also refrigerate them for up to a week. - Blueberry Peach Crumble Bars 🫐 To make these delicious Blueberry Peach Crumble Bars, you need simple, fresh ingredients. Here’s what you will need: - 2 cups fresh blueberries, rinsed and drained - 2 cups ripe peaches, diced (approximately 3 medium-sized peaches) - 1 tablespoon freshly squeezed lemon juice - 1/2 cup granulated sugar (adjust based on your sweetness preference) - 1 tablespoon cornstarch - 1 teaspoon pure vanilla extract - 1 1/2 cups rolled oats - 1 cup all-purpose flour - 1/2 cup packed brown sugar - 1/2 teaspoon baking powder - 1/4 teaspoon fine salt - 1/2 cup unsalted butter, melted and slightly cooled - 1 teaspoon ground cinnamon (optional, for added warmth) These ingredients come together to create a wonderful balance of sweet and tart flavors. The fresh blueberries and peaches mix well with the lemon juice. This adds a nice zing to the bars. The sugar and cornstarch help create a thick, juicy filling. The crumble topping is a blend of oats, flour, and sugars. It gives the bars a crunchy texture that pairs perfectly with the soft fruit layer. The butter adds richness, while the cinnamon gives a warm, cozy vibe to each bite. If you want to try this recipe, check the Full Recipe for step-by-step instructions. You'll love making and sharing these bars! These Blueberry Peach Crumble Bars are easy to make and full of flavor. You learned about the key ingredients, simple steps, and different variations. Remember, you can swap fruits or adjust sweetness to fit your taste. Store leftovers in a container for later. Enjoy these bars warm or with ice cream for a tasty treat. Happy baking!](https://goldendishy.com/wp-content/uploads/2025/06/77e155cd-d820-4acd-a50c-b849e6ba2e1e-768x768.webp)


