Crockpot Birria Tacos Flavorful and Easy Recipe

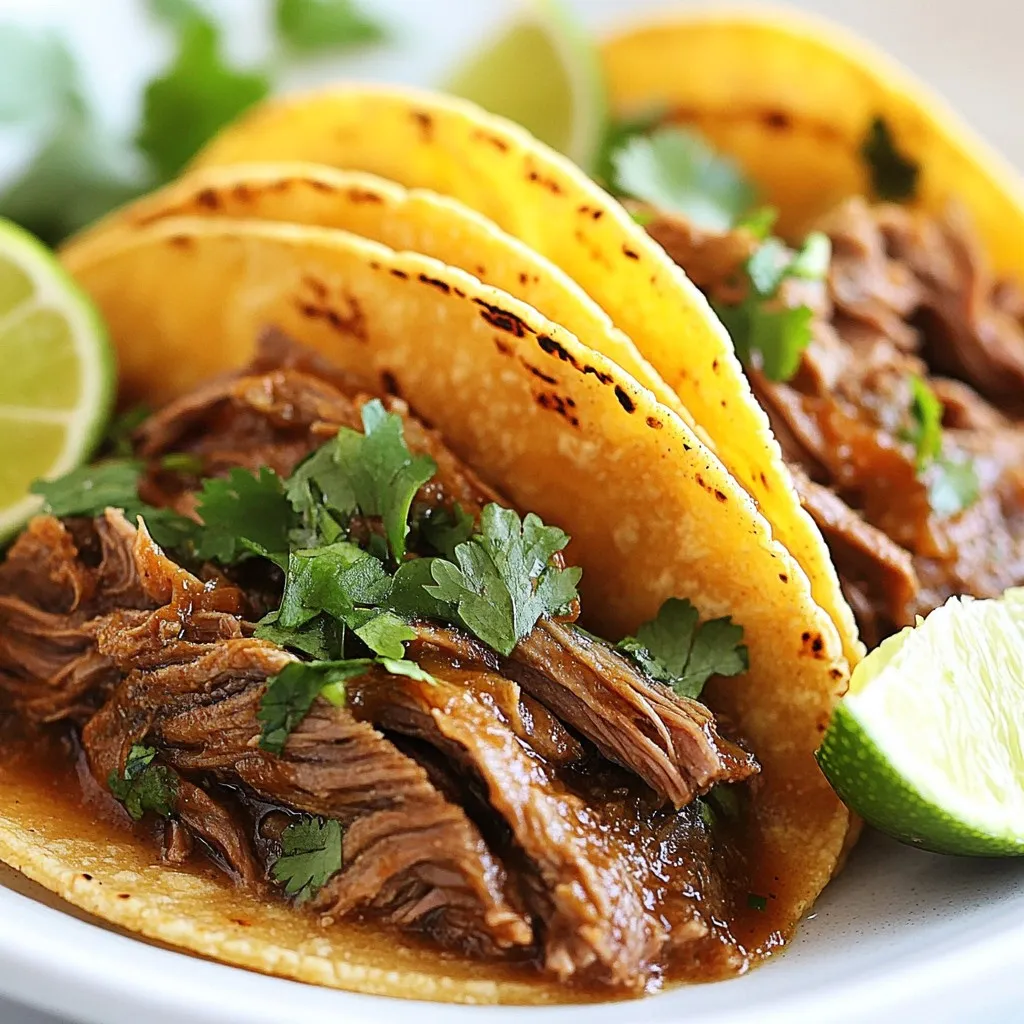
Are you ready to elevate your taco game? In this post, I’ll guide you through making Crockpot Birria Tacos, an easy and tasty dish that will impress your family and friends. With just a few simple ingredients and your trusty crockpot, you’ll create tender, flavorful beef tucked in warm corn tortillas. Let’s dive into this delicious journey and transform your taco nights forever!
Why I Love This Recipe
- Flavor Explosion: This recipe brings together a rich blend of spices and chiles that create an incredibly flavorful and aromatic dish.
- Slow-Cooked Perfection: Using a crockpot allows the beef to become wonderfully tender, making it easy to shred and perfect for tacos.
- Customizable: These tacos can be topped with your favorite garnishes, allowing everyone to personalize their own plate.
- Great for Gatherings: This recipe yields a generous amount, making it ideal for serving at parties or family dinners.
Ingredients
Main Ingredients
– 2 lbs beef chuck roast, cut into 2-inch chunks
– 2 dried guajillo chiles, seeds removed
– 2 dried ancho chiles, seeds removed
– Corn tortillas (about 12)
Seasoning and Sauce Ingredients
– 1 large onion, quartered
– 4 cloves garlic, minced
– 1 tablespoon ground cumin
– 1 tablespoon dried oregano
– 1 teaspoon smoked paprika
– 1 teaspoon ground cinnamon
– 4 cups beef broth
– 2 tablespoons apple cider vinegar
– Salt and freshly ground black pepper, to taste
Garnishes and Serving Suggestions
– Fresh cilantro, chopped (for garnish)
– Lime wedges (for serving)
– Optional toppings (e.g., radishes)
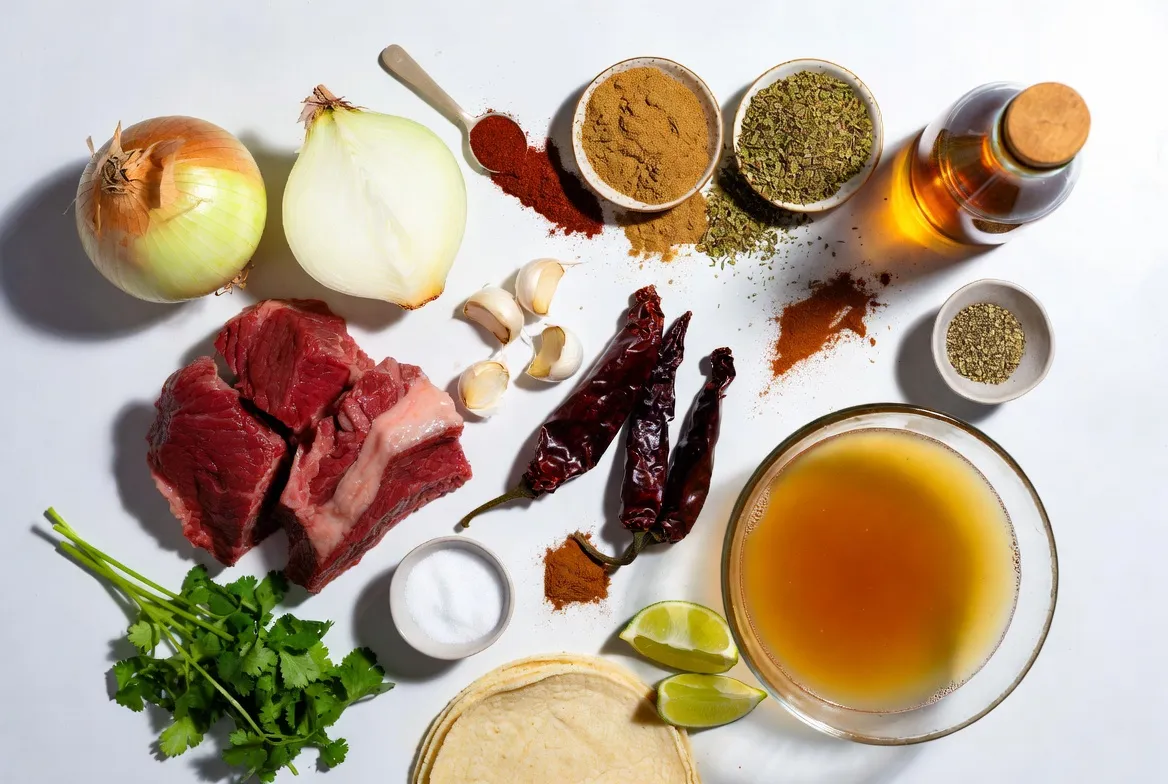
When making crockpot birria tacos, using fresh and high-quality ingredients is key. The beef chuck roast is the star of the dish. It’s rich and tender, perfect for shredding. The dried guajillo and ancho chiles add depth and a nice warmth to the sauce.
Onion and garlic are essential to build flavor. Ground spices like cumin, oregano, smoked paprika, and cinnamon round out the taste. The beef broth adds moisture and richness, while apple cider vinegar brings a touch of acidity.
Don’t forget the corn tortillas! They hold all the delicious filling. For garnishes, fresh cilantro and lime wedges brighten the dish. Optional toppings like radishes add crunch and color.
Choosing the right ingredients makes a world of difference in flavor. Enjoy crafting these tacos!

Step-by-Step Instructions
Preparing the Ingredients
Toasting the dried chiles
First, heat a dry skillet over medium heat. Add the guajillo and ancho chiles. Toast them for about 1-2 minutes. Make sure to turn them often. You want them fragrant, not burnt. Once toasted, remove them from the heat and let them cool.
Blending the sauce ingredients
When the chiles are cool, place them in a blender. Add the quartered onion and minced garlic. Next, add ground cumin, oregano, smoked paprika, and cinnamon. Pour in 1 cup of beef broth and 2 tablespoons of apple cider vinegar. Blend until smooth.
Cooking in the Crockpot
Seasoning the beef
Take 2 lbs of beef chuck roast and cut it into 2-inch chunks. In a large bowl, sprinkle salt and freshly ground black pepper over the beef. Mix well to coat every piece. This seasoning is key for flavor.
Combining ingredients in the crockpot
Now, place the seasoned beef chunks into your crockpot. Pour the blended sauce over the beef. Make sure all the meat is covered. Next, add the remaining 3 cups of beef broth to the crockpot. This step helps to keep the meat moist while cooking.
Final Steps
Shredding the meat
After cooking on low for 8 hours or high for 4-5 hours, check the beef. It should be fork-tender. Carefully take the beef out using tongs. Place it on a cutting board and shred it with two forks.
Warming the tortillas
In a skillet over medium heat, warm the corn tortillas. Heat them for about 30 seconds on each side. You want them soft and slightly toasted.
Assembling the tacos
Take a warm tortilla and add a generous amount of the shredded beef in the center. Top with freshly chopped cilantro. Serve with lime wedges on the side. If you like, drizzle some of the rich broth over the tacos for extra flavor.
Tips & Tricks
Enhancing Flavor
To make your birria tacos shine, seasoning the meat is key. I like to use salt and freshly ground black pepper. This simple step ensures the beef is full of flavor. You can also customize the sauce. Add more spices if you like heat, or keep it mild. Blend in fresh herbs for a unique twist.
Optimal Cooking Times
Choosing the right setting on your crockpot is crucial. Cooking on low for about 8 hours gives you the best results. The beef becomes tender and tasty. If you’re short on time, use the high setting for 4 to 5 hours. Always check for tenderness. The meat should shred easily with a fork.
Presentation Tips
When serving, style matters. I love to place the tacos on a large platter. Add lime wedges and a bowl of broth for dipping. You can even add thinly sliced radishes. They add color and a nice crunch. This way, your meal looks as good as it tastes!
Pro Tips
- Choosing the Right Cut: For the best flavor and tenderness, opt for well-marbled cuts like beef chuck roast. The fat will render down during cooking, adding richness to your tacos.
- Toast Your Spices: Toasting the spices and chiles before blending enhances their flavors. Just be careful not to over-toast, as this can lead to bitterness.
- Resting the Meat: After shredding your beef, let it rest for a few minutes. This allows the juices to redistribute, making the meat even more flavorful and juicy.
- Make Ahead: Birria can be made a day in advance. The flavors deepen as it sits, making it even more delicious when reheated. Just store in an airtight container in the fridge.

Variations
Different Proteins
You can switch the beef for other meats. Pork and chicken work great. For pork, use a shoulder roast. It will be tender and juicy. Chicken thighs are also a tasty option. Just remember to adjust the cooking time. Chicken cooks faster than beef, so check it after three hours on high.
Vegetarian Options
Want a meat-free taco? Try jackfruit or mushrooms. Jackfruit has a great texture. It absorbs flavors well. Use young green jackfruit for the best results. Cook it like you would the beef. For mushrooms, try portobello or shiitake. Sauté them first for a deeper flavor.
Flavor Variations
You can add spices or herbs for a twist. Try adding more cumin or chili powder for heat. Fresh herbs like cilantro or parsley can brighten the dish. Consider adding lime zest for a citrus kick. Mixing in fresh ingredients can change the whole vibe of your tacos. Have fun experimenting!
Storage Info
Refrigeration Guidelines
To store your leftover Birria, place it in an airtight container. Make sure it’s cool before sealing. This helps keep the flavor fresh. The shelf life in the fridge is about 3 to 4 days. Always check for any signs of spoilage before eating.
Freezing Instructions
You can freeze Birria for longer storage. Use a freezer-safe container or bag. Make sure to seal it tightly to avoid freezer burn. For the tortillas, stack them with parchment paper in between. This keeps them from sticking. When you want to eat, thaw the Birria overnight in the fridge. Reheat it on the stove or in the microwave.
Reusing Leftovers
Leftover Birria is great for new meals. You can make a hearty soup by adding broth and veggies. Another fun idea is using it for quesadillas. Just fill a tortilla with cheese and Birria, then grill it. You can also use it as a topping for nachos. The flavor stays bold, and it’s a perfect way to enjoy your leftovers!
FAQs
What is Birria?
Birria is a tasty Mexican dish that started in Jalisco. It began as a stew made with goat meat, but now beef is also popular. The dish combines spices and chiles to create a rich, savory flavor. Birria tacos are soft tortillas filled with this juicy meat. You dip the tacos in the broth, which adds even more flavor. People love birria for its warmth and comfort.
Can I make this recipe ahead of time?
Yes, you can prepare this recipe in advance. Start by cooking the meat and sauce. Once cooked, let it cool and store in the fridge. You can keep it for up to three days. When you’re ready to eat, just reheat the meat and broth. This makes meal prep easy. You can also freeze the cooked birria for up to three months. Just thaw it overnight in the fridge before reheating.
How do I keep my tacos from getting soggy?
To keep your tacos crisp, use warm tortillas. Lightly toast them in a skillet for 30 seconds. This helps create a barrier against moisture. Also, avoid adding too much broth directly to the tacos. Instead, serve the broth on the side for dipping. Lastly, assemble the tacos just before serving to keep them fresh and crunchy.
This blog covers making amazing Birria tacos. We discussed key ingredients like beef chuck roast and dried chiles. You learned how to prepare, cook, and serve these tasty tacos. Tips for enhancing flavor and storage options were provided too.
With the right steps, you can create delicious tacos for any occasion. Enjoy experimenting with different flavors and proteins! Your cooking journey with Birria will be rewarding and fu

Crockpot Birria Tacos
Ingredients
- 2 lbs beef chuck roast, cut into 2-inch chunks
- 1 large onion, quartered
- 4 cloves garlic, minced
- 2 dried guajillo chiles, seeds removed
- 2 dried ancho chiles, seeds removed
- 1 tablespoon ground cumin
- 1 tablespoon dried oregano
- 1 teaspoon smoked paprika
- 1 teaspoon ground cinnamon
- 4 cups beef broth
- 2 tablespoons apple cider vinegar
- to taste salt and freshly ground black pepper
- 12 corn tortillas
- for garnish fresh cilantro, chopped
- for serving lime wedges
Instructions
- In a dry skillet over medium heat, carefully toast the guajillo and ancho chiles for 1-2 minutes, turning occasionally, until they become fragrant but do not burn. Once toasted, remove from heat and allow them to cool slightly. Transfer the cooled chiles to a blender.
- In the blender with the chiles, add the quartered onion, minced garlic, ground cumin, oregano, smoked paprika, cinnamon, apple cider vinegar, and 1 cup of beef broth. Blend the mixture until it reaches a smooth consistency.
- In a large mixing bowl, generously season the beef chunks with salt and freshly ground black pepper to ensure even flavor throughout the meat.
- In a crockpot, place the seasoned beef chunks. Pour the blended sauce over the meat, ensuring it is evenly coated. Add the remaining 3 cups of beef broth, making sure the meat is submerged for maximum flavor absorption.
- Cover the crockpot and cook on low for 8 hours, or on high for 4-5 hours, until the beef is fork-tender and easily shreds apart.
- Once the cooking time has elapsed, carefully remove the beef from the crockpot using tongs and place it on a cutting board. Use two forks to shred the meat into bite-sized pieces.
- In a skillet over medium heat, lightly warm the corn tortillas for about 30 seconds on each side, or until they are pliable and slightly toasted.
- Take a warm tortilla and place a generous amount of the shredded beef in the center.
- Top each taco with freshly chopped cilantro. Serve with lime wedges on the side, and for an extra kick of flavor, drizzle some of the rich broth from the crockpot over the tacos before enjoying.


![To make vegan creamy pesto pasta, gather these fresh and simple ingredients. - 12 oz pasta (penne, spaghetti, or your favorite variety) - 2 cups fresh basil leaves, tightly packed - 1/2 cup raw cashews (soaked in water for at least 2 hours) - 1/4 cup nutritional yeast (for a cheesy flavor) - 3 cloves garlic, minced - 1/4 cup extra virgin olive oil - 1 tablespoon fresh lemon juice - Sea salt and freshly ground black pepper, to taste - 1 cup cherry tomatoes, halved (for topping) - Extra fresh basil leaves (for garnish) Each ingredient plays a vital role. The pasta is the base, while basil brings freshness. Cashews create a rich, creamy texture. Nutritional yeast adds a cheesy taste, perfect for vegan dishes. Garlic gives depth, while olive oil provides smoothness. Lemon juice brightens the flavors. Salt and pepper enhance everything. Cherry tomatoes add color and sweetness. Extra basil leaves make the dish look beautiful. For the full recipe, check out the link to ensure a delicious meal! First, fill a large pot with water and add a generous amount of salt. Bring the water to a rapid boil. This step is key; the salt helps flavor the pasta. Once boiling, add 12 ounces of your favorite pasta, like penne or spaghetti. Cook according to the package instructions. You want the pasta to be al dente, which means it should be tender but still firm to bite. Usually, this takes about 8 to 12 minutes. When the pasta is ready, drain it well and set it aside. Next, it’s time to make the vegan pesto. Grab your blender or food processor. Add 2 cups of fresh basil leaves, 1/2 cup of soaked raw cashews, and 1/4 cup of nutritional yeast. Also, include 3 cloves of minced garlic and 1 tablespoon of fresh lemon juice. Season with a pinch of sea salt and freshly ground black pepper. Blend this mixture until it becomes smooth and creamy. If it doesn't blend well, scrape down the sides of the blender and blend again until you get a silky texture. Now, combine the drained pasta with the creamy pesto sauce. Use a large mixing bowl for this. Pour the pesto over the pasta. With a pair of tongs or a spatula, toss everything together. Ensure that each piece of pasta gets coated with the vibrant pesto. If the sauce looks too thick, add a little water, one teaspoon at a time, until it reaches the desired consistency. Don't forget to taste! Adjust the seasoning with more salt, pepper, or lemon juice if needed. Finally, gently fold in 1 cup of halved cherry tomatoes for a fresh burst of flavor. Serve this delicious dish warm, garnished with extra basil leaves. Enjoy your vegan creamy pesto pasta! For the complete recipe, check the [Full Recipe]. Soaked cashews are the secret to a smooth and creamy sauce. They soften and blend well, making the pesto rich. Soak them in water for at least two hours before use. This step is key for a silky texture. If your pesto is too thick, don’t worry. Just add water! Start with a teaspoon at a time. Blend until you reach your desired creaminess. This helps the sauce hug the pasta perfectly. Don’t stop at just basil! You can spice it up with some red pepper flakes for heat. A pinch of black pepper adds depth. Try adding a bit of garlic powder for more flavor. Lemon juice adds freshness, but balance is key. If it’s too tangy, add a pinch of sugar or more cashews. This helps round out the flavors and brings the dish to life. Pair this pasta with roasted vegetables for a colorful plate. A side salad adds crunch and freshness. For a drink, consider a light white wine, like Sauvignon Blanc. As for portion sizes, aim for about one and a half cups per person. This ensures everyone leaves satisfied. Enjoy this dish warm for the best flavor experience! {{image_4}} You can change nuts or seeds in your pesto. Try using almonds or sunflower seeds. Each option brings a unique taste. For those avoiding gluten, select gluten-free pasta. Options like brown rice or chickpea pasta work well. Both choices give a nice texture and flavor. To mix up the flavor, add different herbs like parsley or spinach. These herbs bring extra freshness to your dish. You can also incorporate various vegan cheeses. Options like cashew cheese or nutritional yeast can enhance the creamy taste. This helps create layers of flavor in your pesto. Make your dish fresh by using seasonal veggies. For example, zucchini or asparagus can add crunch and color. You can also try different tomatoes. Roasted tomatoes can bring a sweet touch, while cherry tomatoes add a pop of freshness. Finish with garnishes like pine nuts or extra basil for a lovely look. For the complete recipe, check the Full Recipe. After enjoying your vegan creamy pesto pasta, store any leftovers in an airtight container. This keeps the pasta fresh and tasty. Place it in the fridge right away. The best storage time is up to 3 days. Beyond that, the pasta may lose its flavor and texture. To reheat your pasta, the best method is using a stovetop. Heat a pan over medium heat. Add a splash of water or olive oil to keep it moist. Stir gently to warm it up. When reheating, avoid high heat, as this can dry out the sauce. You want to keep that creamy goodness intact. Enjoy your delicious meal again! To make vegan creamy pesto pasta, follow these simple steps: 1. Cook the Pasta: Bring salted water to a boil. Add 12 oz of your pasta and cook until tender. This usually takes about 8-12 minutes. Drain and set aside. 2. Prepare the Pesto: In a blender, add 2 cups of fresh basil leaves, 1/2 cup of soaked raw cashews, and 3 minced garlic cloves. Pour in 1/4 cup of nutritional yeast and 1 tablespoon of lemon juice. Add a pinch of sea salt and black pepper. Blend until smooth. 3. Emulsify with Olive Oil: While blending, slowly add 1/4 cup of extra virgin olive oil. Keep blending until creamy. If it’s too thick, add water, one teaspoon at a time. 4. Combine Pasta and Pesto: In a large bowl, mix the drained pasta with your creamy pesto. Toss gently to coat the pasta well. 5. Final Touches: Taste the mix and adjust the seasoning. Fold in 1 cup of halved cherry tomatoes for a fresh touch. 6. Serve: Serve warm with extra basil leaves on top. Enjoy your delicious vegan creamy pesto pasta! Yes, you can freeze vegan creamy pesto pasta. Here are some tips to keep it tasty: - Cool Before Freezing: Let the pasta cool down before packing it. - Use Airtight Containers: Store the pasta in airtight containers or freezer bags. - Leave Space: Leave some room in the container for the pasta to expand. - Label and Date: Always label your containers with the date. Use within 2-3 months for best quality. When ready to eat, thaw in the fridge overnight. Reheat gently on the stove or in the microwave. Add a splash of water if it seems dry. If you don’t have nutritional yeast, try these alternatives: - Grated Vegan Cheese: Use a dairy-free cheese for a similar flavor. - Ground Flaxseed: This can add a nutty taste, though it won't mimic the cheese flavor. - T nutritional yeast: You can use this if you want a similar profile. - Parmesan Substitute: Some brands offer vegan parmesan that works well in pesto. Each substitute will change the flavor a bit, so adjust to your taste! This blog post covered how to make vegan creamy pesto pasta. You learned about ingredients, cooking pasta, and blending the pesto. We explored tips for smooth texture and flavor. I shared variations to keep things fresh, plus storage and reheating advice. In the end, making this dish is quick and fun. Enjoy experimenting with flavors and textures. This pasta will please vegans and non-vegans alike!](https://goldendishy.com/wp-content/uploads/2025/07/928f57b2-1357-48f3-b20e-4d7b01e4c937-768x768.webp)


