Crispy Sweet Potato Wedges Perfectly Roasted Treat

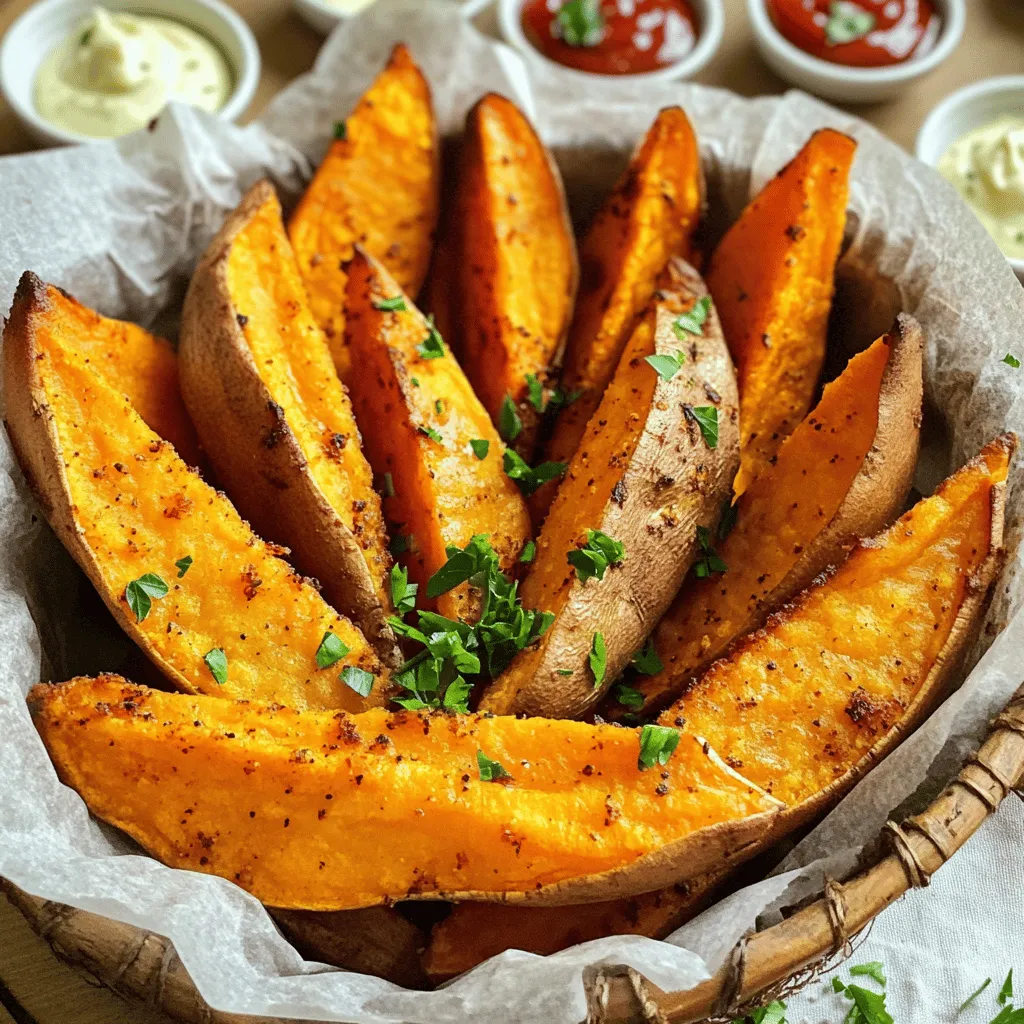
Are you ready to elevate your snack game? Crispy Sweet Potato Wedges are the perfect roasted treat! With just a few simple ingredients, like olive oil and spices, you can create a delightful dish that’s both healthy and satisfying. I’ll guide you step by step, sharing tips for crispiness and delicious serving ideas. Join me on this easy and tasty journey to crispy perfection!
Ingredients
Main Ingredients
– 2 large sweet potatoes
– 3 tablespoons extra virgin olive oil
– Seasoning mix: smoked paprika, garlic powder, onion powder, cayenne pepper
– Sea salt and freshly ground black pepper
Optional Garnishes
– Fresh parsley, finely chopped
Tools Needed
– Baking sheet
– Parchment paper
– Mixing bowl
– Knife and cutting board
When I prepare crispy sweet potato wedges, I love how simple it is to gather the ingredients. You only need a few key items, and they all work together for amazing flavor.
Start with the sweet potatoes. I choose large ones, as they yield more wedges. The olive oil is essential for roasting. It helps the spices stick and gives the wedges that nice crisp.
For the seasoning, I mix smoked paprika, garlic powder, onion powder, and cayenne pepper. This blend adds a smoky, savory kick that makes the sweet potatoes shine. Don’t forget the sea salt and black pepper to enhance all the flavors!
If you want to make them even prettier, consider adding fresh parsley as a garnish. It adds color and a fresh taste.
You will also need some basic tools. A baking sheet lined with parchment paper keeps the wedges from sticking. A mixing bowl helps combine the oil and spices. Finally, a knife and cutting board are needed to slice the sweet potatoes.Enjoy making these sweet potato wedges!
Step-by-Step Instructions
Preparing the Sweet Potatoes
– Preheat your oven to 425°F (220°C).
– Wash and peel the sweet potatoes.
– Slice the sweet potatoes into wedges. Aim for about 1/2 inch thick. This size helps them cook evenly.
Mixing Ingredients
– In a large mixing bowl, combine 3 tablespoons of extra virgin olive oil with the seasonings.
– These seasonings include 1 teaspoon of smoked paprika, 1 teaspoon of garlic powder, 1 teaspoon of onion powder, and 1/2 teaspoon of cayenne pepper.
– Add sea salt and freshly ground black pepper to taste.
– Whisk until the mixture is smooth and aromatic.
Baking the Wedges
– Toss the sweet potato wedges in the seasoned oil.
– Make sure each wedge gets a good coating.
– Arrange the wedges on a baking sheet lined with parchment paper.
– Be careful not to overcrowd the pan. This will help them crisp up nicely.
– Bake for 25-30 minutes. Remember to flip them halfway through for even cooking.
– They should be tender and golden brown when done.Enjoy your crispy sweet potato wedges!
Tips & Tricks
Achieving Extra Crispiness
To get your sweet potato wedges extra crispy, it’s key to avoid overcrowding the baking sheet. When you pile them too close, they steam instead of roast. This makes them soft, not crispy. Arrange the wedges in a single layer for the best results. If your oven has a convection setting, consider using it. This feature helps circulate hot air, creating a crispier finish on all sides.
Serving Suggestions
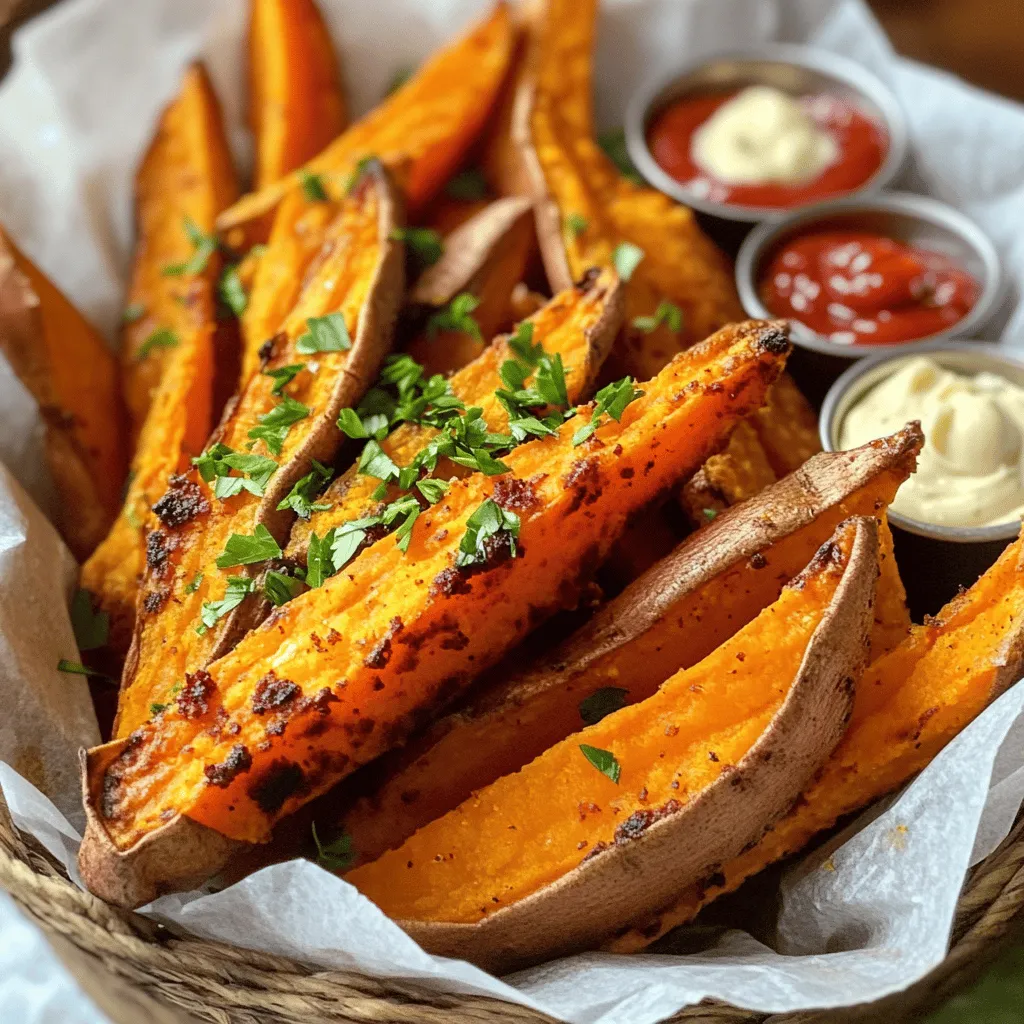
Presentation matters. Serve your crispy sweet potato wedges in a rustic basket lined with parchment paper. This not only looks nice but adds to the homemade feel. Pair your wedges with dipping sauces like creamy garlic aioli or spicy ketchup. These sauces bring out the flavor and make eating more fun!
Flavor Enhancements
Don’t be afraid to get creative with your seasonings! Try adding spices like chili powder or cumin for a kick. These spices can give your wedges a bold flavor. Another great idea is to sprinkle Parmesan cheese on top before baking. This gives a savory twist that takes your sweet potato wedges to the next level. Enjoy experimenting with flavors that you love!

Variations
Spicy Version
To make your sweet potato wedges spicy, increase the cayenne pepper. You can also sprinkle in some chili flakes for an extra kick. This adds heat and flavor that pairs well with the sweetness of the potatoes. If you love spice, this variation is a must-try!
Sweet Version
For a sweeter twist, sprinkle the wedges with cinnamon before baking. You can also drizzle honey on top after they come out of the oven. This adds a nice glaze and enhances their natural sweetness, creating a delightful treat that’s different from the savory version.
Herb-Infused Wedges
You can elevate the flavor by adding fresh herbs. Try mixing in chopped rosemary or thyme before baking. These herbs bring out a unique taste and aroma that pairs beautifully with the sweet potatoes. The result is a fragrant, herb-infused wedge that’s sure to impress.
Feel free to explore these variations and find your favorite way to enjoy crispy sweet potato wedges.
Storage Info
Store in the Refrigerator
After you enjoy your crispy sweet potato wedges, let them cool down. Then, place the cooled wedges in an airtight container. This keeps them fresh and ready for later. Store them in the fridge for up to three days.
Reheating Tips
To bring back that crispy texture, reheat the wedges in the oven or air fryer. Preheat your oven to 400°F (200°C) and bake for about 10 minutes. If using an air fryer, heat it to 375°F (190°C) and cook for 5-7 minutes. Both methods will make them crispy again.
Freezing Options
You can also freeze the sweet potato wedges for future meals. First, let them cool completely. Then, spread them out on a baking sheet and pop them in the freezer for about an hour. Once frozen, transfer them to a freezer-safe bag. To reheat, bake straight from the freezer, adding an extra 5-10 minutes to the cooking time. Enjoy your crispy sweet potato wedges later!
FAQs
How do I make sweet potato wedges crispy?
To make sweet potato wedges crispy, you need to focus on a few key steps. First, cut the sweet potatoes into uniform wedges. This helps them cook evenly. Aim for about 1/2 inch thickness.
Next, use enough oil. I recommend three tablespoons of extra virgin olive oil. Toss the wedges well to coat them, but don’t drown them in oil. Too much oil can lead to sogginess.
Set your oven to 425°F (220°C). Preheat it fully before baking. A hot oven helps create that crispy texture. Spread the wedges out on the baking sheet. Make sure they are not touching. This allows air to circulate around them. Flip the wedges halfway through cooking for even browning.
Can I use other types of potatoes?
Yes, you can use other types of potatoes. Regular potatoes work well. They have a similar texture and will also become crispy. You can choose russet or Yukon gold potatoes as great options.
Yams are another choice. They have a sweeter taste than regular potatoes. However, they may not crisp up as nicely. If you want a different flavor, sweet potatoes are a great option.
What dipping sauces pair well with sweet potato wedges?
Many dipping sauces pair nicely with sweet potato wedges. Here are some popular options:
– Garlic aioli: Creamy and rich, it complements the sweetness.
– Spicy ketchup: Adds a zesty kick to your wedges.
– Honey mustard: Balances sweetness with tang.
– Chipotle mayo: Gives a smoky and spicy flavor.
You can also make dips at home. For creamy garlic aioli, mix mayonnaise with minced garlic, lemon juice, and salt. Enjoy experimenting to find your favorite!
This article covered the steps to make delicious sweet potato wedges. We discussed the key ingredients, tools, and step-by-step instructions to cook them perfectly. With tips for crispiness and a variety of flavors, you can enjoy these wedges in many ways. Don’t forget to experiment with garnishes and sauces to elevate your dish. By following these guidelines, you can create tasty sweet potato wedges that impress anyone at your table. Enjoy making and sharing your tasty creations!


![To make crispy air fryer chicken wings, you need the right ingredients. Here’s what you’ll need: - 2 pounds of chicken wings - 1 tablespoon baking powder - 1 teaspoon garlic powder - 1 teaspoon onion powder - 1 teaspoon smoked paprika - 1 teaspoon salt - ½ teaspoon black pepper - ½ teaspoon cayenne pepper (optional, for heat) - 2 tablespoons olive oil These ingredients help create a crunchy skin and juicy meat. The spice mix is key to adding flavor. The baking powder helps crisp the skin. Garlic and onion powders give a savory kick. Smoked paprika adds a touch of smokiness. The salt enhances all the flavors. Black pepper brings a mild heat, while cayenne adds more spice if you like it hot. You can add a few optional touches to enhance your dish. Fresh parsley, finely chopped, looks great as a garnish. It adds color and freshness to the wings. As for dipping sauces, ranch or blue cheese dressing pairs perfectly with these wings. You can also try hot sauce for an extra kick! For the full recipe, check out the main article. Start by preheating your air fryer to 400°F (200°C). This step is key for crispy wings. Make sure the fryer is empty and clean. Let it heat up while you prepare the chicken. Rinse 2 pounds of chicken wings under cold water. Pat them dry with paper towels. Dry wings help get that nice crunch. In a bowl, mix these spices: - 1 tablespoon baking powder - 1 teaspoon garlic powder - 1 teaspoon onion powder - 1 teaspoon smoked paprika - 1 teaspoon salt - ½ teaspoon black pepper - ½ teaspoon cayenne pepper (optional for heat) After mixing, add the wings to the bowl. Drizzle with 2 tablespoons of olive oil. Toss well so every wing gets coated. You want flavor in every bite! Carefully place the wings in the air fryer basket in a single layer. Avoid crowding them. This allows air to circulate and crisp them up. Cook for 25-30 minutes. Flip the wings halfway through for even cooking. Look for a golden-brown color and crispy texture. After cooking, let the wings rest for a few minutes. This keeps them juicy. Finally, garnish with fresh parsley and serve with ranch or blue cheese dressing. Enjoy your crispy air fryer chicken wings! You can find the full recipe above. To make your wings extra crispy, start with dry wings. Pat them well with paper towels. The baking powder helps create crunch. It pulls moisture away and makes the skin crisp. Air fry at 400°F (200°C) for the best results. Flip them halfway through to ensure even cooking. If you want more crunch, give them a quick broil after cooking. One mistake is overcrowding the air fryer basket. This stops air from flowing around the wings. Cook in batches if needed. Another error is not drying the wings enough. Wet wings lead to soggy skin. Lastly, avoid using too much oil. A little goes a long way. The oil helps the spices stick and adds flavor without making them greasy. Use a good air fryer that heats evenly. A basket-style air fryer works well. You’ll need mixing bowls for seasoning the wings. A set of measuring spoons is also handy for accuracy. Finally, have a good pair of tongs for flipping the wings safely. A meat thermometer can help check if they are cooked through. For the full recipe, be sure to check the linked instructions. {{image_4}} You can easily change the flavor of your wings. To make Buffalo wings, toss them in hot sauce before serving. For BBQ wings, add your favorite BBQ sauce after cooking. You can even mix flavors! Try garlic parmesan by adding garlic powder and parmesan cheese. Each variation brings a new taste to your plate. Wing sizes can change the cooking time. For small wings, cook for 20-25 minutes. Medium wings need about 25-30 minutes. Large wings may take 30-35 minutes. Always check for doneness. The internal temperature should reach 165°F (74°C). This ensures safe and tasty wings. If you don't have an air fryer, you can bake or fry wings. To bake, set your oven to 425°F (220°C) and cook wings for 40-45 minutes. Flip them halfway. For frying, heat oil to 350°F (175°C) and fry wings for 8-10 minutes. Each method offers its own delicious crunch. For the complete recipe, check out the [Full Recipe]. After enjoying your crispy air fryer chicken wings, you may have some left. To keep them fresh, place the wings in an airtight container. This helps keep moisture out. Store them in the fridge for up to three days. If you want to keep them longer, consider freezing them. To reheat your wings, the air fryer is best. Preheat it to 375°F (190°C). Place the wings in the basket in a single layer. Heat them for 5 to 10 minutes. This method helps keep the wings crispy. You can also use an oven, but the air fryer works wonders for crispiness. If you freeze your wings, they can last for up to three months. Place the cooled wings in a freezer-safe bag. Remove as much air as possible before sealing. When you want to eat them, thaw the wings overnight in the fridge. Then, reheat them in the air fryer for a crispy finish. This is a great way to enjoy your crispy air fryer chicken wings later. For the full recipe, check out the complete guide! To get crispy wings, start with dry wings. Use paper towels to remove excess moisture. Baking powder is your secret weapon! It helps make the skin crisp. Coat the wings evenly with the spice mix. Arrange them in a single layer in the air fryer. Don’t overcrowd them; air needs to flow. Flip the wings halfway through cooking for even crispiness. Keep an eye on them for a nice golden color. Yes, you can use frozen chicken wings! Just remember to thaw them first. You can leave them in the fridge overnight or run them under cold water. After thawing, pat them dry. Then, follow the same steps in the Full Recipe. Cooking time may be a bit longer, so check for doneness. When serving crispy wings, ranch and blue cheese dressings are classic choices. They add creaminess and balance the spice. You can also try honey mustard for sweetness or hot sauce for extra heat. Experiment with different sauces to find your favorite match! In this post, we explored how to make crispy air fryer chicken wings. We covered essential ingredients, step-by-step instructions, and helpful tips. You can experiment with flavors like buffalo and BBQ, too. Remember to store leftovers properly and reheat safely for the best taste. Enjoy your tasty wings and share them with friends or family. Now, you have all the tools to make crispy wings at home whenever you want. Happy cooking!](https://goldendishy.com/wp-content/uploads/2025/06/40ff0ca3-8982-419f-b213-91fbe0dabedd-768x768.webp)

![- 1 lb Brussels sprouts, cleaned and halved - 3 tablespoons extra virgin olive oil - 4 cloves garlic, finely minced - 1/2 cup freshly grated Parmesan cheese - Zest of 1 lemon - 1/2 teaspoon red pepper flakes (optional for heat) - Fresh parsley for garnish - Sea salt and freshly cracked black pepper When I make Garlic Parmesan Brussels sprouts, I always start with the basics. Fresh Brussels sprouts are key. I buy about a pound and clean them well. Halving them helps them cook evenly and adds texture. Next, I add extra virgin olive oil. It coats the sprouts and gives them a rich flavor. I use about three tablespoons. Garlic is a must. Four cloves of finely minced garlic bring a great kick to the dish. Parmesan cheese is what makes these sprouts shine. I use half a cup of freshly grated cheese. The cheese melts and creates a tasty crust when roasted. For extra brightness, I often add zest from one lemon. It lifts the flavors and adds a fresh note. If you like heat, a half teaspoon of red pepper flakes gives the dish a spicy kick. Lastly, I season with sea salt and freshly cracked black pepper. These simple seasonings enhance the flavor without overpowering it. Don't forget to garnish with fresh parsley for a pop of color. This combination of ingredients makes a flavorful side dish that everyone will love. For the full recipe, check out the details above. - Preheat oven to 400°F (200°C). - Prepare a baking sheet with parchment paper. First, you want to make your oven hot. This helps cook the Brussels sprouts fast. The parchment paper makes cleanup simple and helps them roast better. - Mix Brussels sprouts with olive oil, garlic, and seasonings. Take your cleaned and halved Brussels sprouts and put them in a big bowl. Add the olive oil, minced garlic, sea salt, and black pepper. Toss everything together. Make sure each sprout gets coated nicely. This mix gives them great flavor. - Spread Brussels sprouts on the baking sheet. - Roast for 20 minutes, stirring halfway through. Now, spread the Brussels sprouts out on the baking sheet. Keep them in a single layer to roast evenly. Set the timer for 20 minutes, but remember to stir them halfway. This helps them get golden and crispy all over. - Add Parmesan cheese and return to oven for additional 5-7 minutes. - Garnish with parsley before serving. After roasting, take them out and sprinkle the grated Parmesan cheese on top. You can also add lemon zest and red pepper flakes if you like some heat. Put them back in the oven for 5-7 minutes. This melts the cheese and makes it bubbly. Once done, take them out and garnish with parsley. Serve them warm for the best taste. For the full details, check the Full Recipe. To get great Brussels sprouts, keep them in a single layer. This helps them cook evenly. If you crowd them, they will steam instead of roast. Stir them halfway through cooking. This ensures every side gets that nice, crispy brown. Want to brighten the dish? Add lemon zest before serving. It gives a fresh taste that pairs well with the savory flavors. You can also try different cheeses. Parmesan is great, but Pecorino Romano adds a nice twist. One common mistake is overcrowding the baking sheet. This leads to uneven cooking. Also, watch your cooking time. Undercooking makes them tough, while overcooking turns them mushy. Follow the recipe closely for the best results. For the full recipe, check out the details above. {{image_4}} To switch up the taste, try using different cheeses. Pecorino Romano adds a salty, sharp flavor. It brings a new twist to the dish. If you want a vegan option, use nutritional yeast. It gives a cheesy flavor without dairy. Plus, it's packed with nutrients! Adding protein can make your dish heartier. Toss in crispy bacon or pancetta for a savory touch. Their rich flavor pairs well with the sprouts. You can also add cooked chicken pieces. This makes the dish more filling and satisfying. For a vegetarian option, substitute the cheese with vegan alternatives. There are many great cheese substitutes that melt well. Use plant-based oil for roasting instead of olive oil. This keeps the dish fully vegan while still being delicious. For the full recipe, check out Garlic Parmesan Brussels Sprouts Delight! Store your Garlic Parmesan Brussels Sprouts in an airtight container. Refrigerating them helps keep their flavor fresh. They are best eaten within 3-5 days for optimal taste and texture. To restore crispiness, reheat the sprouts in the oven. Set your oven to 350°F (175°C) and bake for about 10-15 minutes. If you're in a hurry, you can use the microwave. However, be aware that the texture may suffer a bit. You can freeze Brussels sprouts before roasting for long-term storage. This way, they maintain their flavor. To reheat, simply thaw them first, then roast as per the [Full Recipe]. This will help you enjoy them fresh and tasty! To make your Brussels sprouts crispy, follow these tips: - Use high heat: Roasting at 400°F (200°C) gives the best results. - Spread them out: Place Brussels sprouts in a single layer on your baking sheet. - Don’t overcrowd: Give them room to breathe, which helps them roast better. - Toss halfway: Stir them at the halfway point of roasting for even browning. - Add cheese last: Sprinkle Parmesan cheese towards the end of the cooking time so it melts but does not burn. Yes, you can prepare Brussels sprouts in advance. Here’s how: - Clean and cut: Clean and halve the Brussels sprouts the day before. - Store properly: Keep them in an airtight container in the fridge. - Roast fresh: When ready to eat, toss them with oil and seasonings, and roast right before serving. Garlic Parmesan Brussels sprouts go well with many dishes. Here are a few: - Roasted chicken: The savory flavors complement crispy chicken well. - Grilled steak: The rich flavors of steak pair nicely with the sprouts. - Pasta dishes: They add a fresh, crunchy element to creamy pastas. Yes, Brussels sprouts are very healthy! They are: - Low in calories: Great for weight management. - High in fiber: Good for digestion. - Rich in vitamins: They provide vitamin C, vitamin K, and folate. Plus, they have antioxidants that help your body fight disease. Yes, you can use frozen Brussels sprouts. Here are some tips: - Thaw first: Thaw them completely before cooking for even roasting. - Pat dry: Remove moisture with a paper towel to help them crisp up. - Adjust cooking time: You may need to roast them a bit longer to achieve the same crispiness. For the full recipe, check out Garlic Parmesan Brussels Sprouts Delight. Garlic Parmesan Brussels sprouts are simple to make and full of flavor. We covered essential ingredients like fresh Brussels sprouts, olive oil, and cheese. You learned step-by-step how to prepare, toss, and roast them. Plus, I shared tips for perfecting your dish and variations to keep it exciting. Remember, the key to great Brussels sprouts is even cooking and the right flavors. Take your time to enjoy this healthy side dish. You’ll love the taste and how easy it is to make!](https://goldendishy.com/wp-content/uploads/2025/05/a403e98b-d04b-46c1-bd99-9a315ef16e11-768x768.webp)
