Crispy Sweet Potato Rounds Flavorful and Easy Snack
. This link has all the details you need to make this tasty snack. We covered all the steps to make crispy sweet potato rounds. You learned the key ingredients, preparation, and baking tips. Remember to space the slices for crispiness and try different seasonings for variety. Store leftovers properly for the best flavor. If you have questions, refer to the FAQs for more help. Enjoy creating a delicious snack or side dish that impresses everyone!](https://goldendishy.com/wp-content/uploads/2025/06/bfac51d6-fd22-4fd5-a48f-0e12de6b57a8.webp)
Want a scrumptious snack that’s both tasty and easy to make? You’ll love these crispy sweet potato rounds! With simple ingredients and fun flavors, this dish is perfect for any time of day. I’ll guide you through every step, from prep to baking, and share tips for getting that perfect crunch. Say goodbye to boring snacks and hello to a new favorite! Let’s dive in!
Ingredients
To make crispy sweet potato rounds, you need some simple ingredients. Here’s what you’ll gather:
– 2 large sweet potatoes, sliced into 1/4 inch rounds
– 3 tablespoons olive oil
– 1 teaspoon garlic powder
– 1 teaspoon smoked paprika
– 1/2 teaspoon ground cumin
– 1/2 teaspoon salt
– 1/4 teaspoon black pepper
– 1 tablespoon fresh rosemary, finely chopped (or 1 teaspoon dried)
– Optional: A sprinkle of chili flakes for a kick
These ingredients work together to create a delightful snack. The sweet potatoes give natural sweetness and a creamy texture. Olive oil adds a rich flavor and helps with crispiness. The seasonings bring warmth and depth, making each bite exciting.
I love using fresh rosemary because it adds a fragrant touch. If you like some heat, the chili flakes will bring a nice zing. This recipe is perfect for sharing or enjoying on your own.You’ll find everything you need to whip up this tasty treat!
Step-by-Step Instructions
Preparation Steps
1. Preheat your oven to 425°F (220°C). This helps the sweet potatoes cook evenly.
2. Line a baking sheet with parchment paper. This keeps the rounds from sticking.
3. In a bowl, mix olive oil, garlic powder, smoked paprika, ground cumin, salt, black pepper, and fresh rosemary. This will be your tasty marinade.
4. Add the sweet potato rounds to the bowl. Toss them until each round is coated well with the marinade.
Baking Process
1. Place the sweet potato rounds on the baking sheet in a single layer. Make sure they are not touching. This helps them get crispy.
2. Bake them for 25-30 minutes. Halfway through, flip each round. This ensures they cook evenly.
3. Check for doneness. They should be golden brown and tender. If you want spice, add chili flakes in the last 5 minutes of baking.
4. After baking, let them cool for a few minutes. This will make them crunchier.
Tips & Tricks
Achieving Extra Crispiness
To get your sweet potato rounds super crispy, spacing is key. When you lay them out on the baking sheet, make sure they don’t touch. This helps the hot air circulate around each round, creating a nice crunch. If they overlap, they’ll steam instead of bake, leading to a softer texture.
Flipping the rounds halfway through baking is another important step. This ensures both sides get equal heat and crispness. Use a spatula to carefully turn each round. It’s a simple move that makes a big difference in texture.
Serving Suggestions
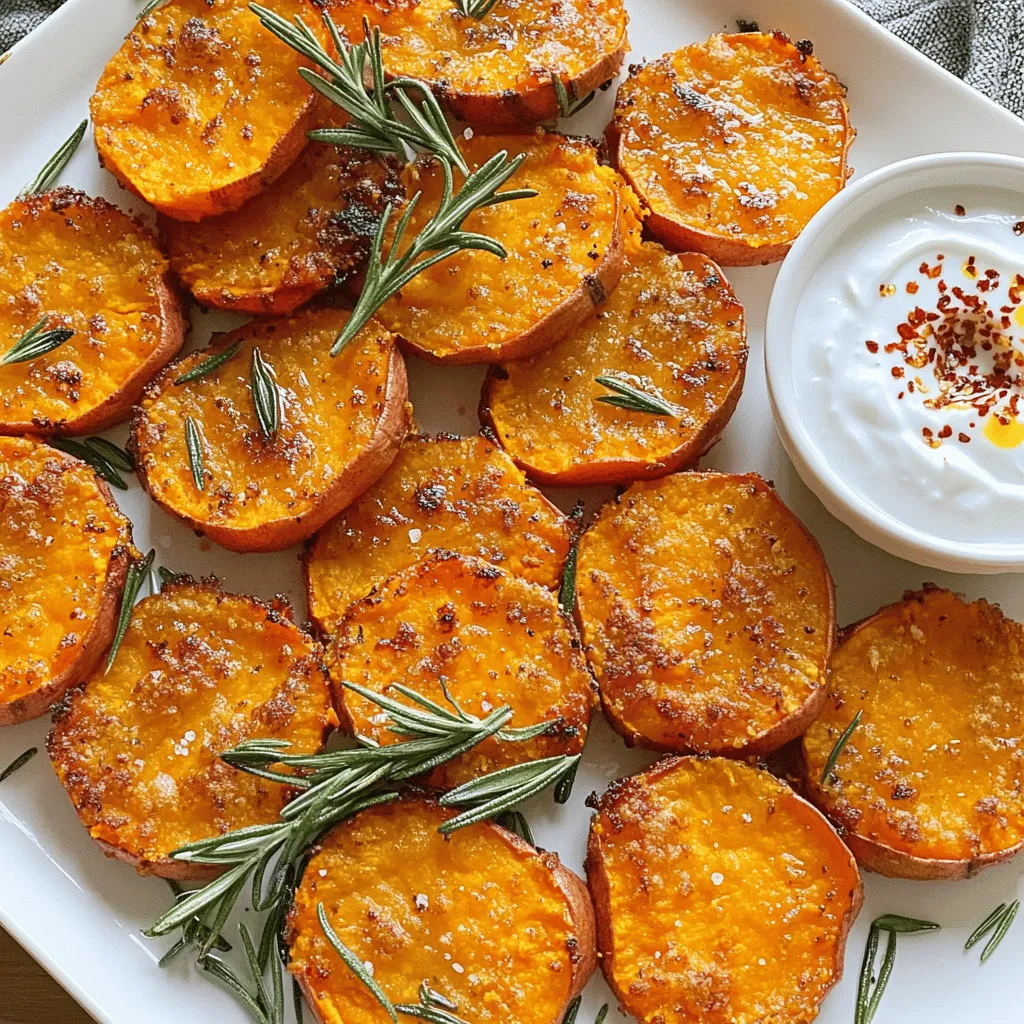
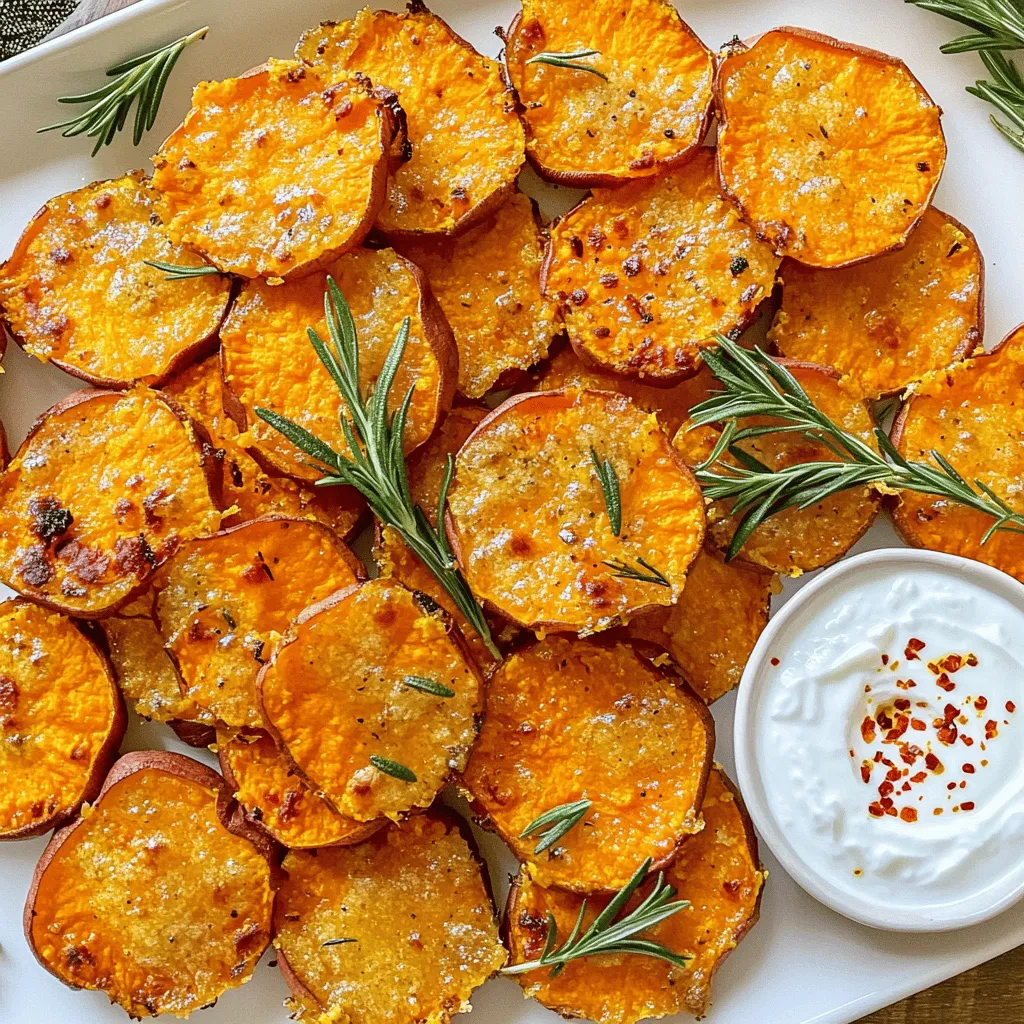
For a beautiful presentation, serve your crispy sweet potato rounds on a large, colorful platter. This makes them stand out even more. Add some fresh rosemary on top for a pop of color.
Don’t forget about dipping sauces! A creamy yogurt or zesty avocado dip pairs well with the sweet flavors. You can also try a spicy sauce for an added kick. Having a dip next to your rounds invites everyone to enjoy them even more.

Variations
Flavor Variations
You can switch up the flavors of crispy sweet potato rounds easily. Try using different herbs and spices to make them unique. For a classic taste, use rosemary and garlic. For something spicy, add chili powder or cayenne pepper. You can even sprinkle some cinnamon for a sweet twist.
You can also choose between cooking methods. Baking gives a nice crisp, while frying can add a crunchy texture. If you fry them, watch the time closely. You want them golden, not burnt. Each method has its perks, so feel free to try both!
Ingredient Substitutions
If you want a gluten-free option, you’re in luck! Sweet potatoes are naturally gluten-free. You can also make these rounds vegan by simply omitting any dairy-based dips.
Want to try different potatoes? You can use regular potatoes, but they might cook a bit differently. Yukon Golds or red potatoes can work well too. Just keep an eye on the baking time, as they may take longer to crisp up. Enjoy experimenting with these swaps!
Storage Info
How to Store Leftovers
To store your crispy sweet potato rounds, let them cool completely. Place them in an airtight container. You can keep them in the fridge for up to 3 days. If you want to keep them longer, consider freezing. Use freezer-safe bags or containers. Just remember to label them with the date.
Reheating Instructions
To reheat and keep them crispy, use the oven. Preheat it to 350°F (175°C). Spread the sweet potato rounds on a baking sheet. Bake for about 10 minutes. This helps restore their crunch. You can also use an air fryer. Set it to 350°F (175°C) and cook for 5-7 minutes. Enjoy your delicious snack again!
FAQs
Can I use other types of potatoes?
Yes, you can! Other potatoes like russet or red potatoes work well. They will taste different, but they can still be crispy and delicious. Just make sure to slice them to the same thickness as the sweet potatoes. This helps them cook evenly.
How long does it take to bake sweet potato rounds?
Baking sweet potato rounds usually takes 25 to 30 minutes. If you cut them thicker, they may need more time. Flip them halfway through to get that nice crisp on both sides. Look for a golden brown color to know they are done.
What can I serve with crispy sweet potato rounds?
These rounds pair well with many things! Try serving them with yogurt dip, guacamole, or even salsa. You can also enjoy them alongside grilled chicken, fish, or salads. Their sweet flavor and crispy texture make them a great side for any meal.This link has all the details you need to make this tasty snack.
We covered all the steps to make crispy sweet potato rounds. You learned the key ingredients, preparation, and baking tips. Remember to space the slices for crispiness and try different seasonings for variety. Store leftovers properly for the best flavor. If you have questions, refer to the FAQs for more help. Enjoy creating a delicious snack or side dish that impresses everyone!
. This link has all the details you need to make this tasty snack. We covered all the steps to make crispy sweet potato rounds. You learned the key ingredients, preparation, and baking tips. Remember to space the slices for crispiness and try different seasonings for variety. Store leftovers properly for the best flavor. If you have questions, refer to the FAQs for more help. Enjoy creating a delicious snack or side dish that impresses everyone!](https://goldendishy.com/wp-content/uploads/2025/06/bfac51d6-fd22-4fd5-a48f-0e12de6b57a8-300x300.webp)

. 1. Heat olive oil in a large skillet over medium heat. 2. Add finely chopped red onion to the skillet. 3. Sauté the onion for 2-3 minutes until it becomes soft. 4. Now, add diced red and green bell peppers to the skillet. 5. Cook for 3-4 minutes until the peppers soften. 6. Stir in corn kernels and black beans. 7. Season with ground cumin, smoked paprika, garlic powder, salt, and pepper. 8. Mix well and cook for 5 more minutes until hot. 1. Heat another skillet over medium heat. 2. Place a tortilla in the skillet and sprinkle ¼ cup of cheese on it. 3. Layer ½ cup of the veggie mixture over the cheese. 4. Top with another ¼ cup of cheese for extra flavor. 5. Fold the tortilla in half, covering the filling. 6. Cook for 3-4 minutes until golden brown on one side. 7. Flip the quesadilla gently using a spatula. 8. Cook for another 3-4 minutes until crispy and cheese melts. - Keep the heat at medium for a crispy texture. - Use a spatula to flip the quesadilla easily. - Check for doneness by ensuring both sides are golden brown. These simple steps make it easy to create loaded veggie quesadillas at home. For the full recipe, refer to the recipe section above. Enjoy the process! Choosing the right cheese is key. I love a mix of cheddar and mozzarella. This mix melts well and adds great flavor. You want the cheese to stretch and pull when you take a bite. Balancing spices and seasonings is also important. Start with the basics like salt and pepper. Then, add spices like cumin and smoked paprika. Adjust them to fit your taste. A little heat can come from red pepper flakes if you like it spicy. Day-to-day storage tips help keep your quesadillas fresh. Place leftovers in an airtight container. Keep them in the fridge for up to three days. You can also wrap them tightly in foil or plastic wrap. Reheating suggestions for best flavor include using the oven or skillet. For the oven, preheat to 350°F. Heat the quesadillas for about 10 minutes. In a skillet, cook them over medium heat. This method keeps them crispy and delicious. Plating ideas can make your meal pop. Arrange the quesadillas in a fan shape on a colorful plate. This makes them look fun and inviting. Adding colorful garnishes like fresh cilantro adds a nice touch. You can also sprinkle some diced tomatoes or avocado on top. These small changes make your meal look gourmet. Enjoy your loaded veggie quesadillas! For the full recipe, check out the Loaded Veggie Quesadillas 🥑 section. {{image_4}} You can make loaded veggie quesadillas even more fun. Here are some easy ideas. Want some extra protein? You can add grilled chicken or tofu. Just cook them first, then slice and add to your quesadilla mix. If you like seafood, try shrimp. Cook them quickly and toss them in for a tasty twist. Spices can change the game. Try different spices like chili powder or oregano. They add depth and warmth. You can also add sauces or marinades. A dash of hot sauce or a sprinkle of lime juice can elevate your quesadillas. Need gluten-free options? Use gluten-free tortillas. They work great and taste just as good. If you're vegan, swap out the cheese for a plant-based version. There are many tasty dairy-free cheeses out there that melt well. You can find the full recipe for loaded veggie quesadillas to get started on these variations. To keep your uncooked quesadillas fresh, wrap them tightly in plastic wrap. This keeps out moisture and air. You can also place them in an airtight container. If you want to freeze them, stack the quesadillas with parchment paper in between. This prevents them from sticking together. Uncooked quesadillas can stay in the freezer for up to three months. After cooking, let the quesadillas cool completely. Then, wrap them in foil or place them in a container. Store them in the fridge for up to four days. I find they taste best within the first two days. If you notice any odd smell or mold, it’s best to toss them. To reheat, use an oven or a skillet. For the oven, preheat to 350°F (175°C). Place the quesadilla on a baking sheet and heat for about 10 minutes. If using a skillet, add a little oil and heat over medium heat for about 3-4 minutes on each side. Leftover quesadillas can also become a fun breakfast. Chop them up and add them to scrambled eggs for a tasty twist. For more ideas, check out the Full Recipe. Making loaded veggie quesadillas is quick and easy. It takes about 10 minutes to prep. Cooking them takes around 15 minutes. In total, you can make them in about 25 minutes. This makes them a great choice for busy days or quick meals. Yes, you can prep loaded veggie quesadillas in advance. To do this, cook the veggie mixture and let it cool. Then, assemble the quesadillas but do not cook them. Store them in an airtight container in the fridge for up to two days. You can also freeze them for a month. When ready to eat, just cook them straight from the fridge or freezer. This makes meal prepping super easy! You can mix and match many veggies in quesadillas. Some great options include: - Spinach or kale for a green boost - Mushrooms for a savory taste - Zucchini or squash for extra texture - Jalapeños for a spicy kick - Tomatoes for freshness Feel free to get creative! Each veggie adds its own flavor and texture. You can make quesadillas that fit your taste perfectly. For more ideas, check out the Full Recipe. These loaded veggie quesadillas are fun and easy to make. We explored essential ingredients like black beans, bell peppers, and corn. I’ve shared tips for perfect texture, storing leftovers, and creative garnishes. Remember, you can customize them with protein or spices to suit your taste. In the end, these quesadillas are more than just food; they bring flavor and joy. Enjoy making them your own!](https://goldendishy.com/wp-content/uploads/2025/06/a7c52493-2108-4a2f-8f90-ee80e7df7b2a-768x768.webp)


