Crispy Roasted Chickpeas Healthy and Easy Snack Recipe

Looking for a healthy snack that’s both tasty and easy to make? Crispy roasted chickpeas might just be your new go-to! Packed with protein and flavor, these crunchy bites are perfect for any diet. In this article, I’ll guide you step-by-step through the simple process of making them, along with tips for maximum crispiness and flavor. Let’s dive in and make your snacking experience a delight!
Ingredients
List of Ingredients
– 1 can (15 oz) chickpeas, thoroughly drained and rinsed
– 2 tablespoons extra-virgin olive oil
– 1 teaspoon smoked paprika
– 1 teaspoon ground cumin
– 1/2 teaspoon garlic powder
– 1/2 teaspoon onion powder
– 1/2 teaspoon fine sea salt
– 1/4 teaspoon freshly ground black pepper
– 1/4 teaspoon cayenne pepper (optional for an extra kick)
– Fresh herbs for garnish (choose either parsley or cilantro)
Nutritional Benefits of Chickpeas
Chickpeas are not just tasty; they are also very good for you. They are high in protein and fiber. This makes them great for filling you up. They also contain many vitamins and minerals, like iron and magnesium. Plus, they are low in calories. Enjoying chickpeas can help you feel full without overloading on calories.
With this recipe, you get a healthy snack that is easy to make.
Step-by-Step Instructions
Preparation Steps
1. Preheat your oven: Set your oven to 400°F (200°C). Preheating helps the chickpeas roast evenly and become crispy.
2. Prepare and dry the chickpeas: Open a can of chickpeas (15 oz), drain, and rinse them well. After rinsing, use a clean towel or paper towels to dry them thoroughly. This step is very important. Dry chickpeas will become crispier when roasted.
Cooking Steps
1. Combine chickpeas with seasoning: In a large bowl, mix the dry chickpeas with 2 tablespoons of extra-virgin olive oil. Add 1 teaspoon of smoked paprika, 1 teaspoon of ground cumin, 1/2 teaspoon of garlic powder, 1/2 teaspoon of onion powder, 1/2 teaspoon of fine sea salt, 1/4 teaspoon of freshly ground black pepper, and 1/4 teaspoon of cayenne pepper (if you want some heat). Stir until every chickpea is covered with the spices.
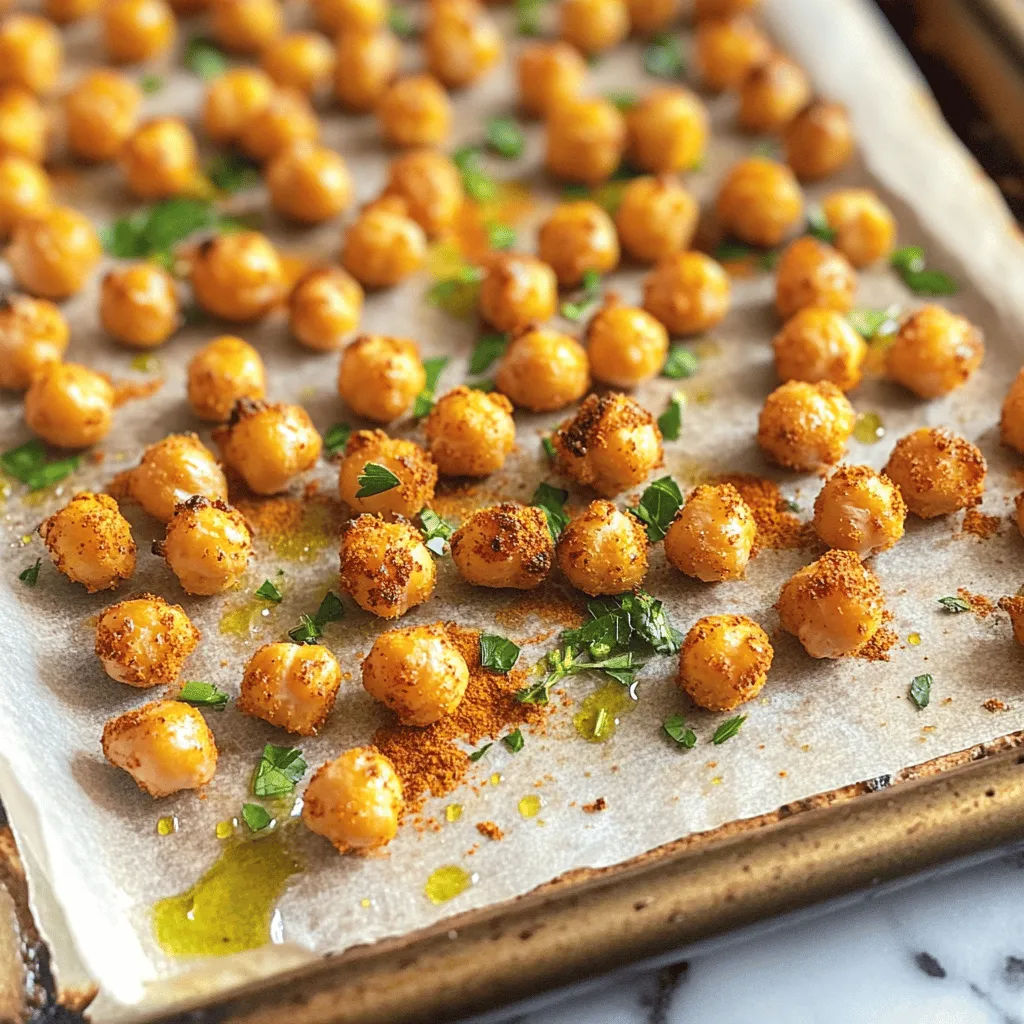
2. Spread on a baking sheet: Line a baking sheet with parchment paper for easy cleanup. Spread the seasoned chickpeas in a single layer on the sheet. Avoid overcrowding them, as this helps them roast properly.
3. Roasting in the oven: Place the baking sheet in the oven. Roast the chickpeas for 25-30 minutes. About halfway through, shake the pan to move the chickpeas around. This helps them brown evenly.
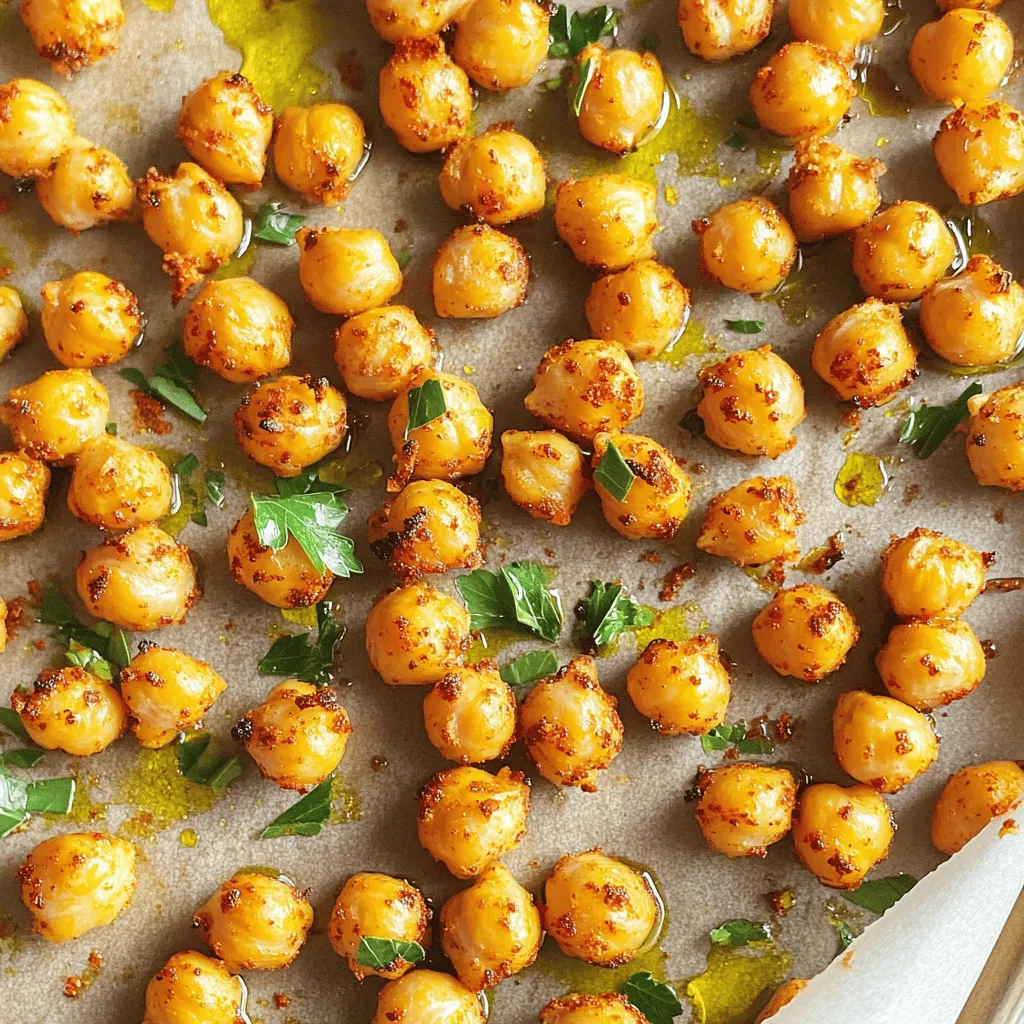
4. Checking for doneness: The chickpeas are done when they are golden brown and crunchy. Keep an eye on them to avoid burning.
Final Touches
1. Cooling and garnishing: Once roasted, take the baking sheet out of the oven. Let the chickpeas cool for around 5 minutes. They will crisp up even more as they cool. Before serving, sprinkle freshly chopped herbs like parsley or cilantro on top for color and taste.
This recipe will give you a tasty and healthy snack.
Tips & Tricks
Achieving Maximum Crispiness
To get the best crunch from your chickpeas, start by drying them well. After rinsing, pat them with a towel until they are completely dry. Moisture is the enemy of crispiness! Next, set your oven to 400°F (200°C). This high heat helps to make them golden and crisp. Roast them for 25 to 30 minutes. Remember to shake the pan halfway through cooking. This way, they brown evenly.
Flavor Enhancements
You can take your chickpeas to the next level with spices. Try adding smoked paprika for a warm flavor. Ground cumin brings a nice earthiness. If you want heat, cayenne pepper works well. You can also add fresh herbs like parsley or cilantro for a pop of color. Citrus zest, such as lemon or lime, can brighten the taste and make your snack even more special.
Serving Suggestions
Crispy roasted chickpeas make a great snack on their own. They pair well with dips like hummus or guacamole. For gatherings, serve them in a rustic bowl or on a chic platter. They look great and invite people to dig in. You can also sprinkle some extra herbs on top for a beautiful finish.

Variations
Flavor Variations
You can easily change the flavor of your crispy roasted chickpeas. Try a spicy Moroccan-inspired version by adding these spices:
– 1 teaspoon ground cinnamon
– 1 teaspoon ground coriander
– 1/2 teaspoon chili powder
Mix these spices with the basic recipe for a warm, exotic taste.
You can also make herb-infused roasted chickpeas. Just add fresh herbs like:
– 1 teaspoon dried oregano
– 1 teaspoon dried thyme
These herbs will give your chickpeas a fresh and earthy flavor.
Alternative Cooking Methods
If you want crispy results without using the oven, try the air fryer. Set it to 400°F (200°C) and cook for 15-20 minutes. Shake the basket halfway for even cooking.
You can also use a stovetop skillet. Heat a little olive oil in the skillet. Add seasoned chickpeas and cook over medium heat. Stir often until they are golden and crispy, about 10-12 minutes.
Dietary Adjustments
These chickpeas fit many diets. They are vegan and gluten-free. You can enjoy them as a healthy snack without worry. Feel free to swap spices based on your taste. For example, use smoked paprika for a rich flavor or skip the cayenne for less heat.
Storage Info
Short-Term Storage
To keep your crispy roasted chickpeas fresh, store them in an airtight container. This helps prevent moisture from making them soggy. I like to use glass jars or plastic containers with tight lids. Make sure the chickpeas are completely cool before sealing them. This way, they stay crunchy longer.
Long-Term Storage
If you want to keep them for a while, freezing is a great option. First, let the chickpeas cool completely. Then, spread them out on a baking sheet and freeze them for about one hour. Once frozen, transfer them to a freezer bag. When you’re ready to enjoy, reheat them in the oven at 400°F (200°C) for about 10 minutes. This helps restore their crispness.
Shelf Life
Crispy roasted chickpeas last about one week when stored properly. If you freeze them, they can last for up to three months. Just remember to check for any signs of moisture before eating. Enjoy your delicious snack!
FAQs
How long do I roast chickpeas for maximum crunch?
Roast chickpeas for 25 to 30 minutes. Check for a golden-brown color. Shake the pan halfway through to ensure even cooking. This will help all sides become crisp.
Can I use dried chickpeas instead of canned?
Yes, you can! Just soak dried chickpeas overnight. Cook them until tender before roasting. This takes more time but gives you control over the texture.
What are some common mistakes to avoid when roasting chickpeas?
Avoid these mistakes for the best results:
– Not drying chickpeas well.
– Overcrowding the baking sheet.
– Not shaking the pan halfway through.
These errors can lead to soggy chickpeas.
Are crispy roasted chickpeas healthy?
Absolutely! Crispy roasted chickpeas are a great snack. They are high in protein and fiber. Plus, they are low in calories. Enjoy them guilt-free!
How can I make them spicy?
To spice things up, add extra cayenne pepper. You can also use chili powder or hot sauce. Toss the chickpeas with your chosen spice before roasting. Adjust the amount to match your heat preference.
Crispy roasted chickpeas are easy to make and packed with nutrients. In this post, I shared the best ingredients, step-by-step cooking instructions, and helpful tips for perfect results. You learned about flavor variations and storage options to keep your chickpeas fresh.
Remember, roasting chickpeas can be a fun way to add crunch and flavor to meals. With practice, you can create your favorite snacks in no time. Enjoy the many ways to showcase this healthy ingredient!


. Prep Time: 15 minutes Total Time: 1 hour 30 minutes Servings: 6 This potato salad is great for summer meals. You can serve it at picnics, barbecues, or potlucks. I love to garnish it with extra dill and chives for a colorful touch. Enjoy! In this post, I shared how to make a classic potato salad. We covered the ingredients, tips for cooking the potatoes, and mixing the dressing. I showed you how to add flavors and enhance your dish. Remember, you can store leftovers correctly or even try tasty variations. Potato salad is easy to make and perfect for any meal. Enjoy your cooking adventure!](https://goldendishy.com/wp-content/uploads/2025/07/3d114334-7953-4aa3-9cf8-99466b57d4b6-768x768.webp)

![To create this vibrant salad, gather these fresh ingredients: - 1 medium zucchini, sliced into half-moons - 1 bell pepper (red or yellow for sweetness), chopped into bite-sized pieces - 1 small eggplant, diced into uniform cubes - 1 cup cherry tomatoes, halved for a burst of sweetness - 1 red onion, cut into wedges for flavor - 3 tablespoons balsamic vinegar for a tangy kick - 2 tablespoons extra-virgin olive oil for richness - 1 tablespoon honey to balance the acidity - Sea salt and freshly cracked pepper to taste - 1 teaspoon dried oregano for an aromatic touch - 1 cup mixed greens (arugula, spinach, or your favorites) - ¼ cup feta cheese, crumbled (optional, for creaminess) - Fresh basil leaves for a fragrant garnish Not all ingredients need to be set in stone. Here are some smart swaps: - Use yellow squash instead of zucchini. The texture remains similar. - Any color bell pepper works well; green adds a more bitter taste. - Swap eggplant for mushrooms for a different texture and flavor. - Try different vinegars, like red wine vinegar, if balsamic is not available. - Maple syrup can replace honey for a vegan option. - For a dairy-free choice, omit feta cheese or use a vegan alternative. Choosing the right veggies makes a big difference. Here’s how to select the best: - Look for firm zucchini with shiny, smooth skin. Avoid soft spots. - Choose bell peppers that feel heavy and have smooth skin. - For eggplant, pick ones that are shiny and feel heavy for their size. - Cherry tomatoes should be plump and free from blemishes. - Pick red onions that are firm and have a vibrant color. - Visit local farmers' markets for the freshest produce whenever possible. These small choices can bring your Balsamic Roasted Vegetable Salad to life. For the complete recipe, check the [Full Recipe]. First, set your oven to 425°F (220°C). This high heat helps the veggies roast nicely. While the oven heats, grab a large mixing bowl. Add your sliced zucchini, chopped bell pepper, diced eggplant, halved cherry tomatoes, and red onion wedges. Mix them well. This step ensures every bite is packed with flavor. Next, take a small bowl. In it, combine 3 tablespoons of balsamic vinegar, 2 tablespoons of extra-virgin olive oil, and 1 tablespoon of honey. Add a pinch of sea salt and freshly cracked pepper. Finally, mix in 1 teaspoon of dried oregano. Whisk these ingredients together until smooth. This vinaigrette will bring a tangy and sweet kick to your salad. Now, line a baking sheet with parchment paper. Spread your mixed vegetables in a single layer. Make sure they are not crowded, as this helps them roast evenly. Place the baking sheet in the oven and roast for 20-25 minutes. Stir the vegetables halfway through. This mix ensures they cook evenly and get that lovely caramelization. Once the veggies are tender and golden, take them out and let them cool for a few minutes. In a large serving bowl, add your fresh mixed greens. Then, toss in the roasted vegetables. Gently mix until the greens and vegetables blend well. If you like, sprinkle ¼ cup of crumbled feta on top. Finally, add fresh basil leaves for a fragrant touch. Enjoy your colorful and tasty salad! For the full recipe, check out the details provided above. To get the best flavor, cut your vegetables into similar sizes. This step helps them roast evenly. Place them in a single layer on the baking sheet. Crowding the pan can cause steaming instead of roasting. Stir the vegetables halfway through cooking. This simple action helps them brown nicely on all sides. Always dress your salad right before serving. This keeps the greens fresh and crunchy. Use just enough dressing to coat the veggies. A light touch prevents sogginess. When mixing, toss gently to avoid bruising the greens. If you prefer more flavor, add more balsamic vinegar or a splash of lemon juice. Fresh herbs can elevate your salad. Try adding chopped parsley or cilantro for a fresh twist. You can also add a pinch of red pepper flakes for a kick. Experiment with spices like cumin or paprika for unique flavors. These additions can make your salad truly special and memorable. {{image_4}} You can mix and match veggies to suit your taste. Try adding carrots for sweetness or broccoli for crunch. Swap in asparagus for a fresh twist. You can even use sweet potatoes for a hearty base. The options are endless! Each veggie brings its own flavor and texture. You can create a new salad every time. Want to make this salad filling? Add proteins like grilled chicken or shrimp. Chickpeas or black beans also work well for plant-based options. They boost the protein without altering the salad's great taste. If you want a creamy touch, add avocado slices. These options turn your salad into a complete meal. This salad is easy to make vegan and gluten-free. Just skip the feta cheese or use a plant-based alternative. Use gluten-free grains like quinoa for added texture. You can also mix in nuts or seeds for crunch. These simple swaps keep your salad tasty while meeting dietary needs. Enjoy the fresh flavors without worry! For the full recipe, check out the Balsamic Roasted Vegetable Salad. Store leftover Balsamic Roasted Vegetable Salad in an airtight container. Make sure the salad is cool before sealing it. This keeps the flavors fresh and prevents sogginess. Try to eat the leftovers within three days for the best taste. I recommend using glass containers for storing your salad. Glass is non-reactive and helps keep the food fresh longer. If you prefer plastic, choose BPA-free containers. Make sure they fit your salad snugly to limit air exposure. To reheat roasted vegetables, place them on a baking sheet. Heat your oven to 350°F (175°C) and roast for about 10-15 minutes. This keeps the veggies crispy and warm. You can also reheat them in a skillet over medium heat for a few minutes. Just stir often to avoid burning. If you want to add a little moisture, a splash of balsamic vinegar can help revive the flavors. Enjoy your meal! Yes, you can make this salad ahead. Roast the veggies and prepare the salad. Keep the roasted veggies and greens separate. Store them in the fridge. Mix them just before serving for the best taste and texture. Mixed greens work great with roasted veggies. I love using arugula, spinach, or kale. They add crunch and a fresh taste. You can choose any greens you enjoy. Just pick ones that won’t wilt fast. Balsamic roasted vegetables last about 3 to 5 days in the fridge. Store them in an airtight container. The flavors will deepen over time, making them even tastier. Just reheat them before serving for a warm dish. You can use frozen vegetables, but fresh is best. Frozen veggies may release more water while cooking. If using frozen, roast them a bit longer. This helps them get nice and crispy. Balsamic roasted vegetable salad is easy and fun to make. We covered the ingredients, step-by-step instructions, and tips for the best results. You can customize this salad with different veggies or proteins. Proper storage keeps leftovers fresh, and I shared FAQs to answer common questions. Try this salad for a tasty and healthy meal. Enjoy making it your own!](https://goldendishy.com/wp-content/uploads/2025/06/26f5156f-9b75-49f6-aa69-260bfc3a782d-768x768.webp)

