Crispy Garlic Parmesan Potato Wedges Easy Indulgence

Looking for a tasty treat that’s easy to make? You’ll love these Crispy Garlic Parmesan Potato Wedges! With just a few simple ingredients, you can whip up a savory snack or side dish that will wow your taste buds. Perfectly seasoned and baked to golden perfection, these wedges will become a favorite in your kitchen. Let’s dive into this simple recipe that combines flavor, crunch, and comfort!
Ingredients
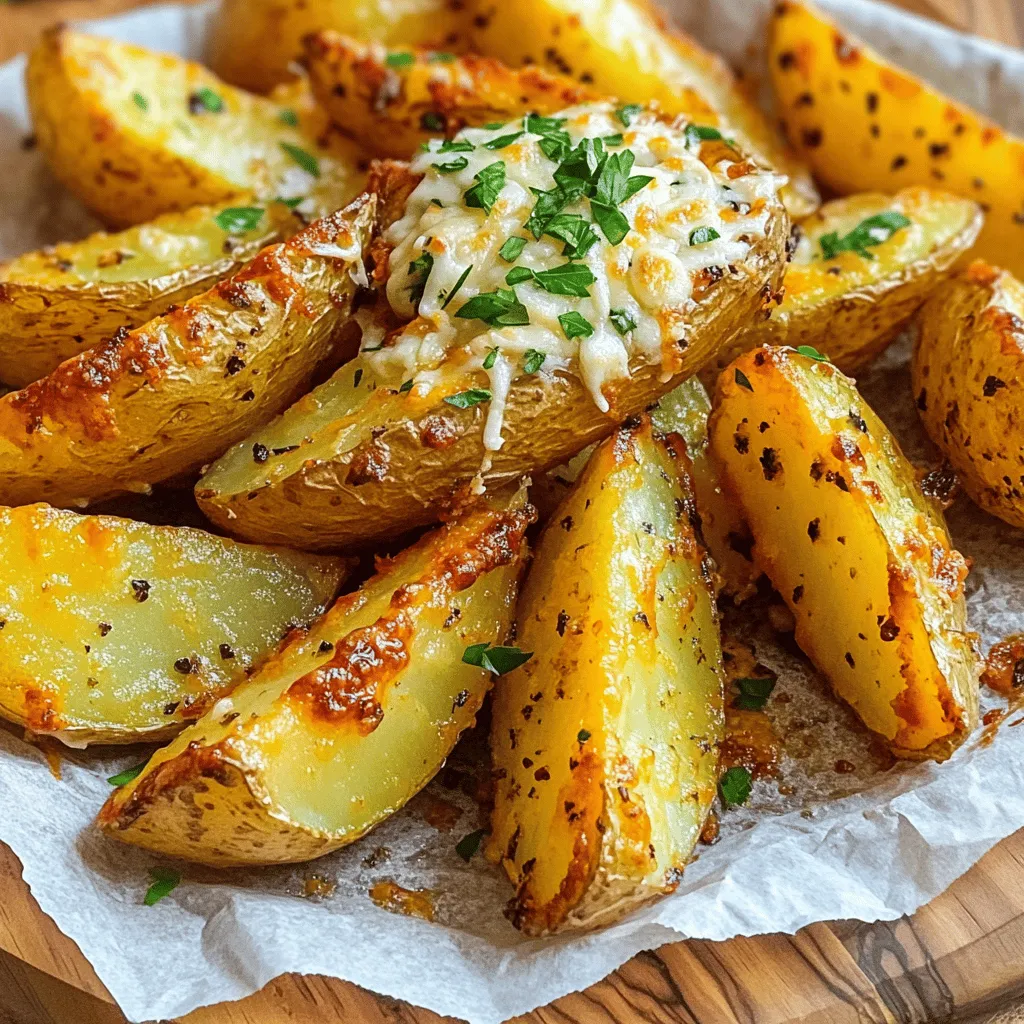
To make crispy garlic Parmesan potato wedges, gather these simple ingredients:
– 4 large russet potatoes, well-scrubbed and cut into wedges
– 1/4 cup extra virgin olive oil
– 4 cloves garlic, finely minced
– 1 teaspoon smoked paprika
– 1 teaspoon dried oregano
– 1 teaspoon fine sea salt
– 1/2 teaspoon freshly ground black pepper
– 1/2 cup finely grated Parmesan cheese
– Fresh parsley, for garnish
These ingredients work together to create a delicious, crispy snack or side dish. The russet potatoes provide a fluffy inside with a crispy outside. The garlic adds a robust flavor, while the Parmesan gives a rich, salty finish. Smoked paprika and oregano enhance the taste, making every bite special. This dish is perfect for sharing or enjoying alone.
Step-by-Step Instructions
Preparation of Potatoes
First, we need to preheat the oven to 425°F (220°C). Then, get your baking sheet ready by lining it with parchment paper. This will make cleanup easy later. Rinse your russet potatoes under cold water. Use a brush to scrub off any dirt. Cut each potato into wedges, aiming for about 8-10 wedges per potato. This ensures they cook evenly.
Mixing Marinade
In a large mixing bowl, combine the olive oil, minced garlic, smoked paprika, dried oregano, sea salt, and black pepper. Mix these ingredients well. This creates a fragrant marinade that will coat the potatoes perfectly.
Roasting Instructions
Now, toss the potato wedges in the marinade. Make sure each wedge gets a good coat of the garlic-oil mix. This step is key for flavor. Next, arrange the wedges on the lined baking sheet in a single layer. Avoid overlapping them to help them crisp up nicely. Roast the wedges in the oven for 25-30 minutes. Halfway through, use a spatula to toss them for even browning. They should look golden and crispy when done.
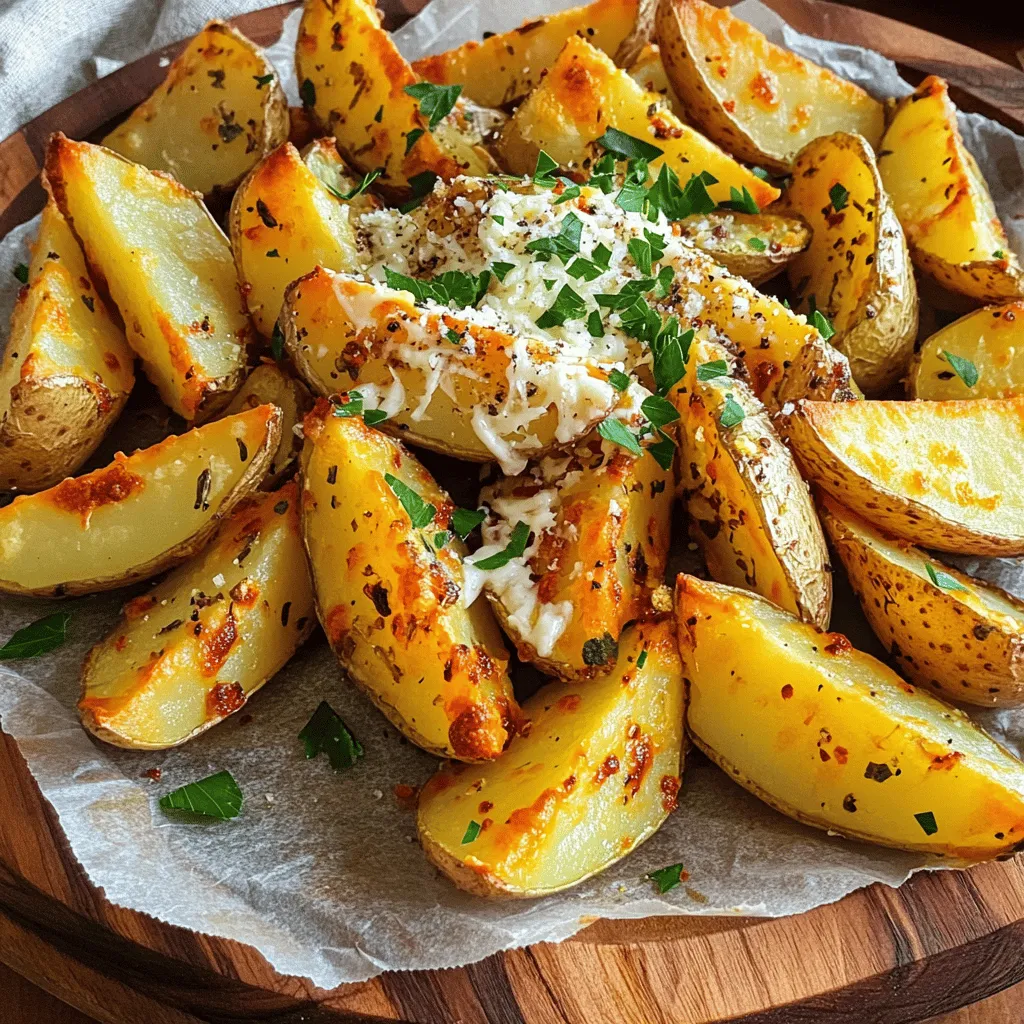
When you take them out, immediately sprinkle the hot wedges with freshly grated Parmesan cheese. The heat will melt the cheese just right. For a fresh touch, garnish with finely chopped parsley. This makes the dish look as good as it tastes.
Tips & Tricks
Achieving the Perfect Crisp
To get the best crisp, arrange the wedges in a single layer. This way, each wedge has space to cook evenly. If they overlap, they will steam instead of crisp up. Halfway through cooking, toss the wedges with a spatula. This helps them brown on all sides and enhances that golden crunch.
Enhancing Flavor
Using freshly grated Parmesan cheese makes a huge difference. It melts beautifully and gives a rich taste. You can also add more seasonings to boost flavor. Try chili powder for heat or lemon zest for brightness. Experiment with flavors to find your favorite mix.
Garnishing Ideas
Serve your crispy wedges with tasty dips. Ranch dressing or garlic aioli pairs well. For a pop of color, sprinkle fresh parsley on top. This not only looks great but adds a fresh taste. Arrange them on a nice platter to impress your guests. You can even use rustic baskets with parchment paper for a fun touch.

Variations
Different Seasoning Options
You can change the flavor of your crispy garlic Parmesan potato wedges by adding spices. For a spicy kick, try adding cayenne pepper. Start with a pinch and adjust to your heat preference. If you love herbs, consider rosemary or thyme. These add fresh notes and deepen the flavor.
Alternative Cooking Methods
If you want to cook faster, use an air fryer. Preheat it to 400°F (200°C) and cook the wedges for about 20 minutes. Shake the basket halfway through for even crispiness. Another great option is grilling. This gives a smoky flavor, perfect for summer meals. Just toss the wedges in foil and grill them for about 15 minutes.
Ingredient Substitutions
Not all diets allow for regular potatoes. You can use sweet potatoes or even cauliflower for a lighter version. Both options work well and taste great. If you need a dairy-free recipe, swap out the Parmesan cheese for a vegan cheese alternative. Nutritional yeast is another option that can add a cheesy flavor without dairy.
Storage Info
Storing Leftovers
To keep your crispy garlic Parmesan potato wedges fresh, follow these tips:
– Refrigeration: Place the cooled wedges in an airtight container. They will stay good for up to 3 days.
– Freezing: If you want to save them longer, freeze the wedges. Spread them in a single layer on a baking sheet. Once frozen, transfer them to a freezer bag. They can last for up to 2 months.
Reheating Instructions
When it’s time to enjoy your leftovers, you have two main options:
– Oven: Preheat your oven to 400°F (200°C). Place the wedges on a baking sheet and bake for 10-15 minutes. This method keeps them crispy.
– Microwave: If you need a quick fix, use the microwave. Heat in short bursts of 30 seconds. This method may make them less crispy but works in a pinch.
To maintain texture, always reheat the wedges at a higher temperature. Avoid wrapping them in foil, as this traps steam and makes them soggy. Enjoy your tasty snack!
FAQs
How long to cook Crispy Garlic Parmesan Potato Wedges?
Cook the wedges for 25-30 minutes at 425°F (220°C). This high heat makes them crispy. Halfway through, toss them for even browning. The wedges should turn golden and crunchy.
Can I make these wedges ahead of time?
Yes, you can prepare these wedges before. Cut and season them, then store in the fridge. Use an airtight container. When ready to cook, simply place them on a baking sheet and roast.
What are the best dips for crispy potato wedges?
These wedges pair well with many dips. Try ranch dressing, garlic aioli, or spicy ketchup. You can also use cheese sauce or sour cream for a rich flavor.
Are these potato wedges gluten-free?
Yes, these potato wedges are gluten-free. All the ingredients in the recipe do not contain gluten. Always check your seasonings to ensure they meet gluten-free needs.
In this post, we covered how to make delicious garlic Parmesan potato wedges. You learned about the key ingredients, step-by-step instructions, and useful tips for perfecting your dish. I shared variations for taste and cooking methods, plus storage and reheating tips.
Now, you have everything you need to make this tasty snack. Enjoy experimenting with flavors and impressing your friends and family!


![- 8 oz (about 225g) rotini or penne pasta - 1 cup cherry tomatoes, halved - 1 cucumber, finely diced - 1/2 red onion, finely chopped - 1 bell pepper (any color), diced into small pieces - 1 cup Kalamata olives, pitted and sliced in half - 1 cup feta cheese, crumbled into bite-sized pieces - 1/4 cup fresh parsley, roughly chopped - 1/4 cup high-quality olive oil - 2 tablespoons red wine vinegar (optional for flavor) - 1 tablespoon freshly squeezed lemon juice - 1 teaspoon dried oregano - Sea salt and freshly cracked black pepper to taste You can make this salad your own. Try adding: - Grilled chicken or shrimp for protein - Artichoke hearts for extra flavor - Sun-dried tomatoes for a sweeter touch - Avocado for creaminess - Different herbs like mint or dill for freshness Fresh ingredients shine in this salad. Here’s how to pick the best: - Choose firm, bright cherry tomatoes. They should smell sweet. - Look for a cucumber with smooth skin. It should feel heavy for its size. - Pick bell peppers that are shiny and firm. Avoid any with soft spots. - For olives, select Kalamata that are dark and plump. - Get feta cheese that is crumbly and moist, not dry. Using fresh ingredients elevates the flavor and makes your Easy Greek Pasta Salad a true delight. For the full recipe, check out the Mediterranean Delight Pasta Salad 🥗! Start by boiling a large pot of salted water. This step is key to flavor. Add 8 oz of rotini or penne pasta. Cook it according to the package directions until it is al dente. This should take about 8-10 minutes. Once the pasta is cooked, drain it well. Rinse the pasta under cold water to stop the cooking and cool it down. This keeps the texture just right. In a large mixing bowl, add the cooled pasta. Next, toss in 1 cup of halved cherry tomatoes, 1 diced cucumber, and 1/2 finely chopped red onion. Don’t forget 1 diced bell pepper, which adds color and crunch. Add 1 cup of Kalamata olives that you’ve pitted and sliced. Finally, sprinkle in 1/4 cup of roughly chopped fresh parsley. Mix everything well to combine the flavors. In a small bowl, whisk together the dressing. Use 1/4 cup of high-quality olive oil. Add 2 tablespoons of red wine vinegar or fresh lemon juice if you prefer a brighter taste. Squeeze in 1 tablespoon of lemon juice for extra zest. Mix in 1 teaspoon of dried oregano. Season with sea salt and freshly cracked black pepper to taste. Whisk until the ingredients blend into a smooth dressing. Drizzle the dressing over the pasta and vegetable mix. Toss gently to coat all the ingredients well with the dressing. This step is crucial for flavor. Now, softly fold in the crumbled feta cheese. Be careful not to break the cheese too much; you want those nice chunks. For the best flavor, cover the salad with plastic wrap. Place it in the refrigerator for at least 20 minutes. This waiting period allows the flavors to blend beautifully. After chilling, taste the salad. Adjust the seasoning with more salt, pepper, or lemon juice if needed. Enjoy making this Easy Greek Pasta Salad! For the Full Recipe, check the link. To make the best Greek pasta salad, start with the right pasta. Use rotini or penne, as they hold the dressing well. Cook the pasta just right. It should be al dente, so it stays firm. Rinse it under cold water after cooking. This step cools the pasta and stops it from cooking more. Next, chop your veggies evenly. This way, each bite has a bit of everything. Fresh ingredients bring the best flavor. Use ripe cherry tomatoes and a crisp cucumber. Kalamata olives add a nice briny touch. Don’t forget the feta cheese! It should be crumbly but not too small. Many people overcook the pasta. This makes it mushy and not enjoyable. Also, don’t skip the rinsing step. It keeps the pasta from sticking together. Another mistake is not seasoning enough. Taste your salad after mixing. You might need more salt, pepper, or lemon juice. Always adjust to make it perfect for your palate. Lastly, let your salad chill before serving. This step allows the flavors to blend and deepen. A quick chill of at least 20 minutes works wonders. For more flavor, try adding fresh herbs. Basil or dill can brighten the dish. If you like heat, add a pinch of red pepper flakes. This gives your salad a nice kick. Experiment with your dressing too! Swap red wine vinegar for lemon juice for a brighter taste. A splash of balsamic vinegar can also add depth. Lastly, if you want a creamier salad, mix in some Greek yogurt. It adds richness without overpowering other flavors. For the full recipe, check out the Mediterranean Delight Pasta Salad. Enjoy making this simple and colorful dish! {{image_4}} You can easily add proteins to your Easy Greek Pasta Salad. Grilled chicken or canned tuna are great choices. They boost the dish's nutrition and make it more filling. For chicken, use cooked, diced pieces. For tuna, just drain and flake it. Mix your chosen protein right into the salad for a complete meal. Feel free to switch up the veggies in your pasta salad. Different colors and flavors keep it exciting. Try adding artichoke hearts, sun-dried tomatoes, or roasted red peppers. You can also use zucchini or spinach for a fresh twist. Just chop them into small pieces and mix them in. If you want a vegan version, swap feta cheese for a plant-based alternative. Nutritional yeast can also add a cheesy flavor without dairy. For gluten-free options, use gluten-free pasta. There are many types available now. This way, you can enjoy the salad without worry. Check labels to ensure all ingredients meet your dietary needs. Find the full recipe at [Full Recipe]. To keep your Easy Greek Pasta Salad fresh, store it in an airtight container. This helps prevent air and moisture from spoiling your salad. If you have leftovers, make sure to cool the salad before sealing it. This keeps the flavors intact and avoids sogginess. You can also separate the dressing if you want to keep the salad crisp for longer. This salad tastes best cold, so there’s no need to reheat it. If you find the pasta has absorbed the dressing, add a splash of olive oil or lemon juice. Toss it gently to revive the flavors. If you stored the salad in the fridge, let it sit at room temperature for about 10 minutes before serving. This will enhance the taste and texture. Your Easy Greek Pasta Salad can last about 3 to 5 days in the fridge. Always check for any signs of spoilage. Look for changes in color or texture. If you notice any off smells, discard it. Trust your senses; if something seems off, it’s better to be safe. Enjoy your salad while it's fresh for the best taste! You can store Easy Greek Pasta Salad in the fridge for about 3 to 5 days. Keep it in a sealed container to keep it fresh. If you see any signs of spoilage, like an off smell or discoloration, it's best to toss it out. Yes, you can make this salad ahead of time! In fact, it tastes better after sitting for a while. The flavors meld together nicely. I recommend making it a few hours in advance or even the night before. Just remember to add the feta cheese right before serving to keep it fresh. Greek Pasta Salad pairs well with various dishes. You can serve it alongside grilled chicken, lamb, or fish. It also works great as a side for burgers or sandwiches. If you're having a picnic, it's perfect with some crusty bread and hummus. Yes, you can substitute feta cheese if you prefer. Try using goat cheese or ricotta for a different flavor. For a dairy-free option, you can use a plant-based cheese. Just keep in mind that the taste will change slightly, but the salad will still be delicious! This blog post covers how to make Easy Greek Pasta Salad. We discussed essential ingredients and tips for freshness. You learned steps to prepare the salad, mix the ingredients, and make the dressing. We highlighted ways to enhance flavors and avoid common mistakes. Plus, you can try various protein and veggie options. Finally, you got storage tips to keep the salad fresh. Enjoy making this salad for your next meal or gathering! It’s simple, tasty, and fun to customize.](https://goldendishy.com/wp-content/uploads/2025/06/0fc22d26-3c6f-4a8e-aae2-92058968a948-768x768.webp)


![- 2 medium zucchinis, grated - 2 medium carrots, grated - 1/2 cup all-purpose flour - 1/4 cup grated Parmesan cheese - 1 large egg - 2 green onions, finely chopped - 2 cloves garlic, minced - 1 teaspoon dried oregano - 1/2 teaspoon salt - 1/4 teaspoon black pepper - Olive oil for frying These ingredients form the base of your zucchini carrot fritters. The grated zucchini and carrots give them a fresh taste and bright color. The flour and cheese help bind everything together, while the egg adds richness. Don’t forget the seasonings! They bring out all the flavors. - Fresh herbs like parsley or dill - Additional cheese variants such as feta or cheddar These optional ingredients can elevate your fritters. Fresh herbs add a burst of flavor and color. You can also mix in different cheeses for a unique twist. - Gluten-free options: Use almond flour or gluten-free flour - Dairy-free alternatives: Replace cheese with nutritional yeast If you need to make dietary changes, these substitutions work well. Gluten-free flour keeps the fritters light and fluffy. Nutritional yeast adds a cheesy flavor without dairy. You can still enjoy delicious fritters that fit your needs. Check the [Full Recipe] for more details! - Grating Vegetables Start by grating the zucchinis and carrots. I use a box grater for this. It makes the job easy and quick. - Removing Excess Moisture After grating, place the vegetables in a clean kitchen towel. Twist and squeeze to remove as much liquid as possible. This step is key. It helps the fritters stay firm and not soggy. - Combining Dry and Wet Ingredients In a large bowl, mix the drained zucchini and carrot with flour, Parmesan cheese, egg, green onions, garlic, oregano, salt, and pepper. Stir well to combine. You want a smooth and even mixture. - Ensuring a Cohesive Mixture Check that all ingredients are mixed thoroughly. The batter should hold together well. This cohesive mixture is vital for great fritters. - Heating the Skillet Heat a non-stick skillet over medium heat. Add a couple of tablespoons of olive oil. Wait until the oil is hot and shimmering but not smoking. - Frying Tips for Crispiness Scoop about 2 tablespoons of the fritter mix into the skillet. Flatten each scoop gently with a spatula. This helps them cook evenly. Fry each fritter for about 3-4 minutes on each side. Look for a golden brown color and a crispy texture. If needed, fry in batches, adding more oil as you go. Serve them warm, and enjoy the tasty crunch! For the full recipe, check out the [Full Recipe]. To make great zucchini carrot fritters, moisture removal is key. Grated vegetables hold a lot of water. If you don’t squeeze them dry, your fritters turn out soggy. After grating, use a clean kitchen towel. Place the veggies in the towel and twist it tightly. This method gets rid of extra liquid, ensuring crispy fritters. Cooking temperature control is also important. Use medium heat for frying. If the temperature is too low, the fritters will absorb too much oil. If it's too high, they will burn on the outside and stay raw inside. A good test is to add a small bit of batter to the pan. If it sizzles right away, you're ready to go! For dipping sauces, yogurt pairs perfectly. You can also try a spicy mayo or tzatziki. These sauces enhance the flavors and add creaminess. For sides, serve your fritters with a crisp salad or roasted veggies. Both options balance the meal nicely. Adding spices can elevate your fritters. Try a pinch of cayenne for heat or smoked paprika for depth. Herbs like dill or parsley can also add freshness. You can mix in other vegetables too. Finely chopped bell peppers or spinach work well. They add color and nutrition, making your fritters even better. For the full recipe, check out the complete guide above! {{image_4}} You can switch up the flavors in your zucchini carrot fritters to keep things interesting. - Spicy Zucchini Carrot Fritters: Add some heat! Mix in chopped jalapeños or red pepper flakes. This will give your fritters a nice kick. You can also serve them with a spicy dipping sauce. - Mediterranean-Inspired Fritters: Want a fresh twist? Use feta cheese, fresh dill, and olives in your batter. These flavors will transport you to the sunny Mediterranean coast. You can easily modify this recipe to fit your dietary needs. - Vegan Version: Replace the egg with a flaxseed or chia seed mix. Combine 1 tablespoon of seeds with 2.5 tablespoons of water. Let it sit until it becomes gel-like. This will bind your fritters well. - Low-Carb Options: For a low-carb twist, swap all-purpose flour for almond flour. This keeps your fritters tasty and lower in carbs. The shape and size of your fritters can change how you serve them. - Mini Bites for Appetizers: Form smaller fritters for easy snacking. They are perfect for parties and gatherings. Just adjust the cooking time to avoid burning. - Larger Fritters for Main Dishes: Make bigger fritters for a hearty meal. Serve them with a salad for a complete dish. They also hold up nicely on a bun for a veggie burger. You can find the full recipe for zucchini carrot fritters above. Enjoy experimenting with these variations to suit your taste! How do you store leftover fritters? Place them in an airtight container. Use parchment paper between layers to keep them crisp. This helps prevent sogginess. What are the best practices for freshness? Store fritters in the fridge for up to three days. Keep the container sealed tight. This keeps them tasty and prevents drying out. Should you freeze fritters before or after cooking? You can freeze them both ways. For the best texture, freeze them uncooked. It helps keep them crisp when cooked later. What are the thawing and reheating tips? Thaw the fritters in the fridge overnight. Reheat them in a skillet over medium heat. Add a little oil for that crispy edge. How long do refrigerated fritters last? They stay good for about three days in the fridge. After that, the texture and flavor may change. What is the freezer storage timeframe? Frozen fritters can last up to two months. Make sure they are in a sealed bag or container. This protects against freezer burn. For more details, check the [Full Recipe]. Yes, you can use frozen zucchini or carrots. However, they will change the texture and flavor. Frozen veggies often hold more water. This extra moisture can make fritters soggy. If you use frozen, let them thaw and squeeze out the water. After that, they can work well in your fritters. To make fritters crispy, focus on a few key tips. First, remove as much moisture as possible from the grated vegetables. Use a clean towel to squeeze out water. Next, heat your oil until it's hot but not smoking. Fry fritters in small batches and leave space between them. This way, they cook evenly. You have many tasty options for dips. Here are some favorites: - Greek yogurt with lemon juice - Spicy sriracha mayo - Creamy ranch dressing - Simple tzatziki sauce These dips add flavor and complement the fritters well. They enhance the meal, making it even more enjoyable. For a full recipe, check the details above! Zucchini and carrot fritters are simple to make and delicious. We covered essential ingredients, like grated veggies, flour, and cheese. You learned how to prepare, mix, and fry the batter for perfect bites. I shared tips to ensure crispness and flavor, plus variations for diets. Don’t forget to store any extras properly! Now you can enjoy these fritters at any meal, with great dips, or as snacks. Have fun cooking and experimenting with these ideas!](https://goldendishy.com/wp-content/uploads/2025/06/18ed450f-8e43-4a66-9091-0bc3385fc8fe-768x768.webp)