Creamy Mushroom Spinach Pasta Delightful and Easy Dish

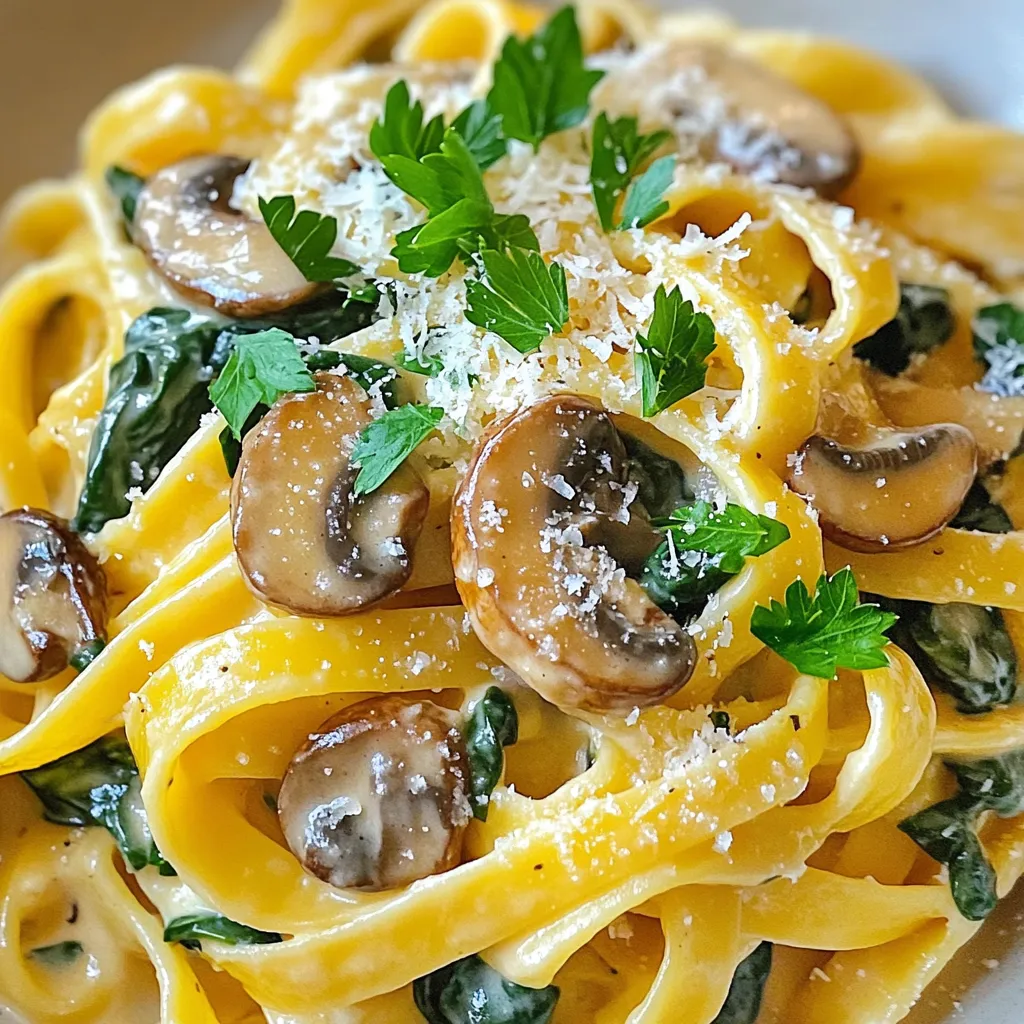
Are you ready to whip up a dish that’s as creamy as it is delicious? This Creamy Mushroom Spinach Pasta combines fresh spinach, savory mushrooms, and rich cream for a meal that’s quick and easy. Whether you’re a busy parent or just craving comfort food, this recipe has you covered. Let’s dive into how you can create this delightful dish in no time!
Ingredients
Main Ingredients
– 8 oz (225g) fettuccine or spaghetti
– 2 tablespoons olive oil
– 1 medium onion, finely chopped
– 3 cloves garlic, minced
– 12 oz (340g) mushrooms, sliced (preferably a mix of cremini and button)
– 5 oz (140g) fresh spinach, roughly chopped
Dairy Ingredients
– 1 cup (240ml) heavy cream
– ½ cup (50g) grated Parmesan cheese
– Salt and pepper to taste
– ½ teaspoon nutmeg
– Fresh parsley, chopped for garnish
To make creamy mushroom spinach pasta, you need simple yet fresh ingredients. Start with fettuccine or spaghetti as your base. The pasta brings a nice bite to the dish. You will also need olive oil to sauté the onions and garlic.
The mushrooms add texture and a rich flavor. I recommend using a mix of cremini and button mushrooms. Fresh spinach brightens the dish and adds color.
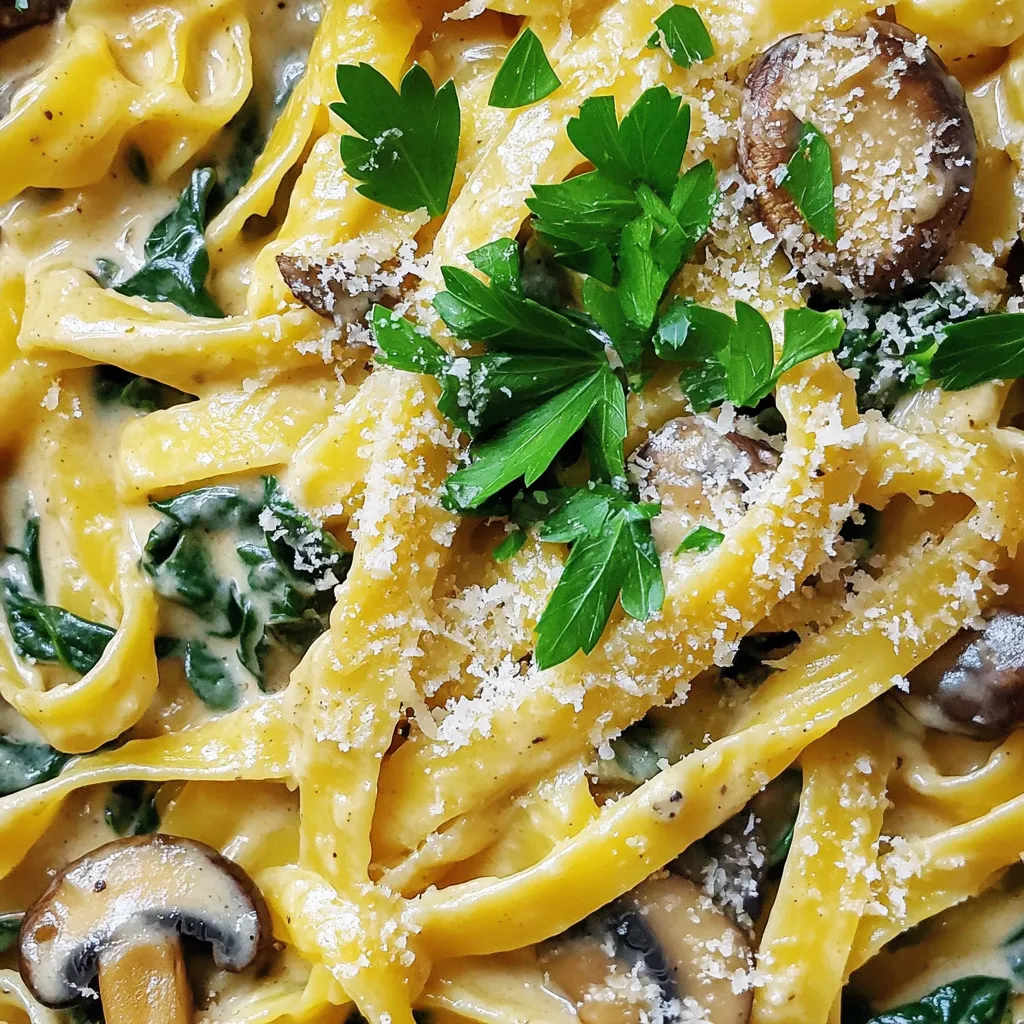
For the creamy sauce, heavy cream gives that luscious texture. Grated Parmesan cheese enhances the flavor and adds a savory note. Don’t forget to season with salt, pepper, and nutmeg for the perfect balance. Finally, fresh parsley will elevate the dish and make it look stunning on the plate.
Gather these ingredients, and you’re ready to start cooking.
Tips & Tricks
Perfecting the Pasta
– Checking for al dente texture: Cook the pasta just until it is firm to the bite. This means you want to feel a slight resistance when you chew. It should not be mushy. Taste a piece a minute or two before the package time is up. This simple check helps keep your pasta perfect.
– Using reserved pasta water: Before draining your pasta, save about half a cup of the cooking water. This starchy water is a secret weapon. You can add it to your sauce to adjust the thickness. Just a little bit makes the sauce creamy and helps it cling to the pasta.
Flavor Enhancements
– Seasoning with salt, pepper, and nutmeg: Start with a pinch of salt and pepper while cooking. This enhances the taste of your dish. Nutmeg adds warmth and depth. Just a half teaspoon is all you need. It lifts the flavors of the mushrooms and cream.
– Choosing additional garnishes: Fresh parsley adds a bright touch. It also gives a nice crunch. You might also sprinkle more Parmesan on top. For extra flavor, consider a sprinkle of red pepper flakes for some heat.
Variations
Ingredient Substitutions
– Using plant-based cream and cheese: If you prefer a vegan dish, swap heavy cream for a plant-based option. Cashew cream or coconut cream works well. Use vegan cheese instead of Parmesan for a creamy texture.
– Mixing in different vegetables: You can add other veggies for more color and flavor. Try bell peppers, zucchini, or broccoli. These add nutrients and make the dish more exciting.
Dietary Considerations
– Making it gluten-free: Choose gluten-free pasta options. Many brands offer great pasta made from rice or lentils. It tastes good and keeps the dish gluten-free.
– Incorporating protein sources: If you want more protein, add cooked chicken or shrimp. You can also use chickpeas for a vegetarian option. This makes the dish heartier and more filling.
Storage Info
Storing Leftovers
To keep your creamy mushroom spinach pasta fresh, store it right. Place the leftover pasta in an airtight container. This helps keep out air and moisture. You can use glass or plastic containers. Make sure the lid seals well.
Refrigerate the pasta within two hours of cooking. This keeps it safe to eat. The creamy sauce will thicken as it cools. It’s best to eat the leftovers within three days for the best taste.
Reheating Instructions
You can reheat your pasta in two ways: the microwave or the stovetop. If you use the microwave, place the pasta in a bowl. Add a splash of water or cream for moisture. Cover the bowl with a lid or a plate. Heat it for about one minute. Stir and heat for another minute if needed.
For the stovetop, use a skillet over low heat. Add the pasta and a little cream or water. Stir gently. This helps keep the sauce creamy. Avoid high heat, as it can make the sauce separate.
By following these tips, you can enjoy your creamy mushroom spinach pasta even days later!

FAQs
Can I use a different type of pasta?
Yes, you can use other pasta types. Here are some options:
– Penne
– Rigatoni
– Fusilli
– Whole wheat pasta
Each shape holds sauce differently. Choose what you prefer!
How can I make it vegan?
To make this dish vegan, swap a few ingredients. Use:
– Plant-based cream instead of heavy cream
– Nutritional yeast for Parmesan cheese
– Olive oil for butter (if needed)
These changes create a creamy and tasty vegan version!
What can I serve with Creamy Mushroom Spinach Pasta?
This pasta pairs well with various side dishes. Consider:
– Garlic bread for crunch
– A fresh green salad for lightness
– Roasted vegetables for added flavor
These sides complement the pasta perfectly!
How long does this dish last in the fridge?
You can store Creamy Mushroom Spinach Pasta in the fridge for up to 3 days. Look for these signs to check if it’s still good:
– Off smell
– Change in color
– Mold growth
If you see any of these signs, it’s best to throw it away.
In this post, we explored how to make creamy mushroom spinach pasta. We covered key ingredients like fettuccine, heavy cream, and fresh mushrooms. I shared step-by-step cooking methods to ensure perfect results. Additionally, we discussed clever tips and variations for different diets.
This dish is simple, yet it packs a punch of flavor. You can customize it to fit your preferences. Enjoy experimenting with this recipe and make it your own!


![To make honey lemon roasted salmon, you need a few simple items: - 4 salmon fillets (6 oz each) - 1/4 cup honey - 2 tablespoons freshly squeezed lemon juice - Zest of 1 lemon (about 1 teaspoon) - 2 tablespoons extra virgin olive oil - 3 cloves garlic, finely minced - Salt and black pepper to taste These ingredients work well together. The honey adds sweetness, while the lemon gives a bright flavor. The olive oil helps keep the salmon moist. Garlic brings a nice kick to the dish. You can add some optional garnishes to make your dish look even better. Consider these: - Fresh dill sprigs for a pop of color and taste - Extra lemon wedges for serving These garnishes add freshness and make the dish more appealing. They also enhance the flavors. If you don't have all the ingredients, don't worry! You can swap some things out: - Use maple syrup instead of honey for a different sweet flavor. - Lime juice can replace lemon juice for a zesty twist. - If you lack fresh garlic, garlic powder works in a pinch. These swaps can still give you a tasty meal. Feel free to get creative! For the full recipe, check the detailed steps. To start, preheat your oven to 400°F (200°C). This gives the salmon a nice roast. In a bowl, mix honey, lemon juice, lemon zest, olive oil, and minced garlic. Whisk it well until smooth. Next, take your salmon fillets and season both sides with salt and black pepper. This will boost the flavor. Place the fillets skin-side down on a baking sheet lined with parchment paper. This step makes cleanup easy. Now, use a brush or spoon to spread the honey lemon mix over the salmon fillets. Make sure to coat them well for great taste. Now, place the baking sheet in the oven. Roast the salmon for 12-15 minutes. It’s done when the flesh looks opaque and flakes easily with a fork. This means it's tender and juicy. After roasting, take the salmon out of the oven. Let it rest for a few minutes. This keeps it warm and moist. When serving, lay the salmon on a white platter. Drizzle any leftover honey lemon mixture from the baking sheet on top. For a nice touch, add lemon wedges around the salmon. If you like, you can garnish with fresh dill sprigs. This adds color and flavor. You can find the full recipe and more tips at [Full Recipe]. Enjoy your meal! To get perfectly roasted salmon, start with fresh fillets. Fresh fish tastes better. Always preheat your oven to 400°F (200°C). This helps the salmon cook evenly. Make sure to line your baking sheet with parchment paper. This keeps the salmon from sticking. For a nice glaze, brush the honey lemon mixture on thick. This adds more flavor and caramelizes well. Roast for 12 to 15 minutes. The salmon is done when it flakes easily with a fork. One common mistake is overcooking the salmon. This makes it dry and tough. Always check it a few minutes before the time is up. Another mistake is not seasoning enough. Salt and pepper bring out the salmon's natural taste. Skipping the marinade is also a no-go. The honey and lemon mix adds great flavor. Lastly, don’t skip resting the salmon after cooking. This keeps it juicy and tender. Marinating is key to enhancing flavor. You can use the honey lemon mix as a marinade. Let the salmon sit in the mixture for 30 minutes before cooking. This allows the fish to soak up all the flavors. Feel free to add herbs like thyme or rosemary. These herbs pair well with salmon. You can also try different citrus juices for a twist. Orange or lime can add a nice touch. For more ideas, check out the Full Recipe. {{image_4}} Grilling salmon gives it a lovely smoky flavor. Start with the same honey lemon mix. Marinate the salmon in this blend for about 30 minutes. Preheat your grill to medium-high heat. Cook each side for about 5-7 minutes. Look for grill marks and a nice char. This method adds depth to the dish. Fresh herbs can brighten your meal. Add herbs like thyme or parsley to the honey lemon mix. These herbs work well with the salmon's rich flavor. Simply brush the mixture over the salmon fillets before cooking. It gives each bite a fresh taste. You can also sprinkle herbs on top after cooking for added color and flavor. Want a faster option? Pan-searing is quick and easy. Heat a bit of olive oil in a skillet over medium heat. Season the salmon with the honey lemon mix. Place the fillets skin-side down in the hot skillet. Cook for about 4-5 minutes per side. This method gives you a crispy skin and juicy inside. It's a great way to enjoy salmon on a busy night. For more cooking ideas, check out the Full Recipe. After cooking your honey lemon roasted salmon, let it cool down. Place the leftover salmon in an airtight container. This keeps it fresh. Store it in the fridge for up to three days. If you want to enjoy it later, do not wait too long. The sooner you store it, the better it tastes when you reheat. You can freeze honey lemon salmon if you have extra. Wrap each piece tightly in plastic wrap. Then, place them in a freezer-safe bag. Squeeze out the air before sealing. Label the bag with the date. You can freeze it for up to three months. When you're ready to eat it, thaw it overnight in the fridge. To reheat salmon, the oven works best. Preheat the oven to 275°F (135°C). Place the salmon on a baking sheet. Cover it with foil to prevent drying. Heat for about 15 minutes or until warm. You can also use a microwave. Put it on a plate and cover it with a microwave-safe lid. Heat for 30 seconds at a time until warm. Enjoy your meal again! For the full recipe, check back to our earlier section. You can tell salmon is done when it looks opaque. The flesh should flake easily with a fork. Use a meat thermometer if you want to be sure. The internal temp should reach 145°F (63°C). If you cut into the fish, it should look moist and tender. Overcooked salmon can be dry, so check it closely. Yes, you can use frozen salmon for honey lemon roasted salmon. Just make sure to thaw it first. Place the salmon in the fridge overnight or run it under cold water. Once thawed, pat it dry with a paper towel. Then, follow the recipe as usual. Cooking from frozen may require a few extra minutes. Honey lemon roasted salmon pairs well with many sides. Here are some ideas: - Steamed broccoli - Roasted asparagus - Quinoa salad - Garlic mashed potatoes - Lemon rice - Mixed greens with vinaigrette These sides add color and nutrition to your meal. You can mix and match based on your taste. Enjoy trying out different combinations! For the full recipe, check out the section above. This blog post covered how to make honey lemon roasted salmon. We explored key ingredients, including essential and optional items. I shared step-by-step cooking instructions and tips to avoid mistakes. You also learned about variations and how to store salmon. Try these methods to create simple and tasty meals. With practice, you'll impress yourself and others with your cooking skills. Enjoy your journey to making delicious honey lemon salmon!](https://goldendishy.com/wp-content/uploads/2025/07/988a6f99-fc0c-4e25-b6bc-fd8b1dc60d33-768x768.webp)

. - Heat your skillet over medium heat. - Add the unsalted butter and let it melt. - Once melted, watch for it to bubble gently. - Next, add the minced garlic. - Sauté the garlic for about one minute. - Stir often until it smells great and turns lightly golden. - Now, add the peeled and deveined shrimp to the skillet. - Season the shrimp with salt and pepper. - If you like spice, sprinkle in some red pepper flakes. - Cook the shrimp for 2-3 minutes on one side. - Flip the shrimp to cook the other side evenly. - Add the lemon zest and juice as they cook. - Keep cooking until the shrimp are opaque. - Remove the skillet from the heat. - Stir in the chopped parsley for a fresh taste. - Serve the shrimp over warm pasta or fluffy rice. - Drizzle the leftover lemon-garlic butter sauce on top for extra flavor. - For a lovely presentation, you can garnish with lemon wedges. For more details, check the Full Recipe. - Achieving the perfect shrimp texture: To get tender shrimp, avoid overcooking. Cook them just until they turn pink. This usually takes about 2-3 minutes per side. - Best practices for sautéing garlic: Start with a hot skillet and melted butter. Add minced garlic and stir for about 1 minute. Keep an eye on it so it doesn’t burn; burnt garlic tastes bitter. - Presentation ideas for a beautiful dish: Serve the shrimp in shallow bowls to make it look elegant. Add a sprinkle of parsley on top for color. Include lemon wedges on the side for a fresh touch. - Pairing options with side dishes: Lemon garlic butter shrimp goes well with cooked pasta or fluffy rice. You can also serve it with a side salad for a light meal. - Additional herbs or spices to try: Consider adding fresh basil or thyme for extra flavor. These herbs pair well with lemon and shrimp. - Adjusting spice levels with red pepper flakes: If you like heat, add more red pepper flakes. Start with a teaspoon and adjust to your taste. This will make your dish more exciting! For more details, check the Full Recipe. {{image_4}} You can change the seafood in this recipe. Try scallops or even crab. These swaps add new tastes while keeping the dish simple. If you want a healthier fat, swap butter for olive oil. Olive oil works well and gives a light, fresh flavor. To mix things up, add other citrus flavors. Lime or orange juice can brighten the dish. You can also infuse the recipe with herbs. Try basil or thyme for a different twist. These herbs can make the dish feel more seasonal. If you need a gluten-free option, serve the shrimp over quinoa or zucchini noodles. Both are great gluten-free choices. For a low-calorie meal, cut back on the butter. You can use less or replace it with vegetable broth. This keeps the dish tasty but lighter. After enjoying your lemon garlic butter shrimp, store any leftovers in the fridge. Use an airtight container to keep them fresh. These shrimp will stay good for about 2-3 days. Always check for freshness before eating. To freeze lemon garlic butter shrimp, let them cool completely first. Place them in a freezer-safe bag, removing as much air as possible. They can last for about 2 months in the freezer. When you're ready to eat, thaw the shrimp in the fridge overnight. Reheat them gently in a skillet over low heat. This keeps them tender and tasty. Always ensure your shrimp is safe to eat after storage. Check for any off smells or changes in color. If the shrimp look slimy or smell bad, it’s best to discard them. Trust your senses to keep your meals safe and enjoyable. Cook shrimp for 4-6 minutes. They cook quickly. In a hot skillet, shrimp turn pink when done. Avoid overcooking; it makes them tough. Yes, you can use frozen shrimp. Thaw them first for best results. Place them in cold water for about 15 minutes. This way, they cook evenly and taste fresh. I love serving lemon garlic butter shrimp with: - Cooked pasta - Fluffy rice - Fresh salad - Garlic bread These sides balance the rich flavors well. Check for color and texture. Cooked shrimp turn pink and opaque. They should feel firm but not hard. When in doubt, cut one open. It should be white inside, not translucent. You’ve learned how to make lemon garlic butter shrimp. We covered essential ingredients, easy steps, tips for cooking, and variations to try. Remember to adjust flavors to your taste and pair with your favorite sides. Store leftovers safely for later enjoyment. Cooking shrimp can be simple and satisfying. Enjoy every bite, and don't hesitate to experiment. Whether for a cozy night in or impressing guests, this dish shines every time. Let your kitchen be a place of fun and flavor!](https://goldendishy.com/wp-content/uploads/2025/06/8ad1771e-7d26-4dd4-879b-9e464bbb0647-768x768.webp)