Cottage Cheese Brownie Batter Dip Protein Delight

Craving a sweet yet healthy treat? Dive into my Cottage Cheese Brownie Batter Dip Protein Delight! This rich and creamy dip is packed with protein but tastes like dessert. Perfect for parties, snacks, or just a little indulgence. Get ready to learn about the must-have ingredients, easy steps to make it, and tips to make it shine. Let’s satisfy that sweet tooth without the guilt!
Ingredients
Key Ingredients for Cottage Cheese Brownie Batter Dip
To make the perfect cottage cheese brownie batter dip, gather these key ingredients:
– 1 cup low-fat cottage cheese
– 1/2 cup unsweetened cocoa powder
– 1/3 cup maple syrup or honey
– 1/4 cup almond butter (or any nut butter of your choice)
– 1 teaspoon pure vanilla extract
– 1/4 teaspoon salt
– 1/4 cup mini chocolate chips (optional)
Each of these ingredients plays a role. The cottage cheese adds creaminess. Cocoa powder gives that rich chocolate flavor. Sweeteners like maple syrup or honey balance the taste. Almond butter adds a nutty, creamy texture.
Optional Ingredients to Enhance Flavor
You can also include these optional ingredients to make the dip even better:
– Mini chocolate chips for extra sweetness and texture
– A pinch of cinnamon for warmth
– Pinch of espresso powder to enhance chocolate flavor
These extras can turn a good dip into a great one. Feel free to experiment and find what you like best!
Nutritional Information Overview
This dip is not only tasty but also packed with nutrition. Here’s a quick look at its benefits:
– Low in fat due to the use of low-fat cottage cheese
– High in protein from the cottage cheese and nut butter
– Contains fiber and healthy fats from the almond butter
– Offers natural sweetness from maple syrup or honey
This dip is a fun way to enjoy a treat while staying healthy. It’s perfect for snacks or parties!
Step-by-Step Instructions
Prepping Your Ingredients
Gather all your ingredients first. You will need:
– 1 cup low-fat cottage cheese
– 1/2 cup unsweetened cocoa powder
– 1/3 cup maple syrup or honey
– 1/4 cup almond butter (or any nut butter of your choice)
– 1 teaspoon pure vanilla extract
– 1/4 teaspoon salt
– 1/4 cup mini chocolate chips (optional)
– Assorted dippers: sliced fruits, pretzels, or graham crackers
Measure each item carefully. This ensures great taste and texture. If you want to add chocolate chips, set them aside for later.
Blending for the Perfect Consistency
Now, place the cottage cheese, cocoa powder, maple syrup, almond butter, vanilla extract, and salt into your blender. Blend on high speed until smooth. Stop to scrape down the sides often. This makes sure everything mixes well.
If you like some texture, blend until mostly smooth. Then, use a spatula to fold in the mini chocolate chips gently. Taste it to see if you want more sweetness. If you do, add a bit more maple syrup or honey and blend again briefly.
Serving and Chilling Tips
Once your dip is ready, transfer it to a serving bowl. For the best flavor, chill in the fridge for 15 to 30 minutes. Chilling helps the flavors mix together nicely.
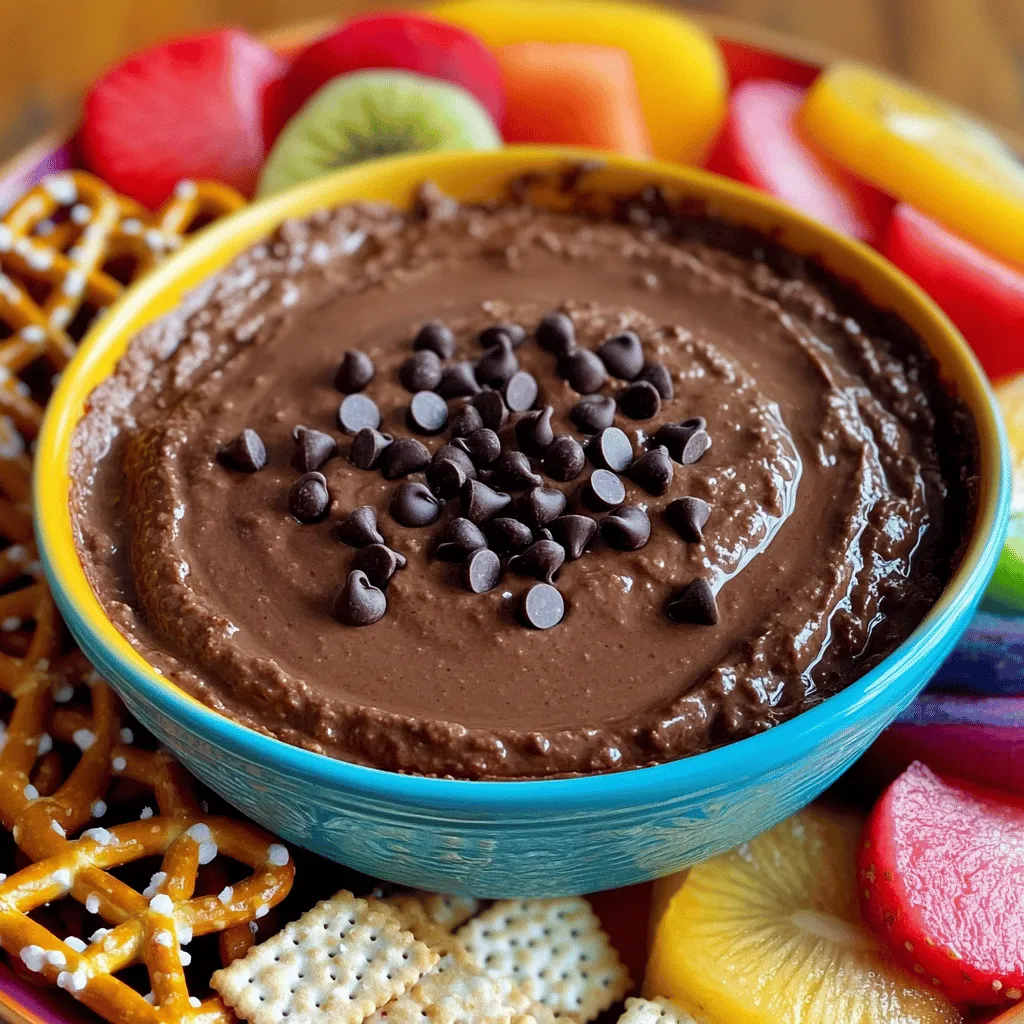
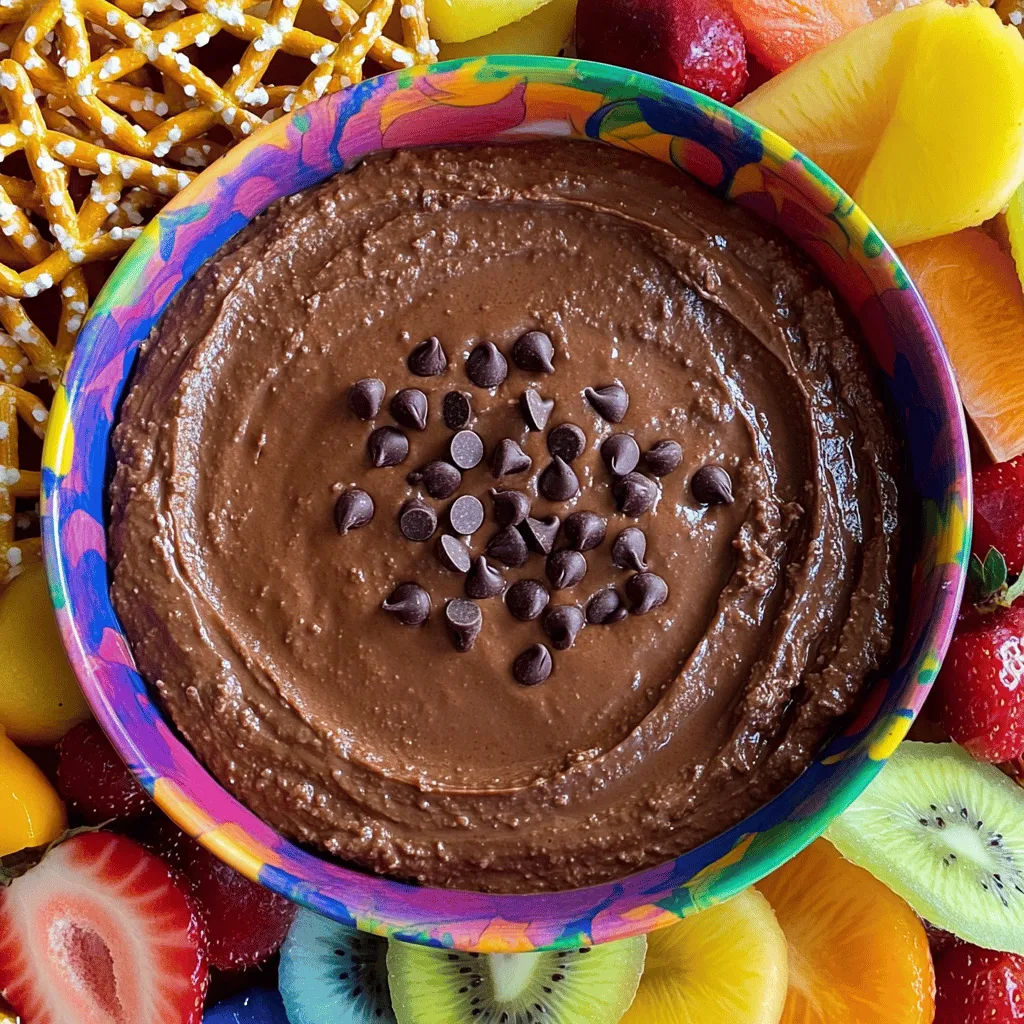
Serve the chilled dip with a variety of dippers. You can use sliced fruits, crunchy pretzels, or sweet graham crackers. To make it look good, serve it in a bright bowl. You can sprinkle some extra chocolate chips on top for a fun touch. Arrange the dippers around the bowl for an eye-catching display.
Tips & Tricks
How to Achieve the Best Texture
To get the best texture, blend the ingredients until smooth. Use a high-speed blender for this. If you want some bits, blend until mostly smooth, then fold in mini chocolate chips. This gives your dip some fun texture!
Adjusting Sweetness to Taste
Taste your dip before serving. If you find it not sweet enough, add more maple syrup or honey. Blend it again for just a few seconds to mix in the sweetness. This dip can suit your taste perfectly!
Presentation Ideas for Serving
Make your dip look great! Serve it in a bright bowl to catch the eye. Sprinkle some extra chocolate chips on top for fun. Arrange dippers like fruits, pretzels, or graham crackers around the dip. This makes it inviting and ready for sharing!

Variations
Alternative Nut Butters to Use
You can switch almond butter for other nut butters. Try peanut butter, cashew butter, or sunflower seed butter. Each nut butter adds its own unique flavor. Peanut butter gives a classic taste. Cashew butter is creamier and sweeter. Sunflower seed butter is nut-free and great for allergies. Choose your favorite to make this dip your own.
Flavor Add-ins for Customization
Kick up the flavor of your dip with fun add-ins. Try adding a pinch of cinnamon for warmth. A splash of coffee extract gives deeper flavor. You can also mix in a tablespoon of nutmeg for a cozy twist. If you love fruits, blend in mashed bananas or pureed strawberries. Each option will make the dip even more delightful.
Different Dipper Suggestions
You can serve your dip with various dippers for fun. Fresh fruits like apples, bananas, and strawberries work well. They add a sweet crunch to the creamy dip. Pretzels give a salty contrast, making each bite exciting. You can also use graham crackers for a classic pairing. Get creative and try other fun items too, like rice cakes or even mini pancakes!
Storage Info
How to Store Leftovers
To keep your cottage cheese brownie batter dip fresh, store it in an airtight container. This helps keep out air and moisture. Make sure to cover it well. Place the container in the refrigerator. This dip stays good for about 3 to 5 days.
Reheating Instructions
You can enjoy this dip cold or at room temperature. If you prefer it warm, gently reheat it on low heat. Use a small pot on the stove. Stir it often to avoid burning. Do not microwave it, as that can change the texture.
Shelf Life and Freezing Tips
If you want to save some for later, consider freezing it. Place the dip in a freezer-safe container. It can last up to 2 months in the freezer. When you’re ready to eat it, let it thaw in the fridge overnight. Stir it well before serving to restore its smoothness.
FAQs
Can I use full-fat cottage cheese?
Yes, you can use full-fat cottage cheese. It will make your dip creamier. The flavor stays rich and smooth. Just remember, this change adds more fat and calories. If you want a lighter option, stick with low-fat.
What can I substitute for almond butter?
If you need a substitute for almond butter, try peanut butter or cashew butter. Sunflower seed butter works well too. Each choice has a unique taste and works in this dip. Just make sure to use a nut or seed butter that you enjoy.
Is this dip suitable for meal prep?
Yes, this dip is great for meal prep. You can make it ahead of time and store it in the fridge. It lasts for about 3-5 days. Just keep it in an airtight container. The flavors will meld together and taste even better!
You now have a complete guide to making cottage cheese brownie batter dip. We covered the key ingredients, tips for the best texture, and even storage ideas. Remember, you can customize the flavors to fit your taste. This dip is not only tasty but also packed with nutrition. Try different nut butters and dippers to make it your own. Enjoy creating this fun treat, and impress your friends with your new skills!


![To make healthy peanut butter oat bars, you need a few key items: - 2 cups rolled oats - 1/2 cup natural peanut butter - 1/4 cup honey or maple syrup - 1/4 cup unsweetened applesauce - 1/2 cup mixed nuts (almonds, walnuts, cashews), roughly chopped - 1/4 cup dark chocolate chips (optional) - 1/2 teaspoon ground cinnamon - 1/4 teaspoon sea salt These ingredients work together to create a tasty and nutritious snack. The oats provide fiber, while the peanut butter adds protein and healthy fats. Honey or maple syrup gives sweetness, and applesauce keeps the bars moist. You can easily change your bars by adding extra flavors or textures. Here are some fun options: - Dried fruits (like cranberries or raisins) - Seeds (like chia or flaxseed) - Protein powder for an extra boost - Coconut flakes for added flavor Feel free to mix and match these add-ins to suit your taste. These oat bars pack a nutritious punch. Here’s a quick look at what you’ll get: - Calories: About 150 per bar - Protein: Around 5g, thanks to the peanut butter and nuts - Fiber: Approximately 3g from the oats and nuts - Healthy Fats: Includes unsaturated fats from the peanut butter and nuts These bars not only taste great but also fuel your body. With their balanced nutrition, they make a perfect snack or breakfast option. For the complete recipe, check the Full Recipe link. Start by preheating your oven to 350°F (175°C). This step ensures even baking. Next, grab an 8x8-inch baking pan. Line it with parchment paper, letting some paper hang over the edges. This makes it easy to lift the bars out later. In a large mixing bowl, combine 2 cups of rolled oats, 1/2 teaspoon of ground cinnamon, and 1/4 teaspoon of sea salt. Stir well until the dry ingredients are mixed evenly. This mix creates a solid base for your bars. In a separate bowl, blend together 1/2 cup of natural peanut butter, 1/4 cup of honey or maple syrup, and 1/4 cup of unsweetened applesauce. Mix vigorously until the mixture is smooth. Pour this wet mixture into the bowl with the dry ingredients. Stir thoroughly, ensuring all the oats are coated. Now, it’s time for the fun part! Fold in 1/2 cup of roughly chopped mixed nuts and 1/4 cup of dark chocolate chips, if you want a sweet touch. Make sure to distribute these extras evenly throughout the batter. Spoon the mixture into your prepared baking pan. Use a spatula or your hands to press the mixture down firmly. This ensures the bars hold their shape while baking. Bake in the preheated oven for 20-25 minutes. Look for a lovely golden brown color on the edges. Once done, remove the pan from the oven. Let it cool for about 10 minutes. Use the parchment paper to lift the bars from the pan and place them on a wire rack. Allow them to cool completely before cutting into your desired size. You can store any leftovers in an airtight container to keep them fresh. Enjoy these tasty treats as a snack or a quick breakfast! For the complete recipe, see the Full Recipe section. To get the best texture for your peanut butter oat bars, use rolled oats. They stay chewy and hold together well. If you want a softer bar, add a bit more applesauce. For crunch, add more nuts. Press the mixture firmly into the pan. This helps the bars hold their shape when baked. Store your bars in an airtight container. This keeps them fresh and moist. You can also layer parchment paper between bars to prevent sticking. If you want to keep them longer, freeze them. They freeze well for up to three months. Just wrap them tightly in plastic wrap before placing them in a freezer bag. These bars make a great snack or breakfast. Cut them into small squares for easy grabbing. Pair them with yogurt or fruit for a balanced meal. You can also drizzle some honey on top for added sweetness. Feel free to explore the [Full Recipe] for more ideas on how to enjoy these delicious treats! {{image_4}} You can change up the nuts in your oat bars. Use almonds, walnuts, or cashews. If you like seeds, try adding pumpkin seeds or sunflower seeds. These options add crunch and healthy fats. Mix and match to find your favorite combination. If you want a different sweet taste, try maple syrup instead of honey. You can also use agave nectar for a milder flavor. For a low-calorie option, consider stevia or monk fruit sweetener. Each sweetener changes the taste just a little. Adding fruits and spices can make your bars pop with flavor. Try mashed bananas or dried fruits like cranberries or apricots. For spices, add a pinch of nutmeg or ginger for warmth. You can even fold in some cocoa powder for a chocolatey twist. These small changes can make your bars exciting and unique. To keep your healthy peanut butter oat bars fresh, store them in an airtight container. This helps to lock in moisture and flavor. You can keep them at room temperature for up to a week. If you want them to last longer, consider refrigerating them. The cool air helps maintain their taste and texture. Freezing is a great way to extend the life of your oat bars. Wrap each bar tightly in plastic wrap. Then place them in a freezer-safe bag or container. You can freeze the bars for up to three months. When you're ready to enjoy them, just take out a bar and let it thaw on the counter. If you prefer warm bars, you can reheat them. Simply place a bar in the microwave for about 15-20 seconds. This warms them up nicely and brings back their fresh-baked taste. If you stored them in the fridge, let them sit at room temperature for a few minutes before warming to avoid cold centers. For more details, check out the Full Recipe. Yes, you can swap peanut butter for almond, cashew, or sunbutter. Each nut butter brings its own flavor. Almond butter gives a creamy texture, while cashew butter is milder. Sunbutter is a great option for nut allergies. Just make sure to choose a natural nut butter without added sugars or oils. These oat bars last about one week at room temperature. Keep them in an airtight container. For longer storage, they can stay fresh in the fridge for about two weeks. If you want to enjoy them later, freeze the bars. They can last up to three months in the freezer. Just thaw them when you are ready to eat. Yes, this recipe is gluten-free if you use certified gluten-free oats. Most rolled oats are naturally gluten-free. However, some brands may process oats with gluten-containing grains. Always check the label before buying. This way, you can enjoy your oat bars without worry. Yes, you can skip added sugars. Use ripe bananas instead of honey or maple syrup. Applesauce also adds natural sweetness. You can add a bit more applesauce if you want a sweeter taste. This keeps the oat bars healthy and tasty without extra sugar. You now have a complete guide to making healthy peanut butter oat bars. We covered essential ingredients and fun add-ins to suit your taste. Step-by-step instructions ensure your bars come out perfectly every time. I shared tips for the best texture and storage methods to keep them fresh. You can also explore different variations for added flavor. These oat bars are easy to make, fun to customize, and nutritious. Enjoy your delicious, homemade snacks!](https://goldendishy.com/wp-content/uploads/2025/07/83a658d4-f414-4ba0-9f79-92aafa211a05-768x768.webp)


