Craving a sweet treat that’s easy to make and oh-so-delicious? I’m excited to share my recipe for Cookies and Cream Cheesecake Truffles! These bite-sized delights combine creamy cheesecake and crunchy cookies for a perfect dessert. Whether you’re planning a party or just want a special snack, this recipe has you covered. Let’s dive into the fun of making these tasty truffles together!
Ingredients
List of Essential Ingredients
To make Cookies and Cream Cheesecake Truffles, you will need:
– 8 oz cream cheese, softened
– 1/2 cup powdered sugar
– 1 teaspoon vanilla extract
– 1 1/2 cups crushed chocolate sandwich cookies (like Oreos)
– 8 oz white chocolate, finely chopped
These ingredients create a creamy and sweet truffle that is hard to resist.
Optional Ingredients for Enhanced Flavor
You can add a tablespoon of coconut oil to the melted white chocolate. This makes the coating smoother. Extra crushed cookies make great decorations on top. They add visual appeal and extra crunch.
Substitutions and Adjustments
If you don’t have cream cheese, try using mascarpone cheese. It gives a rich flavor, too. For a dairy-free option, use vegan cream cheese. Swap out white chocolate for dark chocolate if you prefer a bolder taste. You can even use gluten-free cookies to make these truffles suitable for everyone.
Step-by-Step Instructions
Preparation of the Cheesecake Mixture
First, take 8 oz of cream cheese and let it soften. This step is key for mixing. Place the cream cheese in a large bowl. Use an electric mixer to beat it until it’s smooth and creamy. Next, add 1/2 cup of powdered sugar and 1 teaspoon of vanilla extract. Mix these ingredients until they blend well. Then, gently fold in 1 1/2 cups of crushed chocolate sandwich cookies. Make sure they are well mixed but not too broken.
Forming the Truffles
Now it’s time to form the truffles. Use clean hands to scoop out about 1 tablespoon of the mixture. Roll it into a ball shape. Place each ball on a parchment-lined baking sheet. Make sure to space them evenly. Once all the truffles are shaped, freeze them for about 30 minutes. This helps them hold their shape better.
Melting and Coating with White Chocolate
While the truffles chill, let’s melt the white chocolate. Take 8 oz of finely chopped white chocolate and place it in a microwave-safe bowl. Heat it in 30-second intervals. Stir well between each session until it’s smooth. If you want a creamier texture, add 1 tablespoon of coconut oil. This makes the coating nice and smooth.
Final Chilling and Setting
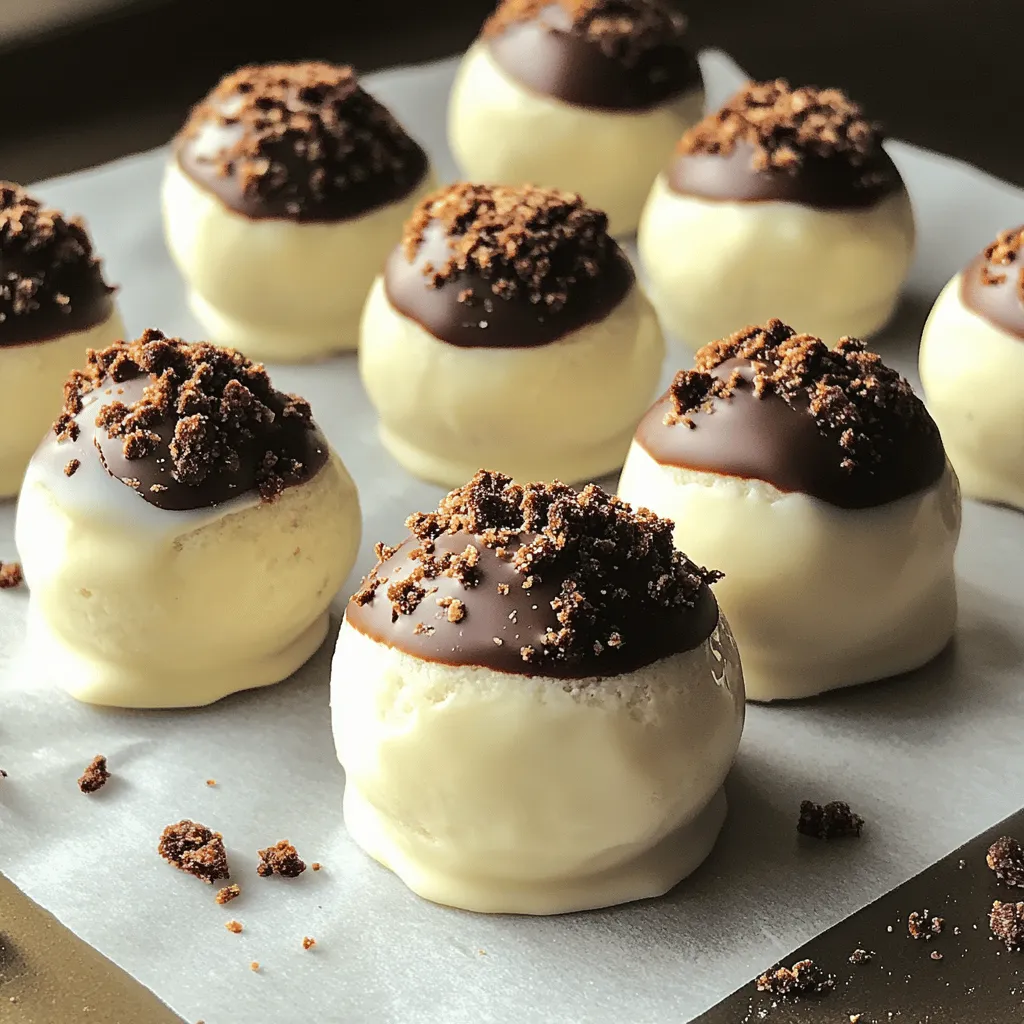
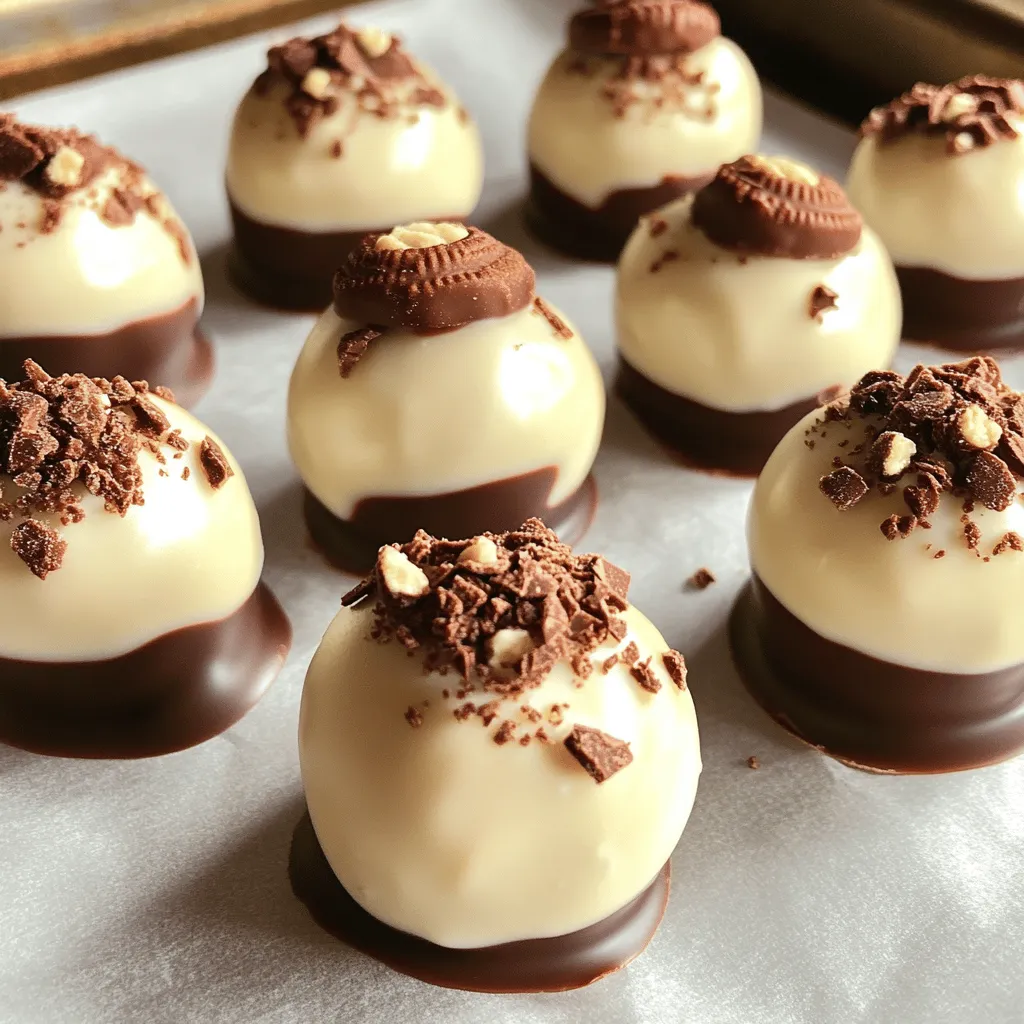
After the truffles are firm, dip each one into the melted white chocolate. Make sure they are fully coated. Allow any excess chocolate to drip off. Before the chocolate sets, sprinkle extra crushed cookies on top for decoration. Place the coated truffles back on the baking sheet. Then, return them to the refrigerator for another 30 minutes. This will help the chocolate harden completely.
Tips & Tricks
How to Achieve the Perfect Truffle Consistency
To get that perfect truffle texture, start with room-temperature cream cheese. This makes it easy to blend. When mixing, add your powdered sugar slowly. This helps avoid lumps. Fold in the crushed cookies gently. You want small bits, not dust. Once you form the truffles, chill them for 30 minutes. This helps them hold their shape when you dip them in chocolate.
Best Practices for Melting Chocolate
For melting chocolate, use a microwave-safe bowl. Chop your white chocolate into small pieces. This helps it melt evenly. Heat the chocolate in 30-second bursts. Stir well after each interval. If you see lumps, keep stirring. They may melt with heat. Adding coconut oil makes it smoother. This gives a nice shine to the truffles, too.
Presentation Ideas for Serving Truffles
How you present your truffles can wow your guests. Arrange them on a pretty platter. Use cupcake liners to make them look fancy. You can drizzle extra melted chocolate over the top. It adds flair and flavor. For a fun touch, sprinkle more crushed cookies on top right after dipping. This makes your truffles look and taste amazing!
Variations
Adding Different Flavorings or Mix-ins
You can make these truffles even more fun by adding new flavors. Try mixing in some mint extract for a fresh twist. You could also add a bit of almond extract for a nutty taste. Want some crunch? Toss in mini chocolate chips or crushed nuts. These changes make each bite unique and exciting.
Gluten-Free Options
If you need gluten-free treats, this recipe is easy to adapt. Use gluten-free chocolate sandwich cookies instead of regular ones. Check the labels of your cream cheese and white chocolate to ensure they are gluten-free too. This way, everyone can enjoy these tasty truffles without worry.
Holiday-themed Variations
You can make these truffles festive for any holiday! For Halloween, add orange food coloring to the white chocolate. Sprinkle on some spooky-themed candies for a fun touch. For Christmas, use peppermint-flavored cookies and add crushed candy canes on top. You can even shape them like little hearts for Valentine’s Day. Get creative and make them fit the season!
Storage Info
Best Practices for Storing Truffles
To keep your Cookies and Cream Cheesecake Truffles fresh, store them in an airtight container. This helps prevent them from drying out or absorbing other smells from the fridge. You can layer the truffles with parchment paper to avoid sticking. Place the container in the fridge for best results.
Freezing Cookies and Cream Cheesecake Truffles
You can freeze these truffles if you want to save some for later. Once they are fully formed and chilled, place them in a single layer on a baking sheet. Freeze them for about 30 minutes until they are firm. Then, transfer them to an airtight container or freezer bag. They can last up to three months in the freezer. To enjoy, thaw them in the fridge overnight.
Shelf Life and Signs of Spoilage
When stored correctly, these truffles last about one week in the fridge. Look for changes in texture or smell as signs of spoilage. If they become too soft or develop an off smell, it’s best to toss them. Enjoy your truffles while they are at their freshest!
FAQs
Can I make these truffles ahead of time?
Yes, you can make these truffles ahead of time. I often prepare them a day in advance. Just store them in an airtight container in the fridge. This keeps them fresh and ready to serve.
What can I use instead of cream cheese?
If you want a different base, use mascarpone cheese or Greek yogurt. Both options provide a nice creaminess. Just remember, the taste will change a bit.
How should I decorate the truffles?
Decorating is fun! After coating the truffles in white chocolate, sprinkle crushed cookies on top. You can also drizzle melted chocolate over them for a fancy look. Get creative with your toppings!
Are there any nut-free options available?
Yes, these truffles are nut-free as long as you choose nut-free chocolate. Check the labels on your chocolate for any traces of nuts. Always keep food allergies in mind when making treats.
You learned how to make delicious cookies and cream cheesecake truffles. We covered essential and optional ingredients, plus tips for perfect consistency. You also found fun variations and smart storage tips. Always feel free to adjust the recipe to fit your taste. Truffles can easily impress anyone. They are perfect for gifts or special events. Enjoy making these tasty treats!


