Are you ready to treat yourself to something delicious and healthy? Coconut Mango Chia Pudding is a simple delight you can whip up in minutes. This dish is not just tasty; it’s packed with nutrients. In this post, I’ll share the easy steps to make it, along with tips for perfecting your pudding. Let’s dive into this tropical treat that will brighten your day!
Ingredients
List of Required Ingredients
To make Coconut Mango Chia Pudding, you need these simple ingredients:
– 1 cup creamy coconut milk
– 1/2 cup ripe mango, pureed until smooth
– 1/4 cup chia seeds
– 2 tablespoons honey or maple syrup (adjust according to your sweetness preference)
– 1/2 teaspoon pure vanilla extract
– A pinch of sea salt
– Fresh mango cubes and shredded coconut for topping
Nutritional Information per Serving
Each serving of Coconut Mango Chia Pudding offers a tasty mix of nutrients. Here’s what you can expect:
– Calories: About 250
– Protein: 4 grams
– Fat: 12 grams
– Carbohydrates: 36 grams
– Fiber: 10 grams
– Sugar: 10 grams
Health Benefits of Key Ingredients
The ingredients in this pudding do more than taste good. Each one brings health perks:
– Coconut milk provides healthy fats that may support heart health.
– Mango is rich in vitamins A and C, boosting your immune system.
– Chia seeds are high in fiber and omega-3 fatty acids, which are great for digestion and heart health.
– Honey or maple syrup adds natural sweetness and antioxidants.
– Sea salt helps balance electrolytes and supports hydration.
These ingredients combine to create a delicious and healthy treat.
Step-by-Step Instructions
Preparation Overview
Making Coconut Mango Chia Pudding is easy and fun. You only need a few steps. Start by gathering all your ingredients. This will make the process smooth.
Mixing the Base Ingredients
First, take a medium bowl. Pour in 1 cup of creamy coconut milk. Then add 1/2 cup of ripe mango puree. You can make the puree by blending ripe mango pieces until smooth. Next, add 2 tablespoons of honey or maple syrup. Adjust the sweetness to your taste. Then, add 1/2 teaspoon of pure vanilla extract and a pinch of sea salt. Use a whisk to mix it all together well. You want a smooth, creamy base with no lumps.
Incorporating Chia Seeds
Now it’s time for the chia seeds. Gradually sprinkle in 1/4 cup of chia seeds while whisking. This step is key to avoid clumping. Keep whisking until the seeds are evenly mixed in. After that, cover the bowl with plastic wrap. Place it in the fridge for at least 4 hours, or even better, overnight. This resting time helps the chia seeds expand. When you return, give it a good stir to mix any settled seeds. Now your pudding is ready to serve!
Tips & Tricks
Best Practices for a Creamy Texture
To make your coconut mango chia pudding creamy, choose full-fat coconut milk. This will give the pudding a rich taste. Blend the coconut milk with mango until smooth. The smoothness adds to the creamy texture. When you add chia seeds, sprinkle them slowly while stirring. This keeps them from clumping. After mixing, let the pudding rest overnight. This allows the chia seeds to absorb the liquid well.
Sweetness Adjustments
Do you like your pudding sweeter? You can adjust the sweetness easily. Use honey or maple syrup based on your taste. Start with two tablespoons. After mixing, taste the pudding. If it needs more sweetness, add a little more. Remember, fresh mango also adds natural sugar, so keep that in mind.
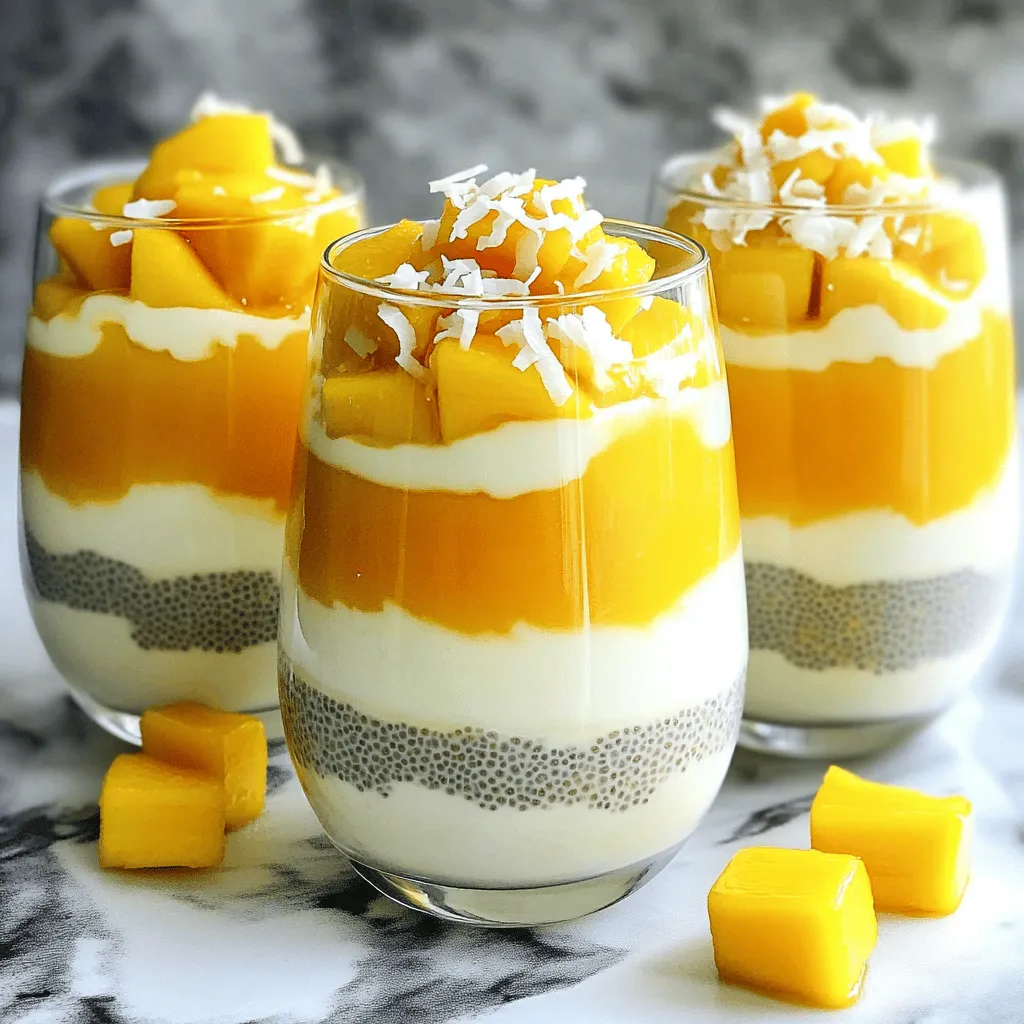
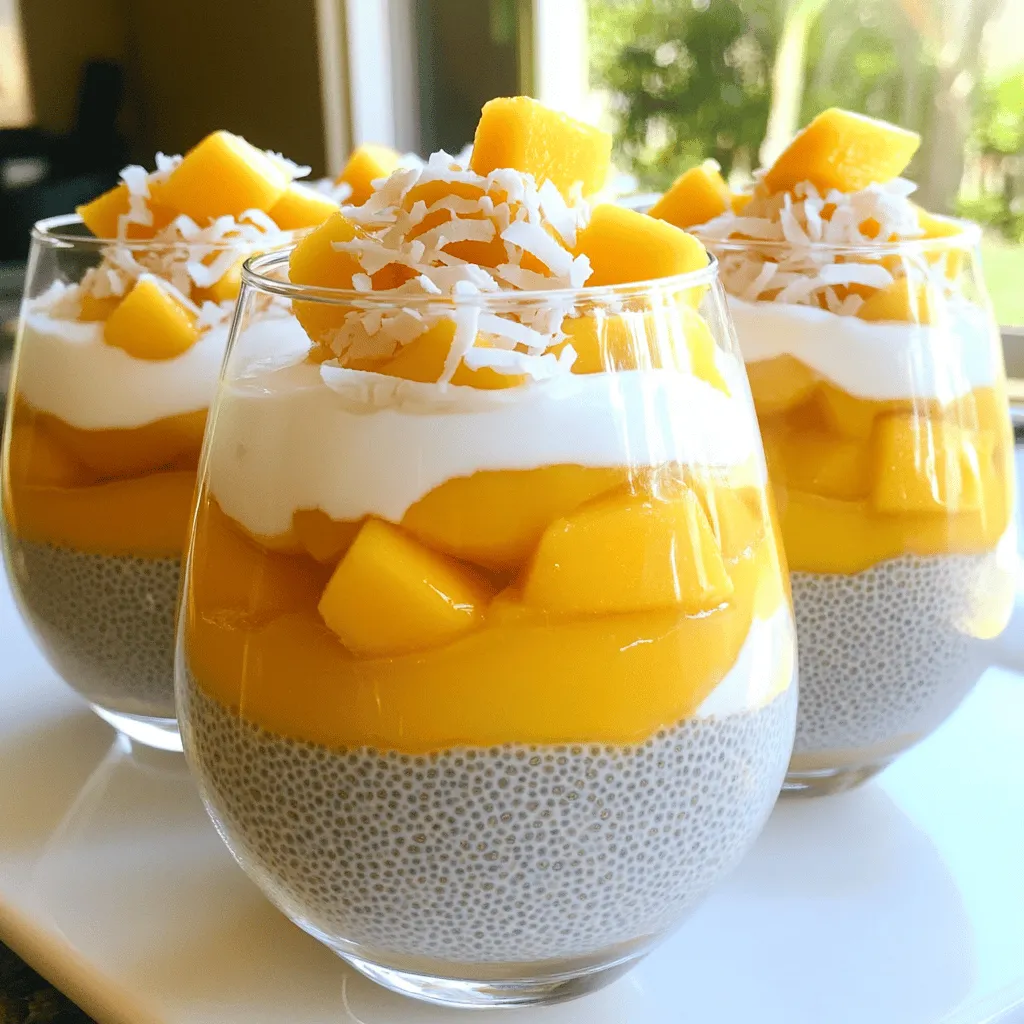
Presentation Tips for Serving
Serving your pudding can be fun! Use clear glasses to show off the beautiful layers. First, scoop the pudding into the glass. Then, add fresh mango cubes on top. Finish with shredded coconut for extra flair. A drizzle of honey or maple syrup can be a nice touch too. This makes your pudding look great and taste even better!
Variations
Flavor Combinations
You can mix flavors to make your coconut mango chia pudding even more fun. Try adding citrus like lime or lemon for a zesty kick. If you love berries, blend in some strawberries or blueberries. These flavors pair well with mango and coconut. You can enjoy a new taste each time you make it!
Dairy-Free Alternatives
If you want a dairy-free treat, coconut milk works great. Almond milk or oat milk can also be used. Both of these milks add their own unique flavor. Just make sure to use unsweetened versions. They keep the pudding healthy and let the natural fruit taste shine.
Toppings Suggestions
Toppings make your pudding look pretty and taste better. You can add fresh mango cubes for sweetness. A sprinkle of shredded coconut adds texture. Try nuts like almonds or walnuts for crunch. You can also use seeds like pumpkin or sunflower for extra nutrients. For a sweet touch, drizzle honey or maple syrup on top. These toppings will make your coconut mango chia pudding a delightful treat!
Storage Info
How to Store Coconut Mango Chia Pudding
To keep your Coconut Mango Chia Pudding fresh, place it in an airtight container. Glass containers work best, but any container with a tight lid will do. Make sure to keep it in the fridge. Avoid leaving it out at room temperature for too long.
Shelf Life and Freezing Options
Your pudding will last for about 4 to 5 days in the fridge. If you want to freeze it, pour the pudding into freezer-safe containers. It can keep for up to 3 months. When you are ready to eat it, move the container to the fridge to thaw.
Reheating and Serving Suggestions
You do not need to reheat this pudding. It is best served cold. When you’re ready to enjoy, stir it well to mix any settled chia seeds. Top it with fresh mango cubes and a sprinkle of shredded coconut. For extra sweetness, add a drizzle of honey or maple syrup. If you want a fun twist, serve it in clear glasses to show off the vibrant layers.
FAQs
How long does Coconut Mango Chia Pudding last?
Coconut Mango Chia Pudding can last up to five days in the fridge. Store it in a sealed container to keep it fresh. After that, the chia seeds may lose their nice texture. If you see any odd smells or colors, toss it out. It’s best to eat it within the first few days for the best taste.
Can I use other types of milk for this recipe?
Yes, you can use other types of milk in this recipe. Almond milk, oat milk, or soy milk work well. Each type will change the flavor a bit, but it will still taste great. Use any milk that you like or have at home. This makes it easy to adjust for your taste or dietary needs.
What are the health benefits of chia seeds?
Chia seeds are tiny but packed with nutrients. They are a great source of fiber, protein, and healthy fats. Eating them can help with digestion and keep you full longer. They also have omega-3 fatty acids, which are good for your heart. Plus, chia seeds are rich in antioxidants, which help protect your body from damage. Adding them to your diet can boost your overall health.
This post covered the ingredients, steps, tips, and storage for Coconut Mango Chia Pudding. You learned how to mix base ingredients and incorporate chia seeds for a creamy treat. Exploring variations and helpful tips can elevate your dish even more.
In conclusion, making this pudding is simple and fun. Enjoy experimenting with flavors and textures. With proper storage, you can savor it longer. Let this recipe inspire you to create delicious and healthy snacks at home.


