Coconut Curry Sweet Potato Soup Flavor-Packed Delight

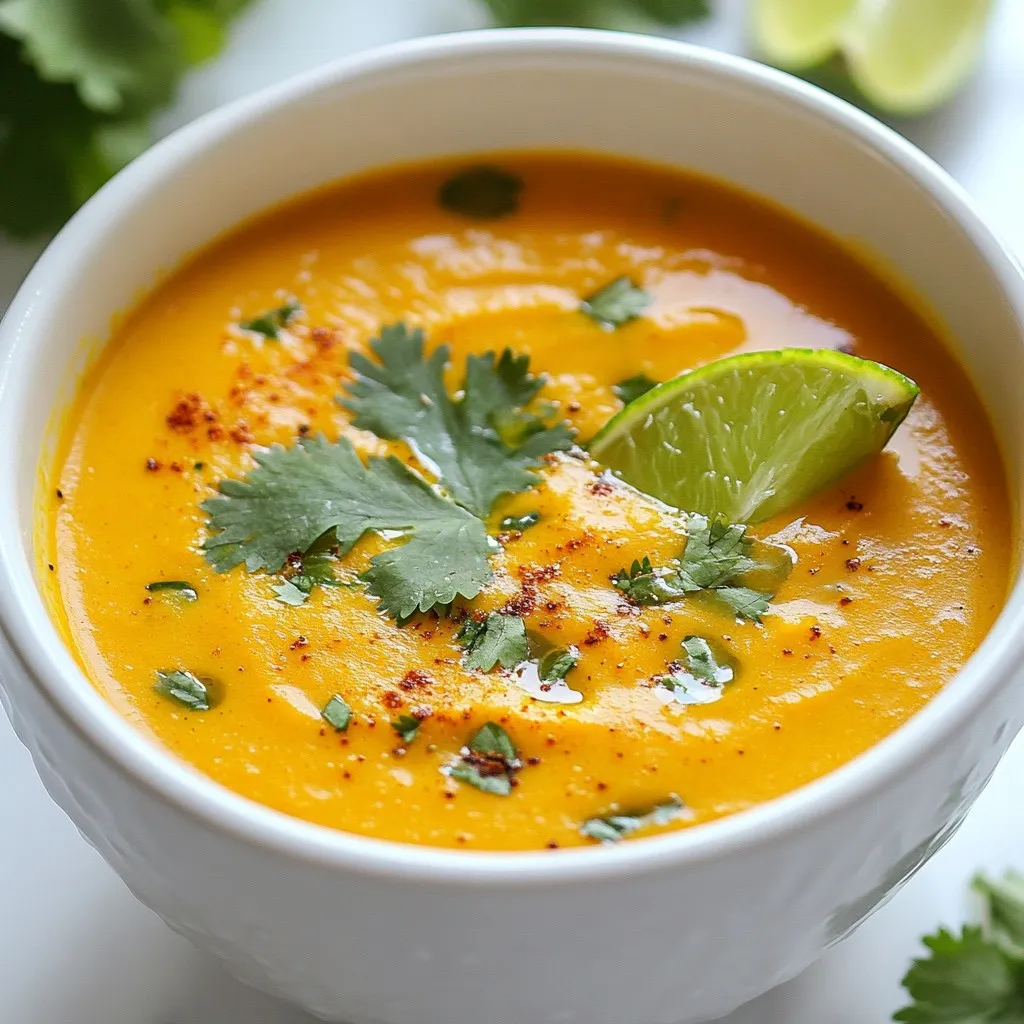
Welcome to my kitchen! Today, we’re diving into a flavor-packed delight: Coconut Curry Sweet Potato Soup. This creamy blend of sweet potatoes and coconut milk, mixed with aromatic spices, will warm you up and leave you craving more. Perfect for a cozy night in, it’s easy to prepare and packed with goodness. So grab your ingredients, and let’s create a dish that’s both delicious and healthy!
Why I Love This Recipe
- Comforting and Creamy: This soup combines the sweetness of sweet potatoes with the richness of coconut milk, creating a comforting and creamy texture that warms the soul.
- Easy to Make: With simple ingredients and straightforward steps, this recipe is perfect for both novice and experienced cooks looking for a quick and delicious meal.
- Full of Flavor: The addition of red curry paste and fresh ginger brings a delightful kick to the soup, making each spoonful packed with vibrant flavors.
- Nutritious and Wholesome: Packed with vitamins and minerals from sweet potatoes and enriched with healthy fats from coconut milk, this soup is both nourishing and satisfying.
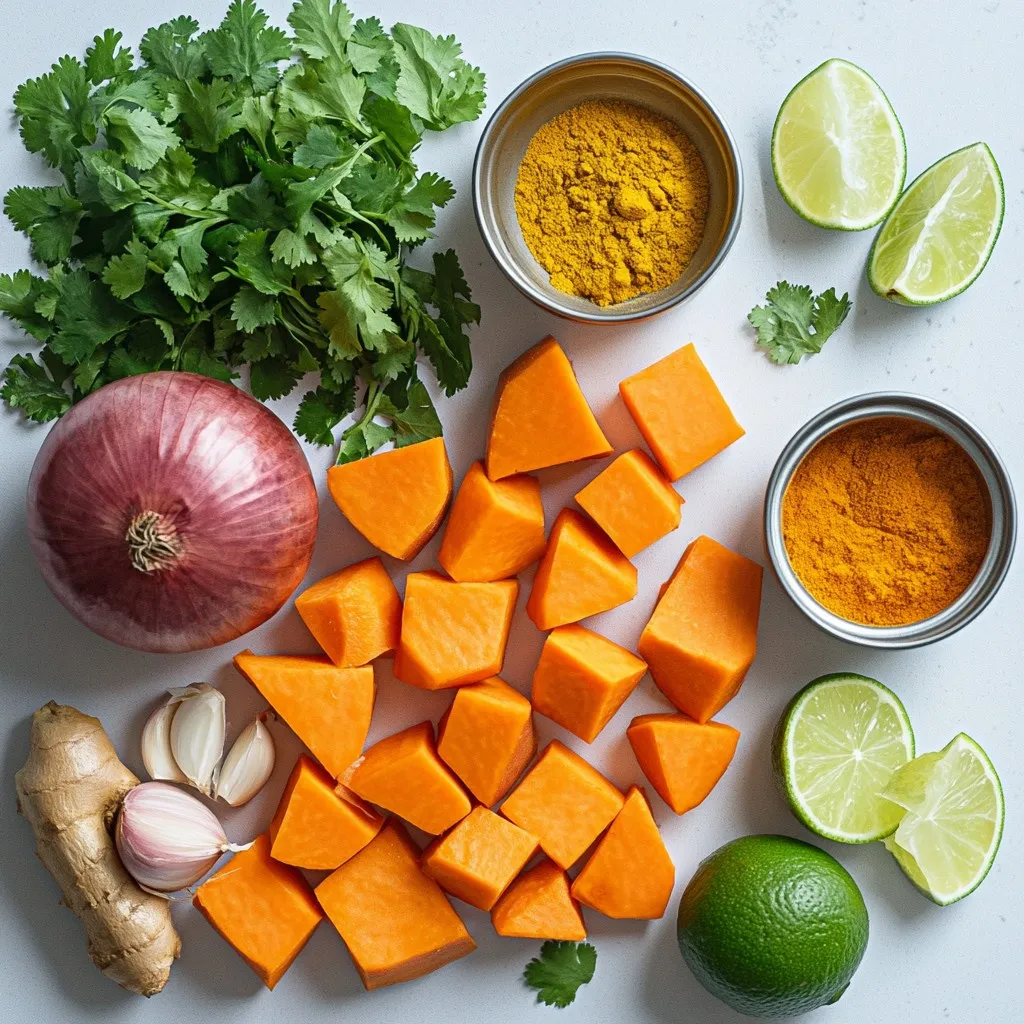
Ingredients
To make Coconut Curry Sweet Potato Soup, you need a few key ingredients. Each item brings unique flavors and textures to the dish. Here’s the complete list:
– 2 medium sweet potatoes, peeled and diced into bite-sized cubes
– 1 can (400ml) coconut milk, shaken well
– 1 medium onion, finely chopped
– 2 cloves garlic, minced or pressed
– 1 inch piece of fresh ginger, grated or minced
– 2 tablespoons red curry paste (adjust based on spice preference)
– 4 cups vegetable broth (homemade or low-sodium)
– 1 tablespoon olive oil
– 1 teaspoon turmeric powder
– Salt and freshly ground black pepper to taste
– Fresh cilantro leaves, roughly chopped, for garnish
– Lime wedges, for serving
Each ingredient plays a role in making this soup creamy, spicy, and comforting. Sweet potatoes provide sweetness and creaminess. Coconut milk adds a rich, velvety texture. Aromatics like onion, garlic, and ginger deepen the flavor. Curry paste and spices create warmth and depth. Finally, the broth brings everything together.
Feel free to adjust the spices to match your taste. You can also play around with garnishes. Enjoy creating this flavorful dish!

Step-by-Step Instructions
Preparation steps
To start, heat olive oil in a large pot over medium heat. Add the chopped onion. Cook for about 5-7 minutes until it gets soft and clear. Then, mix in the minced garlic and grated ginger. Stir for about 1 minute until the smell fills the air.
Next, add the red curry paste and turmeric powder. Cook these spices for 2 minutes. This helps bring out their flavors. Now, toss in the diced sweet potatoes. Make sure they are well-coated with the onion and spice mix.
Pour in 4 cups of vegetable broth. Turn up the heat until it boils. Once boiling, reduce the heat to a gentle simmer. Let it cook for 15-20 minutes. You want the sweet potatoes to be soft and easy to pierce with a fork.
Blending the soup
Once the sweet potatoes are tender, take the pot off the heat. Slowly stir in the coconut milk to create a creamy mix. For blending, you can use an immersion blender. Puree the soup right in the pot until it is smooth.
If you prefer, you can pour the soup into a countertop blender. Blend in batches until smooth. Then return it all to the pot.
Final seasoning and serving
Put the pot back on low heat. Taste the soup and add salt and freshly ground black pepper to your liking. Warm it gently for about 5 minutes.
Serve the soup hot in bowls. Top with roughly chopped fresh cilantro. Add lime wedges on the side for a zesty kick. Enjoy your coconut curry sweet potato soup!
Tips & Tricks
Cooking tips for best results
How to choose sweet potatoes
When picking sweet potatoes, look for firm ones with smooth skin. Avoid those with soft spots or blemishes. The best sweet potatoes should feel heavy for their size. A mix of orange and purple varieties can add depth to your soup.
Adjusting spice levels
Red curry paste can be spicy. Start with one tablespoon if you prefer less heat. You can taste the soup as it cooks and add more if you want it spicier. Mixing in some coconut milk can also help tone down the heat.
Garnishing ideas
Additional flavor enhancers
Add a squeeze of lime juice before serving. This brightens the soup and adds a fresh taste. You can also sprinkle some toasted coconut flakes on top for a crunchy texture.
Alternative toppings
Try adding sliced green onions or diced avocado for creaminess. Chopped peanuts also add a nice crunch. Fresh herbs like basil or mint can give a unique twist to your dish. Mix and match these toppings to find your favorite combination!
Pro Tips
- Adjust Spice Level: Feel free to modify the amount of red curry paste based on your personal spice preference; start with less and add more as needed.
- Creaminess Factor: For an extra creamy texture, blend in a little additional coconut milk after pureeing the soup.
- Flavor Boost: Enhance the soup’s flavor by adding a splash of lime juice directly into the pot before serving.
- Storage Tips: This soup can be stored in the refrigerator for up to 4 days; just reheat gently on the stove before serving.

Variations
Dietary modifications
You can easily make this soup vegan and gluten-free. Use vegetable broth that is certified gluten-free. The coconut milk makes it creamy and rich without dairy. For a low-sodium version, choose low-sodium vegetable broth. You can even skip the added salt and let the spices shine.
Flavor variations
Feel free to add more vegetables to this soup. Carrots, bell peppers, or spinach work great. You can also add proteins like chickpeas or cooked chicken for a heartier meal. If you enjoy spice, try adding fresh chili or extra curry paste. A squeeze of lime juice at the end boosts the flavor too.
Experimenting with these variations keeps the soup exciting and fresh!
Storage Info
Storage guidelines
– Refrigeration tips: Allow the soup to cool before storing. Use an airtight container to keep it fresh. It stays well in the fridge for 3 to 5 days.
– Freezing the soup: For longer storage, freeze the soup. Use freezer-safe containers or bags. It lasts up to 3 months in the freezer. To thaw, place it in the fridge overnight.
Reheating instructions
– Best practices to maintain texture: Reheat the soup gently. This keeps the creamy texture. Stir it often to prevent sticking.
– Microwave vs. stove: The microwave is quick but may heat unevenly. Use the stove for better heat control. Warm it over low heat, stirring until hot.
FAQs
Can I make this soup ahead of time?
Yes, you can make this soup ahead of time. It keeps well in the fridge for about three days. Just let it cool before storing it in an airtight container. When you are ready to eat, reheat it on the stove or in the microwave.
What can I serve with Coconut Curry Sweet Potato Soup?
This soup pairs well with many sides. You can serve it with crusty bread or rice. A simple salad can also complement it nicely. For a special touch, try it with naan bread.
How can I adjust the thickness of the soup?
To adjust the thickness, you have a few options. If the soup is too thick, add more vegetable broth or coconut milk. If it’s too thin, let it simmer longer to reduce. You can also blend it more to create a creamier texture.
Can I use coconut cream instead of coconut milk?
Yes, you can use coconut cream instead of coconut milk. It will give the soup a richer flavor and thicker texture. Just be aware that it can make the soup more calorie-dense. Adjust the other liquids to maintain the right consistency.
This blog post covers making a delicious Coconut Curry Sweet Potato Soup in detail. We explored the necessary ingredients, step-by-step instructions, and tips for the best results. You learned about variations for different diets and flavors, plus how to store and reheat your soup.
In summary, this soup is easy and versatile. Enjoy experimenting with flavors and garnishes. You can share it with friends or savor it all on your own. Happy cookin

Coconut Curry Sweet Potato Soup
Ingredients
- 2 medium sweet potatoes, peeled and diced into bite-sized cubes
- 1 can coconut milk, shaken well
- 1 medium onion, finely chopped
- 2 cloves garlic, minced or pressed
- 1 inch piece fresh ginger, grated or minced
- 2 tablespoons red curry paste
- 4 cups vegetable broth
- 1 tablespoon olive oil
- 1 teaspoon turmeric powder
- to taste salt and freshly ground black pepper
- for garnish fresh cilantro leaves, roughly chopped
- for serving lime wedges
Instructions
- In a large pot, heat the olive oil over medium heat. Once hot, add the chopped onion. Sauté the onion for about 5-7 minutes, stirring occasionally, until it softens and becomes translucent.
- Add the minced garlic and grated ginger to the pot, stirring for about 1 minute until the mixture becomes aromatic and fragrant.
- Stir in the red curry paste and turmeric powder. Cook the spices for an additional 2 minutes, stirring frequently to ensure they are evenly distributed and fragrant.
- Add the diced sweet potatoes to the pot, mixing them thoroughly with the onion and spice mixture to ensure they are well-coated.
- Pour in the vegetable broth and increase the heat to bring the mixture to a rolling boil. Once boiling, reduce the heat to a gentle simmer and let it cook for approximately 15-20 minutes, or until the sweet potatoes are tender and easily pierced with a fork.
- Once the sweet potatoes are tender, remove the pot from the heat and gradually stir in the coconut milk until the mixture is fully combined and creamy.
- Using an immersion blender, carefully puree the soup in the pot until it reaches a silky smooth consistency. Alternatively, you can transfer the soup in batches to a countertop blender, blending until smooth, then return it to the pot.
- Place the pot back on the stove over low heat. Season the soup with salt and freshly ground black pepper to taste, warming it gently for about 5 minutes to combine the flavors.
- Serve the soup hot in bowls, garnished with roughly chopped fresh cilantro on top and lime wedges on the side for an added burst of tangy flavor.


![- 1 pound (450g) potato gnocchi - 2 cups marinara sauce - 1 cup ricotta cheese - 1 cup shredded mozzarella cheese - 1/2 cup grated Parmesan cheese - 1 cup baby spinach, roughly chopped - 1/2 cup cherry tomatoes, halved - 1 tablespoon olive oil - 1 teaspoon garlic powder - Salt and pepper to taste - Fresh basil leaves for garnish Cooking gnocchi is simple. You only need a few key ingredients to make this dish shine. Start with potato gnocchi. It gives a soft, fluffy texture. Marinara sauce adds a rich flavor. Ricotta cheese adds creaminess. Mozzarella and Parmesan bring that cheesy goodness. Don’t forget the fresh spinach. It adds color and nutrition. Cherry tomatoes offer a juicy burst in each bite. Olive oil helps everything meld together. Garlic powder adds depth. Finally, you can season with salt and pepper to your liking. - Alternative cheeses for different flavors: You can swap ricotta for cottage cheese. Use provolone or gouda instead of mozzarella for a twist. - Gluten-free gnocchi options: Look for gnocchi made with rice or corn flour. They work just as well! - Seasonal vegetables to replace spinach or tomatoes: Try bell peppers or zucchini in place of spinach. Fresh asparagus or roasted squash can replace tomatoes too. These substitutions keep the dish fresh and exciting. You can adjust based on what you have or what is in season. Check out the Full Recipe for more details on how to create this loaded baked gnocchi dish! - Preheat the oven to 400°F (200°C). - In a large pot, bring salted water to a boil. - Carefully add the potato gnocchi to the boiling water. - Cook until the gnocchi float, about 2-3 minutes. - Use a slotted spoon to transfer them to a colander. - In a big mixing bowl, combine the drained gnocchi with marinara sauce. - Add ricotta cheese, chopped baby spinach, and garlic powder. - Season with a pinch of salt and pepper. - Gently fold the mixture so all gnocchi get coated. - Take a baking dish and grease it with olive oil. - Transfer the gnocchi mixture to the dish, spreading it evenly. - Top the mix with mozzarella and Parmesan cheese. - Scatter halved cherry tomatoes over the cheese layer. - Drizzle olive oil on top for a nice glaze. - Bake in the preheated oven for 20-25 minutes. - Look for bubbly and golden cheese. - Once baked, remove the dish and let it cool. - Garnish with fresh basil leaves before serving. This loaded baked gnocchi dish is a savory delight that brings comfort and joy. For the full recipe, check out the detailed instructions. Enjoy your cooking! To get that perfect gooey cheese texture, use a mix of cheeses. I like ricotta for creaminess and mozzarella for stretch. Bake the dish until the cheese bubbles and starts to brown. Keep an eye on it to avoid burning. For an even golden-brown top, spread the cheese evenly. A light drizzle of olive oil helps too. You can customize this dish for different diets. For a vegan version, swap the cheese with plant-based options. Low-carb eaters can use cauliflower gnocchi instead of potato gnocchi. Try adding different seasonings. Red pepper flakes add heat, while Italian herbs bring freshness. You can also toss in cooked meats for more flavor. Serve the loaded gnocchi in colorful bowls for a nice look. This helps show off the melted cheese and bright tomatoes. Garnish with fresh basil leaves for a pop of color. A sprinkle of cracked black pepper can add an extra touch. For an elegant finish, drizzle a bit of olive oil on top. For the full recipe, check out the [Full Recipe]. {{image_4}} You can change up the flavor by using different sauces. Pesto sauce gives a fresh taste. It pairs well with the gnocchi's soft texture. Spinach-based sauces add a nice green color and taste. They also boost the nutrition. You can also try a cream or Alfredo sauce. This makes the dish rich and creamy. Each sauce brings its own twist to the meal. Adding proteins makes your loaded baked gnocchi heartier. You can use chicken for a classic touch. Sliced sausage adds a nice zing. If you want a plant-based option, mushrooms work great. They soak up flavors and add depth. Tofu is another good choice for a vegetarian boost. These proteins will fill you up and keep the dish exciting. Want to spice things up? You can add heat with red pepper flakes or jalapeños. They give the dish a nice kick. If you prefer smoky flavors, try smoked paprika or bacon bits. These flavors create a unique twist. You might even consider adding a sweet element, like caramelized onions. This balances the savory notes and adds depth. Each of these enhancements can make your dish special. To keep your loaded baked gnocchi fresh, let it cool. Then, place it in an airtight container. This helps prevent moisture loss. You can also use a glass dish with a lid. Make sure to store it in the fridge. This way, it stays safe to eat for later. When reheating, use the oven for the best results. Preheat it to 350°F (175°C). Place the gnocchi in an oven-safe dish, cover it with foil, and heat for about 15-20 minutes. You can also use a microwave, but it may not keep the texture. If you want to freeze it, do so before baking. Wrap it tightly in plastic wrap, then in foil. It can last up to three months in the freezer. In the fridge, loaded baked gnocchi lasts about three to four days. Check for any changes in smell or color to spot spoilage. If you see mold or it smells off, it’s best to throw it away. Enjoy your delicious meal, and don’t hesitate to check out the Full Recipe for more on this tasty dish! Baked gnocchi is done when the cheese is bubbly and golden. It should smell amazing too! Check the edges for a nice brown color. The dish usually takes 20-25 minutes in the oven. Yes, you can make Loaded Baked Gnocchi ahead! Prepare it and store it in the fridge. Just cover it well. When ready to eat, bake it straight from the fridge. You may need to add a few extra minutes to the cooking time. Great side dishes include a simple green salad or garlic bread. You can also serve roasted veggies for a healthy touch. Pairing with a light soup can make it a cozy meal too. Absolutely! Frozen gnocchi works well for this recipe. Just cook it according to the package instructions. Then, follow the steps in the Full Recipe to make it tasty. Yes, Loaded Baked Gnocchi is perfect for meal prep! You can portion it out for easy lunches or dinners. Just store it in airtight containers in the fridge. Enjoy it throughout the week! Loaded Baked Gnocchi is a fun dish you can easily make. You learned about the great ingredients, simple steps to prepare, and ways to customize it. Remember to enjoy experimenting with flavors and textures. You can adapt it to fit your taste. Whether you're storing leftovers or reheating, you can keep it fresh. This dish not only warms your belly but also sparks creativity in your kitchen. Dive in and enjoy making this delicious meal!](https://goldendishy.com/wp-content/uploads/2025/06/a4704798-2aa5-49c0-949b-2886f6a00168-768x768.webp)
![When making vegetable and bean chili, gather these items first: - 1 tablespoon olive oil - 1 large onion, finely diced - 3 cloves garlic, minced - 1 bell pepper (red or yellow), chopped into bite-sized pieces - 1 medium carrot, diced into small cubes - 1 medium zucchini, diced - 1 cup corn kernels (fresh or frozen will work) - 1 can (15 oz) black beans, rinsed thoroughly and drained - 1 can (15 oz) kidney beans, rinsed thoroughly and drained - 1 can (15 oz) diced tomatoes with their juices - 2 cups vegetable broth (low sodium recommended) - 2 tablespoons chili powder - 1 teaspoon ground cumin - 1 teaspoon smoked paprika - Salt and pepper to taste - Fresh cilantro, chopped (for garnish) - Avocado slices (for serving, optional) These ingredients create a rich, hearty dish that warms you up. You can change this recipe to fit your taste. Here are some ideas: - Add more beans, like pinto or cannellini beans. - Swap in different vegetables, such as spinach or sweet potatoes. - Mix in some hot peppers for a spicy kick. - Use different herbs, like oregano or thyme, for extra flavor. - Top with cheese or sour cream if you prefer. These options let you make the chili your own! This vegetable and bean chili is not only tasty but also healthy. Here’s a quick breakdown of its nutrition: - Calories: Around 250 per serving - Protein: About 12 grams - Carbohydrates: Roughly 40 grams - Fiber: Nearly 12 grams - Fat: Around 5 grams This chili is high in fiber and protein, making it a satisfying meal. You can enjoy it guilt-free! For the full recipe, check out the [Full Recipe]. First, heat 1 tablespoon of olive oil in a large pot over medium heat. When the oil is hot, add 1 large onion, finely diced. Cook the onion for about 5 minutes. It should turn soft and clear. Next, add 3 minced garlic cloves. Stir the garlic in for 1 to 2 minutes. It should smell great and turn light gold. Now, add in a chopped bell pepper, a diced carrot, and a diced zucchini. Cook these veggies for 5 to 7 minutes. Stir them often as they start to soften and brighten. Then, mix in 1 cup of corn kernels. Let them cook for an extra 3 minutes. This adds sweet flavor and color. Next, add 1 can each of black beans and kidney beans, both rinsed and drained. Then, pour in 1 can of diced tomatoes with their juices and 2 cups of vegetable broth. Sprinkle in 2 tablespoons of chili powder, 1 teaspoon of ground cumin, and 1 teaspoon of smoked paprika. Stir everything together well. Increase the heat until it boils. Once boiling, lower the heat to let it simmer. Keep it uncovered for about 30 minutes. Stir occasionally to avoid sticking. Taste and add salt and pepper as you like. Once thickened, remove it from the heat. Let it sit for a few minutes. This helps the flavors mix well. Now, ladle the chili into bowls. You can top each bowl with freshly chopped cilantro. If you want, add avocado slices for a creamy finish. Check out the Full Recipe for more details! To boost the flavor of your vegetable and bean chili, try these tips: - Use Fresh Herbs: Fresh cilantro or parsley adds a bright taste. - Add Citrus: A squeeze of lime or lemon brightens the dish. - Incorporate Spices: Experiment with chipotle powder for heat or oregano for depth. You can also let the chili sit for a few hours or overnight. This resting time lets the flavors meld and deepen. If your chili is too thick, add more vegetable broth. Start with a half cup and stir well. If it’s too thin, simmer it longer. This helps the liquid reduce and thicken. You can also mash some beans to make the chili creamier. Serve your chili with various toppings. Here are some ideas: - Sliced avocado for creaminess - Shredded cheese for a cheesy touch - Crème fraîche or sour cream for richness - Crispy tortilla chips for crunch Pair your chili with warm bread or cornbread on the side. It’s a great way to soak up every delicious drop. For the full recipe, check out the robust vegetable & bean chili. Enjoy your hearty comfort food delight! {{image_4}} If you want a vegan chili, this recipe is already perfect! All the ingredients are plant-based. For gluten-free versions, check your vegetable broth and spices. Most brands are safe, but read labels to be sure. You can switch to gluten-free grains like quinoa or rice as a side. Feel free to change up the beans or veggies. If you don’t have black beans, use pinto or cannellini beans. You can also mix in lentils for added protein. For vegetables, try adding sweet potatoes, spinach, or even kale. This adds flavor and nutrition to your dish. To make your chili spicy, add more chili powder or diced jalapeños. You can also use hot sauce for an extra kick. If you prefer mild flavors, reduce the chili powder and smoked paprika. This way, everyone can enjoy their bowl of chili. For the full recipe, check out the detailed instructions and ingredient list! To keep your vegetable and bean chili fresh, let it cool first. Once cool, store it in an airtight container. Place the container in the fridge. Your chili will stay good for about 3 to 5 days. If you want to enjoy it later, freezing is a great option. You can freeze your chili for up to 3 months. First, let it cool completely. Then, pour it into a freezer-safe container. Leave some space at the top, as the chili will expand when frozen. Label the container with the date. This way, you will know when to use it. When you are ready to eat, thaw the chili in the fridge overnight. For quick reheating, use the microwave or the stove. If microwaving, heat in short bursts, stirring in between. On the stove, warm it over medium heat until it bubbles. Always check that it is hot all the way through before serving. Enjoy your hearty comfort food delight! For the full recipe, check out the detailed steps above. Yes, you can use canned beans. Canned beans save time and effort. Just rinse them well to remove excess sodium. For this chili, I recommend black beans and kidney beans. They add great texture and flavor. Vegetable bean chili lasts about 4 to 5 days in the fridge. Make sure to store it in an airtight container. The flavors actually improve over time, making it even tastier! You can serve this chili with many sides. Try crispy tortilla chips for crunch. Warm bread or cornbread pairs well too. Add a dollop of sour cream or Greek yogurt for creaminess. Don't forget fresh avocado slices for extra flavor! Check the Full Recipe for more serving ideas. This blog post covered all you need for a great vegetable bean chili. We explored the ingredients, showing how to customize it and understand its nutrition. The step-by-step instructions guide you through cooking, while tips enhance its flavor. Variations help you adapt to different diets. Finally, we discussed storage methods and answered common questions. Cooking a tasty chili doesn't have to be hard. You now have tools to make it your own and enjoy it for days. Happy cooking!](https://goldendishy.com/wp-content/uploads/2025/06/710b1993-2890-4a51-b686-850c3b1d6686-768x768.webp)

