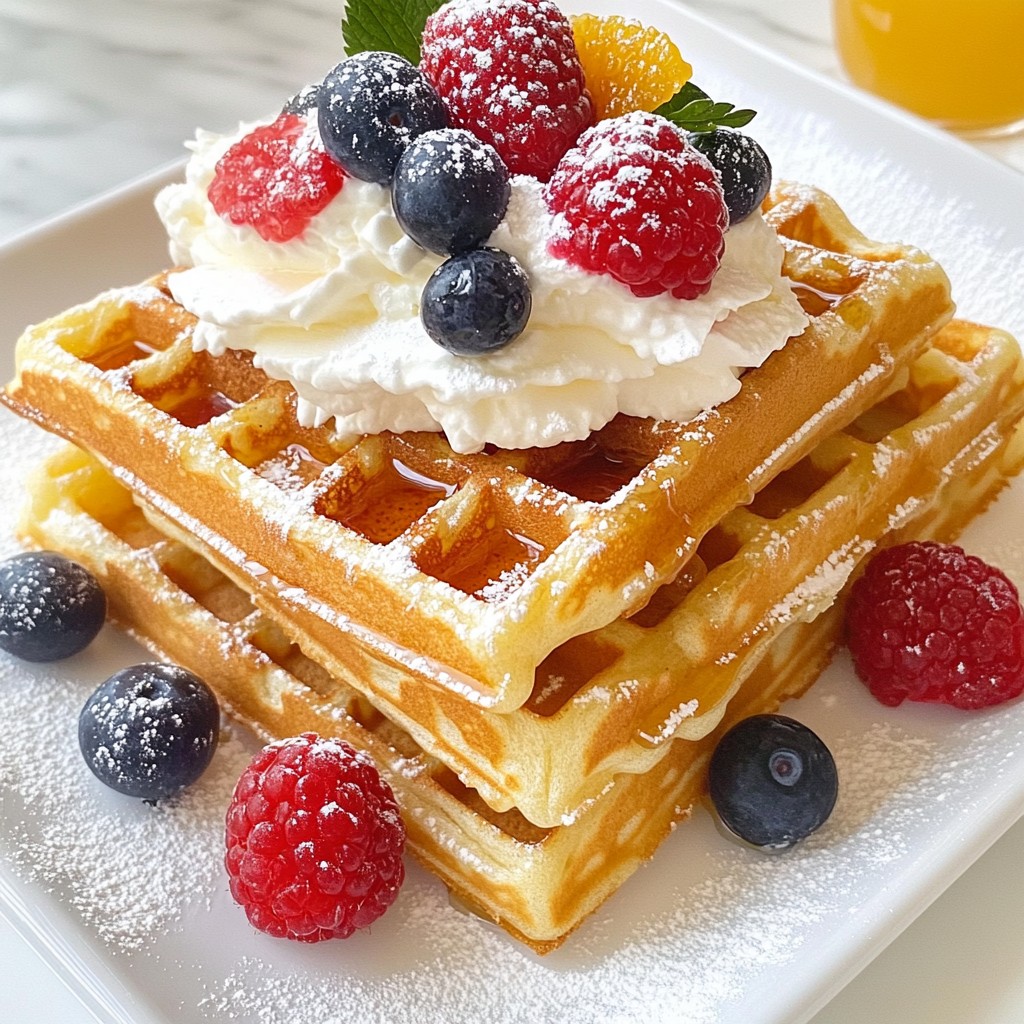
Looking for a simple way to whip up delicious classic vanilla waffles? You’re in the right place! In this blog post, I’ll guide you through an easy recipe that turns basic ingredients into fluffy, golden delights. Whether you're a breakfast beginner or a seasoned pro, this step-by-step method will help you impress friends and family alike. Let’s dive into the world of classic waffles that everyone will love!
Why I Love This Recipe
- Fluffy Texture: The careful mixing of the batter ensures that the waffles are light and airy, making every bite a delight.
- Customizable Toppings: The versatility of toppings allows everyone to create their perfect waffle experience, whether they prefer sweet or fruity.
- Quick and Easy: With a total time of just 25 minutes, this recipe is perfect for busy mornings or spontaneous brunches.
- Classic Flavor: The rich vanilla essence brings a warm, comforting flavor that pairs beautifully with any topping.
Ingredients
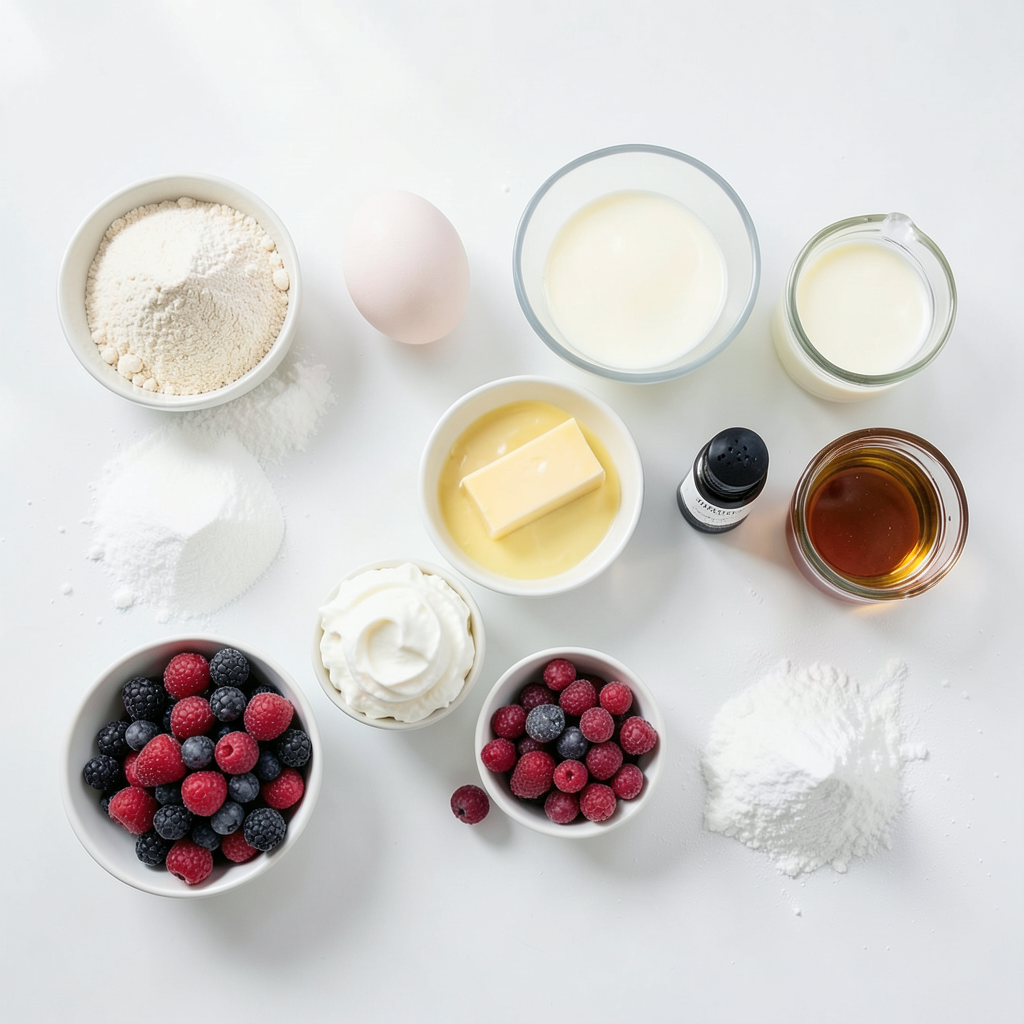
To make classic vanilla waffles, you need simple ingredients. Here’s the list:
- 2 cups all-purpose flour
- 2 tablespoons granulated sugar
- 1 tablespoon baking powder
- 1/2 teaspoon fine salt
- 2 large eggs
- 1 3/4 cups whole milk
- 1/2 cup unsalted butter, melted and slightly cooled
- 2 teaspoons pure vanilla extract
- Optional toppings: Fresh berries, whipped cream, maple syrup, and powdered sugar
Each ingredient plays a key role. The all-purpose flour gives structure, while sugar adds sweetness. Baking powder helps the waffles rise, making them fluffy. Salt brings out the flavors. Eggs bind the mix, and milk gives moisture. Unsalted butter adds richness, and vanilla gives that classic flavor we adore.
For toppings, think of fresh berries like strawberries or blueberries. Whipped cream adds a light, fluffy touch. Maple syrup offers sweetness, while powdered sugar adds a pretty finish. Feel free to mix and match your favorites!
Step-by-Step Instructions
Preheat the Waffle Iron
First, preheat your waffle iron. Follow the instructions from the maker. A hot iron helps the waffles cook evenly and turn crispy.
Prepare the Dry Ingredients
In a big bowl, mix the dry ingredients. Add 2 cups of all-purpose flour, 2 tablespoons of granulated sugar, 1 tablespoon of baking powder, and 1/2 teaspoon of fine salt. Whisk them well until they blend together nicely.
Mix the Wet Ingredients
In another bowl, crack 2 large eggs and beat them until they look frothy. Add 1 3/4 cups of whole milk, 1/2 cup of melted butter, and 2 teaspoons of pure vanilla extract. Stir everything until it becomes smooth and well mixed.
Combine Wet and Dry Mixtures
Pour the wet mix into the bowl with the dry mix. Stir gently with a rubber spatula or wooden spoon. Don’t overmix; it’s okay to have some lumps. This will keep the waffles fluffy.
Cook the Waffles
Next, grease the preheated waffle iron lightly. Use a non-stick spray or a small pat of butter. Ladle about 1/2 to 3/4 cup of batter onto the iron and close the lid. Cook for about 5-7 minutes until they turn golden brown. Check them as times may vary.
Serve and Customize
Once cooked, remove the waffles carefully using a fork or tongs. Place them on a wire rack to stay crispy. Serve them warm and let everyone pick their favorite toppings. Fresh berries, whipped cream, maple syrup, and powdered sugar are all great choices. Enjoy your delicious creation!
Tips & Tricks
Perfecting the Waffle Texture
To get the best waffle texture, start with fresh ingredients. Use all-purpose flour for fluffiness. Mix your wet and dry ingredients gently. Overmixing will make them tough. A few lumps in the batter are okay. They help keep the waffles light and airy.
Preventing Stickiness on the Waffle Iron
To stop waffles from sticking, grease your waffle iron well. Use non-stick cooking spray or a little melted butter. Make sure to cover the plates evenly. This small step makes a big difference. Avoid opening the iron too soon. Let the waffles cook fully to prevent tearing.
How to Keep Waffles Crisp
After cooking, place the waffles on a wire rack. This helps air circulate around them. If you stack them on a plate, they will steam and get soggy. Serve your waffles right away for the best crispiness. You can also warm them in the oven at a low temperature if needed.
Pro Tips
- Perfectly Preheated Iron: Ensure your waffle iron is fully preheated before pouring in the batter. This helps to achieve a golden-brown color and crispy texture.
- Don’t Overmix: Gently stir the batter until just combined. Overmixing can lead to dense waffles, so keep it light and fluffy!
- Keep Them Crisp: Place cooked waffles on a wire rack instead of stacking them directly on a plate. This allows air to circulate, preventing them from becoming soggy.
- Experiment with Flavors: Feel free to add spices like cinnamon or nutmeg to the batter for an extra layer of flavor. You can also mix in chocolate chips or nuts for added texture!
Variations
Adding Flavors (Chocolate, Cinnamon, etc.)
You can easily add fun flavors to your waffles. For a chocolate twist, mix in 1/2 cup of cocoa powder with the dry ingredients. This gives your waffles a rich taste. If you like spice, add 1 teaspoon of ground cinnamon. The warm aroma will make your kitchen smell great.
Fruit Incorporation (Bananas, Apples, etc.)
Fruits can make your waffles even better. For bananas, mash one ripe banana and fold it into the batter. This adds natural sweetness and moisture. You can also use diced apples for a crunchy texture. Just toss in about 1 cup of chopped apples. They will soften while cooking, giving extra sweetness.
Savory Waffle Options
Savory waffles offer a tasty change. You can mix in cheese, herbs, or cooked bacon. For cheese, add 1 cup of shredded cheddar to the batter. Fresh herbs like chives or parsley can brighten the flavor. For a heartier option, mix in 1/2 cup of crumbled bacon. These savory bites are perfect with eggs or a salad.
Storage Info
Storing Leftover Waffles
Once you make your classic vanilla waffles, you may have some left over. To store them, let the waffles cool down first. Place the cooled waffles in an airtight container. You can keep them in the fridge for up to three days. If you want to keep them longer, freezing is a great option.
Reheating Instructions
When you are ready to enjoy your leftover waffles, reheating is easy. You can use a toaster or an oven. For a toaster, just pop them in until they are warm and crisp. For an oven, preheat it to 350°F (175°C). Place the waffles on a baking sheet and heat for about 10 minutes. This method keeps them crispy.
Freezing Waffles for Later
To freeze your waffles, stack them with parchment paper in between each one. This prevents them from sticking together. Place the stack in a freezer bag or airtight container. You can freeze waffles for up to three months. When you crave a waffle, just take one out, and follow the reheating instructions to enjoy a fresh-tasting treat.
FAQs
Can I use whole wheat flour instead of all-purpose?
Yes, you can use whole wheat flour. The waffles will taste nuttier and be denser. You might want to mix half whole wheat and half all-purpose flour. This blend keeps the waffles light while adding nutrition.
What can I substitute for eggs in this recipe?
For egg substitutes, you have several options. You can use 1/4 cup of unsweetened applesauce for each egg. Another option is 1/4 cup of yogurt or buttermilk. These options help bind the batter and maintain moisture.
How do I know when the waffles are done cooking?
Waffles are done when they are golden brown and crisp. Most waffle makers have an indicator light. You can also check by opening the lid carefully. If the steam has stopped and they lift easily, they are ready.
How can I make gluten-free classic vanilla waffles?
To make gluten-free waffles, use a gluten-free flour blend. Many blends work well, but make sure it has xanthan gum. Follow the same recipe for mixing and cooking times. Enjoy your gluten-free treat!
You now have all the tools to make perfect waffles. We covered the key ingredients and the step-by-step process. I shared tips to help you achieve the best texture and keep them crisp. We explored fun variations, like adding flavors and fruits. Finally, I included storage tips for your leftovers.
Enjoy making delicious waffles that fit your taste. Don’t hesitate to get creative and try new toppings! Happy cooking!