Classic Oatmeal Raisin Cookies Irresistible Treat

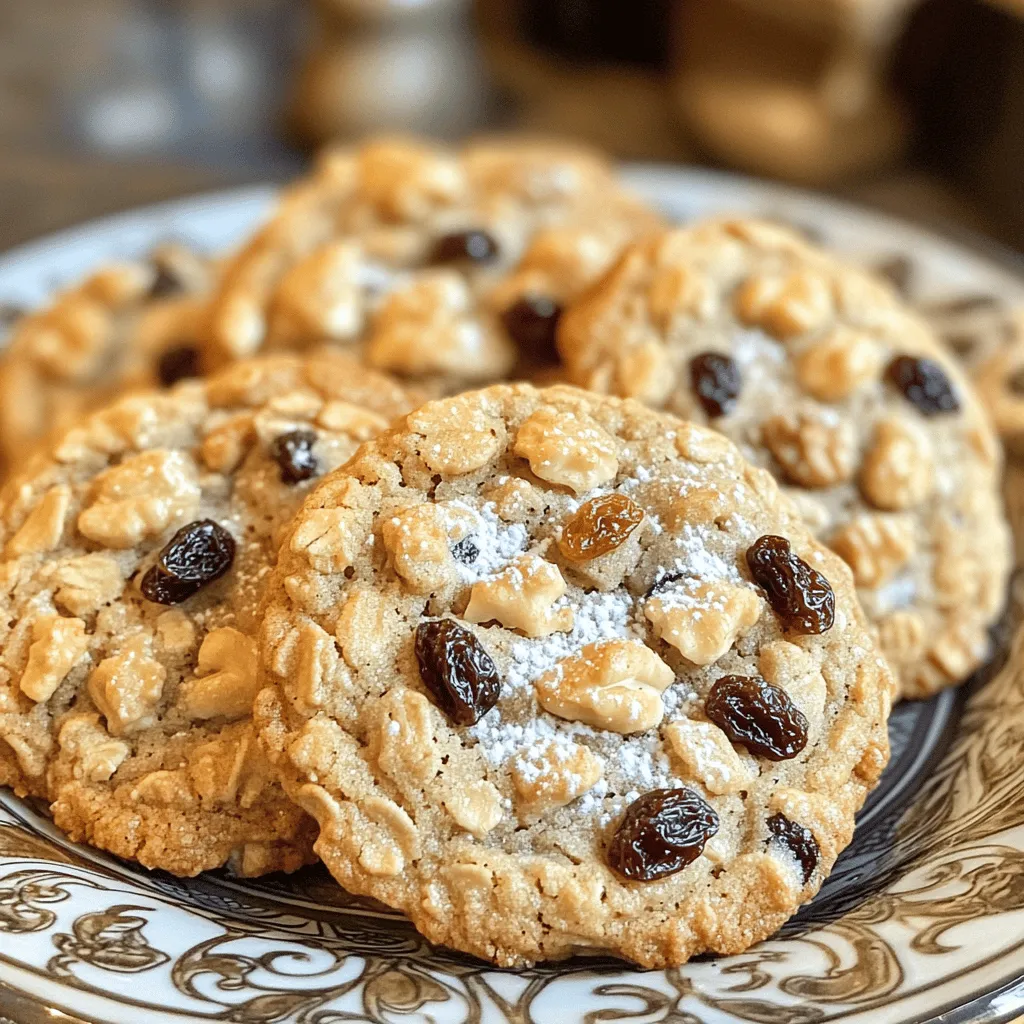
Welcome to your go-to guide for making Classic Oatmeal Raisin Cookies. These cookies are a timeless favorite that perfectly blend chewy oats, sweet raisins, and a hint of cinnamon. I’ll share easy steps, tips, and variations to make your treats irresistible. Whether you’re a baking pro or a beginner, you’ll find everything you need right here. Let’s dive in and create something amazing together!
Ingredients
List of Ingredients
– Rolled oats
– All-purpose flour
– Baking soda
– Salt
– Ground cinnamon
– Unsalted butter
– Brown sugar
– Granulated sugar
– Egg
– Vanilla extract
– Raisins
– Walnuts (optional)
Ingredient Measurements
For this oatmeal raisin cookie recipe, here are the specific amounts you need:
– 1 cup rolled oats
– 1 cup all-purpose flour
– 1/2 teaspoon baking soda
– 1/2 teaspoon salt
– 1 teaspoon ground cinnamon
– 1/2 cup unsalted butter, softened
– 1/2 cup packed brown sugar
– 1/2 cup granulated sugar
– 1 large egg
– 1 teaspoon pure vanilla extract
– 1 cup raisins
– 1/2 cup chopped walnuts (optional)
Ingredient Substitutions
You can swap some ingredients to fit your needs and tastes.
– For a gluten-free version, use almond or oat flour instead of all-purpose flour.
– If you’re vegan, replace the egg with 1/4 cup unsweetened applesauce or a flax egg (1 tablespoon ground flaxseed mixed with 2.5 tablespoons water).
– Use coconut oil in place of butter for a dairy-free option.
– You can switch raisins with dried cranberries or chocolate chips for a fun twist.
These changes keep the flavor while catering to dietary needs.
Step-by-Step Instructions
Preparation Details
First, preheat your oven to 350°F (175°C). This step ensures even baking. Next, prepare your baking sheet by lining it with parchment paper. This will help your cookies not stick and make cleanup easy.
Now, grab a medium-sized bowl to mix the dry ingredients. Combine 1 cup of rolled oats, 1 cup of all-purpose flour, 1/2 teaspoon of baking soda, 1/2 teaspoon of salt, and 1 teaspoon of ground cinnamon. Stir well until everything is evenly mixed. Set this bowl aside for later.
Combining Ingredients
In a large mixing bowl, cream together 1/2 cup of softened unsalted butter, 1/2 cup of packed brown sugar, and 1/2 cup of granulated sugar. Use a hand mixer or whisk to beat the mixture until it is light and fluffy. This process takes about 2-3 minutes.
Next, add in 1 large egg and 1 teaspoon of pure vanilla extract. Beat these into the butter and sugar mixture until it is smooth and well combined.
Now, it’s time to bring the dry and wet mixtures together. Gradually add the dry mix to the wet mix. Use a spatula to stir gently until just combined. Avoid overmixing; the dough should remain slightly sticky.
Finally, fold in 1 cup of raisins and, if you wish, 1/2 cup of chopped walnuts. Make sure the raisins and walnuts are evenly spread throughout the dough.
Baking Process
Using a tablespoon or cookie scoop, drop rounded balls of dough onto your prepared baking sheet. Leave about 2 inches of space between each cookie. This space allows them to spread as they bake.
Place the baking sheet in your preheated oven. Bake for 10-12 minutes. The edges should turn golden brown, while the centers should remain soft and slightly underbaked.
Once baked, remove the sheet from the oven. Let the cookies cool for 5 minutes on the sheet. After that, transfer them to wire racks to cool completely.
For the full joy of this recipe, try serving these cookies fresh with a tall glass of cold milk.
Tips & Tricks
Perfecting the Cookie Texture
To get chewy cookies, use rolled oats. They give a great texture. Make sure to measure your ingredients carefully. Too much flour can make your cookies dry. Mix until just combined for the best chew. Overmixing can lead to tough cookies.
Enhancing Flavor
Add spices like nutmeg or ginger for extra warmth. These spices pair well with cinnamon. You can also try adding a touch of maple syrup for depth. Always use fresh ingredients. Fresh spices and quality butter can make a big difference in taste.
Baking Equipment Recommendations
Choose a light-colored baking sheet. It helps cookies bake evenly. Use parchment paper to prevent sticking. This makes cleanup easy too. For scooping dough, a cookie scoop works best. It helps create uniform cookies that bake evenly. A tablespoon also works if you don’t have a scoop.

Variations
Flavor Variations
You can easily change the taste of your cookies. Adding chocolate chips makes them rich and sweet. You might also want to try different nuts. Pecans or almonds add a nice crunch. Dried fruits can bring a twist too. Try cranberries or apricots for extra flavor. Each choice adds a new layer of taste to the classic oatmeal raisin cookie.
Dietary Adjustments
If you need gluten-free cookies, swap all-purpose flour for almond flour or oat flour. These options keep the cookies tasty while meeting dietary needs. For a vegan version, use coconut oil for butter and a flaxseed egg instead of a regular egg. These swaps keep the cookie soft and chewy, just like the original recipe.
Cookie Size Options
You can make cookies in different sizes. For mini cookies, use a teaspoon to scoop the dough. Bake them for about 8-10 minutes. Larger cookies need more time. Use a tablespoon and bake them for 12-14 minutes. Keep an eye on the edges. They should be golden brown, while the centers stay soft and slightly underbaked.
Storage Info
Best Storage Practices
To keep your cookies fresh, store them in an airtight container. This prevents air from making them dry. You can also add a slice of bread inside. The moisture from the bread helps keep the cookies soft. Use a container that fits the number of cookies you have. A small jar works well for a few cookies. A larger container is great for a big batch.
Freezing Tips
You can freeze both cookie dough and baked cookies. For the dough, scoop it onto a baking sheet lined with parchment paper. Freeze the dough balls until they are solid. Then, transfer them to a freezer bag. This way, you can bake fresh cookies anytime. For baked cookies, let them cool completely first. Place them in an airtight container or freezer bag. To thaw, leave them at room temperature for a few hours. You can also warm them in the oven for a few minutes.
Shelf Life
When stored properly, cookies can last about one week at room temperature. If you freeze them, they can last up to three months. Check for signs of staleness. If the cookies feel hard or taste bland, they may be past their prime. Fresh cookies should be soft and chewy with a rich flavor. Enjoy your cookies while they’re still at their best!
FAQs
How long do oatmeal raisin cookies last?
Oatmeal raisin cookies will last about one week at room temperature. Store them in an airtight container. This keeps them fresh and soft. You can also freeze them for up to three months. Just make sure to wrap them well in plastic wrap. Thaw them at room temperature when ready to eat.
Can I use quick oats instead of rolled oats?
Yes, you can use quick oats. They cook faster and have a finer texture. This will make your cookies softer and less chewy. Rolled oats give a nice chewy bite. If you like a heartier cookie, stick with rolled oats. Both types will still taste great!
What can I substitute for eggs in this recipe?
You have a few good options for egg substitutes. You can use 1/4 cup unsweetened applesauce for each egg. Mashed banana works too, but it will add flavor. Another option is using 1 tablespoon ground flaxseed mixed with 2.5 tablespoons water. Let it sit for a few minutes to thicken. This works well for binding in cookies.
This article covered all you need to know for perfect oatmeal raisin cookies. We looked at key ingredients, their measurements, and possible substitutes. You learned step-by-step instructions for mixing, baking, and achieving great texture. We also shared tips for flavor, equipment, and storage.
Now you can bake delicious cookies that fit your taste and diet. Enjoy your baking journey with these simple recipes!


![To make easy lemon bars, you need a few simple ingredients. Here’s what you’ll need: - 1 cup all-purpose flour - 1/2 cup powdered sugar (plus extra for dusting) - 1/4 teaspoon salt - 1/2 cup unsalted butter, melted - 2 large eggs - 1 cup granulated sugar - 1/4 cup freshly squeezed lemon juice - Zest of 1 fresh lemon - 1/2 teaspoon baking powder Each ingredient plays a key role in the flavor and texture. The flour gives structure, while the butter adds richness. The eggs help bind everything together. The lemon juice and zest bring that bright, zesty flavor. Using fresh lemon juice makes a big difference. It adds a vibrant taste that bottled juice can’t match. The powdered sugar gives the bars a sweet finish. Make sure to have some extra on hand for dusting. Gather these ingredients before you start. This will make the cooking process smooth and easy. For the full recipe, check out the complete guide to making these delicious lemon bars. 1. Preheat your oven to 350°F (175°C). This is important for even baking. 2. In a medium bowl, mix the flour, powdered sugar, and salt. Use a whisk to combine them well. 3. Pour the melted butter into the bowl. Mix it with a fork until it looks like clumpy dough. 4. Press this dough firmly into the bottom of an 8x8 inch baking dish. This will be your crust. 1. In a separate bowl, whisk together the eggs and granulated sugar. Beat them until smooth and slightly frothy. This takes about 1-2 minutes. 2. Next, add the lemon juice, lemon zest, and baking powder to the egg mixture. Stir until everything is mixed well. 1. Bake the crust in the preheated oven for about 15 minutes. It should turn a light golden brown. 2. Carefully pour the lemon filling over the hot crust. Return the dish to the oven. 3. Bake for an additional 20-25 minutes. The filling should be set and lightly browned when done. 4. Once baked, remove the dish from the oven and let it cool for at least 15 minutes. This helps the bars set up. 5. Transfer the bars to a wire rack to cool completely. Once cool, dust with powdered sugar and cut into squares. For the full recipe, check out the detailed instructions. Enjoy your refreshing lemon bars! - Use room temperature ingredients. This helps the batter mix well. - Fresh lemon juice boosts the taste. It brings out the bright, zesty flavor. When you use room temperature eggs and butter, they mix better. This helps create a smooth filling. Fresh lemon juice is key for a strong lemon flavor. Bottled juice can taste flat. - Dust your bars with powdered sugar. This adds a nice touch and looks pretty. - Garnish with lemon slices and mint leaves. They make your bars pop and look inviting. Once your lemon bars cool, dust them with sugar. Then, place lemon slices on top. Add a few mint leaves for color. This makes your dessert not just tasty but also beautiful. For the full recipe, check out the details above. {{image_4}} You can make these lemon bars even more exciting. One way is to add berries. Fresh blueberries or raspberries pair well with lemon. They add a pop of color and taste. Just fold in one cup of your chosen berries after mixing the lemon filling. Another fun idea is to infuse the bars with herbs. Basil or rosemary works great. Chop a few leaves finely and mix them in with the lemon juice. This adds a unique twist that surprises the taste buds. If you need gluten-free bars, don't worry! You can swap the all-purpose flour for a gluten-free blend. Look for a mix that includes rice flour and starches. This keeps the texture light and tasty. For those who follow a vegan diet, you can replace the eggs. Use flax eggs instead. To make one flax egg, mix one tablespoon of flaxseed meal with two and a half tablespoons of water. Let it sit for about five minutes until it gets thick. This works well in the lemon filling to keep it creamy. Check the [Full Recipe] for the main steps to create these delightful lemon bars. To keep your lemon bars fresh, store them in the refrigerator. - Wrap them well: Use plastic wrap or an airtight container. - Keep them chilled: This helps maintain their texture and flavor. If you want to save some for later, you can freeze lemon bars. - Cool completely: Let them cool fully before freezing. - Cut into squares: This makes it easy to grab one later. - Wrap in plastic: Use freezer-safe wrap to prevent freezer burn. - Place in a container: Use an airtight container for extra protection. Lemon bars stay fresh in the fridge for about one week. - Check for freshness: Look for any signs of mold or off smells. If they have been in the fridge too long, they may go bad. - Signs of spoilage: If they look discolored or smell sour, it’s time to toss them. - Texture changes: A slimy texture means they’re no longer good. Storing them right helps you enjoy their bright flavor longer! For the complete recipe, check out the Full Recipe. To make your lemon bars less tart, adjust the sugar and lemon juice. You can add more sugar to balance the tartness of the lemon juice. Try adding an extra 1/4 cup of sugar to the filling. If you want, you can also reduce the lemon juice. Use about 3 tablespoons instead of 1/4 cup. This way, you keep the lemon flavor while making it sweeter. You can use bottled lemon juice, but fresh is better. Bottled juice often lacks the bright flavor of fresh lemons. Fresh lemon juice also has a more vibrant acidity. This difference makes your bars taste much better. If you must use bottled juice, try to find one with no added sugar or preservatives. To cut lemon bars into neat squares, use a sharp knife. First, let the bars cool completely. This helps them set and makes cutting easier. Dip your knife in warm water before each cut. Wipe the knife clean between cuts for a smoother edge. For even squares, use a ruler or a guide to measure before cutting. These tips will help your bars look great on any plate. You learned how to make easy lemon bars from scratch. We covered essential ingredients, step-by-step instructions, and helpful tips for perfect results. Don’t forget to try variations, like adding fruits or herbs. Proper storage keeps your bars fresh longer. Enjoy your sweet and tangy treat! The fun lies in making them your own. Experiment. Share your creations with friends and family. Happy baking!](https://goldendishy.com/wp-content/uploads/2025/07/78212822-f759-45eb-b990-dd8ea93e2cb8-768x768.webp)
![- 1 ripe avocado, peeled and pitted - 1/2 cup unsweetened cocoa powder - 1/2 cup maple syrup or honey - 1/4 cup almond butter or peanut butter - 1/2 cup whole wheat flour - 1/2 teaspoon baking soda - 1/4 teaspoon salt - 1 teaspoon pure vanilla extract - 1/2 cup dark chocolate chips The key ingredient here is the avocado. Why choose avocado for brownies? It adds creaminess and healthy fats. This makes the brownies moist without extra oil. Next, we have cocoa powder. It gives the brownies a rich chocolate taste. The maple syrup or honey acts as a natural sweetener. I prefer maple syrup for its unique flavor. Almond butter or peanut butter brings a nutty taste. Whole wheat flour adds fiber, making these brownies healthier. Baking soda helps the brownies rise. Salt enhances all the flavors. Finally, dark chocolate chips are a must for that gooey chocolate burst. Using avocado offers many perks. It is rich in vitamins and healthy fats. These fats can help lower bad cholesterol. The fiber in avocado also aids digestion. Cocoa powder is full of antioxidants. It can improve heart health while making brownies delicious. Maple syrup is a lower glycemic option. It can provide a steady energy boost without a sugar crash. Switching to whole wheat flour adds more nutrients. It has more fiber than white flour. This helps keep you full longer. If you need gluten-free options, use almond flour instead of whole wheat. It works well and keeps the taste rich. For a vegan-friendly version, replace honey with maple syrup. Use a nut butter that fits your diet. You can also find dairy-free chocolate chips easily. These easy swaps ensure everyone can enjoy these healthy chocolate avocado brownies! - Preheat your oven to 350°F (175°C). - Line an 8x8 inch baking pan with parchment paper. Leave some paper hanging over the edges. This helps with easy removal later. - Take your ripe avocado and mash it in a bowl. You want it smooth and creamy. You can also use a food processor for this step. - In the same bowl, add maple syrup (or honey), almond butter, and vanilla extract. Mix until everything is blended well. - In a different bowl, whisk together cocoa powder, whole wheat flour, baking soda, and salt. Make sure these dry ingredients are mixed well. - Gradually add the dry mix to the wet mix. Stir gently until just combined. It’s okay to have a few lumps; this helps keep the brownies soft. - Fold in dark chocolate chips so they are evenly spread in the batter. - Pour the batter into your prepared pan. Use a spatula to smooth it out evenly. - Place the pan in your oven. Bake for 20-25 minutes. - To check if they are done, insert a toothpick into the center. It should come out with a few moist crumbs but not wet batter. - Once baked, let the brownies cool in the pan on a wire rack for 15 minutes. Use the parchment paper to lift them out. Let them cool further before cutting into squares. Enjoy making these Healthy Chocolate Avocado Brownies with the [Full Recipe]. To make your brownies just right, avoid overmixing. When you combine wet and dry ingredients, mix gently. A few lumps are okay. This keeps your brownies soft and fudgy. Even baking is also key. Make sure to spread the batter evenly in the pan. This helps them bake at the same time. For a lovely presentation, dust the brownies with cocoa powder or powdered sugar. You can also serve them with fresh berries. A dollop of yogurt adds creaminess and balances the rich chocolate. These simple touches make your brownies look great on any plate. You can boost the taste of your brownies easily. Try adding spices like cinnamon or a pinch of sea salt. A splash of almond or peppermint extract gives a fun twist. Using flavored chocolate chips adds another layer of taste. Think about using orange or hazelnut chips for a unique flavor profile. Check out the Full Recipe for more ideas! {{image_4}} To make these brownies gluten-free, swap whole wheat flour for almond flour or coconut flour. These options keep the texture rich and moist while avoiding gluten. Just remember to adjust the amount, as almond flour is more absorbent. For a vegan twist, replace honey with maple syrup. You can also use a plant-based nut butter, like almond or sunflower seed butter, instead of peanut butter. This keeps the flavor intact without any animal products. You can add a fresh twist to these brownies by mixing in mint extract. Use about 1 teaspoon of pure mint extract for a refreshing flavor. This makes mint chocolate avocado brownies that are perfect for any mint lover! Another fun option is to create a peanut butter swirl. Drop spoonfuls of peanut butter into the brownie batter before baking. Use a knife to swirl it around for a beautiful marbled look. This adds a delicious peanut flavor that pairs well with chocolate. If you want to change the serving size, you can easily convert the recipe. For a smaller batch, halve the ingredients. Use a smaller pan, like 6x6 inches, and keep an eye on the baking time. Smaller brownies will bake faster. You can also bake these brownies in a larger pan for thinner squares. A 9x13 inch pan works well, but adjust the baking time to about 15-20 minutes. Check for doneness with a toothpick, just like before. For the full recipe, check out the details above! To keep your brownies fresh, store them in an airtight container. This prevents air from making them dry. You can also place a slice of bread in the container. The bread helps maintain moisture. Always let brownies cool before storing. This avoids steam build-up, which can make them soggy. If you want to freeze brownies, first cut them into squares. Wrap each piece tightly in plastic wrap. Then, place them in a freezer-safe bag or container. This helps avoid freezer burn. When you're ready to eat them, just take out a piece and let it thaw at room temperature. You can also warm them in the microwave for a few seconds. Brownies last about 3-4 days at room temperature. If you see any mold, throw them away. To keep them fresh longer, refrigerate or freeze them. Refrigeration can extend their life to about a week. For best taste, enjoy them within a few days. For the full recipe, check out the provided details. Can I use ripe bananas instead of avocado? Yes, you can use ripe bananas. They add sweetness and moisture. However, the flavor changes slightly. Bananas may make the brownies taste fruitier. If you love banana, give it a try! How can I make these brownies less sweet? To reduce sweetness, cut back on the maple syrup or honey. You can also swap some sweetener for unsweetened applesauce. This keeps the texture but lowers the sugar. What is the best way to test brownies for doneness? The best way is to use a toothpick. Insert it in the center. If it comes out with a few moist crumbs, the brownies are done. If it has wet batter, bake a bit longer. Can these brownies be made without flour? Yes, you can make them without flour. Use a blend of nut flour or almond flour instead. This gives a nutty flavor and keeps the brownies moist. How many calories are in a serving? Each brownie has about 100 calories. This can change based on the ingredients you use. For example, using less sweetener or different nut butter may alter the calorie count. What are good dairy-free alternatives for chocolate chips? Look for dairy-free dark chocolate chips. Many brands make these with coconut or almond milk. You can also chop up a dairy-free chocolate bar for chunks. In this article, I covered a delicious brownie recipe that uses healthy ingredients. You learned about the key components, their nutritional benefits, and how to adapt the recipe for dietary needs. I shared step-by-step instructions for baking these brownies to perfection. With tips on flavor and texture, you can create the best version. Remember to store your leftovers properly to keep them fresh. Enjoy baking these brownies, knowing they are a tasty treat that can fit your diet!](https://goldendishy.com/wp-content/uploads/2025/06/19347e51-2d6e-4328-baa5-83086a8293f2-768x768.webp)


![- 1 cup all-purpose flour - 1 cup whole wheat flour - 1 tablespoon pumpkin pie spice - ½ cup granulated sugar - 1 can (15 oz) pumpkin puree - 2 large eggs - ½ cup brewed coffee, cooled - ⅓ cup vegetable oil - Optional mix-ins: ½ cup chocolate chips or nuts - Baking soda - Baking powder - Salt - Brown sugar - Pure vanilla extract The main ingredients form the base of your muffins. The blend of all-purpose and whole wheat flour adds great texture. Pumpkin puree brings moisture and a rich flavor. You can’t forget the pumpkin pie spice; it gives that cozy fall taste. Granulated sugar adds sweetness, while brown sugar provides depth. For the additional ingredients, eggs help the muffins rise and become fluffy. Brewed coffee gives a coffee kick, enhancing the flavor without being too strong. Vegetable oil keeps them moist. If you want, add chocolate chips or nuts for extra fun. Now, let’s talk staples. Baking soda and baking powder help the muffins rise. Salt balances the sweetness. Finally, pure vanilla extract adds a warm note that ties everything together. You can find the full recipe at the end. Set your oven to 350°F (175°C). This temperature helps the muffins rise nicely. Line or grease the muffin tin to keep the muffins from sticking. I prefer using paper liners for easy cleanup. In a large mixing bowl, whisk together the flours, baking soda, baking powder, pumpkin pie spice, and salt. This step is key for even flavor and texture. Make sure there are no lumps in the mixture. In another bowl, mix the granulated sugar and brown sugar until smooth. Then, add the pumpkin puree, eggs, cooled coffee, vegetable oil, and vanilla extract. Stir until everything is well combined. The mixture should look creamy and inviting. Gradually mix the dry ingredients into the wet mixture. Use a spatula to fold gently. Avoid overmixing; a few lumps are just fine. If you want, gently fold in chocolate chips or nuts for added flavor and texture. Spoon the batter into the muffin tins. Fill each cup about two-thirds full to allow for rising. Place the muffin tin in the oven and bake for 18-22 minutes. To check for doneness, insert a toothpick into a muffin. If it comes out clean, they are ready. Let the muffins cool in the pan for about 5 minutes. After that, transfer them to a wire rack to cool completely. Enjoy them warm for a cozy treat! For an extra touch, serve with cinnamon sugar or maple syrup. You can find the full recipe [here]. To make your muffins light and fluffy, avoid overmixing the batter. Stir gently until the dry and wet ingredients just come together. A few lumps are okay! Also, use room temperature ingredients. This helps the batter mix better and rise well. For a stronger coffee taste, try substituting brewed coffee with espresso. This adds depth to the flavor. Another great tip is to sprinkle some cinnamon sugar on top of the muffins before baking. This gives them a sweet, crispy crust that enhances their cozy taste. These muffins taste best when warm. Enjoy them with a fresh cup of coffee. For added sweetness, drizzle some maple syrup on top or spread a little cream cheese frosting. These simple touches make your cozy fall treat even more delightful! {{image_4}} You can easily make these muffins gluten-free. Simply swap the all-purpose flour with a gluten-free flour mix. Make sure to check the blend. Some mixes work better in baked goods than others. Using a good quality mix helps maintain texture and taste. If you want a dairy-free version, use almond milk instead of regular milk. Almond milk adds a light flavor that pairs well with the spices. For oil, replace vegetable oil with coconut oil. Coconut oil adds a subtle sweetness and complements the pumpkin nicely. To add some crunch, you can mix in nuts like walnuts or pecans. They add a nice texture and flavor. You can also play with spices. Try adding a pinch of nutmeg or cardamom for a twist. If you love chocolate, consider adding chocolate chunks. They melt perfectly and create a rich taste. To keep your pumpkin spice latte muffins fresh, place them in an airtight container at room temperature. This method helps maintain their soft texture and rich flavor. If you have a lot of muffins, you can stack them with parchment paper between layers. This prevents them from sticking together. If you want to enjoy these muffins later, freezing is a great option. First, let the muffins cool completely. Wrap each muffin in plastic wrap, then place them in a freezer bag. Make sure to remove as much air as possible to avoid freezer burn. You can store them in the freezer for up to three months. When you're ready to eat one, take it out and let it thaw at room temperature. You can also reheat it in the microwave for about 15-20 seconds. To keep your muffins moist and tasty over time, consider these tips: - Add a slice of bread to the container. This helps keep the muffins moist. - Avoid exposing them to direct sunlight or heat sources, as this can dry them out. - If you notice any muffins getting stale, you can toast them lightly. This can bring back some of their original flavor. Storing your pumpkin spice latte muffins correctly ensures you can enjoy their warm, cozy flavors for days to come. For the full recipe, check the earlier section! Yes, you can add more pumpkin puree. However, this change will affect the muffins. Adding extra puree makes the muffins moister. It may also make them denser. If you want a lighter muffin, keep the amount as in the Full Recipe. You can try adding an extra tablespoon at first. This way, you can see how the texture changes. These muffins last about three days at room temperature. Keep them in an airtight container. They can also last about a week in the fridge. The cold helps keep them fresh longer. If you want to save them for later, freeze them. They stay good for about three months in the freezer. Just remember to wrap them well. Yes, you can make these muffins without eggs. Here are some good substitutes: - 1/4 cup unsweetened applesauce - 1/4 cup mashed banana - 1 tablespoon flaxseed meal mixed with 2.5 tablespoons water Each option helps bind the muffins. They also add moisture. Choose the one you like best for a vegan version. You can use several options instead of brewed coffee. Here are some alternatives: - Brewed tea for a lighter flavor - Milk or almond milk for a creamy texture - Pumpkin spice tea for a fall twist These options help keep the muffins moist and tasty. You can experiment with what you have at home. These Pumpkin Spice Latte Muffins mix simple ingredients in easy steps. You learned how to combine flours, spices, and pumpkin puree for a tasty treat. I shared tips for perfect muffins and ways to store them well. Remember, you can adjust flavors to your liking. Try nuts or different spices for variety. Whether you enjoy them warm or frozen, these muffins are sure to please. Happy baking!](https://goldendishy.com/wp-content/uploads/2025/06/a78bef71-23f4-423c-981c-d5caf094e886-768x768.webp)
