Classic Cheeseburger Casserole Tasty and Easy Recipe

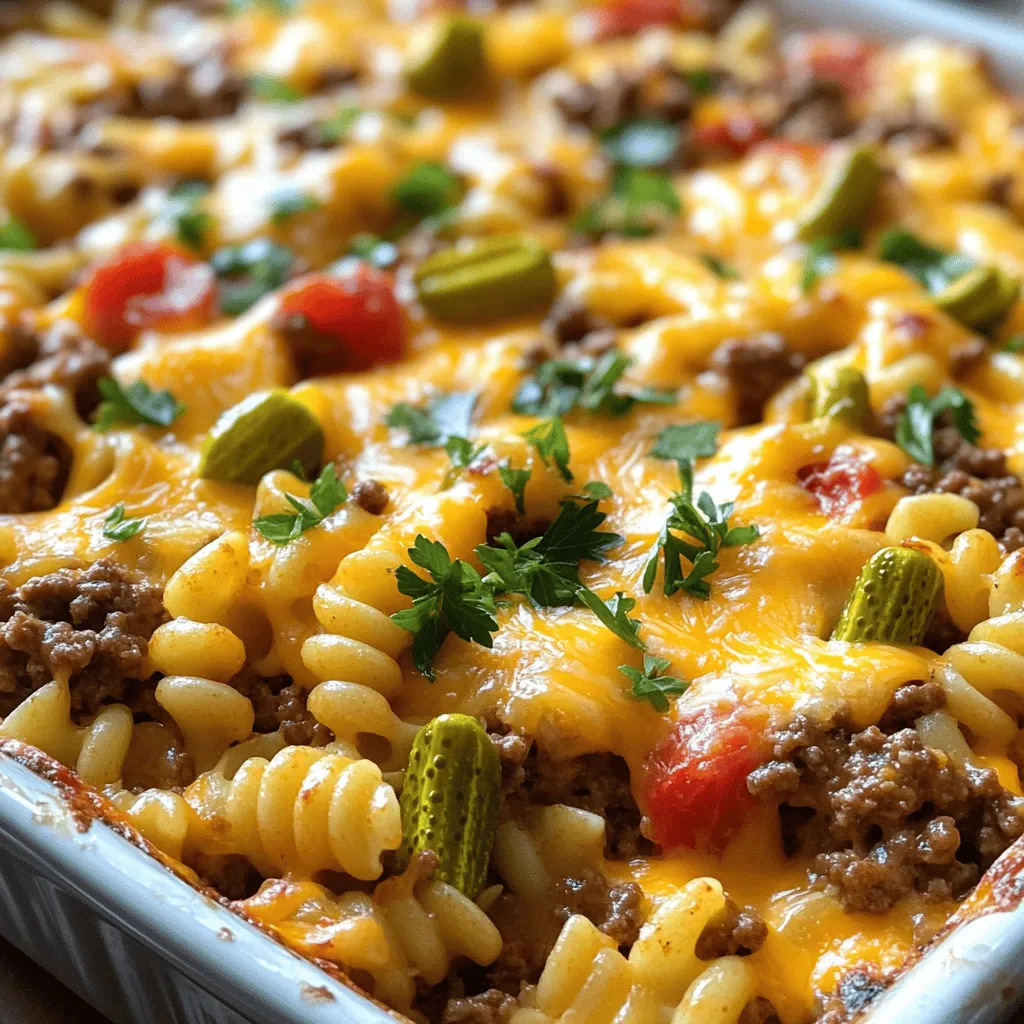
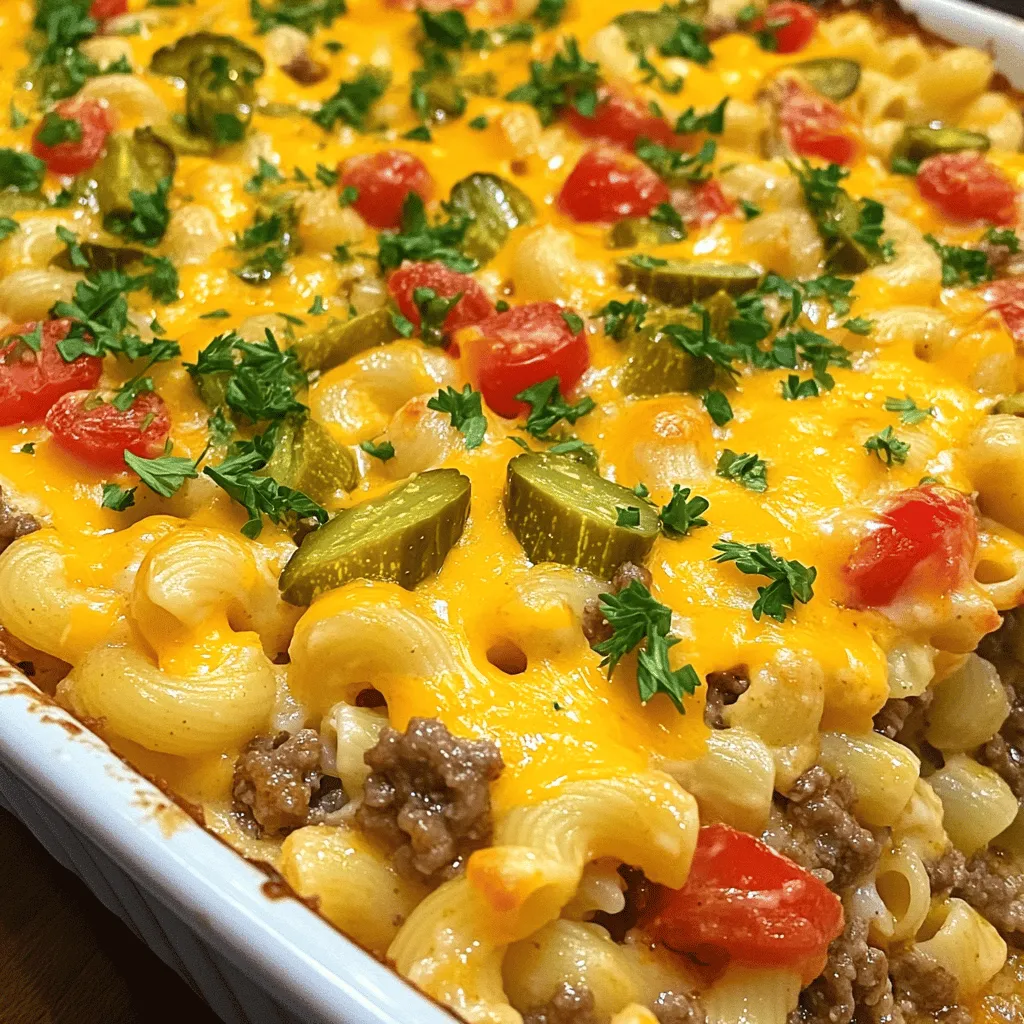
Are you ready to treat your family to a dish that’s both tasty and easy? Welcome to my Classic Cheeseburger Casserole recipe! It combines ground beef, cheesy goodness, and pasta into one delicious meal. Perfect for busy nights, this dish brings the classic flavors of a cheeseburger right to your table. Stick around to discover the simple steps, tips, and variations that will make your casserole a hit every time!
Ingredients
Main Ingredients for Classic Cheeseburger Casserole
When making a cheeseburger casserole, you need simple, tasty ingredients:
– 1 lb ground beef
– 1 small onion, finely diced
– 2 cloves garlic, minced
– 1 cup diced tomatoes (canned or fresh)
– 1/2 cup dill pickles, chopped
– 1 cup shredded cheddar cheese
– 2 cups cooked macaroni pasta
– 1 cup beef broth
– 2 tablespoons Worcestershire sauce
– 1 tablespoon prepared mustard
– Salt and freshly ground pepper to taste
– 1/2 teaspoon paprika
– 1/2 teaspoon dried oregano
These ingredients bring classic cheeseburger flavors together. The ground beef serves as the base, giving the dish its hearty texture. The onion and garlic add flavor, while the diced tomatoes keep it moist. Don’t forget the dill pickles; they give a nice crunch!
Cheese is key for that creamy, rich taste. I like cheddar, but feel free to mix it up with other cheeses like Monterey Jack or pepper jack. The cooked macaroni pasta makes it feel like comfort food.
Optional Garnishes
You can make your cheeseburger casserole even better with some fun garnishes:
– Fresh herbs like parsley or chives
– Additional cheese on top
Adding fresh herbs gives a pop of color and flavor. Extra cheese adds richness. You can be creative here! Choose what you love.
Step-by-Step Instructions
Preparation Steps
1. First, preheat your oven to 350°F (175°C). This step warms the oven for even cooking.
2. Next, grease a 9×13 inch baking dish lightly. This helps prevent sticking.
3. In a large skillet, add 1 pound of ground beef. Cook it over medium heat. Use a spoon to break the meat apart as it cooks. Keep cooking until it’s browned and crumbles easily. Drain any excess fat from the skillet to keep it lean.
4. Add a small onion, finely diced, and 2 minced garlic cloves to the skillet. Sauté for about 3-5 minutes. You want the onion soft and clear.
Combine Ingredients
1. Now, mix in 1 cup of diced tomatoes, 1/2 cup of chopped dill pickles, and 1 cup of beef broth.
2. Add 2 tablespoons of Worcestershire sauce, 1 tablespoon of mustard, 1/2 teaspoon of paprika, and 1/2 teaspoon of oregano. Don’t forget salt and pepper to taste.
3. Stir the mixture well and bring it to a simmer. Let it simmer for about 5 minutes to blend the flavors.
4. In a large bowl, combine 2 cups of cooked macaroni pasta and 1 cup of shredded cheddar cheese.
5. Pour the beef mixture over the pasta and cheese. Stir everything until it’s mixed well.
Baking the Casserole
1. Carefully transfer the mixture into the greased baking dish. Spread it out evenly.
2. Sprinkle any remaining cheese on top for that extra cheesy goodness.
3. Place the dish in the preheated oven. Bake it uncovered for 20-25 minutes. Look for bubbly cheese and a golden top.
4. Once done, remove the casserole from the oven. Let it cool for a few minutes. Optionally, garnish with fresh parsley or chives before serving.
Tips & Tricks
Perfecting Your Cheeseburger Casserole
To make the best cheeseburger casserole, start with browning the beef correctly. Use a large skillet over medium heat. Break the beef into small pieces as it cooks. This helps it brown evenly and gives great flavor. Don’t rush; let it cook until the meat is fully browned. Drain the excess fat to keep your casserole from being greasy.
For cheese, I love using shredded cheddar. It melts well and adds that classic cheeseburger taste. You can also mix in some mozzarella for extra creaminess. If you want a kick, try pepper jack cheese. It adds a nice spice to your dish.
Serving Suggestions
When serving, hot portions work best. A simple side salad adds a fresh touch to the rich flavors. Use greens like lettuce, tomatoes, and cucumbers to balance the meal. You can also serve it with some crusty bread for a filling dinner.
For portion presentation, scoop the casserole into bowls and sprinkle with fresh herbs. Chopped parsley or chives make it look nice and taste fresh. This little touch makes your meal feel special.
Looking for more ideas?

Variations
Ingredient Swaps
You can change the meat in this casserole if you want. Ground turkey or chicken makes a great swap. These meats are leaner and can cut down on fat. They still taste great, so don’t worry about flavor. If you prefer a meat-free meal, try using lentils or mushrooms. These options add texture and keep it hearty.
Flavor Enhancements
Spices and sauces can really change this dish. Try adding chili powder for some heat. A dash of hot sauce can also kick up the flavor. You can also mix in barbecue sauce for a sweet twist.
Toppings can make your casserole even better. Try adding crispy bacon bits for crunch. Sliced green onions or diced tomatoes add freshness. Finally, a dollop of sour cream on top gives a creamy finish. Explore these variations to find your favorite!
Storage Info
Storing Leftovers
After you enjoy your meal, let the leftovers cool. Place them in an airtight container. This keeps your casserole fresh. Store it in the fridge for up to three days. If you want to keep it longer, freezing is a great option.
To freeze, allow the casserole to cool completely. Then, wrap it tightly with plastic wrap. Follow that with aluminum foil for extra protection. You can freeze it for up to three months. Label the container with the date, so you know when to use it.
Reheating Instructions
When you’re ready to eat your leftovers, you want to reheat them properly. For the best results, use the oven. Preheat it to 350°F (175°C). Place the casserole in an oven-safe dish, cover it with foil, and heat for about 20 minutes. This keeps the cheese melty and the casserole warm.
If you’re short on time, the microwave works too. Put a portion on a microwave-safe plate. Heat on high for about 2-3 minutes. Check and stir halfway through. This way, it heats evenly. Enjoy your tasty meal with ease!
FAQs
Common Questions about Classic Cheeseburger Casserole
How long can I store the casserole?
You can store the casserole in the fridge for up to three days. Make sure it’s in an airtight container. If you want it to last longer, freeze it. It can stay good for up to three months in the freezer.
Can I make this dish ahead of time?
Yes, you can prepare the casserole a day ahead. Just follow the steps and cover it. Keep it in the fridge until you are ready to bake. This saves time and lets the flavors blend.
Troubleshooting Tips
What to do if it’s too dry?
If your casserole is too dry, add a splash of beef broth. Stir it gently to combine. You can also add extra cheese on top to make it richer and creamier.
Adjusting for different oven types
Not all ovens cook the same. If your casserole isn’t cooking evenly, check the temperature. You might need to increase or decrease it slightly. Keep an eye on it during the last few minutes. If it’s browning too fast, cover it with foil.
This blog post shared the key steps to make a tasty cheeseburger casserole. You learned about the main ingredients like ground beef, cheese, and pasta. I also covered tips to make it perfect, like browning the beef well. You can change flavors with swaps like turkey or vegetarian options.
In summary, this dish is simple and fun to adapt. It’s perfect for sharing with friends or family. Enjoy creating your own version!


![- Bell peppers: Choose bright colors like red, yellow, or orange. These colors not only look great but also add natural sweetness. Each pepper holds the filling nicely and provides a tasty bite. - Quinoa: Rinse the quinoa well under cold water. This step removes the bitter coating called saponin. Rinsing ensures your quinoa has a clean, nutty flavor that shines in the dish. - Vegetable broth: Use low-sodium broth for better control of the flavor. It enhances the taste of quinoa and adds depth to the dish. You can also try homemade broth for a fresher taste. - Ground spices: Cumin, smoked paprika, and chili powder are key. Cumin gives an earthy flavor, while paprika adds a hint of smokiness. Chili powder can amp up the heat level, making your dish exciting. - Beans and corn: Black beans add protein and fiber, making the meal hearty. Corn brings sweetness and crunch, creating a balanced texture. Both ingredients make the filling more nutritious and filling. - Cheese alternatives: Depending on your diet, choose cheddar for a classic taste or opt for a dairy-free cheese. Both melt well and enhance the flavors, giving a creamy finish to each stuffed pepper. For the full list of ingredients, check the Full Recipe. Start by preheating your oven to 375°F (190°C). This step matters because the right heat cooks the peppers evenly and makes them tender. While the oven warms up, you can prepare the bell peppers. Cut the tops off and scoop out the seeds and membranes inside. Stand the peppers upright in a baking dish. This helps them stay stable while they bake. Next, it’s time to cook the quinoa. In a medium saucepan, add 1 cup of rinsed quinoa and 2 cups of vegetable broth. Bring it to a boil, then lower the heat. Cover and let it simmer for about 15 minutes. You want the quinoa to be fluffy and all the liquid should be gone. While the quinoa cooks, you can mix the filling. In a large bowl, combine the fluffy quinoa, black beans, corn, diced tomatoes, cumin, smoked paprika, and chili powder. Add salt and pepper to taste. Make sure everything is mixed well to ensure a consistent flavor in every bite. Now comes the fun part—stuffing the peppers! Use a spoon to fill each bell pepper with your quinoa mixture. Pack it down gently to fit as much filling as possible. Once filled, sprinkle a good amount of cheese on top of each pepper. Cover the baking dish with aluminum foil and place it in the oven. Bake for 25 minutes. After that, remove the foil and bake for another 10 minutes. This helps the cheese melt and become bubbly. The peppers should be tender but still hold their shape. Once done, take the dish out and let it cool for a few minutes. Right before serving, add fresh cilantro or parsley on top for a nice touch. For the full recipe, check out the details provided earlier. To achieve fluffy quinoa, rinse it well before cooking. Rinsing removes the bitter coating called saponin. Use a fine mesh strainer for this step. Then, cook the quinoa in the right ratio of water to quinoa. I recommend 2 cups of vegetable broth for every 1 cup of quinoa. Bring it to a boil, then simmer for 15 minutes. This way, the quinoa will be light and fluffy. When baking your stuffed peppers, timing is key. Start by covering the dish with foil for the first 25 minutes. This keeps the moisture in, helping the peppers cook evenly. After that, remove the foil and bake for an extra 10 minutes. This will make the cheese melt perfectly and the peppers tender but not mushy. For presentation, serve your stuffed peppers on a large platter. Sprinkle extra herbs like cilantro or parsley around for a fresh look. A drizzle of olive oil or a squeeze of lime juice adds brightness and flavor. As for side dishes, consider a simple green salad or some roasted vegetables. These pair well with the peppers and add color to your meal. A light white wine or sparkling water complements the dish nicely, enhancing your dining experience. For the full recipe, check out [Full Recipe]. {{image_4}} What can I use instead of black beans? You can swap in other legumes like chickpeas or kidney beans. Each offers unique flavors and textures. Chickpeas add a nutty taste, while kidney beans bring a soft bite. Both boost protein and fiber, making your meal heartier. Can I add meat to my stuffed peppers? Yes! Chicken or turkey works great. Use cooked ground meat for easy mixing. This adds a savory depth to your dish. Just remember to season the meat well for the best flavor. How can I change the spices? Explore with different spices to create new flavors. Try adding oregano for a Mediterranean twist or curry powder for a bold kick. Each spice changes the overall taste, making your stuffed peppers exciting. Can I use different veggies? Absolutely! Seasonal vegetables like zucchini, spinach, or mushrooms can enhance your filling. They add more nutrients and variety. Just chop them finely and mix them in with your quinoa and beans. For the full recipe, check out the details above. After enjoying your quinoa stuffed bell peppers, store leftovers in the fridge. Place them in an airtight container. This keeps them fresh for up to four days. If you plan to eat them later, consider freezing them. To freeze, wrap each pepper in plastic wrap. Then place them in a freezer-safe bag or container. Make sure to remove as much air as possible. Properly stored, they can last for up to three months in the freezer. When it’s time to enjoy your stuffed peppers again, you can reheat them in several ways. The oven is my favorite method. Preheat it to 350°F (175°C). Place the peppers in a baking dish and cover with foil. Bake for about 20 minutes, or until heated through. You can also use the microwave for quick reheating. Simply place a pepper on a microwave-safe plate. Cover it with a paper towel to keep moisture in. Heat it for about 2-3 minutes, checking to avoid overheating. If you prefer the stovetop, heat a skillet over medium heat and add a little water. Place the peppers in the skillet and cover. Heat for about 5-7 minutes, turning occasionally. To keep the texture nice, avoid sogginess. When reheating, do not add extra moisture or cover too tightly. This will help maintain that delightful crunch of the peppers. For the full recipe, visit the [Full Recipe]. How long do quinoa stuffed peppers last in the fridge? Quinoa stuffed peppers can last about 3 to 5 days in the fridge. Store them in an airtight container to keep them fresh. If you want to enjoy them later, just heat them up in the oven or microwave. Can I make quinoa stuffed peppers ahead of time? Yes, you can prepare quinoa stuffed peppers ahead of time. Stuff the bell peppers and store them in the fridge. Bake them when you’re ready to eat. This makes meal prep easy and convenient. What can I substitute for quinoa in this recipe? If you want to swap out quinoa, try using brown rice or couscous. Both options provide a nice texture. Just remember to adjust cooking times as needed for these ingredients. Are quinoa stuffed peppers healthy? Yes, quinoa stuffed peppers are healthy. They’re packed with protein, fiber, and vitamins. Quinoa is a complete protein, making this dish a great choice for a balanced meal. Gluten-free options: Ensuring a safe meal for all Quinoa is naturally gluten-free, so this dish is safe for gluten-sensitive people. Just check your labels for any added ingredients that might contain gluten. Vegetarian vs. vegan: Key differences in ingredients Vegetarian quinoa stuffed peppers include cheese, while vegan ones use dairy-free cheese. Both versions are delicious. Choose based on your dietary needs. Quinoa stuffed bell peppers use fresh ingredients and bold flavors for a tasty meal. First, choose colorful bell peppers and rinse the quinoa for the best taste. Use ground spices and beans to boost nutrition. Follow the steps closely for perfect results, and don’t forget to try different flavors and proteins. Store leftovers well to enjoy later. Healthy and easy, this dish fits any dinner. You can impress friends and family while eating well! So, get cooking and enjoy every bite of your delicious creation.](https://goldendishy.com/wp-content/uploads/2025/06/de4f4195-310c-4430-9b68-8374d14e079c-768x768.webp)


![- 2 boneless, skinless chicken breasts - 1 teaspoon garlic powder - 1 teaspoon smoked paprika - 1 teaspoon dried oregano - Salt and freshly ground black pepper to taste - 1 tablespoon extra-virgin olive oil - 1 cup cooked quinoa or couscous - 1 cucumber, finely diced - 1 cup cherry tomatoes, halved - 1/2 red onion, paper-thin sliced - 1 cup creamy Greek yogurt - 2 tablespoons fresh dill, finely chopped - 1 tablespoon fresh lemon juice - Crisp lettuce leaves for serving - Medium-sized mixing bowl - Grill or grill pan - Spatula or tongs - Knife and cutting board - Serving bowls This simple list of ingredients and tools sets you up for a tasty meal. You can find the full recipe to guide you through each step. Start by making a simple rub. In a bowl, mix garlic powder, smoked paprika, dried oregano, salt, and pepper. Add olive oil to this mix. Rub it all over the chicken breasts. Make sure they are well-coated. For the best taste, let the chicken marinate for at least 30 minutes. If you have time, let it sit in the fridge overnight. This will make the chicken super tasty. While the chicken marinates, let’s make the tzatziki sauce. In a clean bowl, combine Greek yogurt, finely diced cucumber, chopped dill, and lemon juice. Stir well until everything blends nicely. Add a pinch of salt and pepper to taste. Set this aside. Letting it sit helps the flavors come together. Preheat your grill or grill pan to medium heat. Once it’s hot, place the marinated chicken breasts on the grill. Cook them for about 5-6 minutes on each side. You want the chicken to reach an internal temperature of 165°F (75°C). After grilling, take the chicken off the heat. Let it rest for about 5 minutes. This helps keep it juicy. After resting, slice the chicken into bite-sized pieces. Grab your serving bowls and start building your dish. Begin with a layer of cooked quinoa or couscous at the bottom. This will be the base of your bowl. Next, add the grilled chicken pieces on top of the quinoa. Then, layer on the diced cucumber, halved cherry tomatoes, and thinly sliced red onion. This adds a pop of color and flavor. Finally, drizzle the tzatziki sauce generously over everything. This brings a creamy contrast. If you like, add a handful of crisp lettuce leaves on top. This gives an extra crunch. Serve your Chicken Tzatziki Bowls in bright plates. It makes the dish look inviting. For a final touch, sprinkle some fresh dill on top and add a lemon wedge for extra zest. Enjoy your meal! To grill chicken that is juicy and flavorful, follow these tips: - Marinate Well: Use the spice rub with garlic powder, smoked paprika, and oregano. Let the chicken sit for at least 30 minutes. For best results, marinate overnight. - Use Medium Heat: Preheat your grill to a medium setting. This helps cook the chicken evenly without burning it. - Check Temperature: Use a meat thermometer to ensure the chicken reaches 165°F (75°C). This keeps it safe to eat. - Rest the Chicken: After grilling, let the chicken rest for 5 minutes. This keeps the juices inside. You can make tzatziki in different ways to suit your taste: - Add Spice: Mix in a pinch of cayenne or red pepper flakes for heat. - Use Different Herbs: Swap dill with mint or parsley for a fresh twist. - Try Other Veggies: Add grated carrots or chopped bell peppers for extra crunch. Presentation makes your Chicken Tzatziki Bowls shine. Here are some ideas: - Choose Colorful Bowls: Use deep plates to highlight the bright ingredients. - Layer Thoughtfully: Start with quinoa or couscous, then add chicken, veggies, and a drizzle of tzatziki. - Garnish: Add a sprinkle of fresh dill or a lemon wedge for a burst of color. These tips will help you create a delicious and beautiful meal that impresses everyone. For the complete recipe, check [Full Recipe]. {{image_4}} If you want a vegetarian twist, try using tofu or chickpeas. Tofu absorbs flavors well. Press and marinate it like the chicken. Cut it into cubes and grill or sauté until golden. Chickpeas also work great. Use canned or cooked chickpeas. Toss them in the same spices and roast in the oven. Both options are rich in protein and add a nice texture. You can swap grains in your Chicken Tzatziki Bowls for variety. Quinoa is high in protein and gluten-free. Couscous cooks quickly and is light on your stomach. Brown rice is hearty and adds fiber. Each grain brings a unique taste and texture. Try different grains each time for a fun twist! Add more fresh veggies to your bowl for color and crunch. Sliced bell peppers bring sweetness and crunch. Shredded carrots add a bright pop and extra nutrition. You can also use radishes for a peppery kick. Mix and match your favorites! This makes each bowl unique, fresh, and delicious. For the full recipe, check out the complete guide. After enjoying your Chicken Tzatziki Bowls, store leftovers in airtight containers. This keeps the chicken juicy and the veggies fresh. Place the chicken and veggies in one container. Store the tzatziki sauce in another. This helps prevent sogginess. You can keep the leftovers in the fridge for up to three days. To reheat the chicken, use a microwave or a skillet. If using a microwave, cover the chicken with a damp paper towel. This keeps moisture in and prevents it from drying out. Heat it for 30 seconds, check, and repeat if needed. If using a skillet, heat on low. Add a splash of water to keep it juicy. Cook until warmed through, about 3-4 minutes. Store your tzatziki sauce in a sealed container in the fridge. It stays fresh for about four days. If you notice extra water on top, just drain it off. Stir the sauce well before using it again. This keeps all the flavors mixed and tasty. For longer storage, you can freeze tzatziki in ice cube trays. Once frozen, transfer the cubes to a freezer bag. This way, you can enjoy it later in your Chicken Tzatziki Bowls or other dishes. If you don't have Greek yogurt, you can use regular yogurt. You can also try sour cream. Both will give a creamy texture, but they may taste a bit different. For a dairy-free option, use coconut yogurt or a blended cashew cream. These options keep the dish rich and tasty. You can marinate the chicken for at least 30 minutes. For better flavor, marinate it overnight. This gives the spices time to soak in. The longer, the better! Just keep it in the fridge to stay safe. Yes, you can make this dish ahead of time. Prepare the chicken and tzatziki sauce a day before. Store them in separate containers in the fridge. When you're ready to eat, just grill the chicken and assemble your bowls. It saves time and tastes fresh! Chicken Tzatziki Bowls taste great with various sides. Try a simple Greek salad with tomatoes and olives. Pita bread with hummus is also a good match. You can add roasted veggies or a light soup for extra flavor and nutrition. Yes, this dish is gluten-free if you use quinoa. Couscous is not gluten-free, so skip it if needed. Always check the labels on your ingredients to be sure. Enjoy this tasty meal without worry! This blog post covered how to make tasty Chicken Tzatziki Bowls. We explored essential ingredients, step-by-step instructions, and helpful tips. I shared fun variations, storage info, and answers to common questions. Now, you can impress your friends with this easy dish. Enjoy the fresh flavors and simple steps. With practice, you’ll make perfect bowls every time. Dive in and have fun in the kitchen!](https://goldendishy.com/wp-content/uploads/2025/06/3644d9ce-b609-47a4-b270-daf6d08e9407-768x768.webp)

. This Buddha bowl recipe highlights the joy of crispy tofu and fresh veggies. You learned about key ingredients like firm tofu, quinoa, and avocado. I shared tips for prepping and baking tofu to keep it crispy. Customize your bowl with different grains and seasonal veggies for variety. Lastly, my storage tips help you enjoy leftovers later. Make this dish your own, and enjoy healthy eating!](https://goldendishy.com/wp-content/uploads/2025/06/f58aaf25-4393-4431-ab1e-3aeff1cd4ada-768x768.webp)