
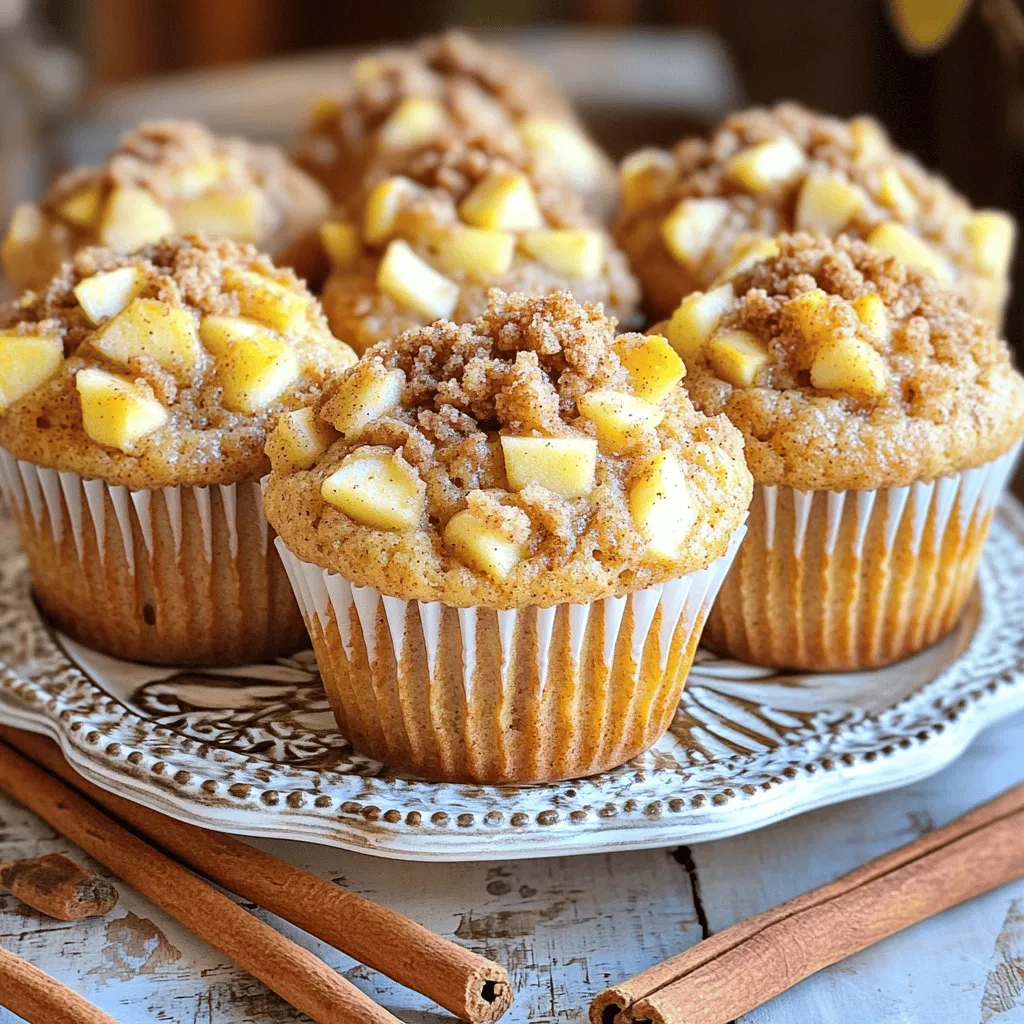
Get ready to indulge in a warm, sweet treat that’s hard to resist! Today, I’m sharing my favorite recipe for Cinnamon Apple Streusel Muffins. Imagine tender muffins packed with soft apples and topped with a crunchy, cinnamon-infused streusel. Whether you’re looking for a breakfast delight or a tasty snack, this recipe has you covered. Let’s dive into the ingredients and make these irresistible muffins together!
Ingredients
Dry Ingredients
To create the perfect base for your muffins, gather these dry ingredients:
– 2 cups all-purpose flour
– 1 cup granulated sugar
– 1 tablespoon baking powder
– 1 teaspoon ground cinnamon
– ½ teaspoon salt
These ingredients blend well together. The flour gives structure. Sugar adds sweetness. Baking powder helps the muffins rise. Cinnamon gives a warm flavor. Salt balances the sweetness.
Wet Ingredients
Next, you need to combine these wet ingredients:
– 1 cup whole milk
– ½ cup unsalted butter, melted
– 2 large eggs
– 1 teaspoon vanilla extract
– 2 cups peeled and diced apples (preferably Granny Smith or Honeycrisp)
These wet ingredients create moisture. The milk makes the muffins tender. Melted butter adds richness. Eggs bind the mixture together. Vanilla enhances the overall flavor. Fresh apples give a fruity crunch.
Streusel Topping Ingredients
For the perfect streusel topping, gather these ingredients:
– ½ cup all-purpose flour
– ½ cup packed brown sugar
– 1 teaspoon ground cinnamon
– ¼ cup cold unsalted butter, cubed
This topping adds a sweet and crunchy layer. The brown sugar gives a rich flavor. Cold butter helps form crumbly bits. Cinnamon ties everything together, adding warmth.
Step-by-Step Instructions
Preparation Steps
First, preheat your oven to 350°F (175°C). This step is key to baking the muffins evenly. Next, grab a muffin tin. Line it with paper liners or grease it lightly with non-stick spray to prevent sticking.
Now, let’s get our dry ingredients ready. In a big bowl, whisk together 2 cups of flour, 1 cup of sugar, 1 tablespoon of baking powder, 1 teaspoon of cinnamon, and ½ teaspoon of salt. Make sure there are no lumps in the mix. This blend gives the muffins their structure and flavor.
Mixing the Batter
In a separate bowl, combine your wet ingredients. Whisk together 1 cup of milk, ½ cup of melted butter, 2 eggs, and 1 teaspoon of vanilla extract until it looks smooth. This mixture adds moisture and richness to the muffins.
Now, gently pour the wet mixture into your dry ingredients. Use a spatula or wooden spoon to stir. Be careful not to overmix; you want to keep the muffins soft and fluffy. Once mixed, fold in 2 cups of diced apples. Granny Smith or Honeycrisp apples work best for their tartness.
Baking and Cooling
Next, prepare your streusel topping. In a small bowl, mix ½ cup of flour, ½ cup of brown sugar, and 1 teaspoon of cinnamon. Then, add ¼ cup of cold cubed butter. Use your fingers or a fork to mix until it looks crumbly.
Now, fill the muffin cups with the batter, about three-quarters full. Sprinkle the streusel topping on each muffin. This adds a nice crunch.
Place the muffin tin in the oven and bake for 20-25 minutes. Check if they are done by inserting a toothpick in the center. If it comes out clean, they are ready.
Let the muffins cool in the tin for 5 minutes. Then, transfer them to a wire rack to cool completely. Enjoy the delightful smell as they cool.
Tips & Tricks
Substitutions for Ingredients
You can make a few easy swaps in this recipe. Here are some ideas:
– Flour: Use whole wheat flour for a healthier muffin.
– Sugar: Substitute with brown sugar for a deeper flavor.
– Milk: Almond or oat milk works well if you’re dairy-free.
– Apples: Try using pears or berries for different fruit flavors.
These substitutions keep the muffins tasty while meeting your dietary needs.
Avoiding Overmixing
Mixing too much can lead to tough muffins. Here’s how to avoid it:
– Combine Gently: Stir the wet and dry ingredients until just mixed.
– Use a Spatula: A spatula helps you fold without overdoing it.
– Don’t Worry About Lumps: Small lumps in the batter are fine. They’ll bake out.
Remember, less mixing leads to lighter and fluffier muffins.
Achieving the Best Texture
To get that perfect muffin texture, follow these tips:
– Room Temperature Ingredients: Use eggs and milk at room temperature.
– Avoid Overpacking Flour: Spoon flour into the measuring cup, then level off.
– Don’t Skip the Streusel: The topping adds a nice crunch and enhances texture.
These small steps make a big difference in the final product. Enjoy your baking!
Variations
Adding Nuts or Other Fruits
You can enhance your muffins by adding nuts or other fruits. Nuts like walnuts or pecans give a nice crunch. Chop them coarsely before mixing them in. You can also add dried fruits, like raisins or cranberries. They bring extra sweetness and chewiness. Just keep the amount to about one cup total. This keeps the muffin balanced and delicious.
Gluten-Free Options
Want a gluten-free treat? Swap the all-purpose flour for a gluten-free blend. Many blends work well in this recipe. Just ensure it has xanthan gum for the best texture. You may also use almond flour or oat flour. Each gives a unique taste. Just remember to adjust the liquid as needed. This way, your muffins will be moist and fluffy.
Flavor Enhancements
To take your muffins to the next level, try adding different spices. Nutmeg or ginger can add warmth. A splash of maple syrup can add depth to the flavor. You could also try a bit of orange or lemon zest. This brightens the taste and adds a fresh twist. Experiment with your favorite flavors to make these muffins truly yours.
Storage Info
Short-Term Storage Methods
Store your muffins in an airtight container. They stay fresh for up to three days. Keep them at room temperature. If you want them to last longer, consider refrigerating them. Just note that the fridge can dry them out a bit.
Freezing Instructions
To freeze your muffins, first let them cool completely. Wrap each muffin in plastic wrap. Then, place them in a freezer bag or container. They can last up to three months in the freezer. When ready to enjoy, just take out how many you want.
Reheating Tips
Reheat your muffins in the microwave for about 15-20 seconds. For a crispier texture, use the oven. Preheat it to 350°F (175°C) and bake for about 5-10 minutes. This brings back that fresh-baked taste. Enjoy your warm muffins with a cup of coffee or tea!
FAQs
Can I make these muffins without eggs?
Yes, you can make these muffins without eggs. Use 1/4 cup of unsweetened applesauce for each egg. This keeps the muffins moist and adds some sweetness. Another option is to use 1 tablespoon of ground flaxseed mixed with 3 tablespoons of water. Let it sit for a few minutes until it thickens.
How do I make them dairy-free?
To make dairy-free muffins, replace the whole milk with almond, soy, or oat milk. Use coconut oil or a dairy-free butter substitute instead of unsalted butter. These swaps keep the muffins delicious while catering to your dietary needs.
What’s the best way to keep muffins fresh?
Keep muffins fresh by storing them in an airtight container. You can also wrap them in plastic wrap or foil. Store them at room temperature for up to three days. For longer storage, freeze the muffins. Place them in a freezer bag and remove air. They will stay fresh for about three months. When ready to eat, thaw them at room temperature or warm them in the microwave.
In this post, we covered key ingredients and steps for baking delicious muffins. I shared tips for mixing, variations for flavors, and storage methods to keep them fresh. Remember, you can always tweak recipes to suit your taste. Use my tips to avoid overmixing and get the best texture. With these insights, you can bake muffins that impress everyone. Enjoy the process and happy baking!


