Ready to taste something amazing? These Chicken Teriyaki Skewers are packed with flavor and super easy to make! With juicy chicken, fresh veggies, and a sweet-savory sauce, this dish will impress everyone at your table. In this article, I’ll guide you through the simple steps to create this tasty meal. Let’s get grilling and enjoy a delicious feast together!
Ingredients
Main Ingredients for Chicken Teriyaki Skewers
– 1 lb boneless, skinless chicken breast
– Soy sauce, honey, rice vinegar, sesame oil
– Fresh garlic and ginger
The main stars of this dish are the chicken and the sauce. Start with 1 pound of boneless, skinless chicken breast. Cut it into 1-inch cubes for even cooking. You’ll also need soy sauce for that salty umami flavor. Honey adds sweetness, while rice vinegar gives a nice tang. Don’t forget the sesame oil, which adds a rich, nutty taste. Fresh garlic and ginger bring a wonderful aroma and flavor to the mix.
Vegetables and Garnishes
– Red and green bell peppers
– Zucchini
– Scallions and sesame seeds for garnish
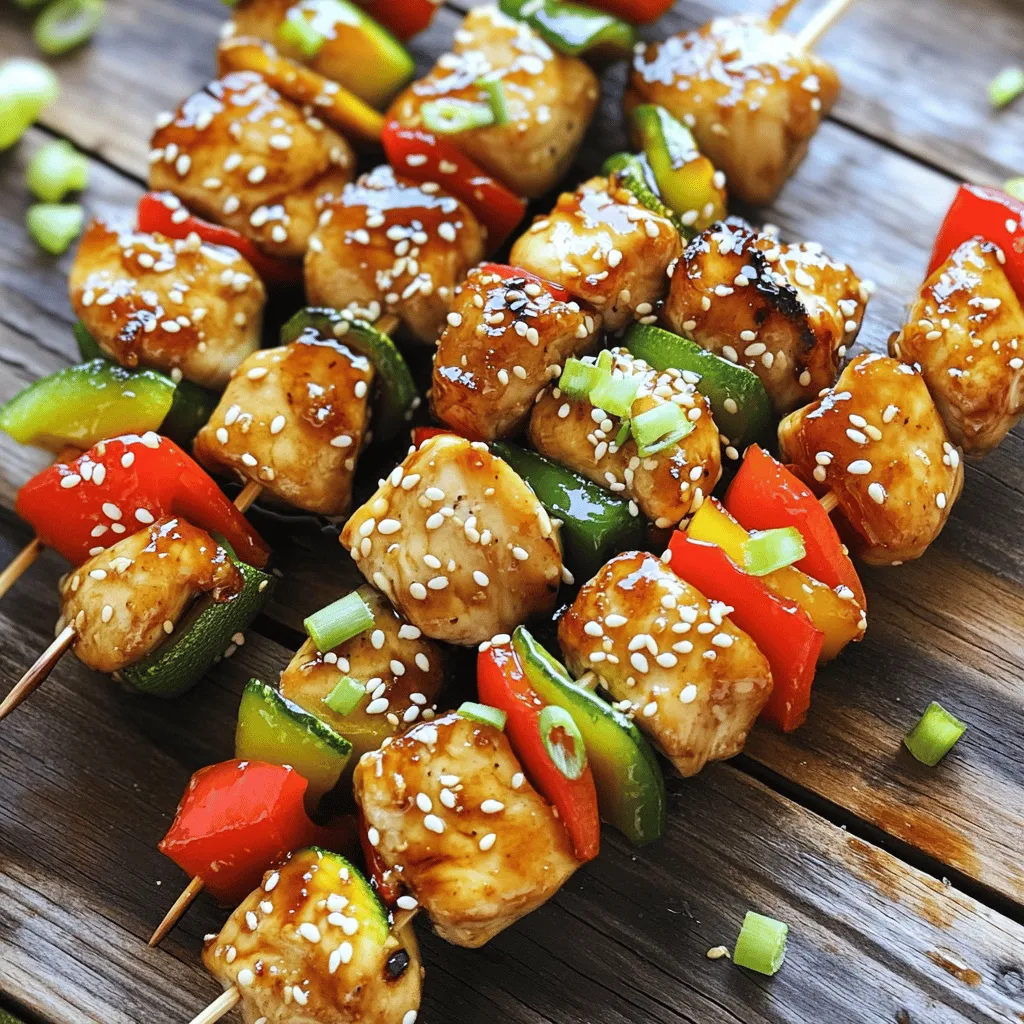
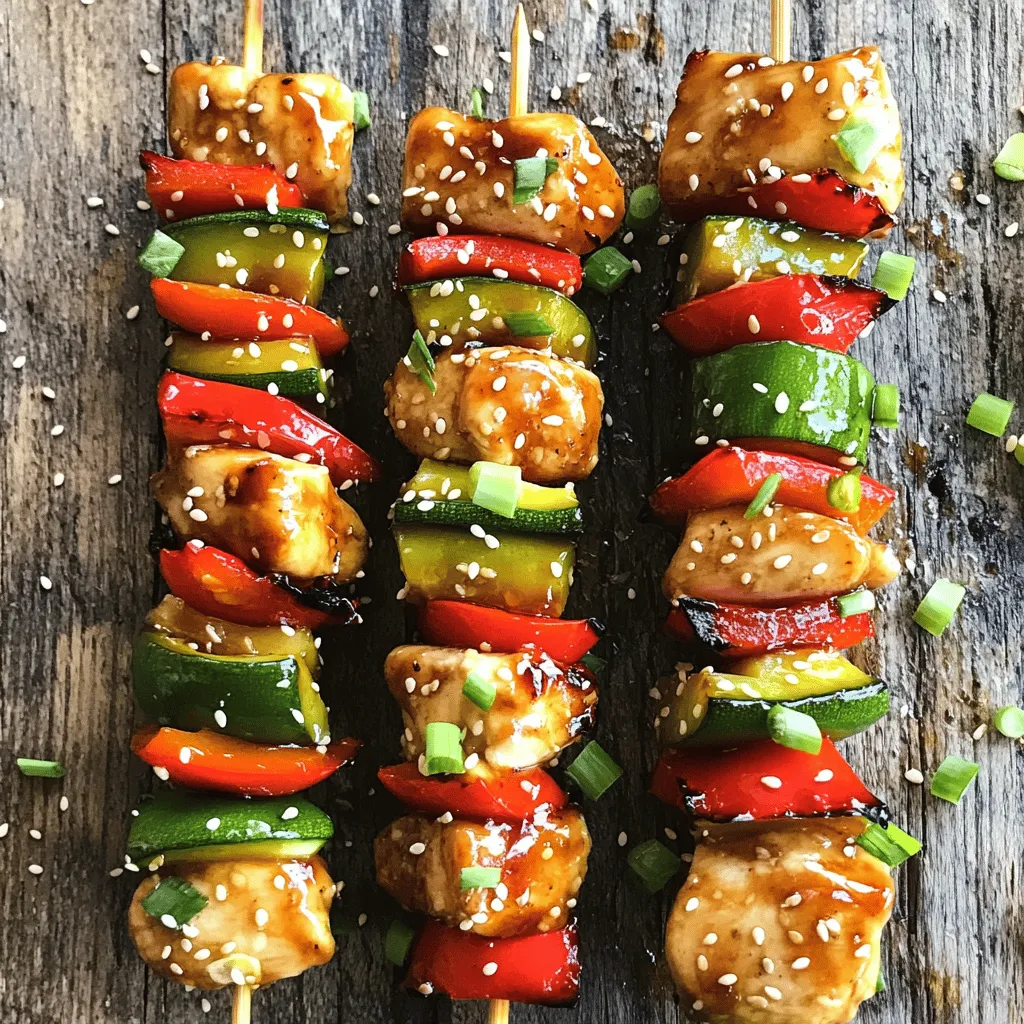
Adding vegetables makes your skewers colorful and tasty. Use red and green bell peppers cut into 1-inch squares. They add crunch and sweetness. Sliced zucchini rounds are great for texture and taste. For garnish, sprinkle chopped scallions and sesame seeds on top. They add a nice pop of flavor and look pretty, too.
Additional Items
– Wooden skewers or metal skewers
– Cornstarch for sauce thickening
You will need skewers to hold all the goodness together. If you choose wooden skewers, soak them in water for about 30 minutes. This helps prevent burning on the grill. Metal skewers are a great option too. For the teriyaki sauce, you will use cornstarch mixed with water to make it thick and glossy. This will give your chicken a beautiful glaze.
Step-by-Step Instructions
Marinating the Chicken
To start, gather your marinade ingredients. In a bowl, mix the soy sauce, honey, rice vinegar, sesame oil, minced garlic, and grated ginger. Whisk until everything blends well. Add the chicken breast cubes, making sure they are well coated. Cover the bowl with plastic wrap. Place it in the fridge for at least 30 minutes. For a stronger flavor, marinate for up to 2 hours. This step is key to juicy, flavorful chicken.
Preparing the Skewers
If you use wooden skewers, soak them in water for at least 30 minutes. This helps stop them from burning. While the skewers soak, preheat your grill or grill pan to medium-high heat. A hot grill will give your skewers those perfect grill marks and lock in the flavors.
Assembling and Grilling
After marinating, take the chicken out of the fridge. Start threading the marinated chicken onto the skewers. Alternate with pieces of red and green bell peppers and zucchini slices. Leave small gaps between each piece for even cooking.
Now, place the skewers on the hot grill. Grill them for about 10 to 12 minutes. Turn them occasionally to ensure even cooking. The chicken should reach an internal temperature of 165°F. You’ll know they are done when they have beautiful grill marks and smell amazing.
Tips & Tricks
Perfecting the Marinade
For the best flavor, marinate the chicken for at least 30 minutes. If you have time, let it soak for up to 2 hours. This longer marinating time helps the chicken absorb all the tasty flavors. To boost the flavor even more, add a splash of orange juice or sprinkle some chili flakes into the marinade. These small changes can make a big difference.
Grilling Tips
To get those nice grill marks, preheat your grill to medium-high heat. Once you place the skewers on, resist the urge to move them around too much. Let them cook for about 10-12 minutes. Flip them only when they lift easily from the grill. To know if the chicken is done, use a meat thermometer. The safe internal temperature for chicken is 165°F. This ensures your skewers are juicy and safe to eat.
Presentation Suggestions
When serving your Chicken Teriyaki Skewers, make it look nice! Arrange them on a platter, maybe on a bed of fresh lettuce. You can also serve them with a small bowl of extra teriyaki sauce for dipping. For sides, consider steamed rice or a fresh salad. The colors of the skewers and the sides will create a beautiful meal. This makes it more fun to eat and share!
Variations
Alternate Proteins
You can switch up the protein in your skewers. Shrimp works great, too. Just remember to cook shrimp for only 4-6 minutes. Tofu is another good choice. Use firm tofu and press it first to remove extra water. Then, cut it into cubes. Tofu takes about the same time as chicken to cook.
Vegetarian/Vegan Options
For a plant-based twist, try a marinade with soy sauce, maple syrup, and garlic. It will give you great flavor without meat. You can make vegetable-only skewers with bell peppers, zucchini, mushrooms, and cherry tomatoes. These cook quickly and taste amazing on the grill.
Flavor Enhancements
You can make your skewers even better with spices. Adding chili flakes or smoked paprika gives a nice kick. You can also try different sauces like peanut or hoisin sauce. Mix in veggies like onions or asparagus for more color and taste. These small changes can make your Chicken Teriyaki Skewers unique and fun.
Storage Info
Storing Leftovers
When you have leftover chicken teriyaki skewers, store them properly. Place the skewers in an airtight container. This helps keep them fresh. Refrigerate them within two hours of cooking. It’s best to eat them within three days.
Recommended Storage Containers
Use glass or plastic containers with tight lids. These containers prevent air from getting in. You can also wrap them in aluminum foil. Just make sure they are sealed well. This keeps your skewers moist and tasty.
Reheating Instructions
To reheat your skewers, use an oven or a stovetop. Both methods keep the chicken juicy. If using an oven, set it to 350°F. Place the skewers on a baking sheet. Heat for about 10 minutes.
For stovetop reheating, use a non-stick pan. Add a splash of water to the pan. Cover it with a lid. This helps steam the skewers and keeps them moist.
Best Practices for Maintaining Flavor
Avoid reheating them in the microwave. Microwaves can make the chicken dry. Instead, always check the internal temperature. It should reach 165°F for safe eating.
Freezing Tips
If you want to freeze the chicken skewers, do it right after cooking. Let them cool completely first. Wrap each skewer in plastic wrap. Then place them in a freezer bag. This helps prevent freezer burn.
Thawing Instructions for Best Results
To thaw, move the skewers to the fridge a day before you want to eat them. This keeps them safe and tasty. If you need to thaw them faster, use the microwave on the defrost setting. But make sure to cook them right away after.
For the best results, enjoy your chicken teriyaki skewers fresh. But if you follow these steps, leftovers can still taste great!
FAQs
How do I know when Chicken Teriyaki Skewers are done?
To check if your Chicken Teriyaki Skewers are done, use a meat thermometer. The chicken should reach an internal temperature of 165°F (75°C). This step is key for food safety. If you don’t have a thermometer, make sure the juice runs clear when you cut the chicken. No pink should show.
Can I make the teriyaki sauce ahead of time?
Yes, you can make the teriyaki sauce ahead of time. Mix the ingredients and store it in the fridge. This makes your meal prep easier. You can also make a larger batch and freeze it. Just thaw it before use. This way, your meal cooks faster.
What can I serve with Chicken Teriyaki Skewers?
Chicken Teriyaki Skewers pair well with many side dishes. You might try steamed rice or quinoa for a filling option. A fresh salad adds a nice crunch. You can also serve them with grilled vegetables for a colorful plate. These sides will enhance the flavors and balance the meal.
Chicken Teriyaki skewers are easy and fun to make. You learned about key ingredients like chicken, vegetables, and sauce. I shared step-by-step instructions for marinating, preparing, and grilling. You also saw tips for perfecting your dish and some tasty variations.
In the end, you can enjoy these skewers any way you like. With proper storage and reheating, leftovers can be just as delicious. I hope this guide helps you create a tasty meal that you will love!


