Chicken and Rice Soup Comforting and Simple Recipe
![To make this simple and tasty chicken and rice soup, gather these ingredients: - 2 boneless, skinless chicken breasts - 1 cup jasmine rice, thoroughly rinsed - 6 cups chicken broth (preferably low-sodium) - 2 carrots, peeled and diced - 2 stalks celery, chopped - 1 small onion, finely diced - 3 garlic cloves, minced - 1 teaspoon dried thyme - 1 bay leaf - 1 tablespoon extra virgin olive oil - Salt and freshly ground pepper, to taste - 1 cup frozen peas - Juice from 1 fresh lemon - Fresh parsley, roughly chopped (for garnish) Each serving of this chicken and rice soup is packed with nutrition. Here’s a quick look at what you get: - Calories: 300 - Protein: 25g - Carbohydrates: 40g - Fat: 6g - Fiber: 2g This soup is low in fat and rich in protein and carbs, making it a cozy choice for any meal. If you need to swap out some items, here are some ideas: - Chicken: Use shredded rotisserie chicken for a quick option. - Rice: Substitute with brown rice or quinoa for a different texture. - Broth: Vegetable broth works well for a lighter flavor. - Vegetables: Add bell peppers, corn, or spinach for extra nutrition. - Herbs: Fresh herbs like rosemary or dill can replace thyme for a new taste. These substitutions help you make this soup work for your pantry or dietary needs. Enjoy creating your version! Start by gathering your ingredients. You need chicken breasts, jasmine rice, broth, carrots, celery, onion, garlic, thyme, a bay leaf, olive oil, and peas. 1. Heat the olive oil: In a large pot, place the olive oil over medium heat. Wait until it shimmers. 2. Add the vegetables: Toss in the diced onion, carrots, and celery. Sauté these for about 5 minutes. You want them to soften and the onion to look clear. 3. Incorporate garlic: Stir in the minced garlic. Cook this for one minute. The smell should fill your kitchen. 1. Add chicken and broth: Place the chicken breasts into the pot. Pour in the chicken broth. Add thyme, bay leaf, salt, and pepper. 2. Bring to a boil: Turn up the heat until the mixture boils. Then, lower the heat to a gentle simmer. 3. Cook the chicken: Cover the pot and let it simmer for 15-20 minutes. Make sure the chicken cooks fully (165°F or 75°C inside). 1. Shred the chicken: Once cooked, remove the chicken and let it cool. Use two forks to shred it into smaller pieces. 2. Add rice: Stir in the rinsed jasmine rice into the pot. Cover it again and let it simmer for about 15 minutes. The rice should be tender. 3. Finish the soup: Return the shredded chicken to the pot. Add the frozen peas and lemon juice. Taste and adjust salt and pepper if needed. 4. Serve: Remember to take out the bay leaf. Serve hot in bowls. Top with fresh parsley for a nice touch. For the complete recipe, visit [Full Recipe]. To make your chicken and rice soup shine, focus on fresh ingredients. Start with quality chicken broth. Low-sodium broth gives you control over salt levels. Add fresh herbs like thyme and parsley for a bright taste. A splash of lemon juice at the end brightens the flavor too. You can also toss in some fresh garlic for depth. One big mistake is overcooking the chicken. Remove it from the pot once it reaches 165°F. Letting it simmer too long can make it dry. Another common error is not rinsing the rice. Rinsing removes excess starch, which helps keep the soup clear. Avoid adding too much water or broth. You want a nice balance of soup and rice. For a creamy texture, add a splash of heavy cream or coconut milk. Stir it in after you add the chicken back to the pot. You can also blend a portion of the soup. Use an immersion blender to create a creamy base while keeping some chunks intact. This mix gives you both texture and creaminess in every spoonful. Follow the [Full Recipe] for a step-by-step guide to making this comforting dish. {{image_4}} You can easily add veggies to your chicken and rice soup. Chopped carrots, celery, and peas work well. You can also try adding spinach, kale, or zucchini for more color and nutrition. These vegetables add flavor and make your soup more filling. Just toss them in during the last few minutes of cooking. This way, they will stay bright and fresh. If you like a kick, make a spicy version. Add diced jalapeños or red pepper flakes for heat. A splash of hot sauce or a spoonful of sriracha can also spice things up. Just keep in mind to adjust the salt. You want a balance of flavors. This spicy twist can warm you up on a cold day! Using a slow cooker makes this recipe even easier. Simply add all your ingredients into the slow cooker. Set it on low for 6-8 hours or high for 3-4 hours. This method allows all the flavors to blend beautifully. Plus, you can come home to a warm, tasty meal. Check out the Full Recipe for detailed steps and measurements. After you finish your chicken and rice soup, let it cool down. This helps keep the soup fresh. Transfer it to an airtight container. It will stay good in the fridge for 3 to 4 days. Make sure to label the container with the date. This way, you’ll know when to eat it. If you want to save some soup for later, freezing works great. First, let the soup cool completely. Then, pour it into freezer-safe bags or containers. Leave some space at the top for expansion. You can freeze it for up to 3 months. When you’re ready to eat, just thaw it overnight in the fridge. To reheat your soup, pour it into a pot. Heat it on medium-low heat. Stir it often to ensure it warms evenly. If the soup seems too thick, add a splash of broth or water. You can also microwave it in a safe bowl. Heat it in short intervals, stirring in between. This ensures every bite is warm and tasty. Enjoy your cozy meal! For the full recipe, check out the Cozy Chicken & Rice Delight section. Yes, you can use brown rice. Brown rice adds a nutty flavor and is more nutritious. However, it takes longer to cook. You should adjust the cooking time. Add brown rice early when you add the broth, and let it simmer for 40-45 minutes. This way, the rice becomes tender and blends well with the soup. To make the soup gluten-free, you need to check a few things. First, use a gluten-free chicken broth. Many brands offer gluten-free options. Also, make sure your rice is certified gluten-free. Jasmine rice is usually safe, but always check the label. By following these steps, your soup will be gluten-free and just as tasty. You can serve many tasty sides with your soup. Here are some great options: - A fresh green salad - Crusty bread or rolls - Garlic breadsticks - Steamed vegetables These sides will make your meal complete and satisfying. For more ideas, feel free to check the Full Recipe and explore different serving suggestions. We reviewed the key steps to make Chicken and Rice Soup, from choosing the right ingredients to cooking methods. You learned helpful tips to enhance flavor and avoid common mistakes. Variations and storage details ensure this dish suits your taste and convenience. Trust these insights to create a tasty soup every time. Enjoy warm bowls of nourishment that you made with care. Happy cooking!](https://goldendishy.com/wp-content/uploads/2025/06/7617fd4a-61d9-414c-8819-76abcb6635e5.webp)
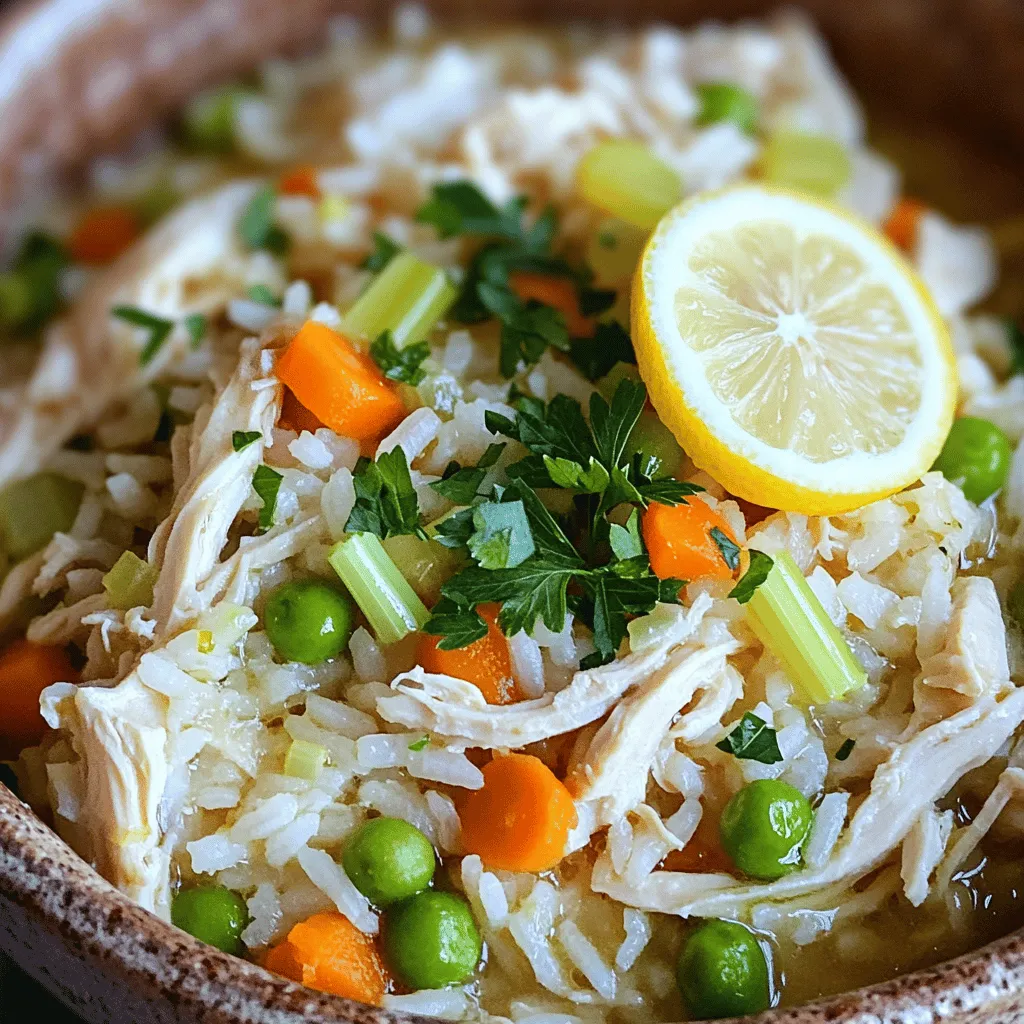
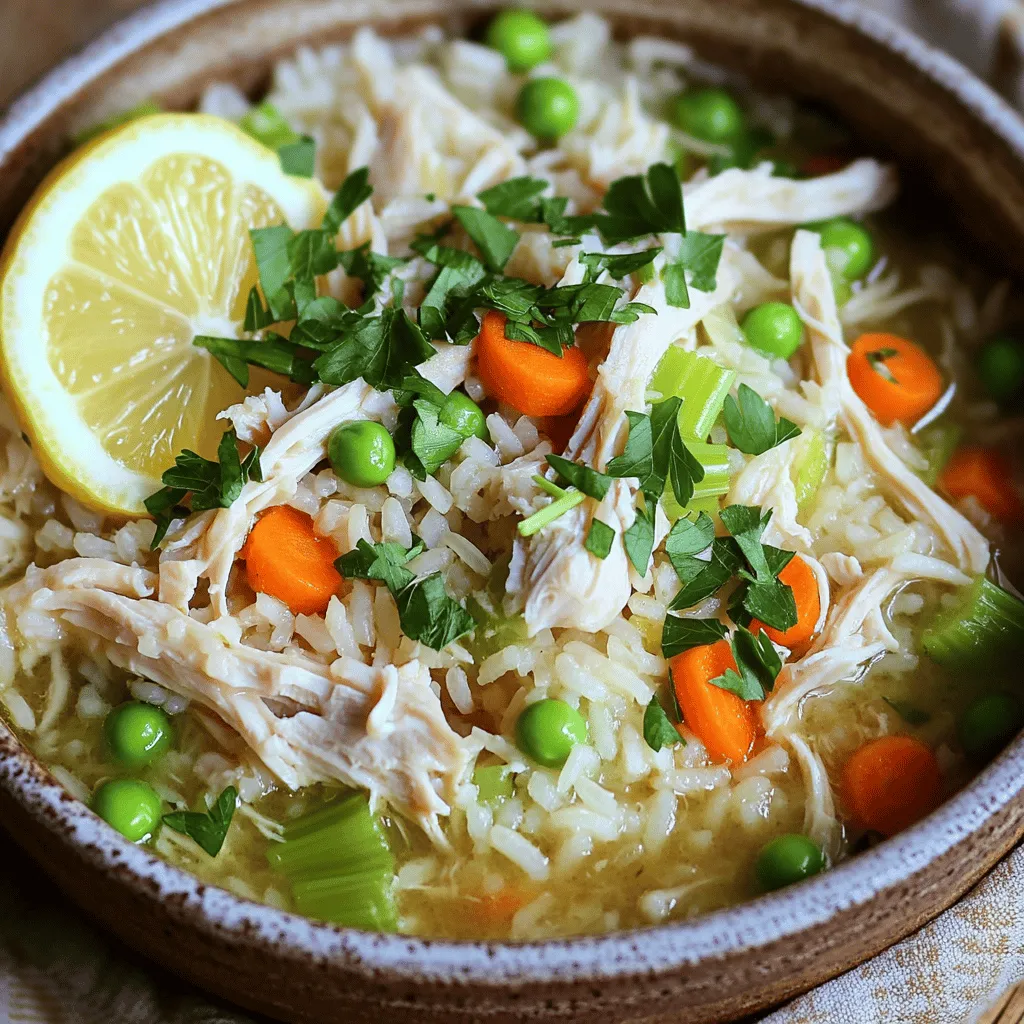
When you’re craving something warm and easy, Chicken and Rice Soup hits the spot. This recipe is not just comforting, but also simple to make. You can whip it up using basic ingredients you likely have at home. Join me as I share my favorite steps, tips, and variations to make this dish your own. Ready to dive into a bowl of deliciousness? Let’s get started!
Ingredients
List of Ingredients for Chicken and Rice Soup
To make this simple and tasty chicken and rice soup, gather these ingredients:
– 2 boneless, skinless chicken breasts
– 1 cup jasmine rice, thoroughly rinsed
– 6 cups chicken broth (preferably low-sodium)
– 2 carrots, peeled and diced
– 2 stalks celery, chopped
– 1 small onion, finely diced
– 3 garlic cloves, minced
– 1 teaspoon dried thyme
– 1 bay leaf
– 1 tablespoon extra virgin olive oil
– Salt and freshly ground pepper, to taste
– 1 cup frozen peas
– Juice from 1 fresh lemon
– Fresh parsley, roughly chopped (for garnish)
Nutritional Information per Serving
Each serving of this chicken and rice soup is packed with nutrition. Here’s a quick look at what you get:
– Calories: 300
– Protein: 25g
– Carbohydrates: 40g
– Fat: 6g
– Fiber: 2g
This soup is low in fat and rich in protein and carbs, making it a cozy choice for any meal.
Possible Ingredient Substitutions
If you need to swap out some items, here are some ideas:
– Chicken: Use shredded rotisserie chicken for a quick option.
– Rice: Substitute with brown rice or quinoa for a different texture.
– Broth: Vegetable broth works well for a lighter flavor.
– Vegetables: Add bell peppers, corn, or spinach for extra nutrition.
– Herbs: Fresh herbs like rosemary or dill can replace thyme for a new taste.
These substitutions help you make this soup work for your pantry or dietary needs. Enjoy creating your version!
Step-by-Step Instructions
Preparation of Chicken and Vegetables
Start by gathering your ingredients. You need chicken breasts, jasmine rice, broth, carrots, celery, onion, garlic, thyme, a bay leaf, olive oil, and peas.
1. Heat the olive oil: In a large pot, place the olive oil over medium heat. Wait until it shimmers.
2. Add the vegetables: Toss in the diced onion, carrots, and celery. Sauté these for about 5 minutes. You want them to soften and the onion to look clear.
3. Incorporate garlic: Stir in the minced garlic. Cook this for one minute. The smell should fill your kitchen.
Cooking the Soup Base
1. Add chicken and broth: Place the chicken breasts into the pot. Pour in the chicken broth. Add thyme, bay leaf, salt, and pepper.
2. Bring to a boil: Turn up the heat until the mixture boils. Then, lower the heat to a gentle simmer.
3. Cook the chicken: Cover the pot and let it simmer for 15-20 minutes. Make sure the chicken cooks fully (165°F or 75°C inside).
Final Steps to Complete the Dish
1. Shred the chicken: Once cooked, remove the chicken and let it cool. Use two forks to shred it into smaller pieces.
2. Add rice: Stir in the rinsed jasmine rice into the pot. Cover it again and let it simmer for about 15 minutes. The rice should be tender.
3. Finish the soup: Return the shredded chicken to the pot. Add the frozen peas and lemon juice. Taste and adjust salt and pepper if needed.
4. Serve: Remember to take out the bay leaf. Serve hot in bowls. Top with fresh parsley for a nice touch.
Tips & Tricks
Enhancing the Flavor of Chicken and Rice Soup
To make your chicken and rice soup shine, focus on fresh ingredients. Start with quality chicken broth. Low-sodium broth gives you control over salt levels. Add fresh herbs like thyme and parsley for a bright taste. A splash of lemon juice at the end brightens the flavor too. You can also toss in some fresh garlic for depth.
Common Mistakes to Avoid
One big mistake is overcooking the chicken. Remove it from the pot once it reaches 165°F. Letting it simmer too long can make it dry. Another common error is not rinsing the rice. Rinsing removes excess starch, which helps keep the soup clear. Avoid adding too much water or broth. You want a nice balance of soup and rice.
How to Make it Extra Creamy
For a creamy texture, add a splash of heavy cream or coconut milk. Stir it in after you add the chicken back to the pot. You can also blend a portion of the soup. Use an immersion blender to create a creamy base while keeping some chunks intact. This mix gives you both texture and creaminess in every spoonful.

Variations
Chicken and Rice Soup with Vegetables
You can easily add veggies to your chicken and rice soup. Chopped carrots, celery, and peas work well. You can also try adding spinach, kale, or zucchini for more color and nutrition. These vegetables add flavor and make your soup more filling. Just toss them in during the last few minutes of cooking. This way, they will stay bright and fresh.
Spicy Chicken and Rice Soup Adaptation
If you like a kick, make a spicy version. Add diced jalapeños or red pepper flakes for heat. A splash of hot sauce or a spoonful of sriracha can also spice things up. Just keep in mind to adjust the salt. You want a balance of flavors. This spicy twist can warm you up on a cold day!
Slow Cooker Method for Easy Preparation
Using a slow cooker makes this recipe even easier. Simply add all your ingredients into the slow cooker. Set it on low for 6-8 hours or high for 3-4 hours. This method allows all the flavors to blend beautifully. Plus, you can come home to a warm, tasty meal.
Storage Info
How to Properly Store Leftovers
After you finish your chicken and rice soup, let it cool down. This helps keep the soup fresh. Transfer it to an airtight container. It will stay good in the fridge for 3 to 4 days. Make sure to label the container with the date. This way, you’ll know when to eat it.
Freezing Tips for Chicken and Rice Soup
If you want to save some soup for later, freezing works great. First, let the soup cool completely. Then, pour it into freezer-safe bags or containers. Leave some space at the top for expansion. You can freeze it for up to 3 months. When you’re ready to eat, just thaw it overnight in the fridge.
Reheating Instructions for Best Results
To reheat your soup, pour it into a pot. Heat it on medium-low heat. Stir it often to ensure it warms evenly. If the soup seems too thick, add a splash of broth or water. You can also microwave it in a safe bowl. Heat it in short intervals, stirring in between. This ensures every bite is warm and tasty. Enjoy your cozy meal!
FAQs
Can I use brown rice instead of jasmine rice?
Yes, you can use brown rice. Brown rice adds a nutty flavor and is more nutritious. However, it takes longer to cook. You should adjust the cooking time. Add brown rice early when you add the broth, and let it simmer for 40-45 minutes. This way, the rice becomes tender and blends well with the soup.
How can I make Chicken and Rice Soup gluten-free?
To make the soup gluten-free, you need to check a few things. First, use a gluten-free chicken broth. Many brands offer gluten-free options. Also, make sure your rice is certified gluten-free. Jasmine rice is usually safe, but always check the label. By following these steps, your soup will be gluten-free and just as tasty.
What can I serve with Chicken and Rice Soup?
You can serve many tasty sides with your soup. Here are some great options:
– A fresh green salad
– Crusty bread or rolls
– Garlic breadsticks
– Steamed vegetables
These sides will make your meal complete and satisfying.
We reviewed the key steps to make Chicken and Rice Soup, from choosing the right ingredients to cooking methods. You learned helpful tips to enhance flavor and avoid common mistakes. Variations and storage details ensure this dish suits your taste and convenience.
Trust these insights to create a tasty soup every time. Enjoy warm bowls of nourishment that you made with care. Happy cooking!
![To make this simple and tasty chicken and rice soup, gather these ingredients: - 2 boneless, skinless chicken breasts - 1 cup jasmine rice, thoroughly rinsed - 6 cups chicken broth (preferably low-sodium) - 2 carrots, peeled and diced - 2 stalks celery, chopped - 1 small onion, finely diced - 3 garlic cloves, minced - 1 teaspoon dried thyme - 1 bay leaf - 1 tablespoon extra virgin olive oil - Salt and freshly ground pepper, to taste - 1 cup frozen peas - Juice from 1 fresh lemon - Fresh parsley, roughly chopped (for garnish) Each serving of this chicken and rice soup is packed with nutrition. Here’s a quick look at what you get: - Calories: 300 - Protein: 25g - Carbohydrates: 40g - Fat: 6g - Fiber: 2g This soup is low in fat and rich in protein and carbs, making it a cozy choice for any meal. If you need to swap out some items, here are some ideas: - Chicken: Use shredded rotisserie chicken for a quick option. - Rice: Substitute with brown rice or quinoa for a different texture. - Broth: Vegetable broth works well for a lighter flavor. - Vegetables: Add bell peppers, corn, or spinach for extra nutrition. - Herbs: Fresh herbs like rosemary or dill can replace thyme for a new taste. These substitutions help you make this soup work for your pantry or dietary needs. Enjoy creating your version! Start by gathering your ingredients. You need chicken breasts, jasmine rice, broth, carrots, celery, onion, garlic, thyme, a bay leaf, olive oil, and peas. 1. Heat the olive oil: In a large pot, place the olive oil over medium heat. Wait until it shimmers. 2. Add the vegetables: Toss in the diced onion, carrots, and celery. Sauté these for about 5 minutes. You want them to soften and the onion to look clear. 3. Incorporate garlic: Stir in the minced garlic. Cook this for one minute. The smell should fill your kitchen. 1. Add chicken and broth: Place the chicken breasts into the pot. Pour in the chicken broth. Add thyme, bay leaf, salt, and pepper. 2. Bring to a boil: Turn up the heat until the mixture boils. Then, lower the heat to a gentle simmer. 3. Cook the chicken: Cover the pot and let it simmer for 15-20 minutes. Make sure the chicken cooks fully (165°F or 75°C inside). 1. Shred the chicken: Once cooked, remove the chicken and let it cool. Use two forks to shred it into smaller pieces. 2. Add rice: Stir in the rinsed jasmine rice into the pot. Cover it again and let it simmer for about 15 minutes. The rice should be tender. 3. Finish the soup: Return the shredded chicken to the pot. Add the frozen peas and lemon juice. Taste and adjust salt and pepper if needed. 4. Serve: Remember to take out the bay leaf. Serve hot in bowls. Top with fresh parsley for a nice touch. For the complete recipe, visit [Full Recipe]. To make your chicken and rice soup shine, focus on fresh ingredients. Start with quality chicken broth. Low-sodium broth gives you control over salt levels. Add fresh herbs like thyme and parsley for a bright taste. A splash of lemon juice at the end brightens the flavor too. You can also toss in some fresh garlic for depth. One big mistake is overcooking the chicken. Remove it from the pot once it reaches 165°F. Letting it simmer too long can make it dry. Another common error is not rinsing the rice. Rinsing removes excess starch, which helps keep the soup clear. Avoid adding too much water or broth. You want a nice balance of soup and rice. For a creamy texture, add a splash of heavy cream or coconut milk. Stir it in after you add the chicken back to the pot. You can also blend a portion of the soup. Use an immersion blender to create a creamy base while keeping some chunks intact. This mix gives you both texture and creaminess in every spoonful. Follow the [Full Recipe] for a step-by-step guide to making this comforting dish. {{image_4}} You can easily add veggies to your chicken and rice soup. Chopped carrots, celery, and peas work well. You can also try adding spinach, kale, or zucchini for more color and nutrition. These vegetables add flavor and make your soup more filling. Just toss them in during the last few minutes of cooking. This way, they will stay bright and fresh. If you like a kick, make a spicy version. Add diced jalapeños or red pepper flakes for heat. A splash of hot sauce or a spoonful of sriracha can also spice things up. Just keep in mind to adjust the salt. You want a balance of flavors. This spicy twist can warm you up on a cold day! Using a slow cooker makes this recipe even easier. Simply add all your ingredients into the slow cooker. Set it on low for 6-8 hours or high for 3-4 hours. This method allows all the flavors to blend beautifully. Plus, you can come home to a warm, tasty meal. Check out the Full Recipe for detailed steps and measurements. After you finish your chicken and rice soup, let it cool down. This helps keep the soup fresh. Transfer it to an airtight container. It will stay good in the fridge for 3 to 4 days. Make sure to label the container with the date. This way, you’ll know when to eat it. If you want to save some soup for later, freezing works great. First, let the soup cool completely. Then, pour it into freezer-safe bags or containers. Leave some space at the top for expansion. You can freeze it for up to 3 months. When you’re ready to eat, just thaw it overnight in the fridge. To reheat your soup, pour it into a pot. Heat it on medium-low heat. Stir it often to ensure it warms evenly. If the soup seems too thick, add a splash of broth or water. You can also microwave it in a safe bowl. Heat it in short intervals, stirring in between. This ensures every bite is warm and tasty. Enjoy your cozy meal! For the full recipe, check out the Cozy Chicken & Rice Delight section. Yes, you can use brown rice. Brown rice adds a nutty flavor and is more nutritious. However, it takes longer to cook. You should adjust the cooking time. Add brown rice early when you add the broth, and let it simmer for 40-45 minutes. This way, the rice becomes tender and blends well with the soup. To make the soup gluten-free, you need to check a few things. First, use a gluten-free chicken broth. Many brands offer gluten-free options. Also, make sure your rice is certified gluten-free. Jasmine rice is usually safe, but always check the label. By following these steps, your soup will be gluten-free and just as tasty. You can serve many tasty sides with your soup. Here are some great options: - A fresh green salad - Crusty bread or rolls - Garlic breadsticks - Steamed vegetables These sides will make your meal complete and satisfying. For more ideas, feel free to check the Full Recipe and explore different serving suggestions. We reviewed the key steps to make Chicken and Rice Soup, from choosing the right ingredients to cooking methods. You learned helpful tips to enhance flavor and avoid common mistakes. Variations and storage details ensure this dish suits your taste and convenience. Trust these insights to create a tasty soup every time. Enjoy warm bowls of nourishment that you made with care. Happy cooking!](https://goldendishy.com/wp-content/uploads/2025/06/7617fd4a-61d9-414c-8819-76abcb6635e5-300x300.webp)


![When making vegetable and bean chili, gather these items first: - 1 tablespoon olive oil - 1 large onion, finely diced - 3 cloves garlic, minced - 1 bell pepper (red or yellow), chopped into bite-sized pieces - 1 medium carrot, diced into small cubes - 1 medium zucchini, diced - 1 cup corn kernels (fresh or frozen will work) - 1 can (15 oz) black beans, rinsed thoroughly and drained - 1 can (15 oz) kidney beans, rinsed thoroughly and drained - 1 can (15 oz) diced tomatoes with their juices - 2 cups vegetable broth (low sodium recommended) - 2 tablespoons chili powder - 1 teaspoon ground cumin - 1 teaspoon smoked paprika - Salt and pepper to taste - Fresh cilantro, chopped (for garnish) - Avocado slices (for serving, optional) These ingredients create a rich, hearty dish that warms you up. You can change this recipe to fit your taste. Here are some ideas: - Add more beans, like pinto or cannellini beans. - Swap in different vegetables, such as spinach or sweet potatoes. - Mix in some hot peppers for a spicy kick. - Use different herbs, like oregano or thyme, for extra flavor. - Top with cheese or sour cream if you prefer. These options let you make the chili your own! This vegetable and bean chili is not only tasty but also healthy. Here’s a quick breakdown of its nutrition: - Calories: Around 250 per serving - Protein: About 12 grams - Carbohydrates: Roughly 40 grams - Fiber: Nearly 12 grams - Fat: Around 5 grams This chili is high in fiber and protein, making it a satisfying meal. You can enjoy it guilt-free! For the full recipe, check out the [Full Recipe]. First, heat 1 tablespoon of olive oil in a large pot over medium heat. When the oil is hot, add 1 large onion, finely diced. Cook the onion for about 5 minutes. It should turn soft and clear. Next, add 3 minced garlic cloves. Stir the garlic in for 1 to 2 minutes. It should smell great and turn light gold. Now, add in a chopped bell pepper, a diced carrot, and a diced zucchini. Cook these veggies for 5 to 7 minutes. Stir them often as they start to soften and brighten. Then, mix in 1 cup of corn kernels. Let them cook for an extra 3 minutes. This adds sweet flavor and color. Next, add 1 can each of black beans and kidney beans, both rinsed and drained. Then, pour in 1 can of diced tomatoes with their juices and 2 cups of vegetable broth. Sprinkle in 2 tablespoons of chili powder, 1 teaspoon of ground cumin, and 1 teaspoon of smoked paprika. Stir everything together well. Increase the heat until it boils. Once boiling, lower the heat to let it simmer. Keep it uncovered for about 30 minutes. Stir occasionally to avoid sticking. Taste and add salt and pepper as you like. Once thickened, remove it from the heat. Let it sit for a few minutes. This helps the flavors mix well. Now, ladle the chili into bowls. You can top each bowl with freshly chopped cilantro. If you want, add avocado slices for a creamy finish. Check out the Full Recipe for more details! To boost the flavor of your vegetable and bean chili, try these tips: - Use Fresh Herbs: Fresh cilantro or parsley adds a bright taste. - Add Citrus: A squeeze of lime or lemon brightens the dish. - Incorporate Spices: Experiment with chipotle powder for heat or oregano for depth. You can also let the chili sit for a few hours or overnight. This resting time lets the flavors meld and deepen. If your chili is too thick, add more vegetable broth. Start with a half cup and stir well. If it’s too thin, simmer it longer. This helps the liquid reduce and thicken. You can also mash some beans to make the chili creamier. Serve your chili with various toppings. Here are some ideas: - Sliced avocado for creaminess - Shredded cheese for a cheesy touch - Crème fraîche or sour cream for richness - Crispy tortilla chips for crunch Pair your chili with warm bread or cornbread on the side. It’s a great way to soak up every delicious drop. For the full recipe, check out the robust vegetable & bean chili. Enjoy your hearty comfort food delight! {{image_4}} If you want a vegan chili, this recipe is already perfect! All the ingredients are plant-based. For gluten-free versions, check your vegetable broth and spices. Most brands are safe, but read labels to be sure. You can switch to gluten-free grains like quinoa or rice as a side. Feel free to change up the beans or veggies. If you don’t have black beans, use pinto or cannellini beans. You can also mix in lentils for added protein. For vegetables, try adding sweet potatoes, spinach, or even kale. This adds flavor and nutrition to your dish. To make your chili spicy, add more chili powder or diced jalapeños. You can also use hot sauce for an extra kick. If you prefer mild flavors, reduce the chili powder and smoked paprika. This way, everyone can enjoy their bowl of chili. For the full recipe, check out the detailed instructions and ingredient list! To keep your vegetable and bean chili fresh, let it cool first. Once cool, store it in an airtight container. Place the container in the fridge. Your chili will stay good for about 3 to 5 days. If you want to enjoy it later, freezing is a great option. You can freeze your chili for up to 3 months. First, let it cool completely. Then, pour it into a freezer-safe container. Leave some space at the top, as the chili will expand when frozen. Label the container with the date. This way, you will know when to use it. When you are ready to eat, thaw the chili in the fridge overnight. For quick reheating, use the microwave or the stove. If microwaving, heat in short bursts, stirring in between. On the stove, warm it over medium heat until it bubbles. Always check that it is hot all the way through before serving. Enjoy your hearty comfort food delight! For the full recipe, check out the detailed steps above. Yes, you can use canned beans. Canned beans save time and effort. Just rinse them well to remove excess sodium. For this chili, I recommend black beans and kidney beans. They add great texture and flavor. Vegetable bean chili lasts about 4 to 5 days in the fridge. Make sure to store it in an airtight container. The flavors actually improve over time, making it even tastier! You can serve this chili with many sides. Try crispy tortilla chips for crunch. Warm bread or cornbread pairs well too. Add a dollop of sour cream or Greek yogurt for creaminess. Don't forget fresh avocado slices for extra flavor! Check the Full Recipe for more serving ideas. This blog post covered all you need for a great vegetable bean chili. We explored the ingredients, showing how to customize it and understand its nutrition. The step-by-step instructions guide you through cooking, while tips enhance its flavor. Variations help you adapt to different diets. Finally, we discussed storage methods and answered common questions. Cooking a tasty chili doesn't have to be hard. You now have tools to make it your own and enjoy it for days. Happy cooking!](https://goldendishy.com/wp-content/uploads/2025/06/710b1993-2890-4a51-b686-850c3b1d6686-768x768.webp)


