Chicken Alfredo Stuffed Shells Delightful Recipe

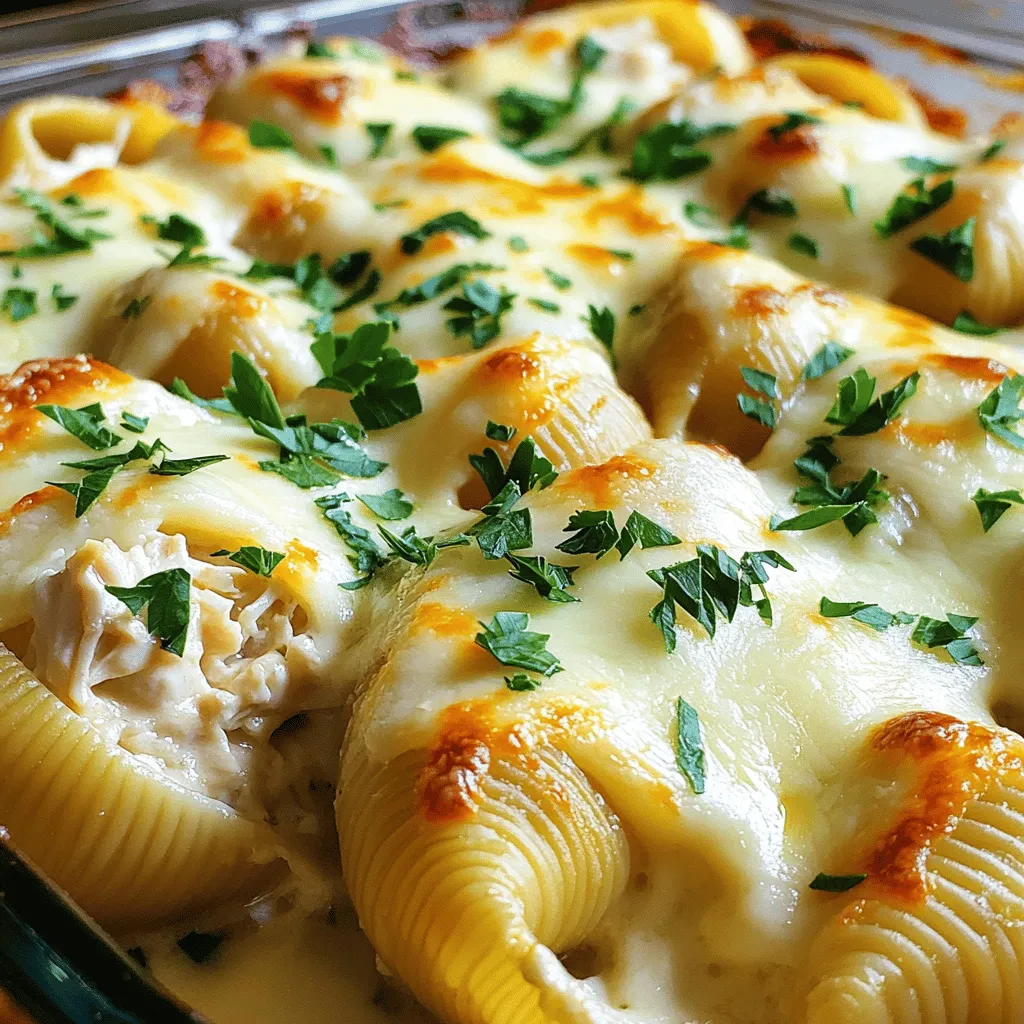
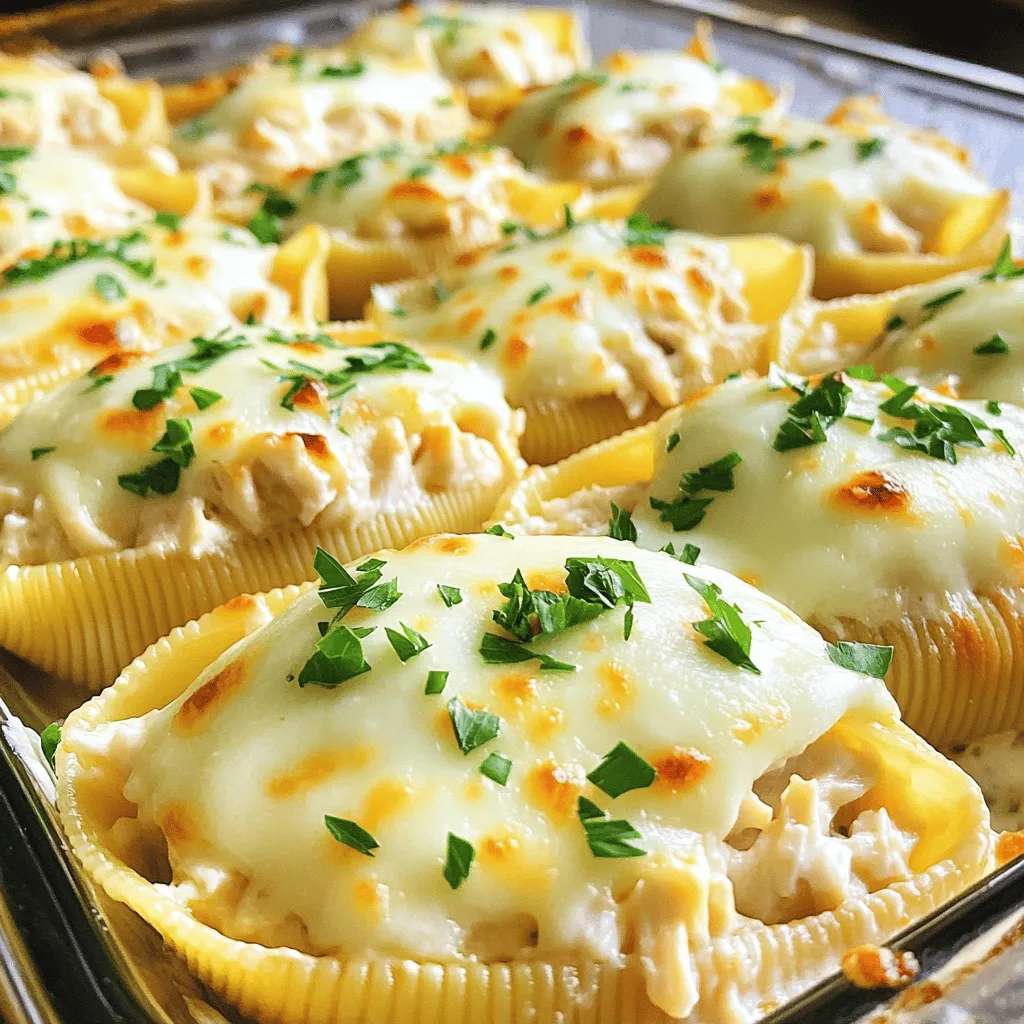
Craving a warm, creamy dish that’s sure to impress? Look no further! Chicken Alfredo Stuffed Shells combine rich flavors and cheesy goodness into one delightful package. I’ll guide you through each step to make this mouthwatering meal. From choosing the best ingredients to helpful tips and tasty variations, you’ll soon have a dish that everyone will love. Let’s dive into this wonderful cooking adventure together!
Ingredients
List of Ingredients
– 20 jumbo pasta shells
– 2 cups cooked chicken, shredded (preferably rotisserie for extra flavor)
– 1 cup ricotta cheese
– 1 cup shredded mozzarella cheese, divided
– 1/2 cup grated Parmesan cheese
– 2 cups Alfredo sauce (store-bought or homemade for richer flavor)
– 2 cloves garlic, minced
– 1 teaspoon Italian seasoning
– Salt and pepper, to taste
– Fresh parsley, chopped (for garnish)
Substitutions for Fresh Ingredients
You can swap rotisserie chicken with any cooked chicken. Grilled or baked works too. Use cottage cheese instead of ricotta for a lighter filling. For a dairy-free option, try cashew cream or tofu. If you lack fresh garlic, garlic powder can do the trick. Don’t have Italian seasoning? Mix equal parts oregano and basil for a similar taste.
Tips for Choosing Quality Ingredients
When picking your chicken, look for fresh, juicy pieces. If using rotisserie, check that it’s moist and well-seasoned. For cheeses, go for high-quality brands; they make a huge difference. Choose a creamy Alfredo sauce for a rich taste. Fresh herbs like parsley add a burst of flavor. Always go for the freshest ingredients you can find; it makes your meal shine.
Step-by-Step Instructions
Prepping the Jumbo Shells
First, you need to cook the jumbo pasta shells. Fill a large pot with salted water and bring it to a boil. Add the shells and cook them until they are al dente, about 10 minutes. Once they’re done, drain the shells and let them cool on a clean towel. This helps them hold their shape.
Making the Filling
In a mixing bowl, combine the shredded chicken, ricotta cheese, and half of the mozzarella cheese. Add the grated Parmesan, minced garlic, Italian seasoning, salt, and pepper. Mix everything well until it forms a creamy filling. The flavors blend nicely, making each bite tasty.
Assembling and Baking the Dish
Now it’s time to fill the shells. Use a spoon or piping bag to stuff each shell with the chicken mixture. Place them seam-side up in a baking dish. Pour half of the Alfredo sauce over the stuffed shells for good coverage. Drizzle the rest over the top. Then, sprinkle the remaining mozzarella cheese on top for a cheesy finish. Cover the dish with foil and bake at 375°F for 20 minutes. After that, remove the foil and bake for another 10-15 minutes until the cheese is bubbly and golden. Let the dish cool for 5 minutes before serving. Garnish it with fresh parsley for a lovely touch.
Tips & Tricks
Common Mistakes to Avoid
When making Chicken Alfredo stuffed shells, avoid overcooking pasta. It should be al dente, or firm to the bite. If you undercook, shells may break when you stuff them. Also, don’t skip the seasoning. A little salt and pepper can make a big difference. Lastly, don’t rush the cooling process. Let the shells cool before filling. This helps keep your hands safe and makes stuffing easier.
Ways to Enhance Flavors
To boost the taste, try using rotisserie chicken. It adds extra flavor without much effort. You can also mix in fresh herbs, like basil or thyme, for a fresh twist. If you want more depth, add a splash of lemon juice to the filling. For an added kick, sprinkle some red pepper flakes on top before serving. This simple step can elevate your dish to a new level.
Serving Suggestions
Serve your stuffed shells on warm plates. This keeps the dish hot longer. I love to add a sprinkle of extra Parmesan on top. A drizzle of Alfredo sauce adds a creamy touch too. Pair these shells with a simple green salad or garlic bread. This makes for a complete and satisfying meal. Don’t forget to garnish with fresh parsley for color and flavor!

Variations
Vegetarian Version
You can easily make a vegetarian version of Chicken Alfredo stuffed shells. Swap the chicken for fresh spinach, mushrooms, and artichokes. These veggies add great flavor and texture. Mix them with ricotta cheese, mozzarella, and a pinch of salt. This filling will still be creamy and delicious!
Different Meat Options
If you want to try different meats, feel free to switch things up. Ground turkey or beef works great. Just cook the meat first and mix it with the cheese filling. You can also use shredded rotisserie chicken for added taste. Each meat option brings a unique flavor to the dish.
Alfredo Sauce Alternatives
Alfredo sauce can be customized too. For a lighter option, you can use Greek yogurt or cottage cheese. These add creaminess without too many calories. For a dairy-free choice, you can use cashew cream or coconut cream. Each sauce gives a different twist while keeping the dish rich and tasty.
Storage Info
How to Store Leftovers
To store leftover Chicken Alfredo Stuffed Shells, place them in an airtight container. Make sure to let them cool completely first. Seal the container tightly to keep air out. This helps prevent drying out. You can store them in the fridge for up to three days.
Reheating Tips
When you’re ready to enjoy the leftovers, preheat your oven to 350°F (175°C). Place the stuffed shells in a baking dish. Add a splash of Alfredo sauce on top to keep them moist. Cover the dish with foil to trap heat. Bake for about 20 minutes, or until heated through. You can also reheat them in the microwave. Just cover the dish and heat for 2-3 minutes. Check to see if they are hot all the way through.
Keeping the Dish Fresh for Longer
To keep the dish fresh longer, freeze the stuffed shells before baking. Use a freezer-safe container or wrap them tightly in foil. They can last up to three months in the freezer. When you’re ready to bake, let them thaw overnight in the fridge. Then, follow the baking instructions as usual. This way, you can enjoy a delicious meal any time!
FAQs
Can I make Chicken Alfredo Stuffed Shells ahead of time?
Yes, you can prepare Chicken Alfredo Stuffed Shells before serving. Just fill the shells and place them in a baking dish. Cover the dish and store it in the fridge for up to 24 hours. When you’re ready, add the Alfredo sauce and bake. This saves time and makes serving easy.
What can I serve with Chicken Alfredo Stuffed Shells?
Chicken Alfredo Stuffed Shells pair well with several sides. Here are some great options:
– Garlic bread for a crunchy side.
– A fresh green salad for a crisp bite.
– Steamed vegetables like broccoli or green beans for color and nutrients.
– A light tomato sauce for extra flavor.
These sides enhance the meal and create a balanced plate.
How do I prevent stuffed shells from breaking while cooking?
To avoid breaking stuffed shells, follow these tips:
– Cook the shells al dente. This ensures they are firm enough to hold the filling.
– Gently stir the shells in boiling water. This keeps them from sticking together.
– Use a large pot to allow room for movement.
– Let them cool on a towel before stuffing. This helps avoid cracks.
By taking care during cooking, your shells will stay intact and delicious.
You learned about key ingredients for making Chicken Alfredo Stuffed Shells. We covered how to prep and bake them to perfection. I shared tips on avoiding mistakes and enhancing flavors. Plus, I offered tasty variations and gave storage advice for leftovers.
In the end, these shells make a great meal for any occasion. Enjoy experimenting and making them your own!


. 1. Preheating the oven: Start by setting your oven to 400°F (200°C). This heat helps the chicken cook evenly and ensures a crispy skin. 2. Drying the chicken thighs: Use paper towels to pat the chicken thighs dry. Getting rid of moisture is key for that nice, crispy texture. 1. Mixing seasoning and applying to chicken: In a bowl, mix olive oil, garlic powder, dried oregano, salt, and black pepper. Rub this mix all over the chicken thighs. Be sure to coat them well for great flavor. 2. Layering the pesto: Take your basil pesto and spoon a good amount onto each thigh. Make sure each piece is coated well for the best taste. 1. Arranging chicken in the baking dish: Place the chicken thighs skin-side up in a baking dish. Scatter halved cherry tomatoes around the chicken. Their juices will add even more flavor. 2. Baking time and checking doneness: Put the dish in the oven. Bake for about 35-40 minutes. Check that the juices run clear and the thickest part of the thigh reads 165°F (74°C) on a meat thermometer. This step-by-step guide will help you create the best Baked Pesto Chicken Thighs. For the full recipe, check out the earlier section. To get crispy skin on your baked pesto chicken thighs, start by patting the chicken dry with paper towels. This step removes extra moisture, helping the skin crisp up nicely. Next, set your oven to 400°F (200°C). This temperature is key for cooking the chicken evenly while also achieving that perfect crispy finish. Mix your basil pesto with a teaspoon of olive oil if it feels thick. This makes it easier to coat the chicken thighs evenly. A good layer of pesto adds rich flavor to each bite. For a fresh touch, use herbs like basil or parsley to garnish the dish. They add color and a bright flavor. Serve your baked pesto chicken thighs on a large platter. Drizzle any juices from the baking dish over the chicken. Scatter the halved cherry tomatoes around for a colorful look. Pair this dish with a fresh salad or fluffy rice. Both sides complement the chicken well and make for a complete meal. For the full recipe, check out the details above. {{image_4}} You can use chicken breast instead of thighs. Chicken breasts are lean and cook faster. They will still soak up the pesto flavor. For a twist, try turkey. Turkey thighs or breasts work well too. They add a different taste while keeping it juicy. Experiment with homemade pesto. You can make it from sun-dried tomatoes or spinach. Both options give a unique flavor. If you like heat, add red pepper flakes. Just a pinch can spice things up without being too hot. This recipe can fit gluten-free diets. Just check that the pesto is gluten-free. Use gluten-free pasta or a side dish to complete the meal. For those avoiding dairy, choose dairy-free cheese. Many brands offer great options that melt well. Feel free to explore these variations to make your Baked Pesto Chicken Thighs even more exciting. For the full details on the base recipe, check the Full Recipe section. To store leftovers properly, let the chicken cool first. Place the chicken thighs in an airtight container. This will keep them fresh longer. I recommend using glass or BPA-free plastic. These containers seal well and prevent spills. You can freeze baked chicken thighs for later use. To do this, wrap each thigh in plastic wrap. Then, place them in a freezer bag. Remove as much air as possible before sealing. When you’re ready to eat, thaw the chicken overnight in the fridge. Reheat it in the oven at 350°F (175°C) until hot. In the fridge, baked pesto chicken thighs last about 3-4 days. Keep an eye on them. If you see any off-smells or discoloration, discard them right away. These signs mean the chicken is spoiled. Enjoy your meal with peace of mind by storing it properly. For the full recipe, check back to make this tasty dish! Bake chicken thighs for about 35 to 40 minutes. This time gives you juicy meat and crispy skin. Check the chicken at 35 minutes to see if it's done. The juices should run clear. If you have a meat thermometer, insert it in the thickest part. It should read 165°F (74°C). This temperature ensures the chicken is safe to eat. Yes, you can prep this dish ahead of time. Season the chicken and coat it with pesto. Place it in your baking dish and cover it. Store it in the fridge for up to 24 hours. When you're ready to cook, just bake it as directed. This makes meal prep easy and quick. Chicken should reach a safe cooking temperature of 165°F (74°C). This temperature kills harmful bacteria. Use a meat thermometer for the most accurate reading. Insert it into the thickest part of the thigh. Once it hits 165°F, your chicken is safe and ready to eat. This post covered juicy chicken thighs baked with pesto and cherry tomatoes. You learned about the key ingredients, seasoning, and steps to prepare this dish. I shared tips to achieve crispy skin and suggestions for variations. Storing leftovers and meal prep were also discussed. Incorporate these ideas in your cooking. Enjoy the flavors and share with others. Your kitchen is now ready for this tasty meal!](https://goldendishy.com/wp-content/uploads/2025/06/60e55a10-6222-4f06-b0be-30d915c75343-768x768.webp)
![- Bell Peppers: I like using large bell peppers. You can choose any color you like: red, yellow, or green. They all taste great! Make sure they are firm and fresh. Each pepper should hold the stuffing well. - Ground Chicken and Dairy: Ground chicken adds a light flavor. It cooks quickly and blends well with other ingredients. Pair it with shredded cheddar cheese for a creamy touch. The cheese melts beautifully, making the dish extra yummy. - Enhancing Ingredients: I always add cooked rice to the mix. It gives the dish a nice texture. Black beans are great too; they add protein and fiber. Corn brings sweetness and color. Together, these ingredients create a hearty filling. - Essential Spices: Be sure to use chili powder, ground cumin, garlic powder, and onion powder. These spices pack flavor into the filling. A sprinkle of salt and pepper brings everything together. - Optional Garnishes: Fresh cilantro adds a burst of flavor. It makes the dish look more vibrant. You can also use a dollop of sour cream for creaminess. - Recommended Sides: Serve the stuffed peppers with a simple salad. A side of rice or quinoa pairs well too. You can also add some tortilla chips for crunch. - Display Ideas: For a beautiful presentation, place each stuffed pepper on a plate. Drizzle a bit of olive oil on top for shine. Add some chopped cilantro for color. This makes the meal look as good as it tastes! For the complete recipe, check out the Full Recipe. 1. Preheat your oven to 375°F (190°C). This step is key for even cooking. 2. Grab four large bell peppers. Cut off the tops and remove the seeds. Rinse the insides to clean them well. 3. Lightly coat the outside of each pepper with olive oil. Stand them upright in a 9x13 inch baking dish. 1. Heat a skillet over medium heat. Add 1 pound of ground chicken to the pan. 2. Cook the chicken for 5-7 minutes. Stir and break it apart until it turns brown. 3. Once cooked, mix in 1 cup of cooked rice, 1 cup of rinsed black beans, and 1 cup of corn. 4. Add 3/4 cup of shredded cheddar cheese, 1 teaspoon of chili powder, 1 teaspoon of cumin, 1 teaspoon of garlic powder, and 1/2 teaspoon of onion powder. Season with salt and pepper to taste. Stir for 2-3 minutes. 1. Generously fill each bell pepper with the chicken and cheese mixture. Pack it well. 2. Sprinkle the remaining 1/4 cup of cheese on top of the stuffed peppers. 3. Cover the dish with aluminum foil to trap steam. Bake in the preheated oven for 30 minutes. 4. After 30 minutes, remove the foil. Continue baking for 10-15 minutes, until the cheese is bubbly and golden. 5. Check if the peppers are tender by piercing them with a fork. 6. Allow them to cool for a few minutes after baking. Optionally, garnish with fresh cilantro for extra flavor. For the complete recipe, check out the [Full Recipe]. What are common mistakes to avoid? One mistake is overcooking the chicken. Cook it just until it's brown. If you use too much salt, it can ruin the flavor. Taste your mixture before stuffing the peppers. How can you ensure even cooking? Make sure all your peppers are the same size. This will help them cook at the same rate. Cover them with foil for part of the baking time. This keeps the heat in and helps them cook through. What are some suggestions for adding extra flavor? Try adding diced tomatoes or jalapeños for a kick. You can also mix in some spices like paprika or cayenne pepper. Fresh herbs like parsley or basil can brighten the dish. What are some ingredient swaps for dietary preferences? For a lower-carb option, replace rice with cauliflower rice. Use ground turkey or tofu for a different protein. You can also swap cheddar cheese for a dairy-free cheese for a vegan option. What cooking methods can you use? You can air fry the stuffed peppers for a crispy texture. Just set the air fryer to 375°F and cook them for about 15-20 minutes. Grilling is another fun method. Just wrap the peppers in foil and place them on the grill. How do you maintain moisture in stuffed peppers? Add a splash of chicken broth to the bottom of the baking dish. This creates steam as they cook. Avoid overstuffing the peppers; too much filling can lead to dryness. For the full recipe, check out the recipe section above. {{image_4}} You can change the ground chicken in your stuffed peppers. Use ground turkey or beef instead. These meats add different flavors and textures. If you want a vegetarian option, try using quinoa or lentils. These ingredients pack a protein punch and keep the dish hearty. For a vegan twist, use a mix of beans and mushrooms. They add a nice texture and flavor. You can also use tofu crumbles, which absorb spices well. This makes your meal rich and filling while keeping it plant-based. You can spice up your stuffed peppers with different flavors. Why not try a Mexican twist? Add taco seasoning or jalapeños for heat. A dash of lime juice brightens the dish. If you love Italian flavors, mix in some Italian herbs like oregano or basil. You could also add marinara sauce to the filling. This creates a rich and comforting taste. Want a twist? Try adding olives, capers, or feta cheese. These ingredients bring unique textures and flavors. They turn a simple meal into something exciting. For those needing gluten-free meals, this recipe is easy to adapt. Use rice instead of breadcrumbs for filling. Always check labels on canned items like beans and corn. They should be gluten-free. If you follow a low-carb diet, you can swap rice for cauliflower rice. This keeps the dish light and low in carbs. You can also skip the beans to reduce carbs even more. These variations help everyone enjoy this tasty meal. No matter your diet, you can find a way to enjoy chicken and cheese stuffed peppers. After you make your chicken and cheese stuffed peppers, let them cool down. This helps keep them fresh. Store them in an airtight container. They will stay good in the fridge for about 3 to 4 days. If you have leftovers, try to eat them within this time. To reheat, place them in the oven or microwave until warm. If you want to keep your stuffed peppers for a longer time, freezing is a great option. First, let them cool completely. Wrap each pepper tightly with plastic wrap. Then, put them in a freezer bag or container. This helps avoid freezer burn. They can last up to 3 months in the freezer. When you're ready to eat, take them out and thaw in the fridge overnight. Reheat them in the oven at 375°F until hot. This will keep the flavors and textures intact. Meal prepping can save time on busy weeknights. You can prepare the filling ahead of time. Cook the chicken and mix in the rice, beans, and spices. Store this mixture in the fridge for 2 to 3 days. When you're ready, stuff the peppers and bake them. For batch cooking, consider making a double recipe. Freeze half for later. This way, you have a tasty meal ready whenever you need it. How do you know when stuffed peppers are done? You can tell when stuffed peppers are done by checking the peppers and cheese. The peppers should be tender and the cheese melted and bubbly. If you pierce a pepper with a fork, it should feel soft but not mushy. Can you prepare them in advance? Yes, you can prepare stuffed peppers in advance. Just stuff them and store them in the fridge. Bake them when you're ready to eat. This makes for a quick and easy family meal. Can I use frozen peppers? Yes, you can use frozen peppers. Just thaw them before stuffing. They may cook faster, so keep an eye on them while baking. What to do if I don't have certain ingredients? If you lack certain ingredients, feel free to swap them out. For example, use quinoa instead of rice or a different type of cheese. Get creative based on what you have! Can stuffed peppers be made on the stovetop? Yes, you can make stuffed peppers on the stovetop. Just steam them in a skillet with a little water. Cover with a lid and cook until tender. How to adjust heating times for different ovens? Oven temperatures can vary. If your oven runs hot, check the peppers a few minutes early. If it runs cool, you may need to add a few extra minutes. Always trust your instincts! We covered the best way to make stuffed peppers. You learned about key ingredients like bell peppers, ground chicken, and spices. You also discovered tips for cooking and storing them. There are many ways to adjust the recipe for different diets and tastes. Incorporating these ideas will make your dish delicious. Get creative with flavors and toppings. With practice, you'll master this easy meal for any occasion. Enjoy your cooking journey!](https://goldendishy.com/wp-content/uploads/2025/06/69b5c483-258e-4498-8701-d043fb5fc497-768x768.webp)
