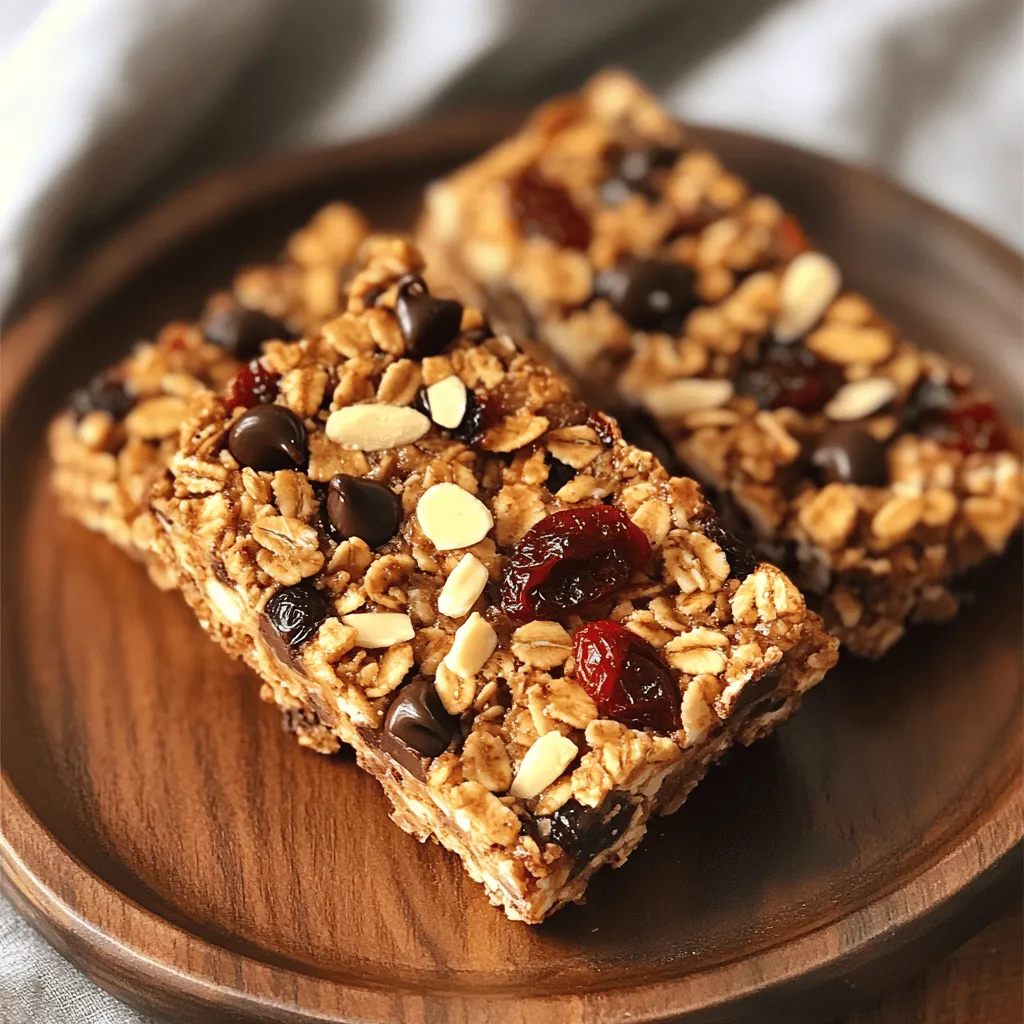
If you’re looking for a tasty, healthy snack, try making Cherry Chocolate Chip Granola Bars! These bars are easy to whip up and perfect for busy days. You’ll love the mix of chewy cherries, rich chocolate, and crunchy nuts. In this post, I’ll guide you through every step, from gathering your ingredients to enjoying the final product. Let’s start your delicious homemade snack journey!
Ingredients
Required Ingredients List
– 1 ½ cups rolled oats
– ½ cup unsweetened almond butter
– ⅓ cup honey or maple syrup
– ½ cup dried cherries, chopped
– ½ cup dark chocolate chips
– ¼ cup slivered almonds
– ¼ teaspoon salt
– 1 teaspoon vanilla extract
Optional Add-Ins
– Substitute nut butter or sweeteners
– Additional nuts or seeds
– Dried fruits variations
In making Cherry Chocolate Chip Granola Bars, you need basic ingredients. Rolled oats are the main base. They give the bars a nice chewy texture. Almond butter adds richness and healthy fats. Honey or maple syrup sweetens the bars and helps bind them. Dried cherries bring a tart flavor that pairs well with chocolate.
Dark chocolate chips add a sweet touch and a hint of bitterness. Slivered almonds add crunch and protein. A pinch of salt boosts all these flavors. Lastly, vanilla extract enhances the overall taste.
For those wanting to switch things up, you can substitute nut butter. Use peanut butter or sunflower seed butter if you prefer. You can also change the sweetener. Agave syrup works well too.
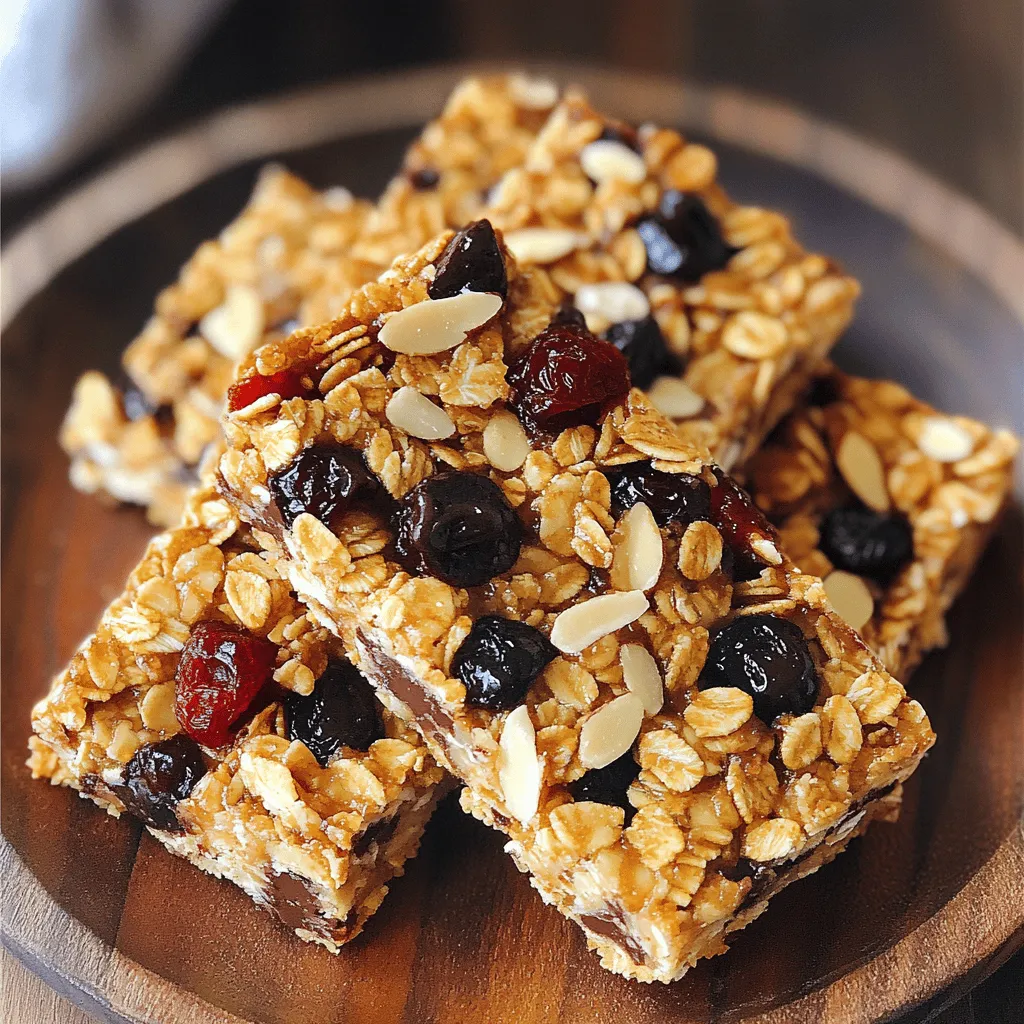
Feel free to add more nuts or seeds. Pumpkin seeds or walnuts can enhance the crunch. You can also try different dried fruits. Raisins, cranberries, or apricots can add unique flavors.
This recipe offers lots of room for creativity. Explore and make it your own!
Step-by-Step Instructions
Preparing the Baking Pan
First, preheat your oven to 350°F (175°C). This helps the bars bake evenly. While your oven heats, grab an 8-inch square baking pan. Line it with parchment paper. Make sure to leave some paper over the edges. This will help you lift the bars out easily after baking.
Mixing Dry Ingredients
In a large bowl, combine 1 ½ cups of rolled oats, ½ cup of chopped dried cherries, and ½ cup of dark chocolate chips. Add ¼ cup of slivered almonds and ¼ teaspoon of salt. Stir these together well. Mixing them evenly ensures every bite has balanced flavor.
Heating the Wet Mixture
Take a small saucepan and set it over low heat. Add ½ cup of almond butter, ⅓ cup of honey or maple syrup, and 1 teaspoon of vanilla extract. Stir this mixture continuously. This helps it melt into a smooth blend. Keep the heat low to avoid burning the mixture.
Combining Ingredients
Once the almond butter mixture is melted, pour it over your dry ingredients. Use a spatula or spoon to mix everything together. Make sure every dry ingredient gets coated. This creates a delicious flavor in each bite.
Baking Process
Transfer the sticky mix into your prepared pan. Press it down evenly using your hands or a spatula. This helps the bars hold their shape. Place the pan in your preheated oven. Bake for about 15-20 minutes. Look for the edges to turn golden brown; this means they are ready.
Cooling and Cutting
After baking, remove the pan from the oven. Let the granola cool completely in the pan for about 30 minutes. This step is very important. Cooling helps the bars firm up. Once cool, lift the granola out using the parchment paper. Place it on a cutting board and slice it into bars or squares. Enjoy your delicious Cherry Chocolate Chip Granola Bars!
Tips & Tricks
Achieving Perfect Texture
To get the right texture in your granola bars, press the mixture firmly into the pan. This helps bind the ingredients together. If you skip this step, the bars may crumble. After baking, let the bars cool for about 30 minutes. This cooling time is key. It helps the bars firm up and hold their shape.
Sweetness Adjustments
You can adjust the sweetness of your bars based on your taste. If you prefer less sweet, use less honey or maple syrup. You can also try natural sweeteners like agave or coconut sugar. These options can change the flavor slightly, so experiment to find what you like best.
Serving Suggestions
Enjoy these granola bars as a snack or breakfast. They are great on their own but pair well with yogurt or fruit. You can also dip them in milk or almond milk for a tasty treat. Consider serving them with a cup of tea or coffee for a cozy snack time.
Variations
Flavor Swaps
You can have fun with your granola bars! Try different dried fruits like apricots, cranberries, or raisins. Each fruit adds a unique taste and texture. If you want to switch up the chocolate, use white or milk chocolate chips. You could even skip the chocolate entirely for a fruity version!
Dietary Modifications
For a gluten-free option, use certified gluten-free oats. This way, everyone can enjoy these treats. If you want to make them vegan, swap the honey for maple syrup. Almond butter is already vegan, but you can also use peanut or sunflower seed butter if you prefer.
Seasonal Variations
Change your granola bars with the seasons! In summer, add fresh berries like blueberries or strawberries. Fall is perfect for pumpkin spice flavor or adding nuts like pecans. For winter holidays, consider festive spices like cinnamon or nutmeg. These twists will keep your snacks exciting!
Storage Info
Best Practices for Storing
To keep your cherry chocolate chip granola bars fresh, store them properly. They last up to one week at room temperature. To maintain their crispness, place them in an airtight container. This prevents moisture from making them soggy. If you live in a warm area, keep them in the fridge. A cool, dark spot works well too.
Freezing Instructions
Freezing granola bars is simple and great for long-term storage. Wrap each bar in plastic wrap or foil. Then, place them in a freezer-safe bag or container. They can freeze for up to three months. When you’re ready to enjoy one, take it out and let it thaw at room temperature. This way, it tastes fresh and delicious!
FAQs
Can I use quick oats instead of rolled oats?
Yes, you can use quick oats. They will make the bars softer. Rolled oats give a chewier texture. I prefer rolled oats for that reason.
How long do homemade granola bars last?
Homemade granola bars last about a week at room temperature. Store them in an airtight container. You can freeze them for up to three months. Thaw them in the fridge before eating.
Can these bars be made nut-free?
Yes, you can make them nut-free. Just use seed butter instead of almond butter. Sunflower seed butter works well and adds a nice flavor.
Where can I buy cherry chocolate chip granola bars?
You can find cherry chocolate chip granola bars in most grocery stores. Look in the snack or health food aisle. You can also buy them online.
How do I make these granola bars more nutritious?
To boost nutrition, add seeds like chia or flaxseeds. You can also mix in protein powder. Increasing the dried fruit and using less sweetener helps too.Here’s a quick recap of the steps and key ingredients:
– Ingredients:
– 1 ½ cups rolled oats
– ½ cup unsweetened almond butter
– ⅓ cup honey or maple syrup
– ½ cup dried cherries, chopped
– ½ cup dark chocolate chips
– ¼ cup slivered almonds
– ¼ teaspoon salt
– 1 teaspoon vanilla extract
– Steps:
1. Preheat your oven to 350°F (175°C).
2. Mix oats, cherries, chocolate, almonds, and salt in a bowl.
3. Melt almond butter, honey, and vanilla in a saucepan.
4. Pour the melted mix over the dry ingredients and stir.
5. Press the mixture into a lined baking pan.
6. Bake for 15-20 minutes until golden brown.
7. Cool, lift out, and cut into bars.
These bars are a delightful snack!
In this post, I shared how to make Cherry Chocolate Chip Granola Bars. You learned about the key ingredients and optional add-ins. I outlined each step, from preparing the pan to cooling and cutting the bars. I also included tips for texture and storage.
Enjoy experimenting with flavors and making these bars your own. Simple changes can make a big difference. Whether you snack or share, these bars are a tasty choice. Happy baking!


