Cheesy Garlic Breadsticks Irresistible Flavor Awaits
. - Combine 1 cup warm water, 2 ¼ teaspoons yeast, and 1 teaspoon sugar. - Let this sit for 5-10 minutes until it becomes frothy. This means the yeast is ready. - In a large bowl, mix 3 cups flour and 1 teaspoon salt. - Pour in the activated yeast mixture and 2 tablespoons olive oil. - Use your hands to mix until a sticky dough forms. - Place the dough on a floured surface and knead for about 5 minutes. - The goal is a smooth and elastic dough. - Lightly grease a bowl and place the kneaded dough inside. - Cover it with a kitchen towel and let it rise for 1 hour. - Once it doubles in size, gently punch it down to release air. - Roll the dough into a rectangle, about ½ inch thick. - Transfer it to a baking sheet, and score it into breadstick shapes. You can find the complete process in the Full Recipe. To make great breadsticks, check your dough's texture. The dough should feel smooth and soft. If it sticks to your fingers, it is too wet. If it pulls away cleanly, you’re on the right track. Knead it until it is elastic. This gives you that perfect bite. For the best results, preheat your oven to 425°F (220°C). This hot oven helps the breadsticks puff up and get golden. Line your baking sheet with parchment paper. This keeps your breadsticks from sticking and makes cleanup easy. Bake for 12-15 minutes. Watch for a golden brown color, that means they are ready! Want to spice things up? You can add extra flavors to your breadsticks. Try adding crushed red pepper for heat or fresh basil for a hint of sweetness. You can also use different cheeses. Cheddar or pepper jack can give you a fun twist. Mix and match to find your favorite! For the full recipe, check out the detailed steps. {{image_4}} You can change the cheese to make each batch unique. Try using cheddar for a sharp taste. Pepper jack adds a fun spicy kick. Mix and match cheeses to create your favorite flavor. Just remember, the more cheese, the better! If you want a vegan option, use plant-based cheese. There are many tasty brands available today. You can also make a garlic spread with olive oil and herbs instead of butter. This keeps the flavor rich while being dairy-free. Add fresh herbs to bring new life to your breadsticks. Chopped basil or thyme can add a lovely aroma. You can mix herbs into the dough or sprinkle them on top before baking. These small changes make a big difference. Try one of these variations next time you bake your cheesy garlic breadsticks using the Full Recipe! To store leftover breadsticks, let them cool completely first. Place them in an airtight container. This keeps them fresh. You can also wrap them in plastic wrap. Store them at room temperature for up to two days. If you want them to last longer, keep them in the fridge. Just remember, cold breadsticks can lose some of their warmth. Freezing is a great way to keep these breadsticks tasty for later. After they cool, wrap each breadstick in plastic wrap. Then, place them in a freezer bag. Make sure to remove as much air as possible. This helps avoid freezer burn. To reheat, take them out and let them thaw first. Then, bake them at 350°F (175°C) for about 10 minutes. They will taste fresh again! When stored properly, these breadsticks stay fresh for about two days at room temperature. In the fridge, they can last up to a week. If frozen, they can last for about three months. Just remember, the sooner you eat them, the better they will taste. For more details, check the Full Recipe. To make your breadsticks extra cheesy, you can add more cheese. Here are some tips: - Use a blend of mozzarella and cheddar for depth. - Sprinkle cheese on top before baking. - Add cheese to the dough for a cheesy base. - Mix in cream cheese with your garlic butter for a rich flavor. Each of these tips gives your breadsticks a gooey, cheesy texture. It enhances the flavor and makes every bite delightful. Yes, you can prepare these breadsticks ahead of time! Here’s how: - Make the dough and let it rise. - Shape the breadsticks and cover them with plastic wrap. - Store in the fridge for up to 24 hours. When you are ready, just take them out to rise a bit more and bake. This method saves time and allows you to enjoy fresh breadsticks without the fuss. Dipping sauces elevate your cheesy garlic breadsticks. Here are some great options: - Marinara sauce adds a classic touch. - Garlic butter enhances the garlic flavor. - Ranch dressing offers a creamy contrast. - Alfredo sauce gives a rich, cheesy dip. These dips not only complement the breadsticks but also add fun flavors to each bite. You can mix and match to find your perfect pairing! In this post, I shared how to make delicious cheesy garlic breadsticks. We covered essential ingredients, step-by-step instructions, and helpful tips. I also shared variations if you want something different. Now, you have the tools and knowledge to create your own. Enjoy these tasty treats with family or friends. Happy cooking!](https://goldendishy.com/wp-content/uploads/2025/06/f014268d-bdac-4f9e-9ca6-06fbafbccd76.webp)
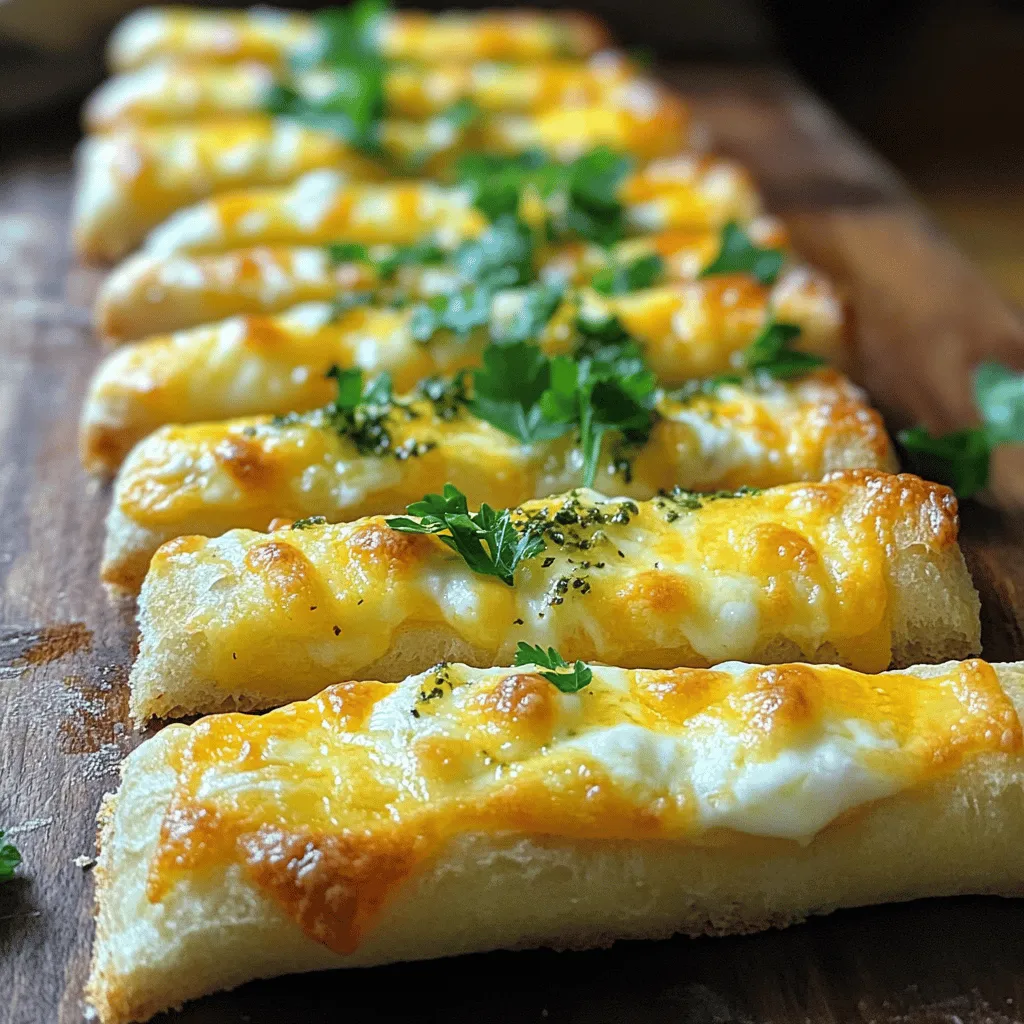
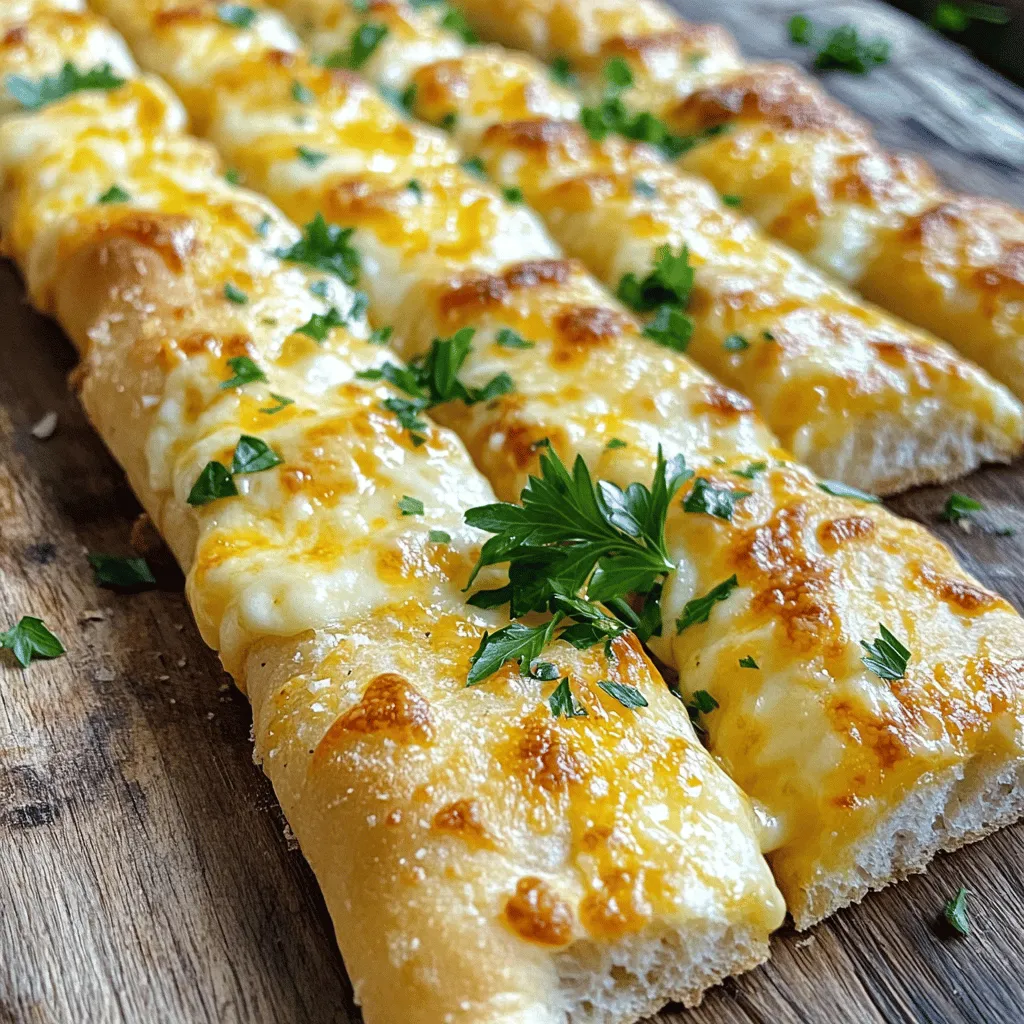
Are you ready to elevate your snack game? These Cheesy Garlic Breadsticks are the perfect blend of flavor and texture that will have everyone asking for seconds. With gooey mozzarella, fresh garlic, and a hint of oregano, you’ll soon find these irresistible treats becoming a staple at your table. Join me as I guide you through making these mouthwatering delights from scratch, ensuring a warm and cheesy experience you won’t forget!
Ingredients
Essential Ingredients for Cheesy Garlic Breadsticks
– 1 cup warm water
– 2 ¼ teaspoons active dry yeast
– 3 cups all-purpose flour
– 1 teaspoon salt
– 2 tablespoons extra virgin olive oil
Flavor Enhancers
– 4 cloves fresh garlic, minced
– 1 teaspoon dried oregano
– 1 ½ cups shredded mozzarella cheese
– ¼ cup grated Parmigiano-Reggiano cheese
Garnishes and Serving Suggestions
– Fresh parsley, finely chopped
– Optional: marinara sauce for dipping
To make cheesy garlic breadsticks, you need a few basic ingredients. Start with warm water, about 110°F or 43°C. This warmth helps the yeast activate. You’ll also need active dry yeast. It adds that lovely rise to your dough.
Next, you’ll need flour. All-purpose flour works best for this recipe. Don’t forget the salt; it brings out the flavors of the breadsticks. Extra virgin olive oil adds richness and moisture.
For flavor, garlic is a must. I love using fresh garlic for its strong taste. Dried oregano adds a hint of earthiness. For that gooey, cheesy goodness, you need mozzarella cheese. Parmigiano-Reggiano cheese adds a salty, nutty flavor that makes these breadsticks irresistible.
When ready to serve, chop fresh parsley for a burst of color and taste. You can also pair these breadsticks with marinara sauce for dipping. It’s a match made in heaven.
You can find the complete recipe for these delicious cheesy garlic breadsticks [here](#).
Step-by-Step Instructions
Activating the Yeast
– Combine 1 cup warm water, 2 ¼ teaspoons yeast, and 1 teaspoon sugar.
– Let this sit for 5-10 minutes until it becomes frothy. This means the yeast is ready.
Preparing and Kneading the Dough
– In a large bowl, mix 3 cups flour and 1 teaspoon salt.
– Pour in the activated yeast mixture and 2 tablespoons olive oil.
– Use your hands to mix until a sticky dough forms.
– Place the dough on a floured surface and knead for about 5 minutes.
– The goal is a smooth and elastic dough.
Risen Dough and Shaping
– Lightly grease a bowl and place the kneaded dough inside.
– Cover it with a kitchen towel and let it rise for 1 hour.
– Once it doubles in size, gently punch it down to release air.
– Roll the dough into a rectangle, about ½ inch thick.
– Transfer it to a baking sheet, and score it into breadstick shapes.
Tips & Tricks
Perfect Dough Consistency
To make great breadsticks, check your dough’s texture. The dough should feel smooth and soft. If it sticks to your fingers, it is too wet. If it pulls away cleanly, you’re on the right track. Knead it until it is elastic. This gives you that perfect bite.
Baking Tips for Golden Breadsticks
For the best results, preheat your oven to 425°F (220°C). This hot oven helps the breadsticks puff up and get golden. Line your baking sheet with parchment paper. This keeps your breadsticks from sticking and makes cleanup easy. Bake for 12-15 minutes. Watch for a golden brown color, that means they are ready!
Enhancing Flavor
Want to spice things up? You can add extra flavors to your breadsticks. Try adding crushed red pepper for heat or fresh basil for a hint of sweetness. You can also use different cheeses. Cheddar or pepper jack can give you a fun twist. Mix and match to find your favorite!

Variations
Cheese Variations
You can change the cheese to make each batch unique. Try using cheddar for a sharp taste. Pepper jack adds a fun spicy kick. Mix and match cheeses to create your favorite flavor. Just remember, the more cheese, the better!
Vegan Alternative
If you want a vegan option, use plant-based cheese. There are many tasty brands available today. You can also make a garlic spread with olive oil and herbs instead of butter. This keeps the flavor rich while being dairy-free.
Herb-Infused Versions
Add fresh herbs to bring new life to your breadsticks. Chopped basil or thyme can add a lovely aroma. You can mix herbs into the dough or sprinkle them on top before baking. These small changes make a big difference.
Storage Info
Short-Term Storage
To store leftover breadsticks, let them cool completely first. Place them in an airtight container. This keeps them fresh. You can also wrap them in plastic wrap. Store them at room temperature for up to two days. If you want them to last longer, keep them in the fridge. Just remember, cold breadsticks can lose some of their warmth.
Freezing Instructions
Freezing is a great way to keep these breadsticks tasty for later. After they cool, wrap each breadstick in plastic wrap. Then, place them in a freezer bag. Make sure to remove as much air as possible. This helps avoid freezer burn. To reheat, take them out and let them thaw first. Then, bake them at 350°F (175°C) for about 10 minutes. They will taste fresh again!
Shelf Life
When stored properly, these breadsticks stay fresh for about two days at room temperature. In the fridge, they can last up to a week. If frozen, they can last for about three months. Just remember, the sooner you eat them, the better they will taste.
FAQs
How do I make my breadsticks cheesy?
To make your breadsticks extra cheesy, you can add more cheese. Here are some tips:
– Use a blend of mozzarella and cheddar for depth.
– Sprinkle cheese on top before baking.
– Add cheese to the dough for a cheesy base.
– Mix in cream cheese with your garlic butter for a rich flavor.
Each of these tips gives your breadsticks a gooey, cheesy texture. It enhances the flavor and makes every bite delightful.
Can I make these breadsticks ahead of time?
Yes, you can prepare these breadsticks ahead of time! Here’s how:
– Make the dough and let it rise.
– Shape the breadsticks and cover them with plastic wrap.
– Store in the fridge for up to 24 hours.
When you are ready, just take them out to rise a bit more and bake. This method saves time and allows you to enjoy fresh breadsticks without the fuss.
What can I dip cheesy garlic breadsticks in?
Dipping sauces elevate your cheesy garlic breadsticks. Here are some great options:
– Marinara sauce adds a classic touch.
– Garlic butter enhances the garlic flavor.
– Ranch dressing offers a creamy contrast.
– Alfredo sauce gives a rich, cheesy dip.
These dips not only complement the breadsticks but also add fun flavors to each bite. You can mix and match to find your perfect pairing!
In this post, I shared how to make delicious cheesy garlic breadsticks. We covered essential ingredients, step-by-step instructions, and helpful tips. I also shared variations if you want something different.
Now, you have the tools and knowledge to create your own. Enjoy these tasty treats with family or friends. Happy cooking!
. - Combine 1 cup warm water, 2 ¼ teaspoons yeast, and 1 teaspoon sugar. - Let this sit for 5-10 minutes until it becomes frothy. This means the yeast is ready. - In a large bowl, mix 3 cups flour and 1 teaspoon salt. - Pour in the activated yeast mixture and 2 tablespoons olive oil. - Use your hands to mix until a sticky dough forms. - Place the dough on a floured surface and knead for about 5 minutes. - The goal is a smooth and elastic dough. - Lightly grease a bowl and place the kneaded dough inside. - Cover it with a kitchen towel and let it rise for 1 hour. - Once it doubles in size, gently punch it down to release air. - Roll the dough into a rectangle, about ½ inch thick. - Transfer it to a baking sheet, and score it into breadstick shapes. You can find the complete process in the Full Recipe. To make great breadsticks, check your dough's texture. The dough should feel smooth and soft. If it sticks to your fingers, it is too wet. If it pulls away cleanly, you’re on the right track. Knead it until it is elastic. This gives you that perfect bite. For the best results, preheat your oven to 425°F (220°C). This hot oven helps the breadsticks puff up and get golden. Line your baking sheet with parchment paper. This keeps your breadsticks from sticking and makes cleanup easy. Bake for 12-15 minutes. Watch for a golden brown color, that means they are ready! Want to spice things up? You can add extra flavors to your breadsticks. Try adding crushed red pepper for heat or fresh basil for a hint of sweetness. You can also use different cheeses. Cheddar or pepper jack can give you a fun twist. Mix and match to find your favorite! For the full recipe, check out the detailed steps. {{image_4}} You can change the cheese to make each batch unique. Try using cheddar for a sharp taste. Pepper jack adds a fun spicy kick. Mix and match cheeses to create your favorite flavor. Just remember, the more cheese, the better! If you want a vegan option, use plant-based cheese. There are many tasty brands available today. You can also make a garlic spread with olive oil and herbs instead of butter. This keeps the flavor rich while being dairy-free. Add fresh herbs to bring new life to your breadsticks. Chopped basil or thyme can add a lovely aroma. You can mix herbs into the dough or sprinkle them on top before baking. These small changes make a big difference. Try one of these variations next time you bake your cheesy garlic breadsticks using the Full Recipe! To store leftover breadsticks, let them cool completely first. Place them in an airtight container. This keeps them fresh. You can also wrap them in plastic wrap. Store them at room temperature for up to two days. If you want them to last longer, keep them in the fridge. Just remember, cold breadsticks can lose some of their warmth. Freezing is a great way to keep these breadsticks tasty for later. After they cool, wrap each breadstick in plastic wrap. Then, place them in a freezer bag. Make sure to remove as much air as possible. This helps avoid freezer burn. To reheat, take them out and let them thaw first. Then, bake them at 350°F (175°C) for about 10 minutes. They will taste fresh again! When stored properly, these breadsticks stay fresh for about two days at room temperature. In the fridge, they can last up to a week. If frozen, they can last for about three months. Just remember, the sooner you eat them, the better they will taste. For more details, check the Full Recipe. To make your breadsticks extra cheesy, you can add more cheese. Here are some tips: - Use a blend of mozzarella and cheddar for depth. - Sprinkle cheese on top before baking. - Add cheese to the dough for a cheesy base. - Mix in cream cheese with your garlic butter for a rich flavor. Each of these tips gives your breadsticks a gooey, cheesy texture. It enhances the flavor and makes every bite delightful. Yes, you can prepare these breadsticks ahead of time! Here’s how: - Make the dough and let it rise. - Shape the breadsticks and cover them with plastic wrap. - Store in the fridge for up to 24 hours. When you are ready, just take them out to rise a bit more and bake. This method saves time and allows you to enjoy fresh breadsticks without the fuss. Dipping sauces elevate your cheesy garlic breadsticks. Here are some great options: - Marinara sauce adds a classic touch. - Garlic butter enhances the garlic flavor. - Ranch dressing offers a creamy contrast. - Alfredo sauce gives a rich, cheesy dip. These dips not only complement the breadsticks but also add fun flavors to each bite. You can mix and match to find your perfect pairing! In this post, I shared how to make delicious cheesy garlic breadsticks. We covered essential ingredients, step-by-step instructions, and helpful tips. I also shared variations if you want something different. Now, you have the tools and knowledge to create your own. Enjoy these tasty treats with family or friends. Happy cooking!](https://goldendishy.com/wp-content/uploads/2025/06/f014268d-bdac-4f9e-9ca6-06fbafbccd76-300x300.webp)


![- 1 medium head of cauliflower, cut into bite-sized florets - 4 cloves fresh garlic, finely minced - 3 tablespoons extra virgin olive oil - 1 teaspoon smoked paprika - 1 teaspoon fine sea salt - ½ teaspoon freshly ground black pepper The main ingredients create a base of flavor. Cauliflower gives a nice texture and absorbs the garlic well. Garlic adds a strong taste that enhances the dish. Olive oil helps with roasting and adds richness. Smoked paprika brings depth, while salt and pepper balance the flavors. - 2 tablespoons grated Parmesan cheese - Fresh parsley, finely chopped You can add Parmesan cheese for a cheesy twist. It melts nicely and adds a savory note. Fresh parsley adds color and freshness on top. These add-ins make the bites even more delightful. - Baking sheet - Mixing bowl - Parchment paper A baking sheet is essential for roasting. Use a mixing bowl to combine all the ingredients. Parchment paper helps with easy cleanup and prevents sticking. These tools make the cooking process smooth and simple. You can find the Full Recipe above for more details. 1. Preheat the Oven: Start by preheating your oven to 425°F (220°C). This heat helps make the bites crispy and golden. 2. Prepare the Cauliflower: Cut one medium head of cauliflower into bite-sized florets. Make sure they are all similar in size. This helps them cook evenly. 1. Combine Cauliflower and Seasonings: In a large mixing bowl, add the cauliflower florets. Then, add 4 minced garlic cloves, 3 tablespoons of olive oil, 1 teaspoon of smoked paprika, 1 teaspoon of sea salt, and ½ teaspoon of black pepper. 2. Ensure Even Coating: Toss everything together well. You want the florets to be fully coated with the olive oil and seasonings. This gives them great flavor. 1. Arrange on Baking Sheet: Line a baking sheet with parchment paper for easy cleanup. Spread the cauliflower in a single layer. Make sure the florets have space. This helps them roast well. 2. Roast Duration and Tips: Place the sheet in the oven. Roast for 25-30 minutes. Keep an eye on them. Toss the florets halfway through. This helps them cook evenly. If you like cheese, sprinkle 2 tablespoons of grated Parmesan cheese on top in the last 5 minutes. This adds a nice touch. Enjoy the full recipe for all the details and tips for these delicious bites! Ensuring Tender Florets To get tender florets, cut them into uniform pieces. This helps them cook at the same rate. Toss them well with oil and seasonings. The olive oil locks in moisture and adds a nice flavor. Roasting at 425°F (220°C) gives the perfect balance of crispiness and tenderness. Avoiding Soggy Cauliflower Space the florets on the baking sheet. If they are too close, steam will build up and make them soggy. Use parchment paper to keep them from sticking. This also helps with cleanup. Remember to toss them halfway through roasting for even cooking. Adding Spices Spices can elevate the taste of your cauliflower bites. I love using smoked paprika for depth. You can also try garlic powder, cayenne, or cumin for a twist. Start with small amounts and adjust to your taste. Using Different Oils While olive oil is great, try other oils for different flavors. Avocado oil works well for high heat. You can also use sesame oil for a nutty taste. Just ensure the oil has a high smoke point to avoid burning. Serving Suggestions Serve the roasted garlic cauliflower bites on a rustic wooden platter. This adds warmth to your meal. You can also arrange them in a circle with a bowl of dipping sauce in the center. This invites guests to dig in. Garnishing Techniques Garnish with fresh parsley for a pop of color. You can also sprinkle some lemon zest on top for a refreshing zing. If you used Parmesan, let some shavings fall over the bites to enhance the look and flavor. For the complete recipe, check the [Full Recipe]. {{image_4}} Vegan Alternatives You can easily make these bites vegan. Just skip the Parmesan cheese. The garlic and spices keep the taste rich and satisfying. You can also add nutritional yeast for a cheesy flavor without dairy. Gluten-Free Options This recipe is naturally gluten-free! You can enjoy it without any worry. Always check labels on packaged spices or sauces to ensure they are gluten-free. Spice Variations Want a kick? Add cayenne pepper or chili powder. For a milder flavor, use paprika or turmeric. You can also try curry powder for an exotic twist. Herb Infusions Fresh herbs make a big difference. Add rosemary or thyme for earthy notes. Basil or cilantro can brighten the dish. Mix and match to find your favorite combination. Air Fryer Instructions Using an air fryer makes these bites super crispy. Set your air fryer to 400°F (200°C). Cook them for about 15-20 minutes, shaking the basket halfway through. Grilling Method Grilling adds a smoky flavor. Toss the cauliflower in a grill basket. Grill over medium heat for about 10-15 minutes. Turn occasionally for even cooking. Enjoy the charred bits! Store any leftovers in an airtight container. This helps keep them fresh. You can place them in the fridge. They stay good for about 3 to 5 days. If you see any signs of spoilage, throw them away. You have two options for reheating: oven or microwave. The oven keeps the bites crispy. Preheat it to 350°F (175°C) and heat for about 10 minutes. The microwave is faster, but it can make them soggy. If using a microwave, heat in 30-second intervals. You can freeze roasted cauliflower bites if you want to save some. Let them cool completely first. Place them in a freezer-safe bag. They can last up to 3 months in the freezer. When ready to eat, thaw them in the fridge overnight. Reheat in the oven for the best texture. To make your roasted garlic cauliflower bites crispy, follow these tips: - Cut the cauliflower into small, even pieces. - Make sure to coat every floret with olive oil. - Spread the florets out on the baking sheet, leaving space between them. - Roast at a high temperature, around 425°F (220°C). - Toss the cauliflower halfway through cooking to ensure even roasting. - If you want extra crunch, broil for the last few minutes. Yes, you can use frozen cauliflower. However, it’s best to thaw it first. Pat it dry with a towel. This helps remove excess moisture, which can make your bites soggy. The cooking time may be shorter, so check for doneness a few minutes early. A great dipping sauce pairs well with roasted garlic cauliflower bites. Here are some tasty options: - Ranch dressing for a classic taste. - Garlic aioli for a creamy twist. - Spicy sriracha for a kick of heat. - Hummus for a healthy choice. Feel free to try different sauces to find your favorite! To adjust the recipe for more servings, simply multiply the ingredients. For example: - Use two heads of cauliflower for eight servings. - Keep the same ratio for olive oil and seasonings. - Roast in batches if your baking sheet is too small. This way, you’ll still get delicious, crispy bites! For the complete instructions, check the Full Recipe. Roasted garlic cauliflower is easy to make and very tasty. We covered the main ingredients, like cauliflower and garlic, and shared tips for perfect texture and flavors. You learned about storage and reheating methods to keep your dish fresh. Try different variations to suit your tastes or dietary needs. Enjoy this dish as a side or snack. It’s healthy, fun, and simple. You'll love making it again and again!](https://goldendishy.com/wp-content/uploads/2025/06/58dc371e-82c7-47cc-93f2-9c36524126f6-768x768.webp)

![- Bell pepper (red, yellow, or green) - Zucchini and yellow squash - Red onion and cherry tomatoes - Mushrooms When I make grilled veggie skewers, I choose a mix of colorful vegetables. They not only look great but also taste fantastic. Bell peppers are a must. You can pick red, yellow, or green. Each type adds a sweet taste. Zucchini and yellow squash are next. Their soft texture and mild flavor work well on the grill. I like to cut them into thick rounds. This helps them hold their shape while cooking. Red onions add a nice bite. I cut them into wedges so they cook evenly. Cherry tomatoes are fun and juicy. I use them whole, so they burst with flavor when grilled. Finally, I love mushrooms. They soak up the marinade and get smoky when grilled. - Olive oil, garlic powder, smoked paprika - Salt and black pepper To bring out the flavors, I use a simple marinade. I drizzle extra virgin olive oil over the veggies. It helps the spices stick and adds richness. I sprinkle garlic powder for a savory kick and smoked paprika for a hint of smoke. Don’t forget to add salt and black pepper. They enhance all the natural flavors. I mix everything well, so each piece is coated. This step is crucial for a tasty outcome. - Fresh basil leaves After grilling, I like to add fresh basil leaves. They give a burst of color and flavor. Just tear them up and sprinkle on top of the skewers. This final touch makes the dish even more inviting. For the full recipe, check out the [Full Recipe]. First, we need to get our grill ready. Preheating is key to good grilling. It helps to cook the veggies evenly and gives them nice grill marks. Set your grill to medium-high heat. This temperature is perfect for cooking our colorful skewers. Let’s prep our vegetables. Start by cutting them into pieces. Cut the bell pepper into 1-inch chunks. Slice the zucchini and yellow squash into thick rounds. Cut the red onion into wedges. Keep the cherry tomatoes whole and use whole mushrooms or half them if they are large. Next, we’ll mix the veggies. Place all the cut veggies in a big bowl. Drizzle them with olive oil and sprinkle in garlic powder, smoked paprika, salt, and black pepper. Now, toss everything gently with your hands or a spatula. Make sure each piece is well-coated with the seasoning. This step adds a lot of flavor! Now comes the fun part: assembling the skewers. Take a skewer and start threading the veggies. Alternate the types of veggies to create a colorful mix. This not only looks great but also adds different flavors in every bite. Be careful when handling the skewers. The ends can be sharp, so keep your hands clear when you thread the veggies. Once you finish, your skewers are ready for the grill. For the full recipe, check out the details above. Grilling veggie skewers is simple and fun. Aim for a medium-high heat. This ensures your veggies cook well. Grill them for about 10-12 minutes. Turn them often to get nice grill marks. You want them tender but not mushy. To boost flavor, try adding spices like cumin or dill. A splash of lemon juice also brightens the taste. For a smoky flavor, use smoked paprika or a dash of liquid smoke. Marinades can add depth, too. A blend of olive oil, vinegar, and herbs works great. For a beautiful presentation, stand skewers upright in a holder. You can also lay them on a platter. Drizzle with olive oil and sprinkle fresh herbs. Pair the skewers with dips like hummus or tzatziki. These add flavor and make serving easier. Check out the Full Recipe for more ideas! {{image_4}} You can mix and match veggies for your skewers. Seasonal vegetables make great choices. In summer, try zucchini and corn. In fall, use butternut squash and Brussels sprouts. You can also add eggplant for a nice smoky taste. Asparagus gives a nice crunch and fresh flavor. If you can’t grill, you can bake or roast your skewers. For oven-baking, preheat your oven to 400°F (200°C). Place the skewers on a baking sheet. Bake for about 20 minutes. Keep an eye on them to ensure they don’t burn. Roasting gives a rich taste and helps the flavors blend well. This recipe is easy to adapt for different diets. For a vegan version, stick to the veggies and oil. If you need gluten-free options, all ingredients in this recipe work well. Just make sure to check labels on sauces or seasonings. You can enjoy tasty skewers that fit your needs by making small swaps. For the full recipe, check the details above. To keep your grilled veggie skewers fresh, use airtight containers. Store them in the fridge right after they cool down. Make sure to eat them within three days for the best taste and quality. If you notice any moisture, add a paper towel inside the container to soak it up. You can reheat skewers in the microwave or on the grill. For the microwave, place them on a plate and cover them with a damp paper towel. Heat in short bursts to avoid overcooking. To reheat on the grill, warm it up and place the skewers back on for a few minutes. This keeps the texture nice and doesn't make them soggy. To freeze skewers, wrap them tightly in plastic wrap and place them in a freezer bag. Make sure to remove as much air as possible. They can last for up to three months in the freezer. When you’re ready to eat them, thaw them in the fridge overnight. Reheat on the grill or in the oven to restore their flavor and texture. For the full recipe, check out the details above. I prefer metal skewers for grilling. They heat up quickly and help cook the veggies evenly. They are also reusable, making them eco-friendly. Wooden skewers are lighter but can burn easily. If you use wooden skewers, you need to soak them in water first. This helps prevent them from catching fire. Both types work well, so choose what you like best. Yes, you can use frozen vegetables. They are convenient and save time. However, frozen veggies may not have the same texture as fresh ones. They can become mushy when cooked. If you choose to use them, thaw them first. Pat them dry to remove extra moisture before grilling. This helps keep them from steaming and allows for better grilling. To prevent sticking, coat your vegetables with olive oil. This adds flavor and creates a barrier. Preheat your grill well before adding the skewers. A hot grill helps to sear the veggies quickly. Turn them gently with tongs. Avoid using a fork, as this can pierce the vegetables and let juices escape. Keep an eye on them, so they don't burn. Soaking wooden skewers is a good idea. It prevents them from burning on the grill. Soak them for at least 30 minutes before using. This helps them stay intact while grilling. If you skip soaking, watch them closely as they cook. You might need to turn down the heat to avoid burning. Soaking is a simple step that makes grilling easier. This blog post guides you on making vibrant vegetable skewers. We covered key ingredients, including bell peppers, zucchini, and cherry tomatoes. I shared tips for preparing the grill and veggies, along with assembling skewers safely. Remember optimal grilling time and temperature for the best results. You can try different vegetables or cooking methods for variety. Don’t forget about storing leftovers properly for later enjoyment. With the right techniques, you’ll create tasty skewers that impress. Your grilling skills can elevate any meal!](https://goldendishy.com/wp-content/uploads/2025/06/899b9bee-2fb2-475c-b5a5-3b543ce01d01-768x768.webp)
