Cheesy Chicken Enchilada Skillet Tasty Weeknight Meal

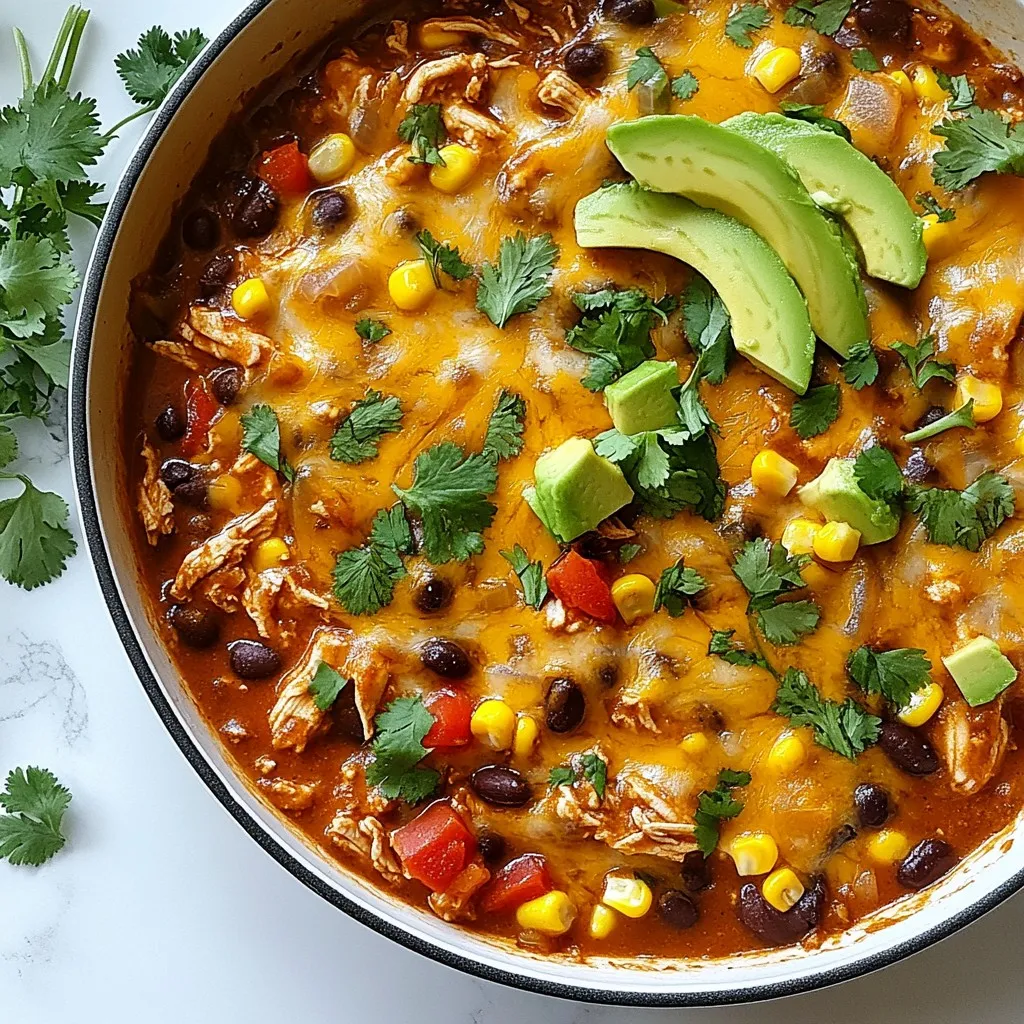
Looking for a quick and tasty dinner? This Cheesy Chicken Enchilada Skillet is the answer. You can make it in just one pan in less than 30 minutes! Packed with chicken, beans, and melted cheese, this meal is sure to please everyone at your table. Let’s dive in and discover how to whip up this easy weeknight favorite!
Why I Love This Recipe
- Quick and Easy: This cheesy chicken enchilada skillet comes together in just 30 minutes, making it perfect for busy weeknight dinners.
- One-Pan Wonder: Minimal cleanup is required since everything is cooked in one skillet, allowing you to enjoy your meal without the hassle of washing multiple pots and pans.
- Flavor Explosion: With a combination of spices, cheese, and fresh ingredients, each bite is bursting with delicious flavors that will satisfy your taste buds.
- Customizable: This recipe is versatile; you can easily swap out ingredients based on your preferences or what you have on hand, making it a go-to for any occasion.
Ingredients
Essential Ingredients
– 2 tablespoons olive oil
– 1 pound chicken breast, diced into bite-sized pieces
– 1 onion, finely chopped
– 2 garlic cloves, minced
– 1 red bell pepper, diced into small cubes
Additional Ingredients
– 1 can (15 oz) black beans, drained and rinsed
– 1 can (10 oz) diced tomatoes with green chilies
– 1 cup corn kernels (use fresh or frozen)
– 2 tablespoons taco seasoning
Topping Ingredients
– 2 cups shredded sharp cheddar cheese
– 1 cup enchilada sauce
– Fresh cilantro, roughly chopped, for garnish
– Optional: Slices of avocado, for serving
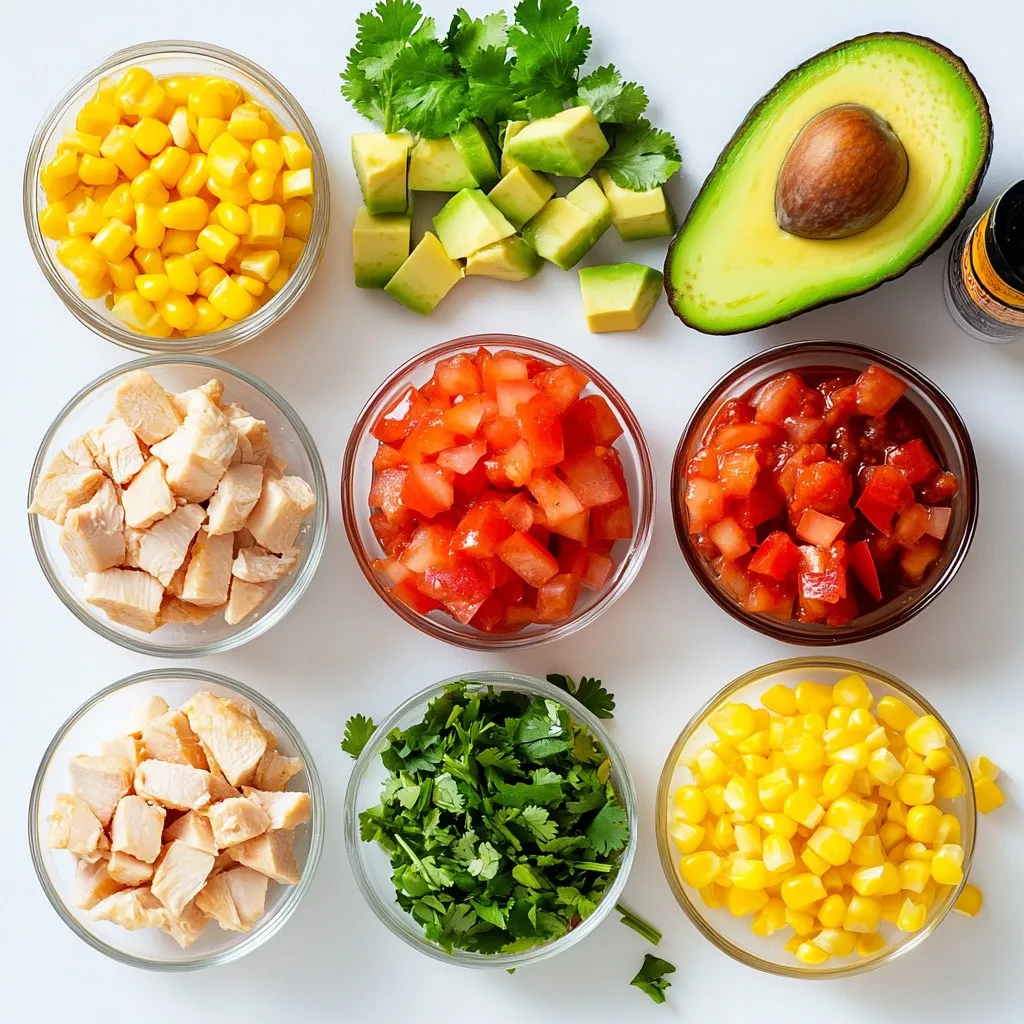
When I make cheesy chicken enchilada skillet, I focus on fresh, quality ingredients. The olive oil gives a nice base flavor. Chicken breast is my go-to protein here. Dicing it into small pieces makes sure it cooks evenly and quickly.
Next, I chop the onion and garlic finely. These add depth to the dish. The red bell pepper brings sweetness and color. I love how vibrant it looks in the skillet.
For the extra ingredients, black beans add protein and fiber. The canned diced tomatoes with green chilies bring heat and tang. Corn kernels add sweetness, balancing the spices. Taco seasoning is key for that classic flavor.
Finally, for toppings, I use sharp cheddar cheese. It melts perfectly and adds richness. The enchilada sauce ties everything together. I often finish with fresh cilantro for brightness. Avocado slices are a tasty option for creaminess. Each ingredient plays a vital role in making this dish a weeknight winner!

Step-by-Step Instructions
Cooking the Chicken
– Heat 2 tablespoons of olive oil in a large skillet over medium heat.
– Once the oil is hot, add 1 pound of diced chicken.
– Season the chicken with salt and pepper.
– Cook for 5 to 7 minutes, stirring often, until the chicken is no longer pink.
Sautéing the Vegetables
– Add 1 finely chopped onion, 2 minced garlic cloves, and 1 diced red bell pepper to the skillet.
– Sauté these for about 4 to 5 minutes.
– Stir frequently until the vegetables are tender and smell great.
Combining Ingredients
– Next, mix in 1 can of black beans, 1 can of diced tomatoes with green chilies, and 1 cup of corn.
– Add 2 tablespoons of taco seasoning to the skillet.
– Stir well and cook for another 2 to 3 minutes until everything is hot.
– Pour in 1 cup of enchilada sauce and stir it all together.
– Let it simmer for 3 minutes to blend the flavors.
Melting the Cheese
– Sprinkle 2 cups of shredded sharp cheddar cheese evenly over the mixture.
– Cover the skillet with a lid and turn the heat to low.
– Cook for 3 to 5 minutes until the cheese is melted and bubbly.
– Once melted, remove from heat and top with freshly chopped cilantro.
– Serve hot, with optional slices of avocado on the side.
Tips & Tricks
Perfecting the Dish
To make sure the chicken is fully cooked, cut it into small pieces. Cook it until it is no longer pink inside. This usually takes about 5-7 minutes. Use a meat thermometer if you have one. The chicken should reach 165°F for safety.
For the cheese, use shredded sharp cheddar. Spread it evenly over the dish. Cover the skillet with a lid. This helps the cheese melt evenly. Cook it on low heat for about 3-5 minutes until it’s bubbly and warm.
Presentation Ideas
Serving in a cast-iron skillet adds a rustic touch. It keeps the dish warm and looks great on the table. You can also pair it with tortilla chips. This makes it fun to scoop up the cheesy goodness. Warm tortillas are another great option. They add a soft, tasty bite to every scoop.
Flavor Enhancements
To make the dish more vibrant, add fresh herbs like cilantro or parsley. Sprinkle them on top before serving. If you want more heat, add more taco seasoning or fresh peppers. You can also try adding a hint of lime juice for a zesty twist. Adjust the spice levels to fit your taste. Enjoy customizing your enchilada skillet!
Pro Tips
- Use High-Quality Cheese: Opt for a sharp cheddar cheese to enhance the flavor of your dish. A good quality cheese melts beautifully and adds a rich taste.
- Customize Your Veggies: Feel free to add or substitute vegetables based on your preference. Zucchini, corn, or even spinach can be great additions to this skillet.
- Spice It Up: If you enjoy heat, consider adding jalapeños or a dash of hot sauce to the skillet for an extra kick of flavor.
- Meal Prep Friendly: This dish is perfect for meal prepping. Make a large batch and store it in portions for quick meals throughout the week.

Variations
Protein Alternatives
You can swap chicken for ground beef or turkey. Both options add a rich flavor. Ground meat cooks quickly, making it a great choice for busy nights. If you want a vegetarian option, use beans and lentils instead. They provide protein and texture. Plus, they soak up all the tasty flavors!
Sauce Alternatives
Feel free to use different types of cheese. Try pepper jack for a spicy kick. Or go with a mild cheese if you prefer. You can even make homemade enchilada sauce. Using fresh tomatoes, spices, and broth can create a unique flavor. Experiment with what you have on hand!
Additional Ingredients
Adding vegetables like zucchini or spinach boosts nutrition and flavor. These veggies blend well into the skillet. You might also want to include jalapeños for heat. They can add a nice kick to your meal. Adjust the amount based on your spice preference. Enjoy making this dish your own!
Storage Info
Storing Leftovers
Once your Cheesy Chicken Enchilada Skillet cools, you should store it right. Place leftovers in a shallow dish. This helps the food cool quickly and evenly. Seal it with a tight lid or plastic wrap. The best storage time is three to four days in the fridge. Use glass or plastic containers for safe storage.
Reheating Tips
When it’s time to enjoy leftovers, you can microwave or reheat them on the stovetop. If using the microwave, place the food in a microwave-safe dish. Heat it in short bursts, stirring often. This keeps the cheese nice and melted. When reheating on the stovetop, warm it over low heat. Stir it gently to avoid burning the bottom. Add a splash of water or extra sauce if it looks dry.
Freezing Options
You can freeze your enchilada skillet for longer storage. Let it cool completely before freezing. Use freezer-safe containers or heavy-duty bags. Be sure to remove as much air as possible. This prevents freezer burn. You can freeze it for up to three months. To defrost, place it in the fridge overnight. Reheat it in the microwave or on the stovetop as mentioned before. Enjoy the tasty flavors again!
FAQs
Can I use frozen chicken breast?
Yes, you can use frozen chicken breast. Just make sure to thaw it first. Thawing helps cook the chicken evenly. You can do this overnight in the fridge or use the microwave. After thawing, cut it into bite-sized pieces before cooking.
What can I substitute for enchilada sauce?
You can use salsa or taco sauce instead of enchilada sauce. Both options add flavor. If you want to make your own, mix diced tomatoes, chili powder, and cumin. This gives a fresh taste to your dish.
How can I make this recipe spicier?
To spice things up, add sliced jalapeños or extra taco seasoning. You can also use spicy enchilada sauce. Another option is to sprinkle red pepper flakes on top before serving. Adjust the heat to your taste!
Is this dish suitable for meal prep?
Yes, this dish is great for meal prep. It stores well in the fridge for up to four days. Just keep it in an airtight container. Reheat it in the microwave or on the stove. The flavors will still be delicious!
Can I make it vegetarian?
Absolutely! To make it vegetarian, skip the chicken. Add more beans, like pinto or kidney beans. You can also include vegetables like zucchini or mushrooms. This keeps the dish hearty and tasty.
This blog post covers a tasty chicken enchilada recipe. We explored essential ingredients like olive oil, chicken, and peppers. I shared step-by-step instructions to make cooking easy. You learned tips for perfecting your dish and presenting it well. You also discovered variations and storage options.
In the end, this dish is flexible and fun to make. You can customize it to fit your taste and diet. Enjoy creating your delicious mea

Cheesy Chicken Enchilada Skillet
Ingredients
- 2 tablespoons olive oil
- 1 pound chicken breast, diced into bite-sized pieces
- 1 unit onion, finely chopped
- 2 cloves garlic, minced
- 1 unit red bell pepper, diced into small cubes
- 1 can (15 oz) black beans, drained and rinsed
- 1 can (10 oz) diced tomatoes with green chilies
- 1 cup corn kernels (use fresh or frozen)
- 2 tablespoons taco seasoning
- to taste unit salt and freshly ground black pepper
- 2 cups shredded sharp cheddar cheese
- 1 cup enchilada sauce
- for garnish unit fresh cilantro, roughly chopped
- optional unit slices of avocado, for serving
Instructions
- In a large skillet, heat the olive oil over medium heat. Once hot, add the diced chicken breast, seasoning generously with salt and pepper. Cook for approximately 5-7 minutes, stirring occasionally, until the chicken is no longer pink in the center and fully cooked through.
- Add the finely chopped onion, minced garlic, and diced red bell pepper to the skillet. Sauté for an additional 4-5 minutes, stirring frequently, until the vegetables are tender and fragrant.
- Incorporate the black beans, diced tomatoes with green chilies, corn, and taco seasoning into the skillet. Mix thoroughly and allow it to cook for another 2-3 minutes until everything is heated evenly.
- Pour in the enchilada sauce, stirring well to combine all ingredients. Let it simmer for about 3 minutes to allow the flavors to meld beautifully.
- Evenly sprinkle the shredded sharp cheddar cheese over the mixture in the skillet. Cover the skillet with a lid and reduce the heat to low. Let it cook for 3-5 minutes, or until the cheese is melted and bubbly.
- Once the cheese has melted to perfection, remove the skillet from heat. Top with freshly chopped cilantro for a burst of flavor.
- Serve the enchilada skillet hot. If you wish, garnish with slices of avocado either atop the dish or on the side for a creamy contrast.


![For this recipe, you need key ingredients to make the salmon shine. Here’s what to gather: - 4 salmon fillets (approximately 6 oz each) - 2 tablespoons Sriracha sauce - 3 tablespoons honey - 1 tablespoon soy sauce - 2 cloves garlic, finely minced - 1 tablespoon fresh ginger, finely grated - 2 tablespoons olive oil - Salt and freshly ground black pepper, to taste These main ingredients create a sweet and spicy glaze that makes the salmon pop. Seasoning is crucial in cooking. It helps to enhance the natural flavors of the fish. Use these simple items: - Salt - Freshly ground black pepper Make sure to season both sides of the salmon. This step adds depth to every bite. Garnishes make your dish look great and add extra flavor. For this salmon recipe, you will need: - 1 tablespoon sesame seeds - 2 green onions, thinly sliced Sprinkling these on top gives the meal a beautiful finish. The sesame seeds add crunch, while green onions bring freshness. To see the full details for cooking, check the [Full Recipe]. To make the glaze, grab a medium bowl. Combine 2 tablespoons of Sriracha sauce, 3 tablespoons of honey, and 1 tablespoon of soy sauce. Add 2 minced garlic cloves and 1 tablespoon of freshly grated ginger. Whisk these together until the mixture is smooth. This sweet and spicy glaze will add the perfect flavor to your salmon. Set this aside for later use. Next, take 4 salmon fillets and dry them with a paper towel. This step helps the skin get crispy. Now, sprinkle salt and pepper on both sides of each fillet. Make sure to cover every inch. This simple seasoning enhances the natural taste of the fish. Now, heat 2 tablespoons of olive oil in a large skillet over medium-high heat. Once the oil shimmers, carefully place the salmon fillets in the skillet, skin-side down. Sear them for about 4-5 minutes until the skin turns golden and crispy. Once that happens, gently flip the fillets over. Lower the heat to medium and pour the glaze over the salmon. Cook for another 4-5 minutes, basting the salmon occasionally with the glaze. When it is cooked through and caramelized, remove the fillets from the skillet. Enjoy every bite of this flavorful salmon dish! For the full recipe, check out the details above! To get that perfect crispy skin, start with dry salmon. Use a paper towel to pat it well. This removes extra moisture, which helps the skin crisp nicely. Heat your skillet until it shimmers before adding the salmon. Place the fillets skin-side down and don’t move them for the first few minutes. This helps create a nice golden crust. Sear for about 4-5 minutes, then flip gently to finish cooking. If you like a milder glaze, reduce the Sriracha amount. Start with 1 tablespoon instead of 2. You can also add extra honey to balance the heat. For spice lovers, add more Sriracha or a pinch of cayenne pepper. Taste the glaze before pouring it on the salmon. This way, you can adjust it to your liking. Using the right tools makes cooking easier. Here’s what I recommend: - Large skillet for searing - Mixing bowl for the glaze - Whisk for blending ingredients - Paper towels for drying salmon - Spatula for flipping fillets These tools help you create a delicious Sriracha honey glazed salmon from the [Full Recipe]. {{image_4}} You can switch up the Sriracha honey glaze if you want. Try a sweet soy glaze instead. Mix soy sauce, brown sugar, and ginger for a tasty alternative. You can also use teriyaki sauce for a different flavor. It adds a rich, savory taste that pairs well with salmon. Another option is a citrus glaze. Mix orange juice and honey for a bright, zesty twist. While salmon shines in this recipe, other fish work too. Try using trout, which has a similar flavor and texture. Mahi-mahi also holds up well to grilling and glazing. Cod is another great option, as it absorbs flavors nicely. Each fish brings its own unique taste, so feel free to experiment. Toppings can elevate your dish further. Try adding sliced avocados for creaminess. Chopped cilantro or parsley adds a fresh touch. You can also sprinkle crushed peanuts or cashews for crunch. For a spicy kick, add sliced jalapeños. These toppings can make your meal even more fun and flavorful. Enjoy customizing your Sriracha honey glazed salmon with these ideas! Store your leftover salmon in an airtight container. Make sure to let it cool first. Place a piece of parchment paper between layers if stacking. This keeps the fish from sticking together. Refrigerate the salmon for up to three days. If you plan to keep it longer, freezing is a better option. To reheat, use the oven for the best taste. Preheat to 350°F (175°C). Place the salmon on a baking sheet and cover it with foil. Heat for about 10 to 15 minutes. This keeps the salmon moist and tasty. You can also use the microwave. Heat it in short bursts of 30 seconds. Check often to avoid overcooking. If you want to freeze your salmon, do it right after cooking. Wrap each piece tightly in plastic wrap. Then, place them in a freezer bag. Remove as much air as you can before sealing. You can freeze it for up to three months. When ready to eat, thaw it in the fridge overnight before reheating. For more ideas, check out the Full Recipe. You can tell if the salmon is cooked when it flakes easily with a fork. The flesh should be opaque and no longer translucent. A good rule is to cook it for about 4-5 minutes per side, depending on thickness. Use a food thermometer if you want to be precise. The internal temperature should reach 145°F (63°C). Cooking it just right keeps it moist and tasty. Yes, you can prepare the glaze ahead of time. Just store it in the fridge in an airtight container. This makes cooking easier later. However, I recommend cooking the salmon fresh. This keeps it juicy and full of flavor. If you must, you can cook the salmon and store it in the fridge for up to 2 days. For a full meal, pair the salmon with fluffy jasmine rice or quinoa. Steamed broccoli or snap peas add color and crunch. You can also serve it with a fresh salad for a light touch. If you want something more filling, try roasted potatoes or sweet potatoes. These sides balance the bold flavors of the salmon well. Check out the Full Recipe for more details! This blog post shared key details about making Sriracha Honey Glazed Salmon. You learned what ingredients to use, including seasoning and garnishes. I outlined simple steps to prepare the glaze, season the fish, and achieve that perfect sear. Plus, you found helpful tips for crispy skin and spice adjustments. I also covered variations for sauces and fish, along with storage options for leftovers. Savor this dish and share it with others. Enjoy your cooking!](https://goldendishy.com/wp-content/uploads/2025/07/1e0cb0f2-d69e-43b4-ab0e-316143d411f1-768x768.webp)
. You learned how to make Jalapeno Cheddar Cornbread step by step. This recipe includes a complete ingredient list, tips for substitutions, and ways to adjust spice levels. You also discovered how to achieve the best texture and flavor. Finally, I shared variations, storage info, and answers to common questions. Now, enjoy this tasty cornbread at your next meal. It pairs well with soups or stews and is perfect for sharing. Happy baking!](https://goldendishy.com/wp-content/uploads/2025/06/9d5f618c-dadf-46fc-a447-7ca9d5a4ec71-768x768.webp)


