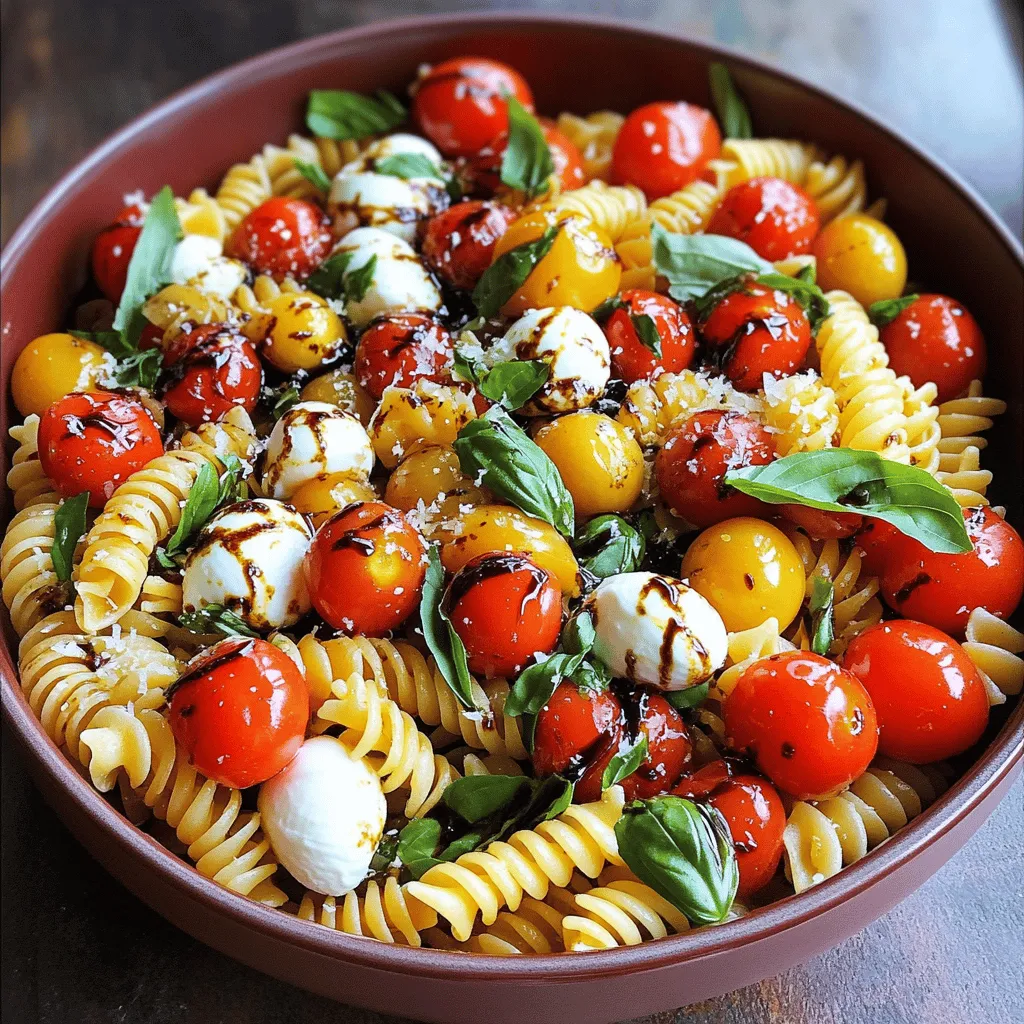
Are you ready to elevate your pasta game? This simple recipe for Caprese Pasta with Balsamic Glaze combines fresh flavors and easy steps to create a dish you’ll love. With ripe tomatoes, creamy mozzarella, and rich balsamic glaze, every bite bursts with joy. I’ll guide you through each part, from choosing the best ingredients to helpful tips for serving. Let’s dive into this delicious, crowd-pleasing meal!
Ingredients
Key Ingredients Overview
To make Caprese Pasta with Balsamic Glaze, gather these key ingredients:
– 12 oz pasta (fusilli or penne recommended)
– 2 cups cherry tomatoes, halved
– 1 cup fresh mozzarella balls (bocconcini), drained and patted dry
– 1/2 cup fresh basil leaves, roughly torn
– 1/4 cup extra virgin olive oil
– 2 tablespoons balsamic glaze (store-bought or homemade)
– 1 teaspoon garlic powder
– Salt and freshly ground black pepper to taste
Each ingredient plays a vital role. The pasta serves as the base. Cherry tomatoes add sweetness and color. Fresh mozzarella adds creaminess. Basil brings freshness, while balsamic glaze ties everything together with a sweet-tangy kick.
Optional Garnishes
You can enhance your dish with a few optional garnishes:
– Freshly grated Parmesan cheese
– Extra basil leaves for a pop of color
– A drizzle of olive oil before serving
These garnishes boost flavor and make your pasta look stunning. They add a gourmet touch that impresses everyone.
Quality Tips for Ingredients
Choosing high-quality ingredients makes a big difference. Here are some tips:
– Use fresh pasta for a softer texture and richer flavor.
– Select ripe cherry tomatoes for better sweetness.
– Buy mozzarella balls packed in water for the best taste.
– Pick fresh basil with vibrant green leaves.
When you use quality ingredients, your Caprese Pasta will shine. Each bite will burst with flavor, making your meal truly special.
Step-by-Step Instructions
Cooking the Pasta
Start by boiling a large pot of salted water. Once it reaches a rolling boil, add 12 ounces of pasta. I recommend using fusilli or penne for this dish. Cook the pasta according to the package instructions, usually around 8 to 10 minutes. You want it al dente, which means it should remain firm to the bite. After cooking, drain the pasta in a colander. Rinse it under cold water to stop the cooking process, then set it aside.
Preparing the Dressing
In a small mixing bowl, combine 1/4 cup of extra virgin olive oil, 1 teaspoon of garlic powder, and salt and black pepper to taste. Whisk these ingredients together until they form a smooth mixture. This dressing adds flavor to your pasta and brings all the ingredients together. Set the dressing aside for now.
Combining and Serving the Pasta
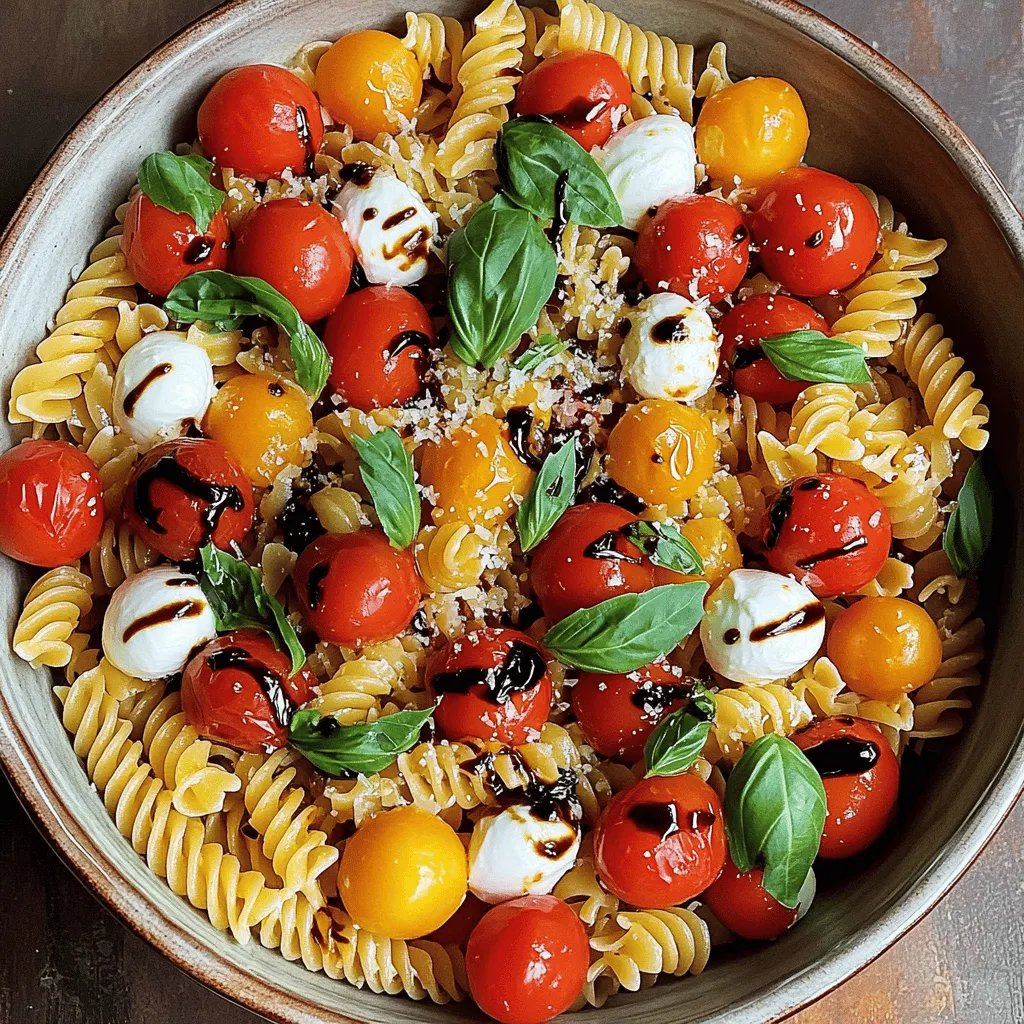
In a large mixing bowl, add the drained pasta, 2 cups of halved cherry tomatoes, and 1 cup of fresh mozzarella balls. Use a spatula or wooden spoon to gently mix these ingredients together. Next, pour the prepared dressing over the pasta mix. Toss everything until all the ingredients are coated with the dressing. Then, gently fold in 1/2 cup of torn fresh basil leaves. Be careful not to bruise them. Just before serving, drizzle 2 tablespoons of balsamic glaze over the pasta. Toss the dish again for an even flavor. You can serve this pasta warm or chill it in the fridge for about 30 minutes for a cold salad. Enjoy your Caprese Pasta with Balsamic Glaze!
Tips & Tricks
Enhancing Flavor Profiles
To boost the flavors in your Caprese pasta, focus on fresh ingredients. The magic lies in ripe cherry tomatoes and creamy mozzarella. Use extra virgin olive oil for a rich taste. If you want a zesty kick, add a bit of lemon juice. It brightens the dish. Consider also using garlic powder for depth—just a teaspoon will do. Lastly, a sprinkle of salt and pepper can make all the difference.
Perfecting Pasta Texture
Cooking pasta to the right texture is key. Aim for al dente, which means it should be firm but cooked. Start with a large pot of salted boiling water. This helps flavor the pasta. Follow the package’s recommended cook time, usually about 8-10 minutes. Once cooked, drain it but do not rinse. Rinsing washes away the starch, which helps sauce cling to the pasta.
Presentation Tips for Serving
A beautiful presentation makes any meal special. Use a large, shallow bowl for serving. This allows the colors to pop. Top your pasta with fresh basil leaves and a sprinkle of Parmesan cheese. You can drizzle a bit more balsamic glaze on top for that extra visual appeal. Serve it warm or chill it for a refreshing treat. Remember, we eat with our eyes first!
Variations
Ingredient Swaps for Different Flavors
You can mix up this Caprese pasta recipe easily. Use different pasta shapes like spaghetti or farfalle for fun. Swap cherry tomatoes for sun-dried tomatoes if you want a bolder taste. You can also try adding grilled chicken or shrimp for protein. Instead of fresh mozzarella, use feta for a tangy twist.
Seasonal Additions
Seasonal ingredients can brighten this dish. In spring, add asparagus or peas for freshness. Summer is perfect for zucchini or bell peppers. In fall, consider roasted butternut squash for a sweet flavor. Winter calls for hearty greens like kale or spinach. These additions can enhance color and taste.
Dietary Adjustments (Vegan, Gluten-Free)
You can make this dish fit many diets. To make it vegan, skip the mozzarella and use avocado or cashew cheese instead. For a gluten-free option, choose gluten-free pasta made from rice or quinoa. Adjust the dressing by using a vegan-friendly oil. This way, everyone can enjoy Caprese pasta.
Storage Info
Proper Storage Techniques
To keep your Caprese pasta fresh, store it properly. Place any leftovers in an airtight container. This helps keep moisture in and prevents the pasta from drying out. If you have extra balsamic glaze, store it separately. This way, you can drizzle it on just before serving.
Reheating Tips
When it’s time to eat your leftovers, reheat the pasta gently. Use a microwave or a pan on low heat. If using the microwave, heat in short bursts to avoid overcooking. Add a splash of olive oil or a bit of water to keep it moist. Stir well to ensure even heat.
Shelf Life of Caprese Pasta
Caprese pasta stays fresh for about 3 days in the fridge. After that, the flavors can fade. If you want to keep it longer, consider freezing it. But remember, the texture might change once it’s thawed. Enjoy your delicious meal within those days for the best taste!
FAQs
How can I make homemade balsamic glaze?
To make balsamic glaze, start with balsamic vinegar. Pour one cup of vinegar into a small saucepan. Heat it over medium heat. Stir it often as it heats. Once it boils, reduce the heat. Let it simmer for about 15 to 20 minutes. The vinegar will reduce and thicken. You want it to coat the back of a spoon. Take it off the heat and let it cool. The glaze will thicken more as it cools.
Can I use different types of pasta?
Yes, you can use many types of pasta. Fusilli and penne are great choices. You can also try rotini, farfalle, or spaghetti. Each type offers a unique texture. Choose what you like best. Just remember to cook it until it is al dente.
Is Caprese Pasta suitable for meal prep?
Absolutely! Caprese pasta is great for meal prep. You can make it ahead of time. Store it in an airtight container in the fridge. It keeps well for up to three days. Just add the balsamic glaze right before serving. This will keep the flavors fresh.
This article covered key ingredients for Caprese pasta, how to cook it, and tips for flavor and texture. We also explored variations for different diets and seasonal tastes.
Remember, quality ingredients make a big difference. Experiment with flavors and enjoy your meals. It’s all about making food that you love. Enjoy creating your perfect Caprese pasta!


